• Skip to primary navigation
  • Skip to main content
  • Skip to primary sidebar
  • Skip to footer

AppleToolBox

Tools and Fixes for Mac, iPad, iPhone & iWatch

Search posts

  • About
  • Contact

CONNECT WITH US

CATEGORIES

  • iPhone
  • iPad
  • iPod
  • Apple Watch
  • Mac/MacBook
  • AirPods
  • Apple TV
  • News
  • Apple Services
  • HomePod
  • Reviews

SITE

  • Home
  • About Us
  • Contact
  • Advertise

Search posts

You are here: Home / Mac / How to Downgrade from macOS Sierra to El Capitan

How to Downgrade from macOS Sierra to El Capitan

By Sudz Kar 4 comments Last updated February 24, 2018

There are three key aspects when you are considering a downgrade from macOS Sierra to El Capitan. These are as follows:

  1. First You will have to Erase the macOS Sierra from your Mac
  2. Next you will have to Re-install El Capitan
  3. Check that your System is stable

Please make sure that you backup your MacBook before proceeding with the downgrade.

RELATED: How to Maintain Your Mac OSX

Usually this process is pretty easy and safe if you had chosen a second partition for using the beta install. It is always a good idea to do so if you are trying to install a beta edition of the OS X.

How to Downgrade from macOS sierra to El Capitan

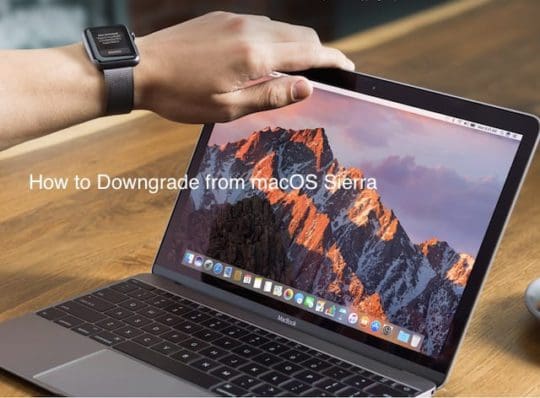
Lets proceed with the detailed steps for each of the above milestones. Please make sure that your machine is  connected to a wi-fi with internet access before your proceed.

Contents

  • Erasing the existing macOS Sierra
  • Reinstall El Capitan
  • Check Your System

Erasing the existing macOS Sierra

  • Restart your Mac from the  menu
  • Hold Down Command +R keys together upon hearing the chime and hold the keys till you see the Apple logo appear on the screen. This launches your Mac into the recovery mode
  • Select Disk Utility from your OS X utilities
  • Select the indented volume name of your startup disk from the left side of the Disk Utility window, then click the Erase tab.
  • Type in Macintosh HD for the name as Mac OS Extended from the format list and then choose Erase
  • Close the Disk Utility window

Reinstall El Capitan

Now that the macOS Sierra has been erased from your drive, you will need to re-install the OS X El Capitan.

  • Re-install OS X from OS X utilities and choose the OS X El Capitan Installer.once the process is complete, restart the Mac.
  • Invoke Recovery mode while the Mac is starting up by pressing together the Command + R keys.
  • Open your OS X Utilities. From your OS X Utilities menu, click Restore from Time Machine Backup. We are assuming that you had made a complete backup before installing the macOS beta on your machine.
  • Select your Time Machine backup disk
  • Select the backup you want to restore from
  • Click Continue and follow the instructions to reinstall OS X and your backed up files.

Check Your System

  • At this point, you have erased macOS Sierra and re-installed El Capitan. Restart your Mac and you should be all set to go.
  • In the case, you run into issues in starting your Mac or Macbook after the El Capitan re-install, you may have to check some of your kext settings if you hadn’t already taken care of it prior to the beta install. Please check our El Capitan startup problem article and follow the directions.


Related Posts:

  • 2023 Mac Studio lifestyle – 1
    macOS Could Not Be Installed, How-To Fix
  • pexels-jess-bailey-designs-810079
    How To Run Linux On Mac: A Step-by-Step Guide
  • 2022 Mac Mini with Studio Display and Accessories
    Mac Tips For New Users In 2023
  • Delete-Group-Reminders-Folder-macOS
    MacBook Will Not Start Up After macOS Update, How-To Fix
  • MacBook Pro 2021 iPad Mini iPhone 13 Pro AirPods 3 Beats Fit Pro iPad Pro Best Apple Products – 5
    How to Downgrade From macOS Ventura to macOS Monterey
  • WWDC 2022 iOS 16 Lock Screen – 17
    What's New in iOS 16 Beta 5?
  • sidecar on iPadOS and macOS
    Sidecar not working in iPadOS and macOS? How to fix…
  • How to Disable the Login Password on Mac
    My Mac Won't Start or Boot: How To Fix White Screen
  • pexels-tima-miroshnichenko-6860464
    How To Start Using Regex With The Shortcuts App
sudz - apple
Sudz Kar

Obsessed with tech since the early arrival of A/UX on Apple, Sudz (SK) is responsible for the original editorial direction of AppleToolBox. He is based out of Los Angeles, CA.

Sudz specializes in covering all things macOS, having reviewed dozens of OS X and macOS developments over the years.

In a former life, Sudz worked helping Fortune 100 companies with their technology and business transformation aspirations.

Reader Interactions

Write a Comment Cancel reply

Show 4 Comments

  1. doug says

    May 3, 2021 at 12:20 AM

    But won’t restoring your time machine put that OS over your install of the older system>

    Reply
  2. john mallison says

    February 24, 2018 at 8:04 AM

    “We are assuming that you had made a complete backup before installing the macOS beta on your machine.”
    Bit late for that, half way down the page…… maybe you should start off by saying this….?

    Reply
    • SK says

      February 24, 2018 at 9:40 AM

      John, Fair point. Total oversight on our part to “Assume”. Will Update the piece.

      Reply
      • HATIM says

        April 3, 2019 at 4:03 AM

        yeah i kinda got confused i nearly dd it before i checked the comments

        Reply

Primary Sidebar

Recent Posts

  • How to Fix Bad AirPods Sound Quality on PC
  • Use This Trick to Sync Apple Notes and Microsoft Word
  • How to Run Android Apps on a Mac
  • What Is the Best iOS Emulator for Windows PCs?
  • How to Remove Personal Info From Word Doc (Mac)
  • How to Share Files Between iPhone and Android

Connect with us

Footer

ABOUT

  • About Us
  • Contact us
  • Advertise
  • Privacy
  • Terms of Use

GUIDES

  • iOS & iPadOS
  • Apple ID
  • iCloud
  • App Store
  • iTunes
  • FaceTime
  • iMessage
  • Siri
  • Books and iBooks
  • Game Center
  • AirPlay

CONNECT

  • Facebook
  • Twitter
  • FeedBurner
  • YouTube

© Copyright 2010-2024 Guiding Tech Media · All Rights Reserved

This site and its content are in no way affiliated or endorsed by Apple, Inc. · Reproduction without explicit permission is prohibited

Last Updated on February 24, 2018 by Sudz Kar