In today’s post, we’re going to be covering something pretty technical. How to install Linux on Mac.
For those that don’t know, Linux is an operating system, like macOS or Windows. What sets it apart, though, is that it’s open source. That means that anyone can download it for free and install it on any machine. And once they’ve installed it, they can go into Linux’s code and start tweaking it how they see fit.
The challenge with Linux, though, is that there aren’t any Linux computers waiting to be purchased. When you go to your local computer store, you’ll find Macs and Windows PCs, but you probably won’t see any Linux PCs. That’s because it’s up to you to install Linux on your existing computer.
In other words, you’re going to need to install Linux on your computer, kind of like you would an app. But this process can be a bit difficult, so we’re going to be looking at how to do this.
This is going to be a bit of a long post, so without further ado, let’s get into it!
The first thing you’ll need to do when installing Linux on Mac is to choose your Linux version. Again, this is something you might not be familiar with.
Unlike Windows and macOS, which more or less come as is, Linux has been modified by users to exist in different versions and formats. So you can pick a version of Linux that has the features and design attributes that you like the most.
Here’s a quick breakdown on some of the most popular versions of Linux:
Ubuntu: The first and most popular Linux distribution is Ubuntu, and there’s a good chance that it’s the one you’ve heard of. It’s built to be similar to macOS and is geared towards new Linux users. So if you just want the “basic” Linux experience, go with Ubuntu.
Linux Mint: For those who are looking for an experience that is a bit more Windows-like, there’s Linux Mint. It has similar features when compared to Ubuntu, but its design language mimics Windows.
Debian: If you’re a more experienced Linux user, a developer, or someone who works in IT, then you may want to consider Debian. It’s a more technical, but also feature-packed, Linux distribution. This makes it a bit more challenging to use, but if you can work through that, you’ll get more out of it than other distributions.
Of course, there are a ton of other Linux distributions out there. A lot of them are great, and a lot are not so great. So feel free to explore, go on forums and ask questions, and find the one that’s right for you.
What if you have an M-Series Mac?
Another question you may have surrounding Linux on Mac is whether or not you can install Linux on an M-Series (Apple Silicon) Mac. Since Apple has moved (nearly) its entire Mac lineup to the M-Series chips, a lot of Apple users might currently have a Mac with an M1 or M2 chip.
Well, if that’s you, then I have some unfortunate news. For now, there aren’t any reliable ways to install Linux on your Mac. As far as I can tell, there is only one Linux distribution that can be installed on ARM Macs, and it’s still in its alpha stages.
That having been said, you can still use Linux on your Mac. You just can’t install it. Instead, you’ll need to use virtualization software.
Installing Linux on Mac: Using virtualization software
Virtualization software allows you to run a Linux OS experience inside of a Window on your Mac. It’s a virtual environment. It’s a bit hard to explain until you’ve tried it, but the gist is that virtualization allows you to run Linux on your Mac like you would any other app. This is as opposed to installing it on your hard drive and running it from there, like you typically would with an OS.
Installing Linux on Mac this way has some pros and cons. You’ll have some more control over your distribution out of the gate, and you can essentially use Linux and macOS side-by-side. On the other hand, though, you’re not going to get the same performance from Linux as you would by installing it directly on your drive.
In short, using a virtualized version of Linux is better for toying with Linux, developing apps, and seeing if you like using Linux. For those that want to actually switch from macOS to Linux, though, you’ll find that virtualization is just a half-measure.
Choose a virtualization app
The first step in installing a virtualized version of Linux on Mac is to choose your virtualization app of choice. Fortunately, a lot of these are free, and there aren’t too many differences between them. Here are some popular options for you to choose from:
Some of these are free while some are quite pricey, so do your research to find the one that feels right to you! Using a virtualization app is pretty easy, and from what I can tell, there aren’t too many major differences between these apps.
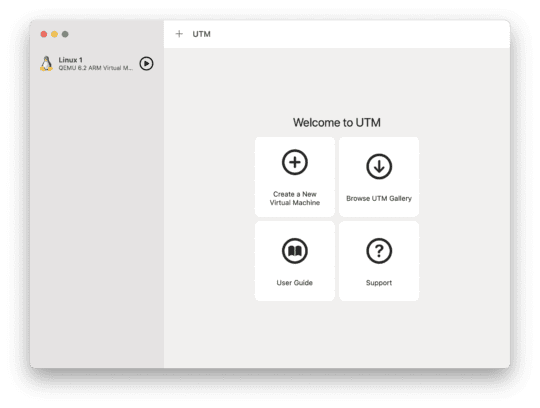
In general, it’s recommended that you start with UTM. It’s completely free, very easy to use, and will help you learn the basics without needing to invest in anything more robust.
Choose your ISO file
Next, you’ll need to choose your ISO file. An ISO file is a disk image. It contains the Linux distribution that you’ve decided to use. For instance, if you want to use Ubuntu, then you’re going to want to download an ISO file from this page.
Once you find the ISO file you’re going to use to install Linux on your Mac, go ahead and download it. Then, move it somewhere where it’ll be easy to find, like your Desktop or Downloads folder. Some virtualization software, like Parallels, will automatically find the ISO file for you. But on the off chance yours won’t, it helps to put your ISO file somewhere you can find with ease.
With your ISO file downloaded, you’re ready to open your VM app and start installing Linux on Mac. Go ahead and open the virtualization app you’ve picked, open it, and choose the option that allows you to create a new virtualization machine.
Work through the configuration options, reading the descriptions of options carefully so that you create a version of Linux that you’re happy with. Don’t worry if you don’t get it right on the first try, though. Since we’re creating a virtual version of Linux, it’ll be easy to delete it and start over if you wind up changing your mind.
Eventually, you should get to a point where the virtualization app is asking you to choose your ISO file. This is why it’s important that you saved it somewhere memorable! Navigate to your ISO file and select it.
Save your virtualization file and wait for the install to finish
Now that you’ve selected your ISO file, you’re ready to start configuring your version of Linux even more. Again, this is going to vary a bit depending on which virtualization app you’ve chosen. But you should be presented with choices to choose how much storage this version of Linux will have, how many cores it will run on, etc.
It’s important to know that when you choose how much storage this Linux virtual machine will have, that your Mac is going to give up that much storage to the VM. For instance, if you choose 50GB of storage, your Mac will lose 50GB of storage so that your Linux VM can have that storage.
Once establish all of these settings, you’re finally going to be asked if you want to save your Linux VM. This will create the bootable file on your Mac that you can use to launch Linux within your VM app. Or, in simpler terms, this is where you’ll create the “Linux app” that you’re going to run later.
This can take a long time, as the VM app is essentially building your Linux distribution for you using your configuration options. So it can take several minutes to even a few hours.
Once it’s done, though, you should be ready to run Linux on your Mac! Just open the VM app (i.e., UTM or Parallels), choose the Linux VM you just created, then run it!
Be aware that the first time you run this Linux VM, it’ll be like the first time you boot up a computer. You’ll need to create a username and password, set up your desktop, and all of the other basic stuff that comes along with starting up a new computer.
And that’s it! That’s all there is to know about installing Linux on Mac using a virtualization app. It’s the simplest way, the least permanent way, and a method that doesn’t involve a lot of risk.
Installing Linux on Mac: Replacing macOS with Linux
The next method we’re going to use for installing Linux on Mac is to actually replace macOS with Linux. This is a semi-permanent option and one that will fundamentally change the way that you interact with your Mac. In many ways, it won’t even be a Mac anymore, but a Linux PC using Mac hardware.
If this is your first time using Linux, then I strongly recommend not using this method. Instead, try Linux in a VM first using the method we just covered. See if you like it, if it’s accomplishing your goals, then transition into this method.
Another tip is to use an older Mac that you don’t use very often. For instance, if you have an old MacBook laying around that is beginning to run slowly and you’ve already replaced it, then try and turn that into a Linux MacBook.
In most cases, you should be able to revert back to macOS, but it can be a pretty difficult and lengthy process. So make sure you’re committed before trying this method out!
Install Etcher on your Mac
The first thing you’ll need to do to replace macOS with linux is to install Etcher. Etcher is an app that allows you to install OS software onto a drive. From there, you can install the OS onto the rest of your Mac. But to start, we’re going to need to put it on a bootable drive, i.e., a flash drive with enough storage to hold the Linux OS of your choosing.
But we’re getting ahead of ourselves a bit! First, download Etcher. Once you’ve downloaded, go ahead and install it. There’s not much else to it – it should install just like any other app.
As a quick note, Etcher is a free, open-source app. That means anyone can edit and contribute to its source code, so you can check it out for yourself to make sure it’s safe. And if you like it enough and know how to write code, then you can even contribute to its development.
Download the Linux ISO of your choosing
Next, we’re going to install Linux on a bootable drive. Don’t worry if that sounds complicated – it’s pretty simple. For those that don’t know, a “bootable drive” is just a hard drive, thumb drive, flash drive, SSD, whatever you want to call it. You should probably have one that has at least 50GB on it, which you can grab from Amazon for less than $50.
You’ll also need the ISO file for the Linux distribution of your choosing. If you want to use Ubuntu, then you’re going to want to download an ISO file from this page. But it’s relatively easy to find the download links for the version of Linux you wish to use.
So to recap, you should have:
Etcher downloaded and installed
A bootable drive with around 50GB of storage or more
Your Linux distribution ISO of choice downloaded
Make sure that your drive is plugged into your Mac. Additionally, save any valuable information that is on this drive, because we’re about to wipe it. So creative projects, family photos – move them to a safe location.
Install Linux on a bootable drive
Now that you have all of these things (and nothing stored on your flash drive) you’re ready to install Linux on your bootable drive.
To do this, go ahead and open Etcher. Click the Settings icon in the top-right of the window, then check Unsafe Mode. A prompt will ask you if you’re sure; go ahead and choose Yes. Then click Back.
Next, go ahead and click Select Image. Navigate to your ISO file that you downloaded before (it should look something like “ubuntu-16.04.1-desktop-amd64.iso” depending on the ISO file you went with) and select it.
Insert your flash drive into your Mac if it isn’t already. Under Select Drive, click Change. Then, choose your flash drive from the available options. If you aren’t sure which it is, you can unplug your flash drive and then plug it back in. Whichever option disappears then reappears is your flash drive.
IMPORTANT NOTE: DO NOT choose “/dev/disk0”. That’s your Mac’s hard drive. If you select it, you will wipe your Mac. Because we selected Unsafe Mode earlier, there is no failsafe to stop you from doing this. So please, be mindful, and do not choose this option. And be extra sure that the option you do select is your flash drive.
Lastly, go ahead and click Flash!. The ISO file will now begin being copied to your flash drive. When it’s done, go ahead and remove your flash drive from your Mac.
Editing your boot entry
Now it’s time for another somewhat stressful step, editing your boot entry. Your boot entry controls how your Mac starts up. We’re going to change it from macOS and all of its default settings to instead embrace booting up from Linux. So please, follow these steps carefully and only proceed if you’re confident in your technical abilities.
Shut down your Mac. Once it’s turned off, plug in your flash drive that now has the Linux ISO copied to it. Turn your Mac back on while holding the option key on your keyboard down.
This will bring up a few different options that you may have not seen before. That’s ok – go ahead and choose the EFI Boot option, then press return on your keyboard.
That will bring you to a black and white screen with the options “Try Ubuntu” and “Install Ubuntu”, assuming you used an Ubuntu ISO. If you picked a different ISO, they may look a little different. If the options don’t seem similar, go ahead and look for more information online before proceeding, as we’re just going to be covering Ubuntu installations from here on out.
Don’t choose either of the options on the screen just yet. Instead, press the “e” key on your keyboard. That key is short for “edit”, which will allow you the option to edit your Mac’s boot entry.
You should see a line of code that starts with the word “linux“. On this line, replace the word “nomodeset” after “quiet splash”. Once you’ve done that, the whole line should read: “linux /casper/vmlinuz.efi file=/cdrom/preseed/ubuntu.seed boot=casper quiet splash nomodeset –“.
Next, press F10 on your keyboard. That will boot Ubuntu into trial mode.
Install Linux on Mac
Double-click the Install Ubuntu icon. Choose your language (presumably English), then click Continue.
Click the Install this third-party software option and then click Continue. You should get an alert that says “/dev/sdb”. Go ahead and choose Yes.
Lastly, you’ll want to select Erase disk and install Ubuntu and then click Continue once more. As this option states, you’ll be erasing your Mac’s disk. That means removing macOS, all of your files, everything. It will be a brand new Linux computer.
Make sure that your Mac’s main hard drive is selected, then click Install Now.
From here, you will be given a few basic configuration options. This includes entering your location, choosing your keyboard layout, and so on. You’ll also be asked to create a username and password. This will be used to log into your account, the same way you have a username and password on macOS. Be sure that you do not forget your username and password!
Once you’ve chosen each of these configuration options and clicked Continue, you’ll start installing Linux on Mac!
Installing Linux on Mac: Using dual-boot with rEFIND
Now that we’ve covered how to run Linux on Mac in a virtual environment and how to replace macOS with Linux, it’s time to cover a compromise solution. That’s dual-booting. For those that don’t know, dual-booting is the ability to turn your Mac off, then while it’s turning back on, select which operating system you want to use. This is how Bootcamp works on Intel Macs, and it’s also how this next solution is going to work.
While not as technical as the previous solution, this is still going to involve a lot of steps. So strap in and get ready!
Install rEFInd
To make dual-booting with Linux on Mac possible, you’re going to need to use rEFInd. rEFInd is an app that allows you to simultaneously install Windows, Linux, macOS, and other operating systems on your Mac.
Unfortunately, I haven’t been able to find any information on whether or not rEFInd is support on M-Series Macs. So for this guide, we’ll be assuming that it only works on Intel Macs. But I encourage you to give it a try for yourself!
IMPORTANT NOTE: Full-disk encryption can sometimes cause issues with rEFInd on Mac. So if you have this enabled, go ahead and disable it.
Once downloaded, open your Mac’s Terminal. You can do this by pressing command + spacebar, typing “Terminal”, then pressing return.
Drag and drop the rEFInd install file you just downloaded (it should be in your Downloads folder, “refind-bin-[version].zip”) into the Terminal window. Then, press return. This will start the installation process for rEFInd.
Partition your Mac
Once rEFInd has finished installing, go ahead and shut down your Mac. It’s important that you completely shut it down. Don’t just restart it.
Next, turn your Mac back on. You should see the rEFInd boot manager screen whenever your Mac turns back on. This is the screen you’ll see from now on when turning your Mac back on, allowing you to switch between operating systems.
Of course, right now, we still only have one operating system on our Mac, and that’s macOS. To change that, you need to start by partitioning your Mac. Partitioning your Mac just means setting aside some storage space for the new operating system you’re going to install (in this case, Linux).
To do this, go ahead and boot into macOS from the rEFInd boot-up screen. Once you’re logged back into your macOS account, you’ll need to access Disk Utility. Again, you can do this by pressing command + spacebar, typing “Disk Utility”, and pressing return on your keyboard.
Once Disk Utility is open, choose your Mac’s hard drive from the list of drives on the left. Then, choose Partition from the toolbar at the top of the window.
Next, you’ll need to shrink the size of your macOS partition to make room for Linux to be installed on your Mac’s hard drive. You need a minimum of 5GB to install Linux on Mac, but that’s cutting it kind of close. I would recommend anywhere from 20GB to 50GB, depending on what you can spare.
Remember, partitioning your Mac’s storage in this way will limit how much storage you have in macOS. So if you give 20GB to Linux, you’ll have 20GB fewer for macOS.
You don’t need to create a new partition after you shrink the size of your macOS partition. Just leave that extra space empty for now so that we can install Linux on it later.
Install and boot Linux
Finally, it’s time to install and boot Linux on Mac. To do this, you’re going to need a bootable drive with Linux installed on it. You can follow these directions for doing this or go back to the Install Linux on a bootable drive section in this article (the one you’re currently reading).
Once you’ve got the bootable drive in hand, plug it into your Mac. Then, restart your Mac. This should bring you back to the rEFInd screen you saw earlier.
This time, though, you should see the option to boot from the bootable Linux drive you’ve created. Go ahead and select it and then boot into it.
Next, launch your Linux distribution’s installer. This will start the installation process – go through it using the step-by-step process it provides. At some point, you’ll come across an option that says “Install Ubuntu alongside Mac OS X“. Choose this option!
After the installation process is complete, go ahead and restart your Mac so that you are once again facing the rEFInd screen. This time, instead of your bootable drive, you should see Linux as an available option. You can now choose to boot into your Mac using Linux or macOS.
And that’s it!
Linux on Mac: How to go back to macOS
Now that we’ve covered the three best ways to install Linux on Mac, you may be wondering how you can go back to macOS. After all, Linux isn’t for everyone, and you may find that you no longer want to use it.
In that case, here’s how you revert back to macOS.
If you’re using a virtualization app to use Linux on your Mac, then all you need to do is go into that virtualization app and delete the Linux virtual machine you’ve created. This will remove Linux from your Mac and give you back whatever amount of storage you originally had dedicated to Linux.
If you’ve replaced macOS with Linux, meaning that you no longer have macOS on your Mac, then you have two options to restore macOS. And to be honest, they’re both pretty technical. You’ll essentially be going through the same process you used to install Linux on your machine, except this time with macOS. Here are your options:
Boot your Mac into Recovery Mode and choose Reinstall macOS from the available options. There are directions on how to do this here.
If that doesn’t work, then that means you’ve wiped your recovery partition in the process of removing macOS. But don’t worry! You should still be able to reinstall macOS. To do so, you’ll need to create a bootable drive. Just like we’ve covered in this post with creating a Linux bootable drive, except this time using macOS. For this, you’re going to need to download a macOS installer, which you can find here. Then, you’re going to need to create the bootable drive/installer, which you can find directions for here. Again, this can be a bit difficult, so if you’re struggling, don’t hesitate to reach out to Apple’s customer support.
Lastly, if you used rEFInd to install Linux on Mac, you can simply boot into macOS and open Disk Utility. Here, you should be able to find your Linux partitions. Delete them, and that will effectively remove Linux from your computer, giving you back the storage space you initially set aside for Linux.
And that’s it! That’s everything you need to know to install Linux on Mac as well as to remove it if you change your mind. Again, this is one of the most technical things you can do with a Mac, so please, proceed with caution.
As for whether or not you should start using Linux on your Mac, that’s really up to you. I’ve never done this personally, but I have heard that Linux runs better on older Macs than macOS does. So if you have an old Mac that is beginning to show its age, replacing macOS with Linux might be a way to keep it running smoothly for a few more years.
If you’ve started using Linux over macOS, I’d love to hear your thoughts! Let me know in the comments below whether you love it, hate it, regret it, or are never going back.
I’m new to the Mac world and thought I’d get an older Mac to play around with. I was stunned at how slow these things are after just eight years. Linux is so much faster than MacOS! So, I’d like to convert the Mac into a Linux PC.
This is a wonderful and comprehensive guide. Thank you so much for taking the time to write it! Like penttila, I was following along great until I got to:
replace the word “nomodeset” after “quiet splash”. Once you’ve done that, the whole line should read: “linux /casper/vmlinuz.efi file=/cdrom/preseed/ubuntu.seed boot=casper quiet splash nomodeset –“.
What are we replacing nomodeset with? It’s still in the final output that you produced. Is this a typo that we should ignore? Thanks for the help!
These sentences have no meaning for me, please explain or fix it:
On this line, replace the word “nomodeset” after “quiet splash”. Once you’ve done that, the whole line should read: “linux /casper/vmlinuz.efi file=/cdrom/preseed/ubuntu.seed boot=casper quiet splash nomodeset –“.


Definitely gonna try this, I have 2015 MBP and felt like Fedora is good match for it now
I’m new to the Mac world and thought I’d get an older Mac to play around with. I was stunned at how slow these things are after just eight years. Linux is so much faster than MacOS! So, I’d like to convert the Mac into a Linux PC.
This is a wonderful and comprehensive guide. Thank you so much for taking the time to write it! Like penttila, I was following along great until I got to:
replace the word “nomodeset” after “quiet splash”. Once you’ve done that, the whole line should read: “linux /casper/vmlinuz.efi file=/cdrom/preseed/ubuntu.seed boot=casper quiet splash nomodeset –“.
What are we replacing nomodeset with? It’s still in the final output that you produced. Is this a typo that we should ignore? Thanks for the help!
These sentences have no meaning for me, please explain or fix it:
On this line, replace the word “nomodeset” after “quiet splash”. Once you’ve done that, the whole line should read: “linux /casper/vmlinuz.efi file=/cdrom/preseed/ubuntu.seed boot=casper quiet splash nomodeset –“.
Thanks
Ok you can’t buy from bricks and mortor store but don’t make it sound like you can’t buy a linux machine from a company over the net.
The best review ever…. Thanks for that!