If you’ve installed Windows after solely using Apple devices, chances are you miss the simplicity of immediate note-syncing between Apple devices. Unfortunately, Windows-specific note apps can’t easily sync with Notes. And if you don’t want to switch to third-party note-taking apps, you might be thinking of setting up a system to sync Apple notes with Word.
While this can be done manually, by copy-pasting notes or emailing them, it’s not really “syncing” in the correct sense of the word. So, here’s an automated process that will do just that.
Part 1: Create an iOS Shortcut to Export All Notes
You need to set up a Shortcut on your iPhone that gathers all iCloud Notes into one file.
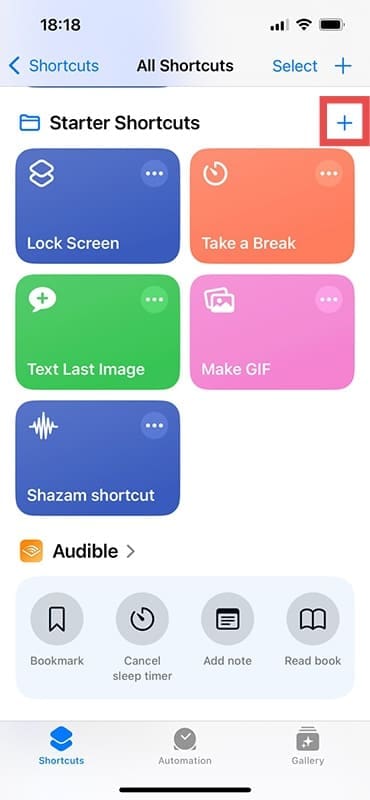
Step 1. Open the Shortcuts app on your iPhone and tap the “+” to create a new shortcut. Give it a name like “Export Notes to OneDrive.”
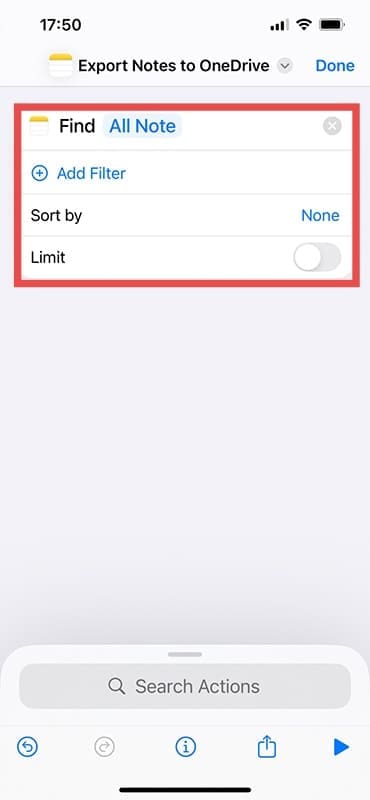
Step 2. Add the “Find Notes” action. Leave the filter blank or set it to find notes in the desired account or folder (such as your iCloud Notes folder). If you have iOS 16 and later, or have fewer than 26 notes, go to Step 5.
Step 3. (iOS 15 and earlier) Add a “Repeat with Each” action to loop through the list of notes found. This will let you process each note one by one, avoiding the 26-note limit imposed by the iOS 15 and earlier systems for Shortcut. Inside this loop, use a “Text” action (or “Set Variable” action) to build the output for each note. Insert the “Repeat Item’s Title” (note name) and “Body” (note text) into the text. For example, you might construct it as:
[Note Title]
———–
[Note Body text]
———–
The last line is a blank line or other separator before the next note. This ensures each note’s content is clearly separated in the final file.
Step 4. After the Repeat loop, you should have a combined text of all notes. If you used a variable to accumulate text (e.g. appending each note’s text to a variable), the result will be a single text containing all note entries. Alternatively, you can collect each formatted note in a list and then use “Combine Text” with a separator.
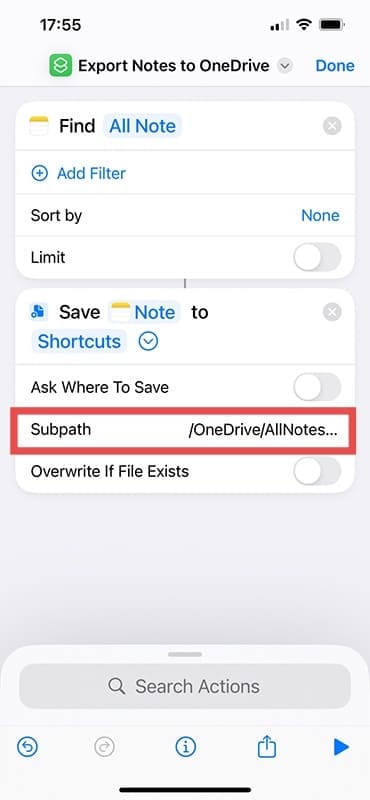
Step 5. Add a “Save File” action to write this text to OneDrive. Tap “Show More” on the Save File action and disable “Ask Where to Save” so it can run automatically.
Step 6. Add your OneDrive folder as the destination.
Step 7. In the “Subpath” field, enter a filename like “AllNotes.txt.”
This will configure the action to “Save [Combined Text] to OneDrive/…/AllNotes.txt.” The Shortcuts app will automatically overwrite the file each time with the latest content (since it’s saving to the same path). Ensure the OneDrive app is logged in so this file is synced to the cloud.
Part 2: Automate the Shortcut to Run on Note Updates
To keep the OneDrive file in sync with your Notes, you need set up a personal automation that runs the above shortcut whenever notes change.
Step 1. In the Shortcuts app, go to Automation (on the bottom) and tap “New Automation” to create Personal Automation.
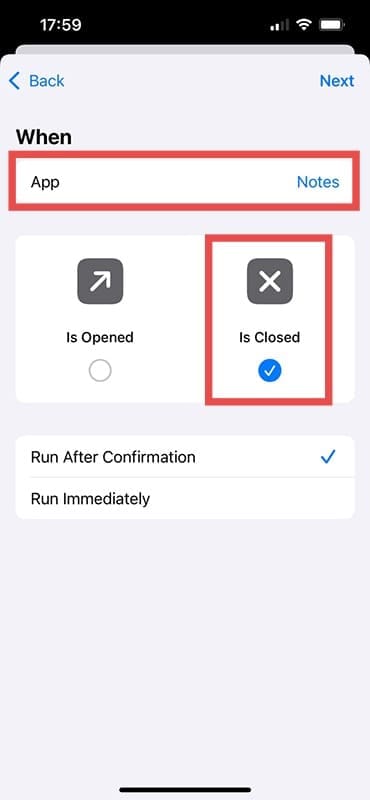
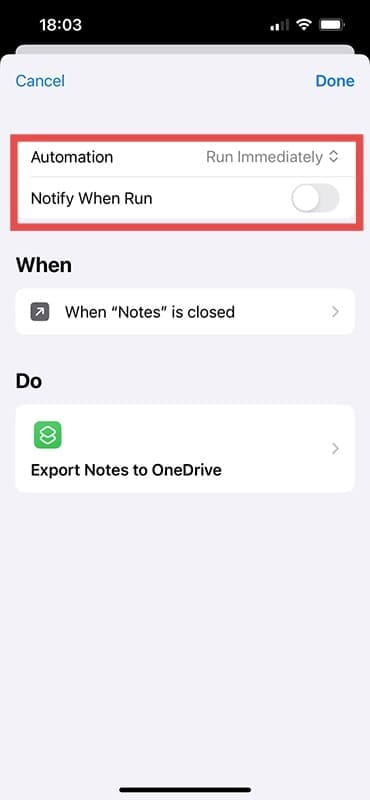
Step 2. Scroll and choose App as the trigger. Set it to trigger “When Notes is closed,” so select Notes app and “Is Closed” for the trigger condition.
Step 3. Add the “Run Shortcut” action and choose the “Export Notes to OneDrive” shortcut you created.
Step 4. Toggle “Ask Before Running” to “Off,” and confirm you want to “Run Immediately.” The first time the shortcut runs, you might need to grant Shortcuts some permissions.
If you force quit the Notes app, the automation might not fire reliably, but make sure to close it completely when you’re done inputting rather than putting it in the background. As a fallback or alternative, you could use a “Time of Day” automation (for example, every hour or every evening) or a “Charger” trigger to run the sync shortcut.
Part 3: Open the Exported File via OneDrive to the PC
With the Shortcut and automation in place, the iPhone will regularly save the file with the name you chose to OneDrive. You can check this by creating a folder on your PC that stores it.
Step 1: On your Windows PC, go to OneDrive.
Step 2. Make sure you’re logged with the same Microsoft account as the one used on the Shortcuts and ensure that the folder where the notes file is saved is selected for syncing. For example, if the Shortcut saved the file to OneDrive/Documents/AllNotes.txt, ensure the “Documents” folder is part of your OneDrive library on PC.
Step 3. The synced notes file will appear in your OneDrive folder on Windows. If it’s a .txt file, double-click it to open in Word (as Word can open text files) or in any text editor. For most uses, leave it as .txt and let Word open it in compatibility mode, or explicitly use “Open in Word.”
You could also have named it with a .docx extension in the Shortcut, but since the content is plain text, Word might warn that the file format is not a true Word document.
Every time the Shortcut runs, it overwrites the OneDrive file with up-to-date note contents. OneDrive will sync this change to your PC. However, avoid keeping the file open in Word when the sync is running.
Part 4: (Optional) Enhance Formatting in Word with a Macro or Script
You can use a simple Word macro (VBA script) or other scripting solution on Windows. A macro could find those patterns and apply a Heading style or bold formatting. For instance:
Sub AutoOpen()
‘ Example: format lines starting with “##” as Heading 1
Selection.HomeKey wdStory ‘ go to start
With Selection.Find
.Text = “^p## *” ‘ pattern: line break, “## ” and any text (note title)
.MatchWildcards = True
End With
While Selection.Find.Execute
Selection.Font.Bold = True ‘ make title bold
Selection.Font.Size = 14 ‘ make title text larger
Selection.Text = vbCr & Mid(Selection.Text, 3) ‘ remove “##” and preserve the title text
The above is an illustrative snippet: it looks for lines beginning with “## ” (our marker for note titles), makes them bold and larger, removes the “##” prefix, and applies a Heading 1 style. You will need to adapt the macro to match how your text is structured (for example, if you used a different delimiter or added “Title: ” before each note’s title, search for that).
If you don’t want to deal with macros, you can also manually use Word’s features on the text file. For instance, after opening the notes in Word, use “Find & Replace” or apply a style by selecting all note titles. This must be done every time the file updates.
Finally, you can use scripting or Shell to adjust the VBA macro to run independently of the file and can even run the script when the file is updated (i.e. synced from the Shortcuts app).
Alternatively, you could adjust the Shortcut to output in a richer format. One approach is to use the “Make Rich Text” or “Make PDF” action in Shortcuts. For example, you could convert the combined text to Rich Text and save as an RTF file (Word can open RTF with formatting). This won’t bring over images, but any bold or italic text in notes might carry over if Shortcuts captures them (not guaranteed). Generally, Apple Notes formatting is limited via Shortcuts, so the macro method in Word gives you more control over final appearance.
As an avid gamer, I’ve run into my fair share of error codes and weird faults that have forced me to find fixes to problems I never anticipated. That gave me a passion for sharing those fixes with others so we can all game without feeling like our hardware is rebelling against us.


")


Write a Comment