Last week, we covered a bunch of must-know tips for new iPhone users. Today, we’re covering a similar topic: Mac tips for new users in 2023.
I may be a professional Apple commentator these days, but it was only four years ago when I pulled my first MacBook out of its sleek white box. Today, I own a couple of Macs and have worked on one nearly every day since 2018.
So, as someone who used Windows for the first 20+ years of their life and only recently switched to Mac, I feel more than qualified to bring you all of the tips and tricks you need to know if you just got your first Mac.
Before we dive in, I do want you to know that I’ve broken this article up into three main sections. The first section will cover apps that I think every new Mac user should at least give a shot. In the second section, I cover the features of macOS that you’re going to want to get comfortable with. And finally, I close out this post by going over some accessories for your Mac that you’ll wanna grab asap.
As mentioned, the first thing we’re going to be covering are the must-have apps you need to download if you just booted up and logged onto Mac for the first time. After all, your computer is really just the stage for all of the amazing apps you’re going to be using to get your work done.
In this short list of apps, I’ve tried to avoid apps that everyone already knows about (Microsoft Word, Photoshop, etc.). I figure you already know about those apps and can decide for yourself if you want them.
Instead, I’ve covered a few apps that you might not know of and that are mostly exclusive to the Mac experience. They’ll make your time on a Mac that much better and more productive, as well as downright simpler.
At the top of the list is an app geared towards the techies. If you’re not interested in personalizing or “hacking” your Mac, you can go ahead and skip this one. If you’re a programmer, automator, or just someone who loves a good time-saver, you’re going to love this item on our list of Mac tips for new users.
I (and many others) often say that Keyboard Maestro is the reason that they’re never going to switch to another operating system. Keyboard Maestro is exclusive to macOS, and it’s an absolutely incredible, mind-blowing app.
Essentially, this is an automation app. It allows you to drag, drop, and combine a plethora of actions together, ranging from simple (copy/paste) to complex (precisely moving the mouse cursor around your screen).
This allows you to program certain functions on your Mac that don’t exist natively. For reference, I use this app to automatically outline my articles, do the math on how long my articles should be, and upload my articles. I also use it to copy and paste multiple different things at once, turn comma-separated lists into bullet lists, and customize the keyboard shortcuts in just about every app I use.
In short, this app allows you to hack your Mac. At first, you’ll probably start small, creating a few basic routines that every automator has come up with before. But as you go, you’ll start to have new, more intricate ideas, ones that can seriously save you a lot of time and headaches.
I’m probably not selling this app enough, but seriously, give it a shot. It’s my favorite app of all time and a must-have for serious Mac users.
Shottr is a must-have when it comes to Mac tips for new users
Next up on our list of Mac tips for new users is Shottr. Shottr is an interesting app because it solves a problem you might not really have on Mac. That’s making screenshotting better.
Screenshotting on Mac is already super solid. We’ll cover it in more detail later on in this post, but macOS allows you to take screenshots of windows, choose specific areas of the screen, and even edit and tweak your screenshots with ease. It’s a great experience, especially if you’re coming to Mac from Windows.
That said, there’s always room for improvement, and that’s exactly what Shottr is. An improvement. It allows you to take screenshots in a similar way to the default screenshotting feature on Mac. However, when you take a screenshot, it immediately brings you to an editor for that screenshot.
In this editor, you essentially get Photoshop Lite. It has a ton of useful features for removing sensitive information, drawing on your screenshot, and more. It’s probably overkill for most users, but for those who take a lot of screenshots, it can be a big help.
That brings us to Magnet, an app you’ll probably see on every list of Mac tips for new users. That’s because Magnet is truly a must-have app for every Mac user.
For those coming from Windows: You know how you can drag windows on Windows around, and they’ll instantly snap together? You probably never even thought of this as a feature, but when you switch to Mac, you’ll notice that it’s missing.
Yep, for whatever reason, in 2023, Mac doesn’t have native window snapping. Instead, you’ll need a third-party app to do it for you.
That’s all Magnet is. It’s an app that helps windows on your Mac snap together. You can even map certain snapping configurations to keyboard shortcuts, so you can organize your Mac how you like it with ease.
And that’s it! Seriously, this app is incredibly simple, but it’s also something everyone should download. Go grab it!
One of the most elegant apps I’ve enjoyed using nearly since my first day as a Mac owner is Typora. Typora is a minimalist writing app that uses markdown instead of traditional word processing features.
This means you can easily organize the structure of what you’re writing without needing to worry about alignment, moving images around, and so on. Everything just kind of works.
I don’t think it’s the best writing app for all use cases, to be clear. This is one of those Mac tips for new users that only some users are going to get a lot of use out of. Still, if you’re working on short-form content like essays, articles, or opinion pieces, Typora is a great app to add to your repertoire.
Next on our list of Mac tips for new users is Dropover. This is an app that I use so often I forget it’s not a built-in feature of macOS. It’s such a simple, easy app that it blends into the background of macOS perfectly.
Dropover is an app that allows you to “shelve” files while you’re in the middle of dragging and dropping them. You grab a file, wiggle your mouse, and a Dropover shelf appears. You then set the file on that shelf, go about your business, switch apps, whatever you wanna do. And when you’re ready, you grab the file from that shelf and go back to what you were doing.
It makes dragging files between apps, folders, and windows way easier. And you can add as many or as few files to a shelf as you like. You can even create multiple shelves at once. And, if you want to share the files in a shelf, Dropover makes that easy, too. You just click the share button on the shelf.
The last app I’m going to recommend on this list of Mac tips for new users is TinkerTool. This is an app I only learned about recently, but I wish I would’ve had it far sooner. Basically, TinkerTool brings a lot of obscure Mac features and settings to the forefront.
These aren’t features and settings that your Mac doesn’t have, mind you. You can dig through your Mac and access everything that TinkerTool has to offer. However, TinkerTool brings them together in a simple, neat way so that you can quickly start personalizing the way you use your Mac.
Basically, if you don’t feel like digging around in System Preferences for XYZ setting, you can check if TinkerTool has made it easier to access.
Mac tips for new users: Features you need to know about
And that’s it! Those are our suggestions for apps that new Mac users will love. Now it’s time to cover the next section of our Mac tips for new users, features.
This is going to be the meat of this list, as the majority of what you’ll need to know when you get a new Mac is the features to get used to.
Of course, we aren’t going to be covering every single unique feature to macOS. Instead, we’re just going to be focusing on the features that you’ll be using a lot and/or that are unintuitive. That way, you can quickly start learning the “right” way to use your new Mac.
Gestures
Starting off our list of Mac tips for new users is gestures. This is something that, in my experience, is pretty unique to macOS. It’s also one of the best aspects of using macOS, but you’ll need to learn how to use gestures before you can really start enjoying them.
For those that don’t know, your Mac will respond to gestures you make on your trackpad or Magic Mouse. You can use these gestures to open certain windows, activate features, switch between apps, scroll, and so on.
Here are some of the basic gestures you need to know:
Swipe up/down with two fingers on your trackpad to scroll (just one finger on a Magic Mouse)
Swipe left/right with three fingers on your trackpad to switch between fullscreen apps (just two fingers on Magic Mouse)
Using three fingers and your thumb, pinch or expand your fingers on the trackpad to bring up Launchpad (there isn’t a gesture on this for Magic Mouse)
Swipe up/down on your trackpad with three fingers to activate/deactivate Mission Control (on Magic Mouse, you tap with two fingers to toggle Mission Control)
Swipe to the left with two fingers from the very right edge of your trackpad to open Notification Center (there is no gesture for this on Magic Mouse)
You can customize these gestures if you need to in the System Preferences app, but for most people, I recommend just learning these default gestures. They’re pretty intuitive after a while, and they make using your Mac feel that much more fluid.
Screenshots
I did cover Shottr, an app for replacing the default screenshotting feature on your Mac, earlier in this list of Mac tips for new users. However, we’re also going to be covering the default screenshotting feature of macOS for those who aren’t looking for a replacement.
There are a few different ways to take screenshots on macOS. My personal favorite way is to press command + shift + 5. This brings up the screenshot app, allowing you to fine-tune how and what you want to screenshot. You can even screen record from this app.
If you just want to quickly take a screenshot of your entire screen, then press command + shift + 3. Or, you can take a screenshot of a specific portion of your screen by pressing command + shift + 4.
Windows vs Fullscreen apps: Mac tips for new users
This next tip on our list of Mac tips for new users is more of a concept than it is a feature you need to know. I’m going to cover this section as if you’re a native Windows user switching to a Mac device.
On Windows, you use apps as windows. Windows can take up the full screen, or they can be smaller windows that sit side by side. Either way, everything is taking place on your desktop. You never leave the desktop, you just move from one app to the next, minimizing apps if they’re in your way.
On Mac, you’re going to be managing these windows much differently. You can, technically, use app windows in the same way that you do on Windows. However, if you do, you’re going to find that macOS is a bit lacking, clunky, and potentially even slow.
That’s because macOS isn’t really designed to be used in this way. Instead, you’re meant to be using the majority of your apps in fullscreen mode. Each window has three dots in the top-left corner:
A red dot, which closes the app
A yellow dot, which minimizes the app
A green dot, which makes the app fullscreen
If you’ll do me a favor, go ahead and open three different apps on your Mac. Then, press the green button for one of them.
You’ll notice that the app expands and takes over your screen. You are no longer on the desktop of your Mac, but instead locked into this app. To switch back to your desktop, double-tap two fingers on your Magic Mouse or swipe up with three fingers on your trackpad. Then, click one of the other apps you opened.
Once you’ve selected one of these other apps, make it fullscreen as well by clicking its green button. You’ll now be focused on that app.
You can now swipe between this fullscreen app and the other app you fullscreened by swiping with two fingers left and right on your Magic Mouse or three fingers left and right on your trackpad. You can also swipe back to your desktop in this way.
This is how you’re meant to use apps on macOS. You don’t interact with multiple apps at a time in the desktop, or one big app on the desktop. Instead, you’re switching between fullscreen apps as you work.
Trust me, it’ll seem unintuitive at first, especially if you’ve been using Windows your whole life. But once you get the hang of it, you’ll start to realize that it’s much more organized and streamlined. When you’re using an app, you’re really locked in and focused on it. You aren’t juggling multiple apps at once.
If you’re still struggling to understand this concept, please let me know in the comments below and I’ll make a follow-up post explaining this idea in more detail.
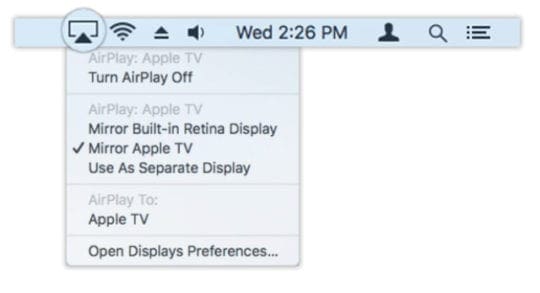
The Menu Bar
Another major feature we want to bring to your attention on this list of Mac tips for new users is the Menu Bar. This is something that doesn’t really exist on Windows, but it’s pretty core to the way that macOS functions.
If you look at the top of your Mac’s screen, you should see a black bar that has information on it like the time, WiFi connectivity, etc. in the top-right, and an logo in the top-left. There is probably some other stuff too, but you can explore that on your own.
This is what’s known as the Menu Bar! It’s basically a status menu, showing you relevant information for whatever app you’re currently using. The right side of the Menu Bar stays the same (unless you customize it), but the left side will change each time you switch between apps.
You can click the logo to bring up settings for your Mac, such as logging out or restarting your computer. You can also dig through the app-specific options like File, Edit, and Help to pull up the settings and features for the app that you’re using.
As mentioned, you can customize the Menu Bar! To move things around on the Menu Bar, hold the command key down and click and drag the icon you want to move. You should be able to move basically everything around. You can also remove icons you don’t want up there (like Siri, for instance) by command dragging them off of the Menu Bar.
Menu Bar apps can also be downloaded and installed, which are some of my favorite types of apps! These apps go on the right side of the Menu Bar and are represent by an icon. You just click that icon and you’ll have access to whatever features that app has to offer.
One of your Mac features that resides in the Menu bar is the Control Center. If you own an iPhone, then you’re probably familiar with what the Control Center is. For those that don’t know, though, the Control Center is basically a quick menu for accessing a bunch of handy settings and features on your Mac.
For instance, this is where you’ll change the volume and brightness of your Mac, access Bluetooth settings, control music that’s currently playing, and even change the Focus/Do Not Disturb settings for your Mac.
To access the Control Center, just click the icon that looks like two toggle switches in the top-right of the Menu Bar. It’s directly to the left of the clock in your Menu Bar.
You can’t customize or mess around with the Control Center too much. But you will be interacting with a lot, so go ahead and toy around with it to get a feel for what you can do with it.
The Dock
The next major feature of macOS that we’re going to be covering in this list of Mac tips for new users is the Dock. The Dock is that little bar filled with app icons at the bottom of your screen. On Windows, you have the taskbar and Start menu. On Mac, you simply have the Dock!
At first, understanding the Dock might seem a bit tricky. You’ll close apps but still find them present in the Dock, and you’ll have some apps that appear and disappear from the Dock on its right side. This is also where the Trashcan is located.
Basically, the Dock is just a shelf for your most-used apps. It’s not where all of your apps will be (unless you put them all there, I suppose) but it is where the bulk of your daily apps will be. You can easily customize what is or isn’t in your Dock by dragging and dropping icons on or off of the Dock.
App icons that have a little dot under them are still running, either in the foreground or the background. That means you can click on their icon to instantly bring them up. When you click the red button on these apps, they don’t really close, they just are hidden from view. Generally, that’s totally fine – you don’t need to quit apps unless they are heavy-usage.
Other apps either aren’t running in the background or simply won’t run in the background by default. When you click their red button, they quit completely and will need to be restarted when you run them again. That just means they’ll startup a bit slower when you click on their icon in the Dock.
On the very right side of the Dock is the Trashcan, which you can’t move around. Just like the Recycling Bin on Windows, this is where the files you don’t want will go. You can empty the Trashcan by right-clicking it and clicking Empty Trash. That will permanently delete all of the files in the Trashcan.
One difference between the Trashcan on Mac and the Recycling Bin on Windows is that the Trashcan is where you’ll uninstall apps. On Windows, uninstalling apps is kind of a hassle. But on Mac, you just drag the app icon into the trash and the app is instantly uninstalled. It’s that easy! This is also why it’s somewhat difficult to install malware on your Mac – removing it is as easy as throwing the malware in the trash.
Directly to the left of your Trashcan will be a thin grey line followed by some other apps that you’ve recently opened. As you might have guessed, this is where your recently opened apps will reside. These are the apps that you’re either currently using or recently used but that aren’t a part of your main Dock apps. You can add these apps to your Dock by dragging their icon to the left of the thin grey lines.
Unlike the Menu Bar, which you probably only want to customize once you get comfortable with your Mac, you can and should start customizing the Dock right away. Go ahead and remove any default apps that you probably aren’t going to be using, and start adding the apps that you are going to be using. Eventually, you’ll get to the point where the Dock contains all of the apps you regularly use and none of the ones that you don’t.
And don’t worry about crowding the Dock – it’ll keep expanding to fit as many or as few apps as you want to add.
Spotlight: One of the best Mac tips for new users
That brings us to Spotlight, one of the absolute best features of macOS. Seriously, if you are just skimming through this list of Mac tips for new users, don’t skim past Spotlight.
Spotlight is basically an app launcher and search engine for your Mac. Just press command + spacebar and Spotlight will pop up. You can now type in the name of any file or app on your Mac and press return on your keyboard. That app or file will instantly open.
It’s an awesome feature and a real timesaver. On Windows, you probably spend a lot of time digging around for apps or have a desktop that’s loaded up with the apps you use. On Mac, you simply place your daily apps in the Dock and then access the rest through Spotlight.
That’s about all that there is to Spotlight. It might seem pretty simple, but seriously, you’ll be bringing it up constantly while you use your Mac. It’s always available, no matter what app you’re using, so never hesitate to use it!
Launchpad
The last real feature you need to be aware when thinking about Mac tips for new users is Launchpad. Remember how I mentioned that your daily apps go in the Dock? Well, you may be wondering where the rest of your apps go.
You’ll find nearly every app that you’ve downloaded to your Mac in the Launchpad. Similar to the Start menu on Windows, this is an area of your Mac where your apps are “stored” until you’re ready to use them.
You can bring up Launchpad in a few ways. First, you may have a Launchpad icon in your Dock if you just set up your Mac. You can also activate Launchpad by activating Spotlight, typing in “Launchpad”, and hitting return.
Or, you can use the Launchpad gesture – make a pinching motion on your trackpad with three fingers and your thumb.
Personally, I don’t find myself using Launchpad too often. I default to Spotlight whenever I want to bring up an obscure app on my Mac. The only time I really use Launchpad is when I’m looking for an app whose name I don’t remember.
But I’m sure a lot of people use Launchpad pretty often, and it is a core feature of your Mac that you need to know about.
What about virus protection? Is my Mac really immune?
Before moving onto the next section of our Mac tips for new users, I did want to talk about something that you may have heard about before purchasing your new Mac. That’s the idea that Macs can’t get malware or viruses. Is this true, or do you need to invest in malware protection?
For the most part, this is actually true. I was a bit nervous about catching malware on my Mac for the first year or so, but I’ve now owned multiple Macs for several years without any issues ever cropping up.
It’s also true that you are 99.99% protected against viruses. I know that to most people, viruses and malware are the same thing, but in reality they’re pretty different. Malware is a malicious app that you download to your computer. A virus, on the other hand, is malicious software that spreads from one computer to another.
With the way macOS is designed right now, a virus spreading between your machines is virtually impossible. So don’t worry about that – unless you seek out or create a virus, you should be good.
Technically, you can get malware on your Mac. But the threat level is pretty low. As mentioned earlier in this post, you can just delete malware by dragging it into your Mac’s Trashcan. Apple “sandboxes” the apps on its machines, which means that apps on your Mac can’t really interact with the rest of your Mac unless you explicitly let them. It’s why Mac is a bit more limited than Windows in some respects, but it’s also why malware doesn’t really affect Mac users.
Additionally, macOS is far, far less popular than Windows. So whenever a bad hacker is designing malware, they usually just design it to work on Windows. Windows is more popular and more vulnerable, so it just makes more sense to attack it.
So in short, no, you don’t need malware protection and you definitely don’t need virus protection. Avoid downloading sketchy apps and visiting sketchy websites and you shouldn’t ever have any issues.
Alright, now we’re starting the last section of our list of Mac tips for new users – accessories! Honestly, this section is completely optional. You don’t need any of this stuff to make your Mac run smoothly. However, a little extra investment if you have the extra cash can go a long way. These are, in my opinion, the primary accessories to consider grabbing after you’ve purchased your first Mac.
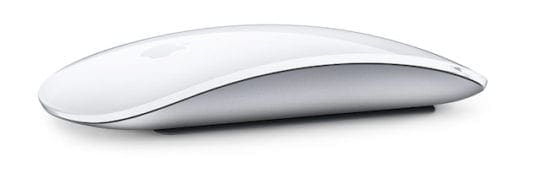
Magic Trackpad vs Magic Mouse
The first thing I want to seriously recommend on our list of Mac tips for new users is grabbing the Magic Trackpad and/or the Magic Mouse. You don’t really need both, but personally, I do like being able to switch between them depending on which app I’m using.
If you have a MacBook, then you’re already going to have a Magic Trackpad built into your Mac. So you can grab the Magic Mouse and get the best of both worlds.
If you own a Mac, then you probably had to choose between a Magic Trackpad or Magic Mouse whenever you purchased your Mac. Again, whichever one you chose, I do recommend also grabbing the other.
The reason I recommend having both devices (if you can; they’re a bit pricey, so having both isn’t for everyone) is that they’re better at different things. The Trackpad is great for fluid interactions and gestures, while the Mouse is great for everyday usage and precision.
If you have to choose one or the other, then I would generally say go with the Magic Mouse. Though I have both, I use the Magic Mouse for 90% of what I do on my computer. The Magic Trackpad is just nice to have when I need it.
However! Before you buy a Magic Mouse, try one in an Apple Store or from a friend if you can. The Magic Mouse is very flat when compared to other mouse devices, which can feel a bit weird to a lot of people. In fact, some people complain that their hand cramps while using the Magic Mouse.
I haven’t had any issues with it and find it very comfortable to use, but it’s not for everyone. If you try out a Magic Mouse and find that it is a bit awkward for you, go ahead and grab a Logitech mouse. They’re just as good in terms of quality, even if they don’t match up with macOS quite as well.
AirPods
Another accessory I want to recommend on our list of Mac tips for new users is AirPods. Specifically, I recommend grabbing AirPods Pro or AirPods Max if you can afford them. Standard AirPods are alright, but it’s been my experience that they don’t last very long.
You of course don’t need a pair of AirPods to use your Mac. But they are a great accessory, they work seamlessly with macOS, and it’s one less cable to have to deal with while you work on your computer.
That’s really all that there is to it! Grab a pair if you have the cash and inclination, it’s worth it. You can check out this post if you’re not sure which kind of AirPods to get.
Extra storage
Something new Mac users should definitely consider grabbing for their Mac is extra storage. Unlike most Windows computers, hardly any Mac devices have upgradeable storage. That means whatever storage option you chose when you purchase your Mac is what you’re stuck with.
Fortunately, it’s easier than ever to grab a flash drive from Amazon with a ton of storage. Just find one that supports USB C and plug it into your Mac, and you’ll have that much extra storage.
Just be aware that a lot of storage devices on Amazon are scams. If you see a ridiculous price to storage ratio (“$10 for 1TB!”) don’t buy it! Stick to prices that look reasonable and fair, and check reviews on third-party sites before making a purchase.
Also, keep in mind that Windows and Mac use two different formats for flash drives. That means that if you’re going to use a flash drive that was previously used with a Windows computer, your Mac is going to format it whenever you plug it in. That will erase anything you have on that drive, so I recommend using a drive that has no data on it.
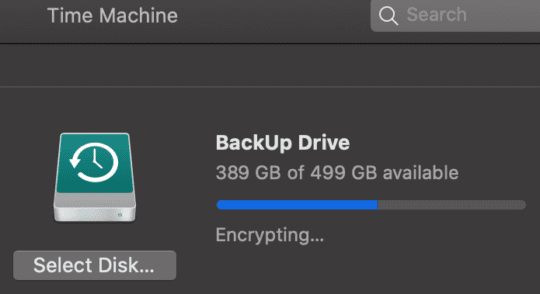
A Time Machine drive
The very last suggestion on our list of Mac tips for new users is to invest in a Time Machine drive. For those that don’t know, Time Machine is a unique feature of macOS that, frankly, everyone should take advantage of if they can.
Time Machine is a feature that essentially backs up your Mac every hour. You plug in a flash drive or HDD/SSD that has double the amount of storage that your Mac has. Then, you tell your Mac that you want to use that Drive as a Time Machine drive. Your Mac will ask you.
Pretty quickly, your Mac will start copying your entire operating system to that flash drive. It’ll probably take a few hours the first time.
After that, though, your Mac will begin instantly updating any new files or changed files on Time Machine. That should take a few minutes at most.
The idea is that, at any time, if your Mac were to crash or burn, you’d still have the Time Machine drive with all of your information on it. You can use this Time Machine drive to restore individual files or your entire Mac. It’s incredibly handy and will seriously save you in an emergency event. Trust me, I’ve had to use it a few times.
This is more expensive than simply expanding your storage, however, because as mentioned, you do need to grab a Time Machine drive that has about double the storage of your Mac. That’s not a requirement, technically, but I highly recommend doing so. Additionally, only certain drives support Time Machine. So you’ll need to find a specific device for Time Machine.
Still, it’s an absolutely excellent feature that I recommend everyone who can use. For more information on Time Machine, check out this article.
Become a pro in no time with these Mac tips for new users
And that’s it! Those are our Mac tips for new users. While it might seem like a lot, the truth is that macOS is a super easy OS to get the hang of. These tips will just help you master it that much faster.
You can still be focused on an app in Windows, or Linux (which has even better window management). However, you can also multitask – which is what sets a laptop apart from a tablet. Mac doesn’t support multitasking very well out of the box, and being “locked in and focused on” a maximized app window without a good way to quickly arrange apps on screen for maximum productivity is just an annoying limitation of OS. Window management is one of the things that MacOS is just not good at out of the box.
As a long time Mac user it is good to hear what you think is useful. Two things I would like to share:
1) Do you know about QuickLook? That is what I really miss when I have to work on a Windows computer. When you are in the Finder click one time on an icon, press the space bar and the file will open a preview version. you can use the arrow keys to move up/down/across to other icons. This has gotten more powerful – it will now play audio or video files or open web pages. You can access the Markup tool for some editing or fully open the application if needed.
2) In the section of the article where you are talking about flash drives – the Mac will NOT automatically reformat the drive when you plug it in. It may ask if you want to reformat, but this would be another good article for you about how to format flash drives. Sometimes you need to format in a way to allow files to be moved between macOS and Windows.
Best regards