It’s 2023, and that means there are likely a ton of new iPhone owners. If that’s you, then you’ve come to the right place for learning iPhone tips for new users. In this article, we’re going to be covering everything you need to know if you’ve just purchased your first iPhone.
First, while this article might seem long, know that using iPhone is pretty easy and intuitive. If you’re switching over from Android, you’ll likely find that many of the action you perform on Android are easier to discover on iPhone. The learning curve is not steep.
Second, you’ll also probably find that there aren’t as many missing features as you might anticipate. In 2023, iPhone is pretty feature-packed. So feature-packed, in fact, that I actually cut out a lot of tips for this post just to keep it from being too long.
And finally, I’ve organized this article into three sections. The first is must-have apps, which is just a few apps that you might not have used or had access to on Android. I think these are great apps to use, especially if you’re just setting up your first iPhone.
From there, I cover features that you either will have fun testing out or that you need to know to effectively use your iPhone. And finally, I cover a few accessories that will make your iPhone more useful and fun in day-to-day life.
Alright, enough preamble – let’s get into it!
Contents
- iPhone Tips For New Users: Must-have apps
- iPhone Tips For New Users: Features you need to know about
- Switching between apps
- Accessing and customizing the Control Center
- Personalizing your iPhone with Focus
- Don’t worry about closing apps
- Turn on back-tap
- Using the versatile Share button
- Shake to undo
- Secure your passwords with Keychain
- Search your iPhone with Spotlight
- Mute incoming calls
- Long-press everything
- Add widgets to your Home Screen
- Explore fun interactions in iMessage
- iPhone Tips For New Users: Accessories to consider
- Use these iPhone tips for new users to become a pro in no time
iPhone Tips For New Users: Must-have apps
First things first, we’re going to look at a handful of apps that you need to try if you’re new to iPhone. Most of these apps are totally free, and many come pre-installed on your iPhone. As mentioned, these are apps that you either haven’t had access to before or might not have used while using an Android phone. I love and use these apps all of the time and hope you’ll dig them too!
Apple Music
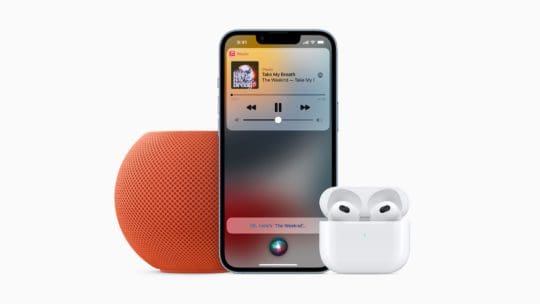
The first app you’ll want to start using is Apple Music. I know, everyone has their preference when it comes to listening to music on their smartphone. However, switching to Apple Music is at the top of my list of iPhone tips for new users for a few reasons.
For one thing, Apple Music is a great app. It’s clean, easy to use, and packed with music. It’s just a great app.
Secondly, Apple Music is deeply integrated with iOS. That means it’ll work better with Siri, third-party and first-party apps, and you can even create automatic routines with Music using the Shortcuts app.
While there’s not necessarily anything wrong with Spotify and co, when you’re on iPhone, Apple Music is simply going to work better overall. So check give it a shot if you haven’t before.
Measure
Next on our list of iPhone tips for new users is to download (if it doesn’t come preinstalled on your iPhone) the Measure app. Measure is an app that Apple developed, so it’s totally free to use on your iPhone.
This app uses the camera on your iPhone to measure objects in your physical space. Simply open the Measure app and point your camera at an object in your vicinity, such as a wall, and tap a point on the wall. Then, move your camera to another point on the wall and tap there. Instantly, a line will be drawn on your camera from these two points. That line will have measurements on it showing you how long that space is in the real-world.
You can use this feature to measure furniture, walls, and really anything you want. No ruler or measuring tape required. Very handy in a pinch.
I will point out that, while the Measure app gets more accurate with each iOS update, it’s not perfect. So consider the measurements it provides as a close estimate (and it is pretty close) rather than a perfect approximation.
Fantastical
That brings us to the next app on our list of iPhone tips for new users, Fantastical. Fantastical is an app that I’ve been using for several years now, and it’s one of my absolute favorite third-party apps for iPhone.
Essentially, Fantastical is just a really good calendar app. That might not sound too exciting, but seriously, it’s really good.
There are two major selling points to Fantastical. The first is that it uses natural language parsing, or NLP. That means that instead of doing a bunch of typing and button-pushing to create events in the calendar, you simply type what you want the app to schedule.
For instance, if I want to schedule an appointment for tomorrow at 5pm, I just type “Appointment for tomorrow at 5pm” into Fantastical. It’ll then create that event for me. You can get more detailed or less detailed if you like, making this a super fast and easy way to keep your calendar updated.
The second major selling point of Fantastical is that it combines your reminders and calendar events. So you can quickly see upcoming appointments, meetings, and events alongside tasks you need to complete that day. This makes it perfect for students and workers who need to keep track of a lot of events and tasks.
It’s not free, but I’ve found it to be totally worth the price, especially as someone who uses this app for work.
Apple Books
Another app on our list of iPhone tips for new users is Apple Books. This is a free app developed by Apple, and it’s one that isn’t necessarily for everyone. If you’re not a reader, you can go ahead and skip this one.
For those who do like to read, though, definitely give Apple Books a look. It has a great selection of books, provides a comfortable reading experience, and does an excellent job of tracking what you’re reading.
I’ve used a few other reading apps and prefer Books in just about every way. It’s better looking, easier to use, and better at setting and tracking my reading goals.
The one drawback of Books is that it doesn’t offer any kind of reading subscription. You have to purchase each book individually, so building up your library can get costly. Beyond that, though, this is an excellent app for readers.
CARROT Weather
Before getting into the next app on our list of iPhone tips for new users, I’ll admit that the default Weather app on iPhone is pretty solid. It’s easy to use and it looks great. It has animations that change depending on the weather, and it gives you a pretty solid forecast.
Still, it’s hard to beat the fun of the CARROT Weather app. This app is not only great to look at and accurate, it also has a lot of personality.
In the settings for CARROT Weather, you can choose how the app talks to you. You can make it crass, kind, funny, grumpy, and more. Whatever you set it to is how it’s going to deliver the weather forecast to you each day.
While this might seem like a gimmick (and it kind of is) it’s surprisingly helpful. That’s because it causes you to pay more attention to the weather each day. And that in turn makes you more conscious about how you dress and prepare for the day ahead. And, of course, it’s also a ton of fun.
Yelp
Last but not least is the Yelp app. You Amy be wondering why I’ve included Yelp, as it’s an app you’ve no doubt heard of and had access to on other smartphones.
The reason I’m bring Yelp up on this list of iPhone tips for new users is that Yelp is integrated with the Maps app on iPhone. For so many users, this is an annoying inconvenience. It makes it harder to look at photos for restaurants, read reviews for local shops, and so on.
However, if you download and set up the Yelp app, it actually makes the Maps app much richer. Yelp has a surprising amount of useful information, from reviews and photos to websites, payment information for stores, answers to questions (“Does this restaurant have a bathroom?”), and so on.
Before having an iPhone, I never considered using Yelp before. After having an iPhone, though, Yelp has become one of my favorite apps. It’s a great way to get in touch with the community, try and review new places near you, and of course, improve the experience of using the Maps app.
iPhone Tips For New Users: Features you need to know about
Alright, with apps out of the way, it’s time get into the meat of this post of iPhone tips for new users. And that’s the features you need to know about.
As mentioned earlier in this post, this is a combination of features that I feel you need to know about to effectively use your iPhone and features that are just plain fun to play with. Unlike the apps section, these are all totally free to use and experiment with.
Switching between apps
First up on our list of iPhone tips for new users is switching between apps. This is something that is really essential to using your iPhone, but it also might not be immediately obvious.
If you’re using an iPhone that still has a Home Button, you can switch apps by double-clicking the Home Button. That’ll bring up all of the apps you’ve accessed recently. You can scroll through them and tap on the one you want to access.
If you’re using an iPhone that doesn’t have a Home Button (i.e., it uses Face ID instead of Touch ID), then you’re going to change apps by swiping.
First, look for the Home Bar on your iPhone. It’s a little grey bar at the bottom of the screen in most apps. You won’t see it on the Home Screen, but you’ll still use the same gestures on the Home Screen.
To close an app, you swipe up from the bottom of your screen using the Home Bar. Bringing up the app switcher is pretty similar to swiping an app away, except that you don’t lift your finger off the screen. Swipe up from the bottom of the screen, and once your finger is about halfway up the screen, leave your finger there. Then, lift your finger.
That should bring up the app switcher. It might feel a little unintuitive at first, but you’ll quickly get the hang of it. From the app switcher, you can swipe through your open apps and choose one.
You can also change apps by swiping left or right on the Home Bar. It works like a slider, taking you back and forth between your most recently opened apps.
Accessing and customizing the Control Center
Once you’ve got the hang of switching between apps, you’ll want to check out the Control Center. The Control Center is where you’ll find access to settings like volume and brightness, as well as features like the Camera and flashlight.
To access Control Center, just swipe down from the top-right corner of your iPhone’s screen. From there, you can play around with swiping and pressing icons. You can also long-press most icons here to bring up additional settings.
Something you may not know about the Control Center is that you can customize it. To do so, open the Settings app, scroll down and tap Control Center, then add or remove and reorganize controls in Control Center as you see fit.

Personalizing your iPhone with Focus
One of the more complex iPhone tips for new users is personalizing your iPhone with Focus. Focus modes are different modes you can set on your iPhone that change which apps, widgets, and wallpapers you see on your iPhone.
You can think of this as an advanced Do Not Disturb feature. Whenever you’re at work, you can turn on your Work Focus, which will block personal texts and calls from showing up on your phone. Then, when you’re at home, you can switch to Personal Focus, which will block emails, messages, and calls from work.
You can create as many Focus modes as you want. Personally, I have one for work, personal life, sleep, driving, generic Do Not Disturb, and exercising.
To experiment with Focus, open the Settings app, scroll down and tap Focus, then tap the + icon in the top-right of the screen to create a new Focus mode.
Again, you can use Focus modes to customize which notifications you’re receiving, your iPhone’s wallpaper, which apps you see, and more.
Don’t worry about closing apps
A much simpler item on our list of iPhone tips for new users is to not worry about closing apps. This is something you’ll see a lot of iPhone users do, even if they’ve been using iPhone for a long time. They’ll open the App Switcher and start swiping apps away to close them.
The reason people do this is that they assume having a bunch of open apps will deplete their battery life and/or slow down their iPhone’s performance.
The truth is, however, that you can have as many apps open as you like without noticing any impact on performance. That’s because your iPhone is designed to “sleep” apps after you haven’t interacted with them in a while or you’ve opened several apps since opening that particular app.
This means that having hundreds of apps “open” on your iPhone doesn’t mean that they’re all active and running in the background. It just means they’re frozen or sleeping, waiting for you to return to them.
Closing these apps actually makes them slower to load in the future. So unless an app is malfunctioning (in which case closing it could fix the problem) it’s best to just leave apps in the background alone.
Turn on back-tap
Next up on our list of iPhone tips for new users is to turn on back-tap. I don’t necessarily think this feature is for everyone. I don’t personally use it, for instance. However, lots of people find it really useful, or at the least a neat gimmick.
Back-tap is exactly what it sounds like. It’s a feature that allows you to tap the back of your iPhone to trigger certain actions or events. This feature is disabled by default and is intended to be used by individuals with accessibility needs.
However, anyone can enable this feature and use it for a variety of purposes. For instance, you can use back-tap to take you back to the Home Screen. Or you can use it to turn on your iPhone’s flashlight, open Notification Center, take a screenshot, and much more.
To play around with back-tap, open the Settings app, scroll down and tap Accessibility, then tap Touch, and scroll all the way to the bottom and tap Back Tap. From here, you can map various actions to a double-tap or triple-tap.
Just know that it’s fairly easy to set this feature off by accident, so I wouldn’t map it to any detrimental actions if you can avoid it.
A feature you might not have discovered yet while learning iPhone tips for new users is the Share button. This is a button you’ll see all across iOS. It’s a square with an arrow on it.
This button is primarily used for sharing things with other people. So if you see an image, link, or video you want to share with others, tap that button and you can email, text, Snap, etc. it to others.
However, the Share button is used for way more than just that. It contains settings for web pages, information in various apps, actions to open a link in a different app, and much more.
Think of this as the three-dot menu in Android. It primarily helps you share things, but it does way more, too. So if you’re ever wondering, “How do I do X?”, try the Share button!

Shake to undo
Another unintuitive item on this list of iPhone tips for new users is shake to undo. This works pretty much throughout the entirety of iOS. Just shake your iPhone (somewhat vigorously) and you’ll have the option to undo something you just did.
If you’re thinking that this is kind of a terrible and inconvenient way to handle undoing things, you’re correct! I and lots of others hate this feature and can’t wait for it to be removed from iOS. But for now, this is something that all iPhone users (including you) have to deal with.
Secure your passwords with Keychain
One of the richer features on this list of iPhone tips for new users is Keychain. This is something that not even a lot of long-time Apple users take advantage of, and it’s a real shame!
Keychain is a feature that creates and stores passwords for you. Kind of like 1Password or LastPass, but built into your iPhone.
This feature acts as a great way to keep track of your various passwords, so you don’t have to worry about remembering and typing out your passwords all of the time. However, it’s also a great way to start using unique passwords for all of your accounts.
Every time you make a new password on your iPhone, Keychain will suggest a strong, randomized password for you. Don’t worry about memorizing it – Keychain will do that for you. And if you ever need to look up a password, you can simply look it up in the Passwords section of the Settings app.
You can learn more about using Keychain here.
Search your iPhone with Spotlight
That brings us to one of my favorite iPhone tips for new users, Spotlight! Spotlight is a feature that you’ll find on nearly every Apple device. It’s a built-in way to search through your apps, files, and the web, all at the same time.
To access Spotlight, simply swipe down on the Home Screen of your iPhone and start typing. That’s it!
You can use Spotlight to quickly find apps, files, photos, or websites without digging through your phone. I use this all of the time to find apps whose location I haven’t memorized.
Mute incoming calls
This is one of the easiest tips on this list – muting calls! Let’s face it, most of the time, when we’re getting a call on our phone, we don’t want to answer. On iPhone, muting incoming calls is super simple.
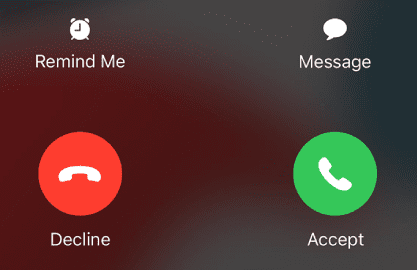
Just press the Power Button whenever a call starts ringing your iPhone. This will mute the ringing and vibrating, but it’ll leave the call visible in case you want to answer it.
If you don’t want to answer the call, you can press the Power Button again to decline the call. Just know that the person on the other end is going to see that you declined their call.
Long-press everything
Another great suggestion in this list of iPhone tips for new users is to long-press everything. Seriously, try long-pressing links, images, app icons, words, icons in Control Center, etc.
To long-press something, just press something with your finger and leave your finger there for an extra second or two. Most of the time, a new set of options or features is going to appear.
You can think of long-pressing on iPhone as akin to right-clicking on your computer. It’s super simple, but without it, you’d be lost!
Add widgets to your Home Screen
Nearing the end of our list of iPhone tips for new users is to add widgets to your Home Screen. This is something that’s been around on Android forever, so you’re probably familiar with the idea of widgets. They’re little icons and windows you can put on your Home Screen to show yourself information from various apps on your iPhone.
To create a widget, long-press the background of your Home Screen. Pretty soon, the app icons should start jiggling. This is called “Jiggle Mode” (no, seriously, it is).
Whenever your Home Screen is in Jiggle Mode, a + icon will appear in the top-left of the screen. Tap it, and you’ll have access to a bunch of widgets from apps that you have on your iPhone.
Tap one of the widgets in the widgets drawer, customize it, then add it to your Home Screen. You can then move it around and place it wherever you like.
Explore fun interactions in iMessage
Last but not least, new users should have fun with iMessage! This is one of the biggest features that new users love about owning an iPhone, and for good reason. There are a lot of cool features going on in iMessage. So much so that I don’t really have time to go through them all. Here are just a few to get you started!
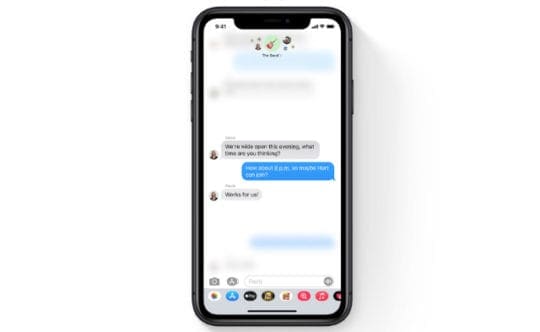
Whenever you’re sending an iMessage to someone (that means that bubbles are blue, not green, and that the other person also has an iPhone), you can long-press the blue Send arrow.
When you long-press that blue arrow, a popup will appear allowing you to send various screen or message effects. These animations will play whenever the other person checks their messages. I don’t send these too often, but they can be great to use whenever it’s a holiday, someone’s birthday, or for comedic effect.
Another great feature of iMessage is audio messages. This is indicated by the little app bubble in iMessage of an audio waveform. Tap it, and you’ll have the ability to start recording an audio message for the other person.
Note: The microphone icon is not for sending audio messages. It’s for dictating words for your iPhone to type.
Lastly, if your iPhone supports Face ID, then you can send Animojis to others. Tap the little app icon in iMessage that looks like an emoji face taking a photo. It’ll allow you to record and talk as if you’re an animated emoji of your choosing.
iPhone Tips For New Users: Accessories to consider
Before closing out this article, I did want to cover some last few tips on accessories to pair with your iPhone. After all, the iPhone itself is only half the fun. The other half is personalizing it with accessories to make it more useful customized.
A case and screen protector
The first accessories you really should grab for your new iPhone are a case and screen protector. Both are super easy to find these days, and both for not too much. Any generic screen protector should do the trick.
As for a case, there are countless options to go with. Some of my favorite cases come from Wildflower Cases and Native Union, but you can find tons of other options online.
The important thing is to keep your iPhone protected! iPhones are more expensive and tend to retain a lot of their trade-in value. However, a cracked iPhone is not going to do as well as a trade-in item, so keep it safe and secure with a case and screen cover.
AirPods
Another that you should consider grabbing while exploring iPhone tips for new users is a pair of AirPods. I know, everyone already knows what AirPods are. They’ve been mocked and praised all over the internet.
But having owned a handful of AirPods at this point, I have to say that they are a pretty solid accessory. My only recommendation is to avoid grabbing the standard AirPods, as I feel they’re fairly overpriced.
Instead, I’d spend the extra money on the AirPods Pro or AirPods Max. These devices are more expensive, yes, but they’re more worth the price tag. The standard AirPods, meanwhile, have a tendency to stop working after just a year or two of use.

A MagSafe charging stand
Lastly, I’d recommend finding a MagSafe charging stand. MagSafe is a fairly new iPhone feature that allows you to charge your iPhone wirelessly. In addition, the wireless charger magnetizes to the back of your iPhone, making it handy and convenient.
When you grab a MagSafe charging stand, you’ll be able to charge your iPhone and have it propped up at the same time. It’s satisfying, fun to look at, and a great way to keep your iPhone charged while still having easy access to it.
Use these iPhone tips for new users to become a pro in no time
And that’s it! Those are our picks for the best iPhone tips for new users. While that can be a lot to take in, the key is to never stop exploring your iPhone. Too many users set their iPhone up and then forget the rest, and when you do that, you miss out on a lot of what makes iPhone so great.
For more insights, news, and guides on all things Apple, check out the rest of the AppleToolBox blog.
See you next time!







Write a Comment