Interfacing between Apple and Windows is never going to be as smooth as keeping things in one ecosystem, but the good news is it’s easier than before. There are plenty of options these days to integrate your Microsoft and Apple tech, and the same is true even for passkeys. In this article, we’ll show you how to sync Apple Passkeys (Windows 11).
Getting your passkeys and iCloud keychain to sync in Windows is a simple, if multi-step process. You must have “Advanced Data Protection for iCloud” enabled, or your Apple device must be within Bluetooth range of your Windows PC. We’re going to walk you through things below:
Download and Install iCloud for Windows
The first and most important step is to bring iCloud for Windows from the Microsoft Store. Here’s how to download and install it:
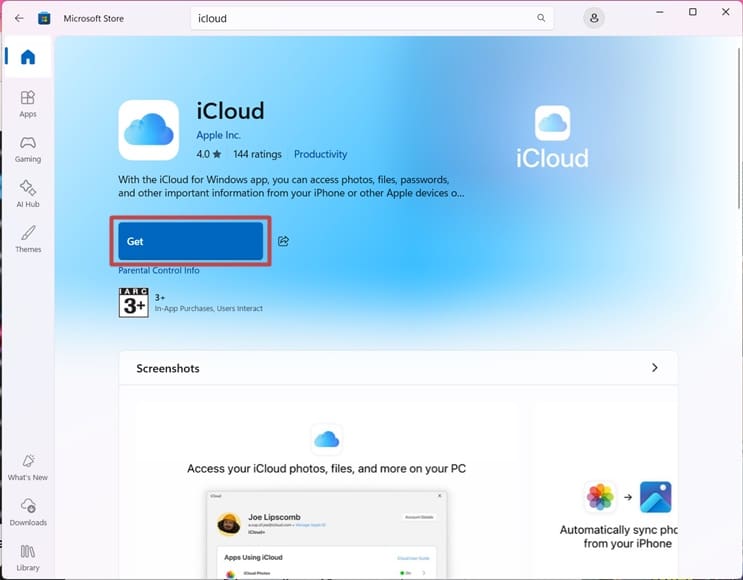
Step 1. Open the Microsoft Store and search for “iCloud.”
Step 2. Click the “Get” button to download and install the app.
Step 3. Open the app and log in with your Apple ID.
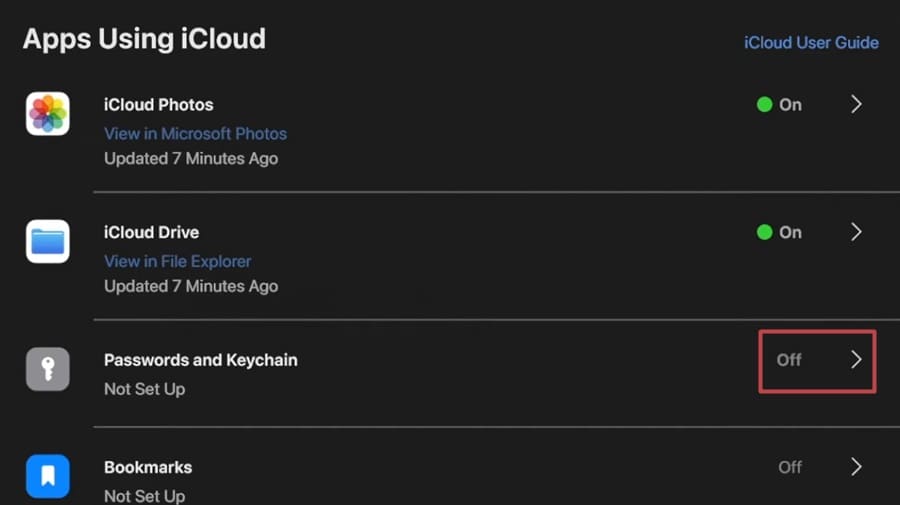
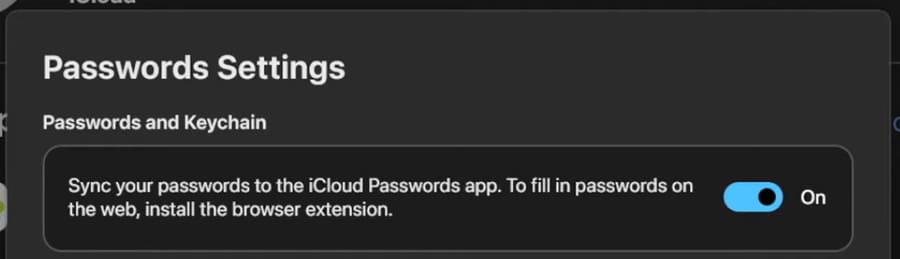
Step 4. Once you’ve signed in, click the arrow next to “Passwords and Keychain,” then turn on “Passwords & Keychain.”
Step 5. If prompted to approve the setup, enter the verification code sent to your device or phone number.
Step 6. Click “Done.”
Set Up Browser Extensions
Besides being able to sync iCloud Keychain, Windows 11 also allows you to implement them where you’ll be using them most: your web browsers. The process for setting these up is also quite straightforward. Here’s what you need to do:
Step 1. In iCloud for Windows, click the arrow next to “Passwords and Keychain.”
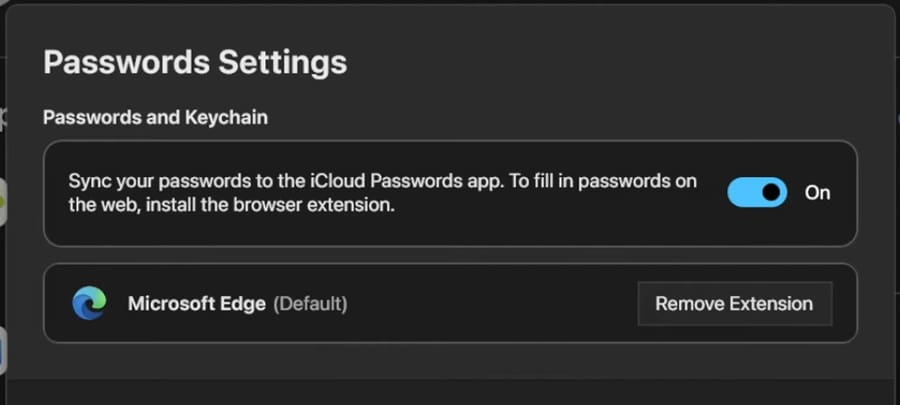
Step 2. You’ll see supported browsers for which you can install the iCloud Passwords extension. To add the iCloud extension to each browser, simply click the “Install Extension” button next to its listing.
Step 3. Follow the steps to install the extension, and once finished, click the “Done” button to finalize.
After installing the extension, you may need to enter a six-digit verification code generated by iCloud Passwords to enable it. If you ever want to remove the browser extension, head right back to this screen and click “Remove Extension” next to the listed browser to begin the process. Alternatively, you can also remove via the browser itself.
Managing Accounts and Passwords
If you ever want to edit a username or password for one of your websites, iCloud Passwords easily allows you to do so:
Step 1. Open “iCloud Passwords” from the “Start” menu and sign in if you haven’t already.
Step 2. Choose the account you want to edit, and click the “Edit” icon (it looks like a pencil).
Step 3. If you need to change a verification-code setup key, click “Edit” and paste the two-factor authentication setup key you received from the website into the setup key field. To remove the verification code, click “Delete Verification Code” twice.
Step 4. Hit the “Save” button to finalize the process.
Note that if you change a password in iCloud Passwords, you must also change it on the website. Changing it in iCloud Passwords does not change the password for the website.
As an avid gamer, I’ve run into my fair share of error codes and weird faults that have forced me to find fixes to problems I never anticipated. That gave me a passion for sharing those fixes with others so we can all game without feeling like our hardware is rebelling against us.










Write a Comment