Screen savers, once a tool for preventing screen burn-in on older CRT monitors, have evolved into a fun and creative way to personalize your Mac experience. While modern displays no longer suffer from burn-in issues, screen savers are still a great way to showcase stunning visuals when your Mac is idle.
Being able to use screen savers on the Mac is nothing new, but with macOS Sonoma, Apple has completely revamped the entire experience. The first thing that you’ll notice when logging into your account after updating to macOS Sonoma is the redesigned Lock Screen. The various users will appear at the bottom, while showing the date and time at the top, similar to what you’ll see on your iPhone or iPad.
Make sure your Mac is updated and running the latest version of macOS Sonoma.
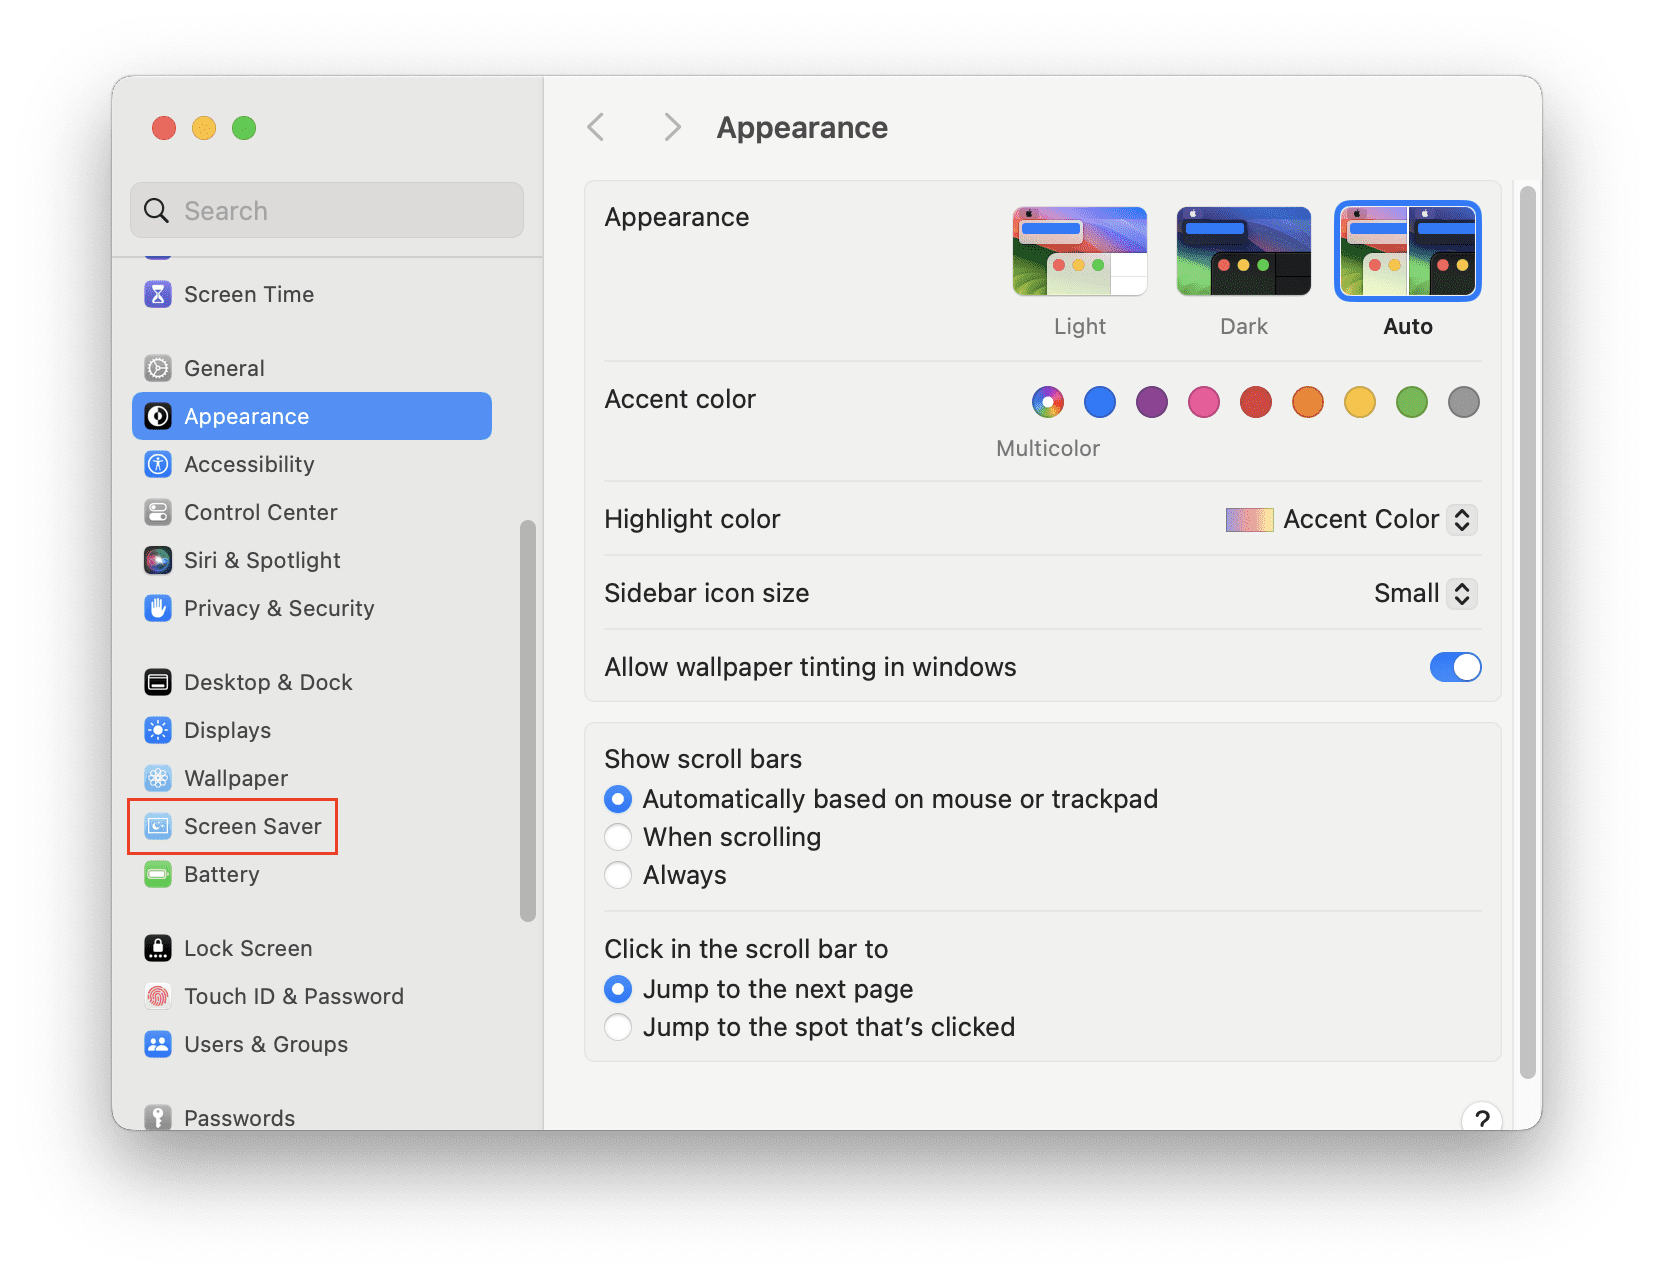
Open the System Settings app on your Mac.
In the sidebar on the left, scroll down and click Screen Saver.
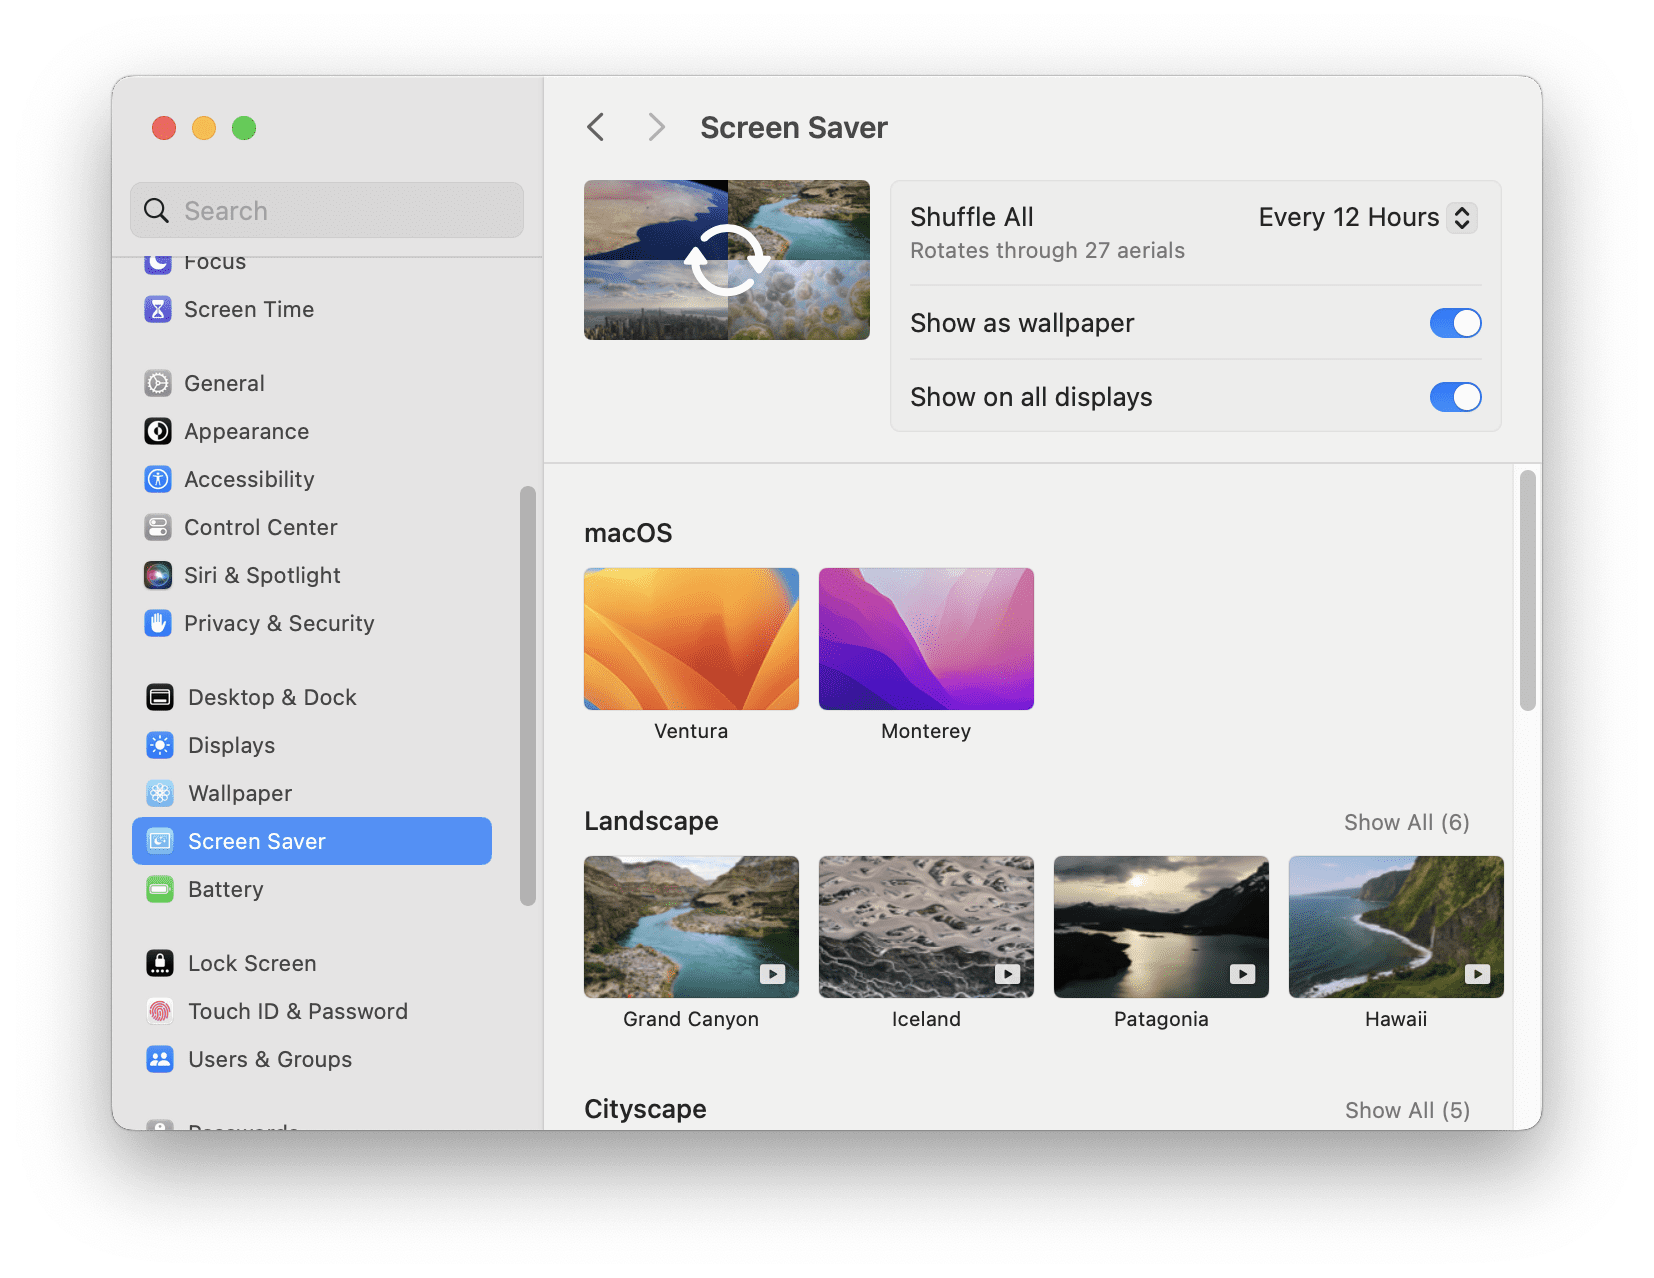
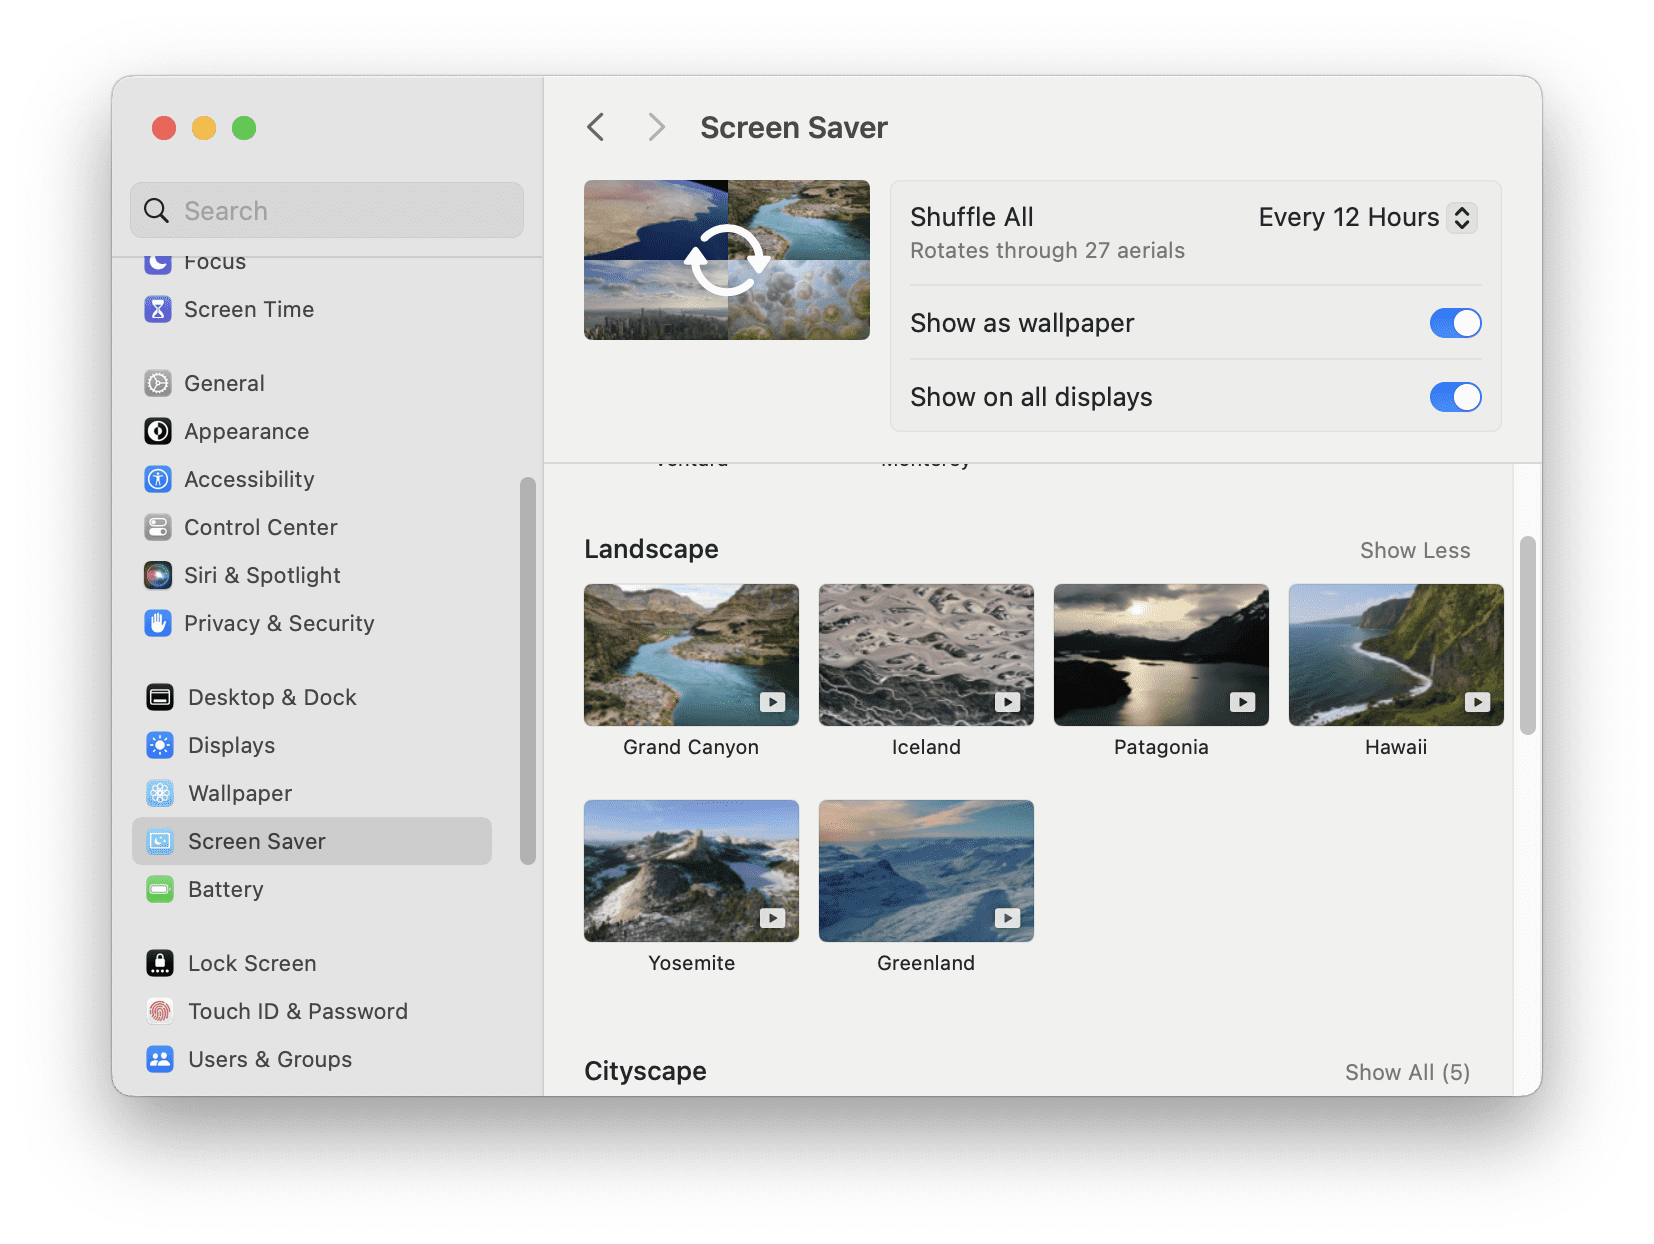
Locate and select a screen saver that you want to use from one of the following categories:
Landscape
Grand Canyon
Iceland
Patagonia
Hawaii
Yosemite
Greenland
Cityscape
New York
Los Angeles
Hong Kong
London
Dubai
Underwater
Palau Jellies
Palau Coral
California Kelp Forest
Barracuda
Humpback Whale
California Dolphins
Earth
Middle East
Caribbean
Nile Delta
Caribbean Day
Iran and Afghanistan
Once selected the chosen screen saver will begin downloading to your Mac. A progress bar appears letting you know how much longer before the screen saver will be finished downloading.
Another nice touch that Apple has added with the addition of new screen savers in macOS Sonoma is the ability to use the image as your wallpaper. All you need to do is click the toggle next to Show as wallpaper and your background will instantly change, provided that the image is finished downloading.
Lastly, if you have multiple monitors connected to your Mac, you can also customize the screen saver on a per-monitor basis. Or, you can click the toggle next to Show on all displays, and the screen saver will be applied to any monitors or displays that are connected to your Mac.
How to Shuffle Aerials Screen Savers on macOS Sonoma
One of the hidden changes with macOS Sonoma is the addition of Apple’s collection of “Aerials” screen savers. These have been available on the Apple TV for some time now, even leading some to create apps that bring the wallpapers to the Mac. However, those workarounds are no longer necessary, and you can even go so far as to shuffle Aerials screen savers on macOS Sonoma.
Make sure your Mac is updated and running the latest version of macOS Sonoma.
Open the System Settings app on your Mac.
In the sidebar on the left, scroll down and click Screen Saver.
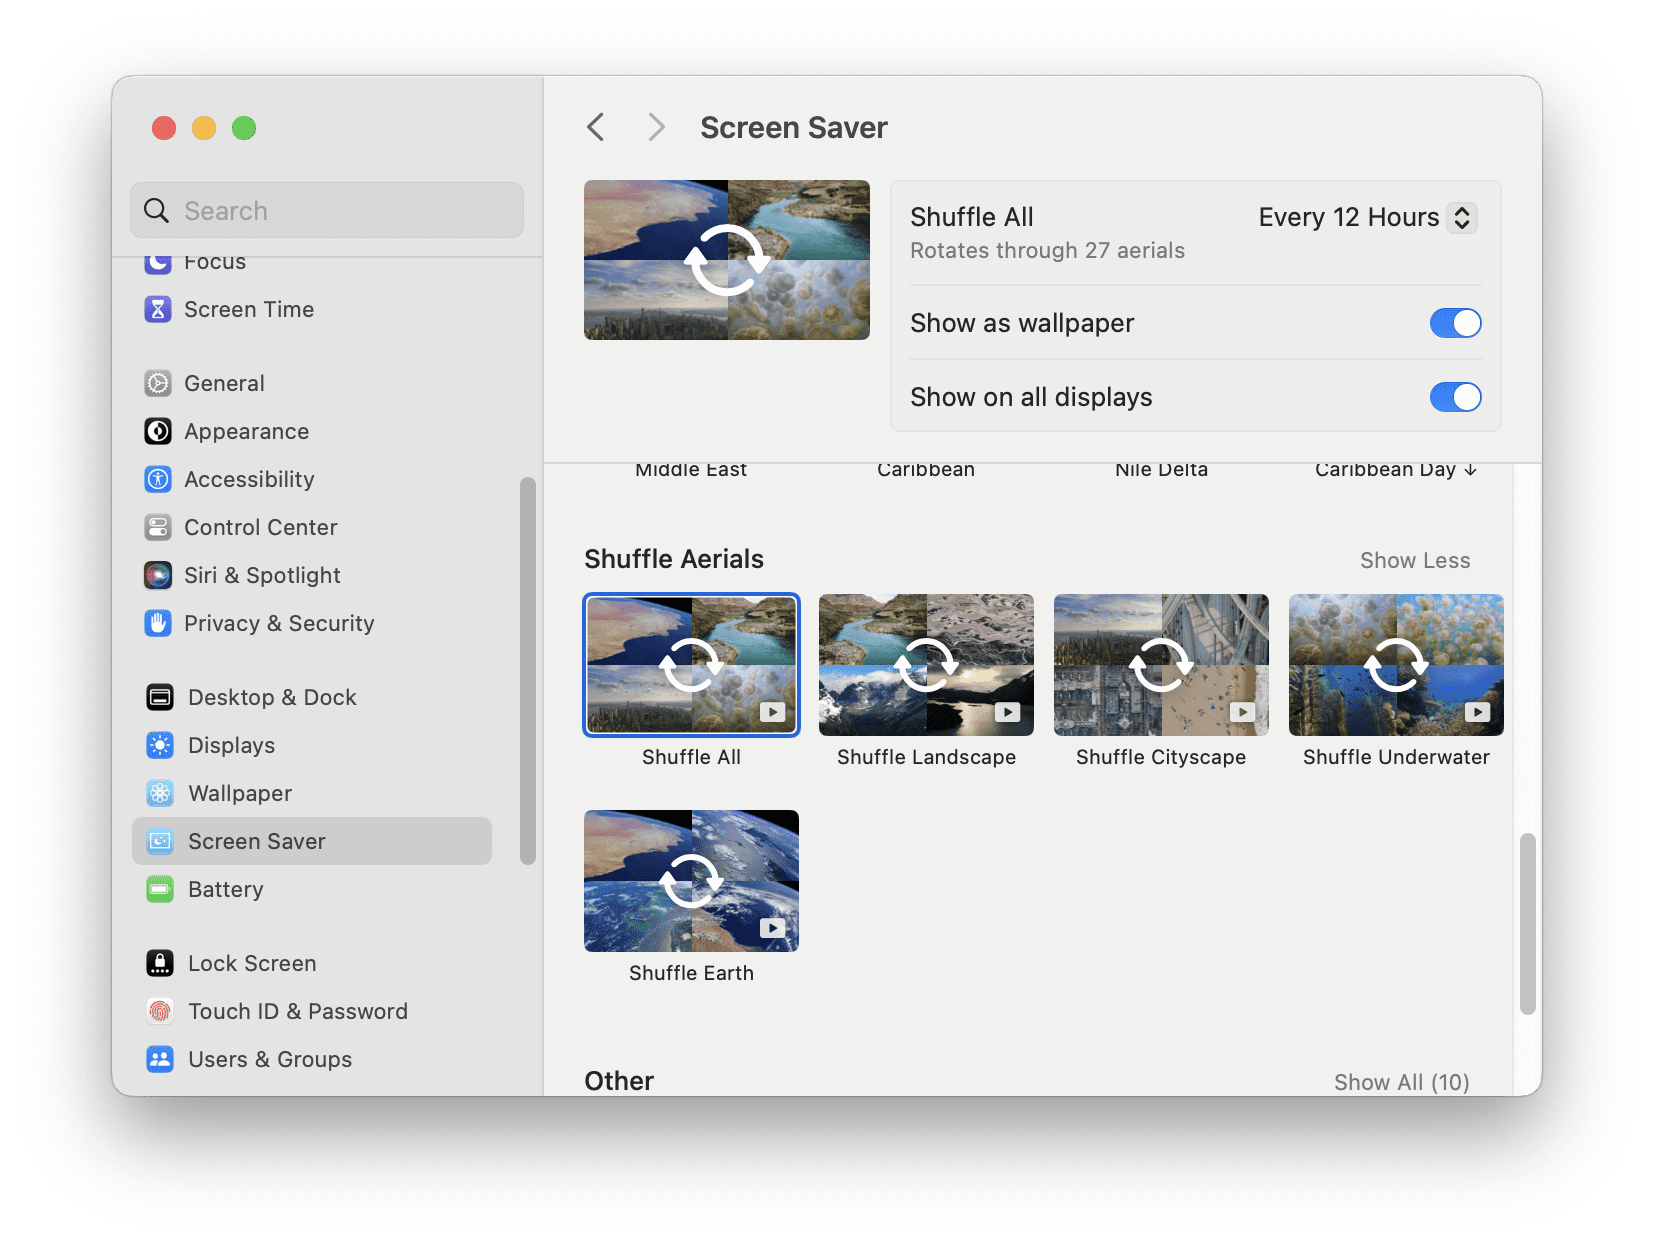
Scroll down until you reach the Shuffle Aerials section.
Select one of the following:
Shuffle All
Shuffle Landscape
Shuffle Cityscape
Shuffle Underwater
Shuffle Earth
Once selected, go back to the top of the page.
Click the drop-down menu next to Shuffle All.
Select one of the following:
Every 12 Hours
Every Day
Every 2 Days
Every Week
Every Month
How to Delete Live Wallpapers in macOS Sonoma
These dynamic backgrounds add a touch of elegance and vibrancy to your Mac, changing subtly throughout the day. However, as with all forms of digital personalization, there comes a time when change is desired. Whether it’s to free up space, reduce distractions, or simply refresh your workspace, removing these live wallpapers can be as important as setting them up.
Open the Finder app on your Mac.
In the Menu Bar, tap the Go button.
From the drop-down menu, highlight and select Go To Folder…
Open the different folders, locating the one with all of the various .mov files.
Locate the live wallpapers that you want to delete.
Right-click on the live wallpaper.
From the drop-down menu that appears, highlight and select Move to Trash.
Repeat these steps for any other live wallpapers that you want to delete.
Once deleted, right-click the Trash icon in your dock.
From the pop-up menu that appears, highlight and select Empty Trash.
After the files have been deleted, open the Activity Monitor app on your Mac.
Click the CPU button in the Menu Bar of the app.
Click inside the Search box in the top right corner.
Type Wallpaper and hit the Enter key.
Locate and highlight the Wallpaper listing under the Process Name section.
Click the Stop (X) button in the Menu Bar.
Locate and highlight the Wallpaper (System Settings) listing under the Process Name section.
Click the Stop (X) button in the Menu Bar.
Deleting live wallpapers in macOS Sonoma is a simple process that can have a significant impact on your computing experience. By following the steps outlined in this guide, you can effortlessly customize your desktop to better suit your current preferences or needs. Whether you’re streamlining your workspace, decluttering your digital environment, or preparing for a fresh new look, managing your live wallpapers is a key aspect of personalizing your Mac.
Conclusion
Screen savers are a fun and easy way to personalize your Mac and make the most of your display when your computer is idle. With this guide, you should now be able to set up and use screen savers on macOS. Remember, you can always change your screen saver settings if you want to try out a different look.
Andrew Myrick is a freelance writer based on the East Coast of the US. He enjoys everything to do with technology, including tablets, smartphones, and everything in between. Perhaps his favorite past-time is having a never-ending supply of different keyboards and gaming handhelds that end up collecting more dust than the consoles that are being emulated.
Hello, appreciate your knowledge of Apple screen savers. Hope you can help since Apple has yet to respond. I really don’t like any of their screen saver options and want to continue using the one I have – slide show basically of my photos. Don’t see that option? Did they take that preference away from us to customize so we all have to conform to them? If so, Apple really starting to P me off…. HELP!
I prefer creating my own screen saver/desktop/wall paper from my iPhoto photos. I’m a retired art critic and art historian. I have very particular tastes.
I like to use the photos I’ve taken while on trips as my screen saver, but don’t see that option on Sonoma. How do I select the photos in a folder as the ones that I want as my screen saver rather than the options provided by Apple?


Like others, I’m disappointed that it seems I can no longer use my own photos for wallpaper or screensaver images.
years ago, Macs had a screensaver that used you library of images as tiles to build an image of one of your images. I still miss it.
Hello, appreciate your knowledge of Apple screen savers. Hope you can help since Apple has yet to respond. I really don’t like any of their screen saver options and want to continue using the one I have – slide show basically of my photos. Don’t see that option? Did they take that preference away from us to customize so we all have to conform to them? If so, Apple really starting to P me off…. HELP!
This is an unbelievably retrograde decision. I want to use my photos not someone else’s.
Really wish I had not downgraded to Sonoma
I prefer creating my own screen saver/desktop/wall paper from my iPhoto photos. I’m a retired art critic and art historian. I have very particular tastes.
I like to use the photos I’ve taken while on trips as my screen saver, but don’t see that option on Sonoma. How do I select the photos in a folder as the ones that I want as my screen saver rather than the options provided by Apple?