The Dashboard on a Mac was a secondary desktop that could be used to add desktop widgets to Mac. These widgets were designed to be simple and easy to use, and they provided a quick way to access information or perform tasks.
It was accessible via the Dashboard icon in the dock, which then opened a new window complete with a list of widgets that you could add. From there, these widgets could be resized, moved around, or removed with just a few clicks.
Despite being a useful tool for quickly accessing information or performing tasks, Apple ultimately removed the feature with the release of macOS 10.15 Catalina. Instead, the default way to use and add desktop widgets to Mac is through the Notification Center.
Click the time and date in the top right corner of your Mac’s Menu Bar.
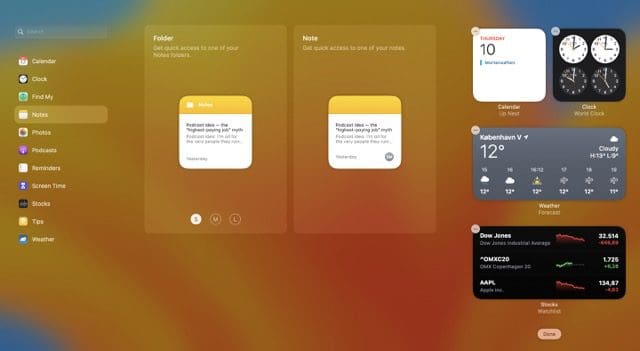
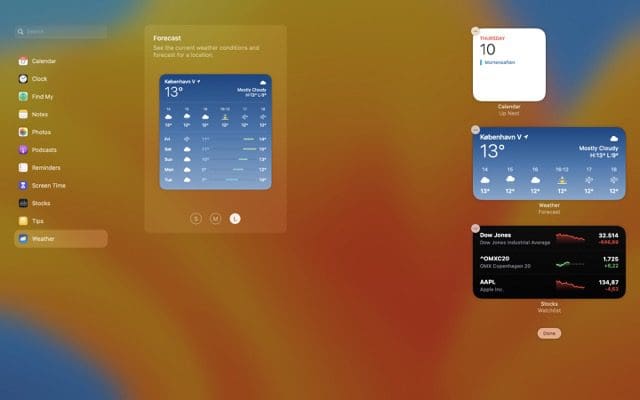
At the bottom of the screen, click the Edit Widgets button.
From the pop-out window that appears, locate the widget that you want to add.
Hover your mouse cursor over the top of the widget that you want to add.
Click the + button in the top left corner.
Repeat the steps for any other widgets that you want to add to your Mac’s Notification Center.
Once you’ve picked all of the widgets you want to have, drag and drop the widgets according to how you want them to be displayed.
While going through the various widgets that are accessible on your Mac, you’ll notice that there are different sizes that can be used. This is similar to the interface that you’ll find when picking widgets on an iPhone or iPad. Essentially, you’ll be able to customize which widgets appear along with the layout based on your needs or wants.
How to Add Desktop Widgets to Mac with macOS Sonoma
macOS Sonoma has brought a slew of features to the Mac, making it feel more integrated with the iOS ecosystem. One of the standout features is the introduction of widgets, which allow users to have interactive elements right on their desktop. If you’re wondering how to make the most of this feature, you’re in the right place. Let’s dive in!
Unlock your Mac.
Remove any open app windows, giving you a clear view of your Mac’s desktop.
If using a trackpad, tap with two fingers to reveal the drop-down menu. If using a mouse, simply right-click to reveal the same menu.
From the menu that appears, highlight and select Edit Widgets…
At the bottom of your screen, a new widget menu will appear.
Go through the list of options, and locate the app that you want to use a widget for on your desktop.
If applicable, select the widget and layout that you want to use.
Drag and drop the widget to its corresponding location on your Desktop. Alternatively, you can click the Green + button in the top left corner of the widget to add it your Desktop.
There’s another method for those who want to add widgets to desktop on macOS Sonoma. This is great for those who have already been using widgets in the Notification Center, and just want to continue using those same widgets.
In the top right corner of the screen, click the Time and Date in the Menu Bar.
Click the Edit Widgets button at the bottom.
Drag and drop the widget onto your Mac’s Desktop.
Something worth noting is that these steps actually removes the widget completely from the Notification Center on your Mac. This is probably going to be fine for most users, but if you would prefer to have duplicated widgets, you won’t want to follow these steps.
How to Add Desktop Widgets to Mac From iPhone with macOS Sonoma and iOS 17
Thanks to the power of Continuity, Apple introduced the ability to use the same great widgets from your iPhone, right on your Mac. This means that even if the app doesn’t have a Mac version, you can still view and interact with the related widget, provided that the app is installed on your iPhone. There are a couple of other requirements, as you’ll need to have iOS 17 running on your iPhone and the latest version of macOS Sonoma installed on your Mac. From there, the Continuity feature must be enabled on both devices, they must be signed into the same Apple ID, and you’ll need to keep both devices near each other in order for the widgets to appear.
Provided that you have met all of the requirements, all you need to do is follow the steps in the section above. But when you see the redesigned Widgets menu appear, you’ll need to look for the “From iPhone” indicator in the top right corner. In some instances, if you have the same app installed on both devices, you might end up seeing both a “From Mac” and “From iPhone” option. Just pick whatever widget you prefer from the list of options.
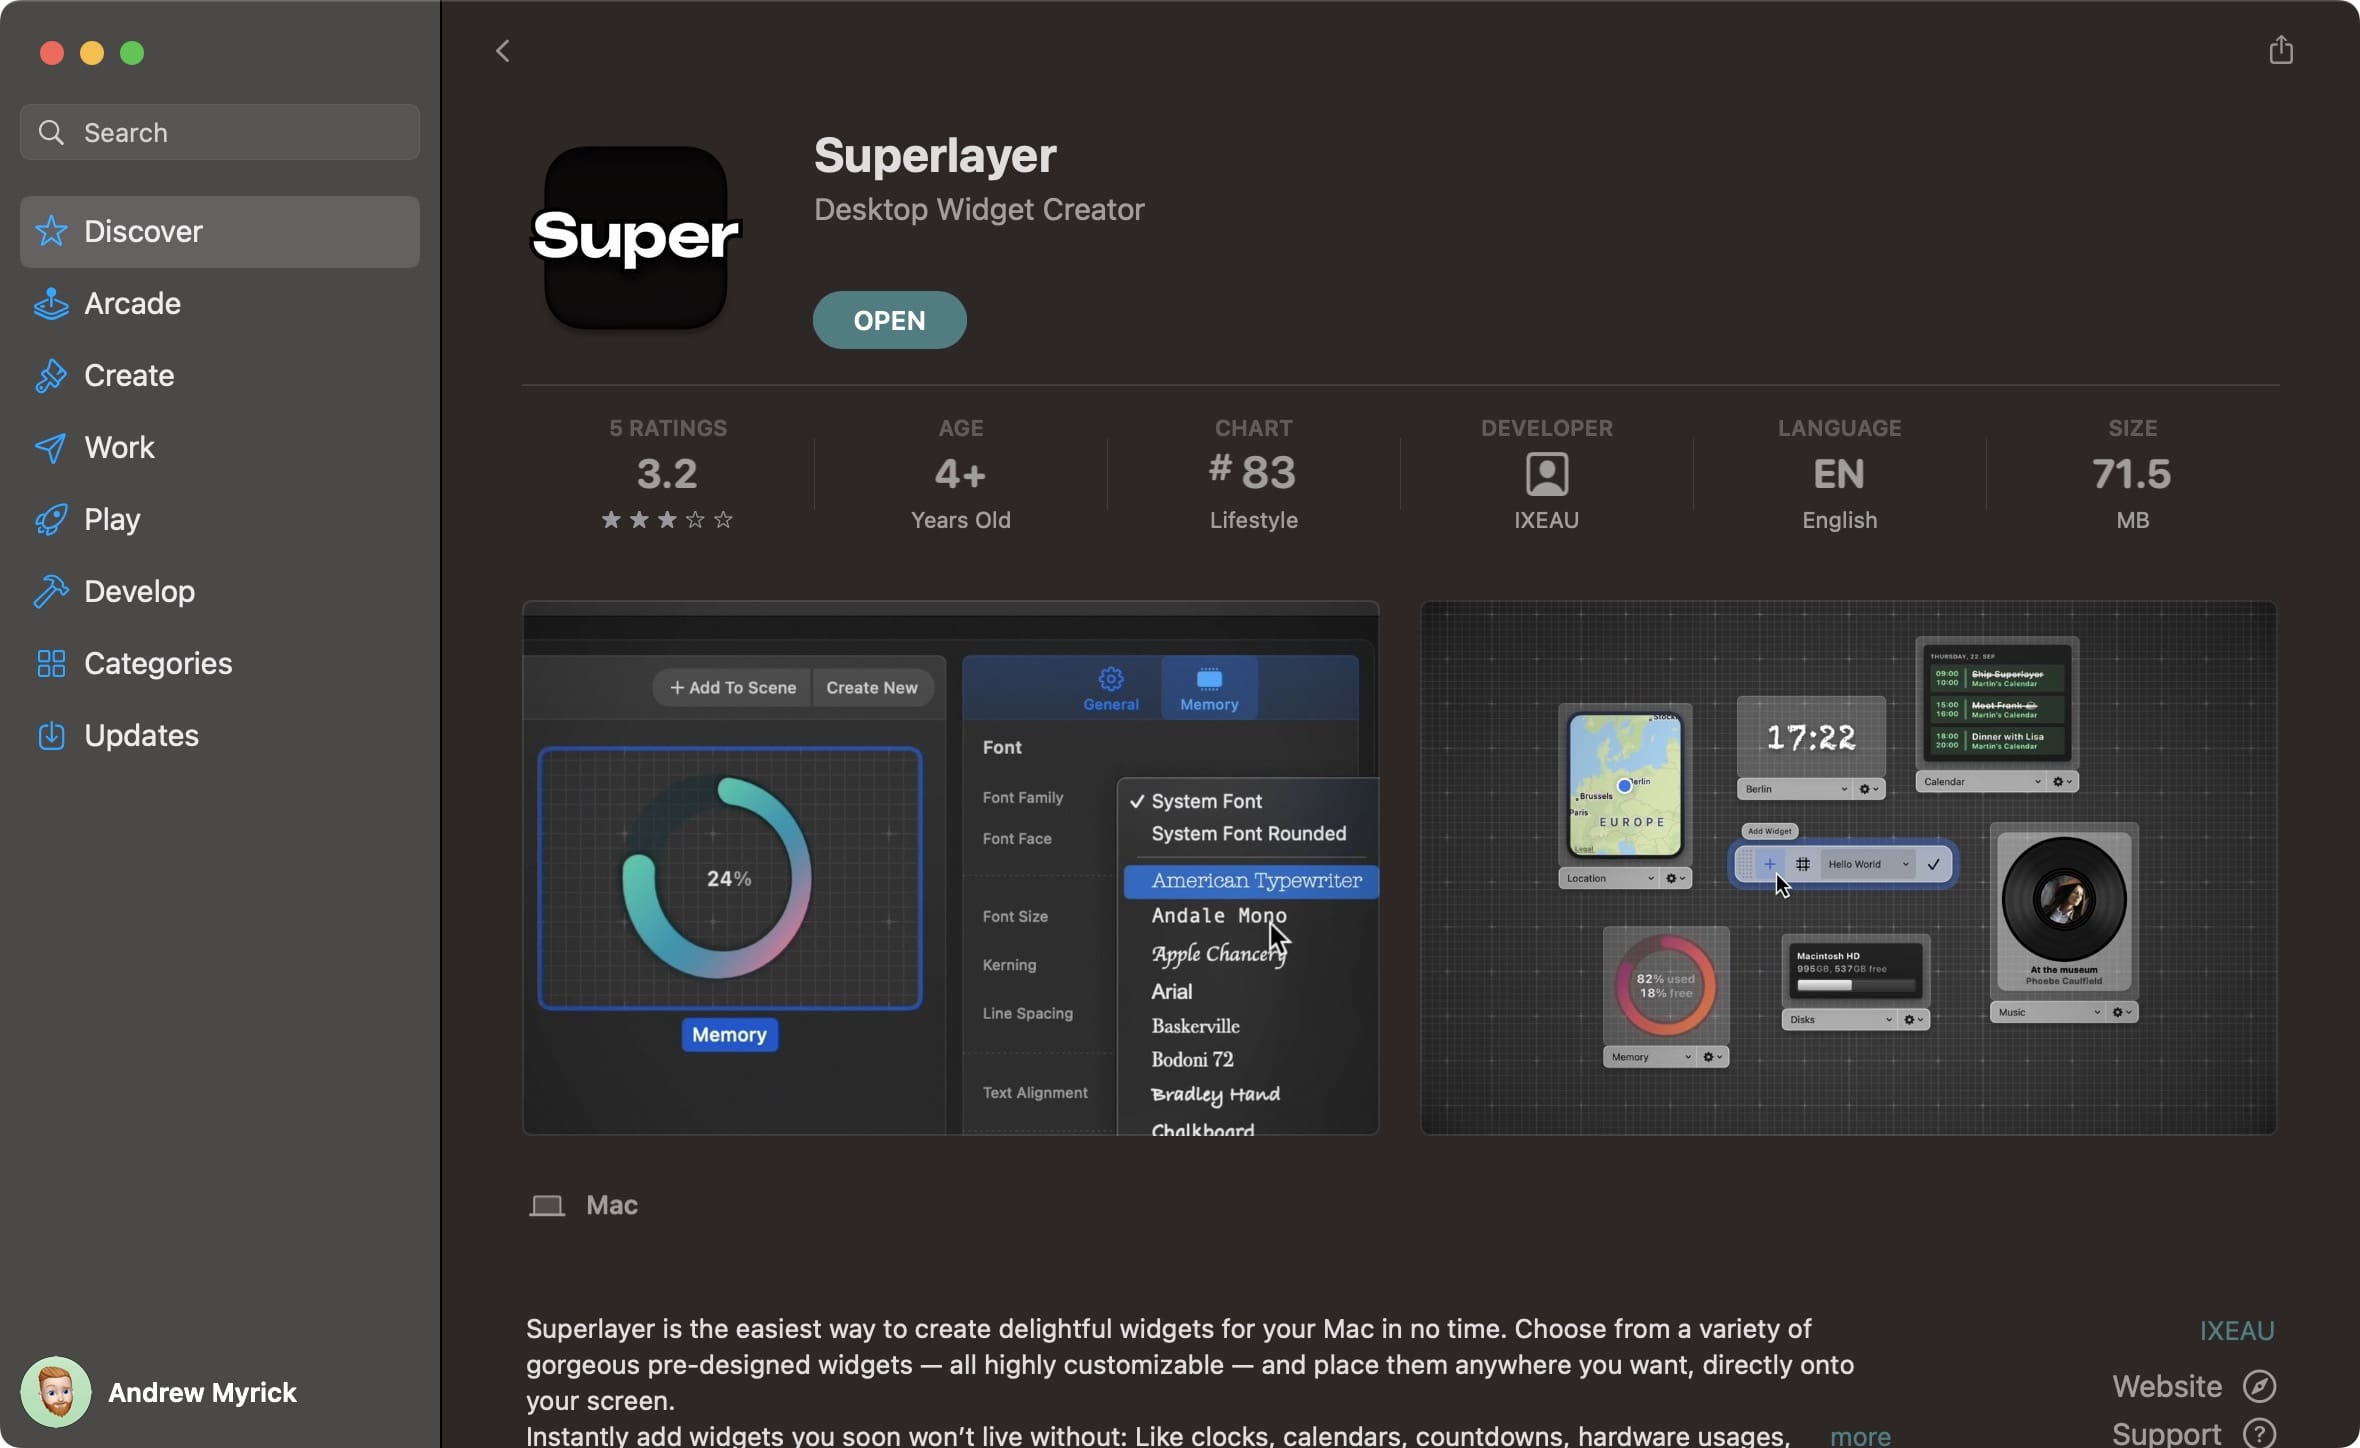
How to Add Desktop Widgets to Mac Using Superlayer
While the iPad and iPhone are getting a bunch of “love” and have the ability to add widgets to the Home Screen, this has yet to be extended to the Mac Desktop. And while adding widgets to the Notification Center is great and all, you could find yourself in an “out of sight, out of mind scenario,” forgetting they are even there. Well, if you’ve been looking for a way to add desktop widgets to Mac, you’re in luck. Here’s how you can do just that:
Download and install the Superlayer app from the Mac App Store.
Once installed, open the Superlayer app on your Mac.
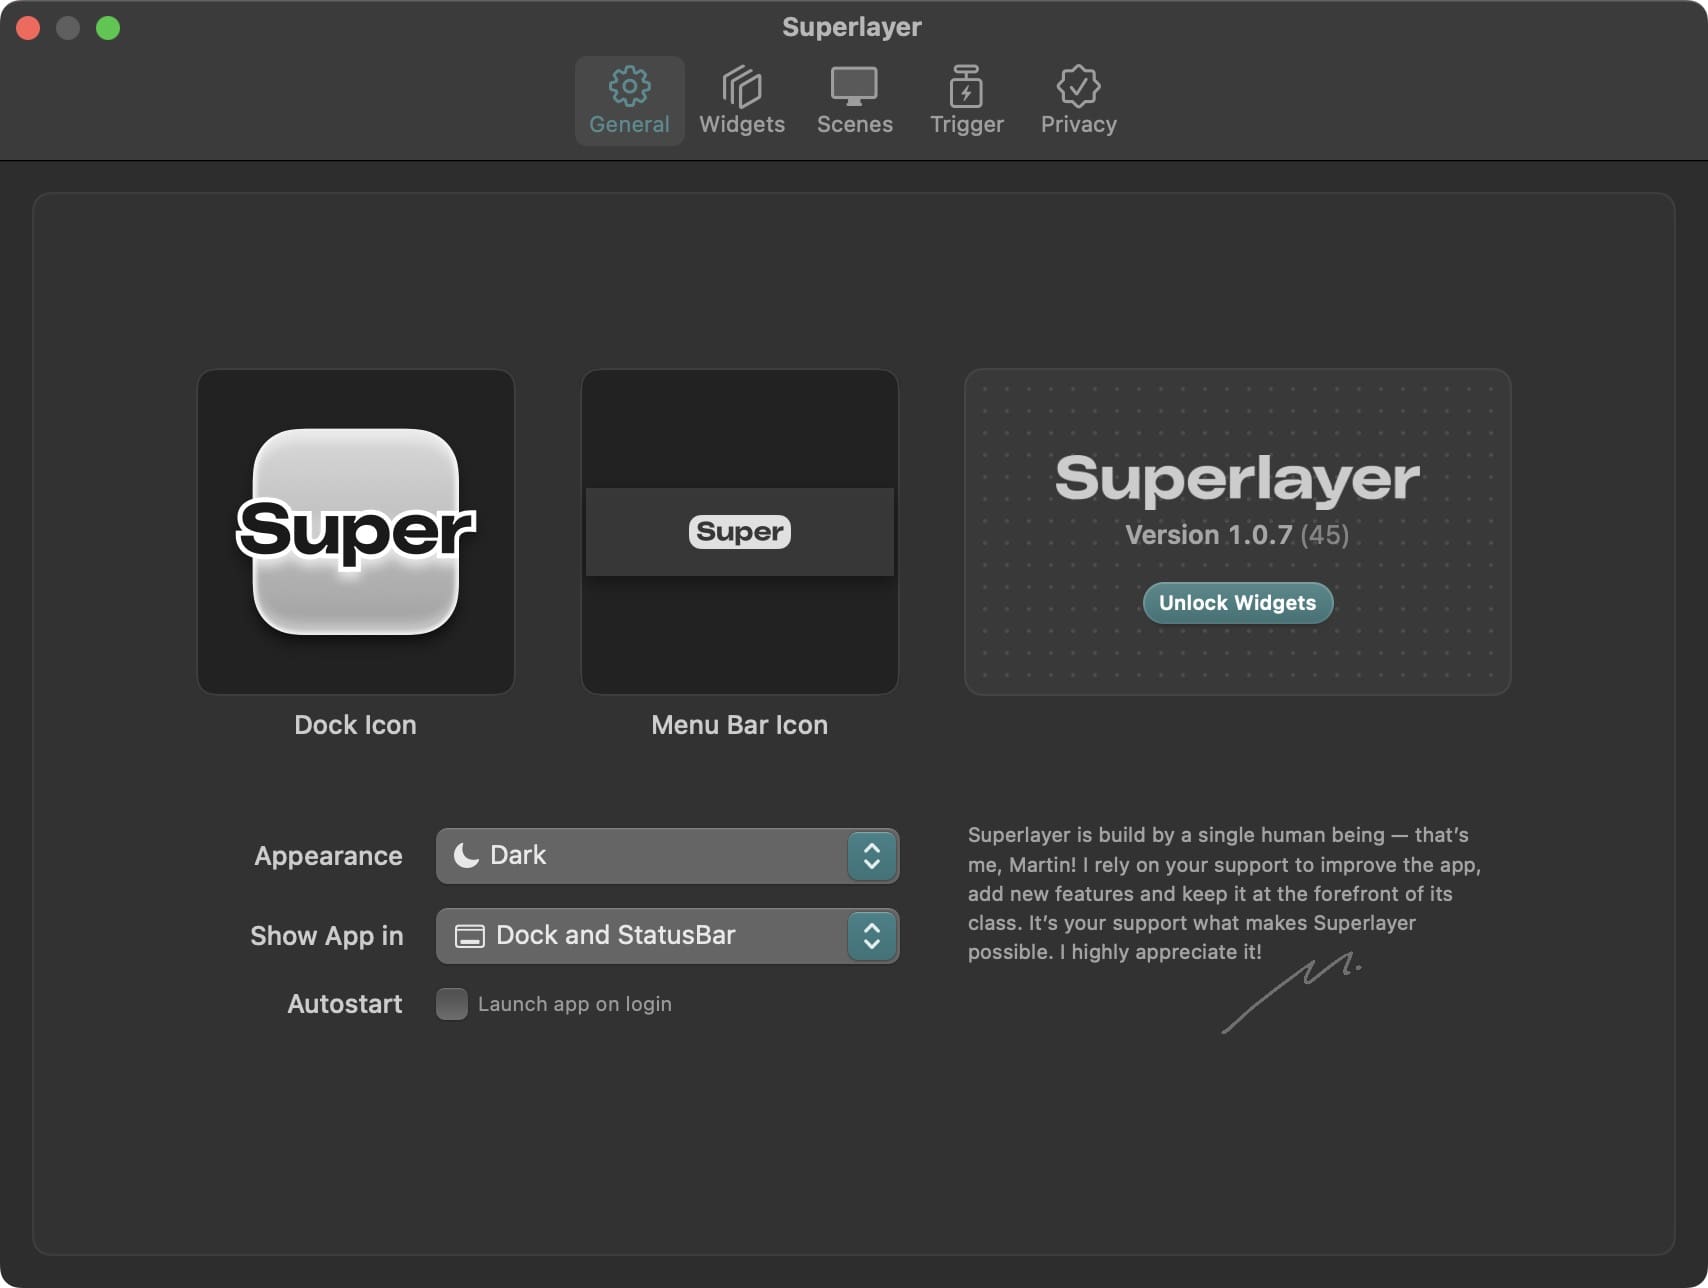
From the General tab, click the Unlock Widgets button.
Sign up for one of the subscription options listed.
After you’ve completed your purchase, click Widgets in the toolbar at the top of the Superlayer window.
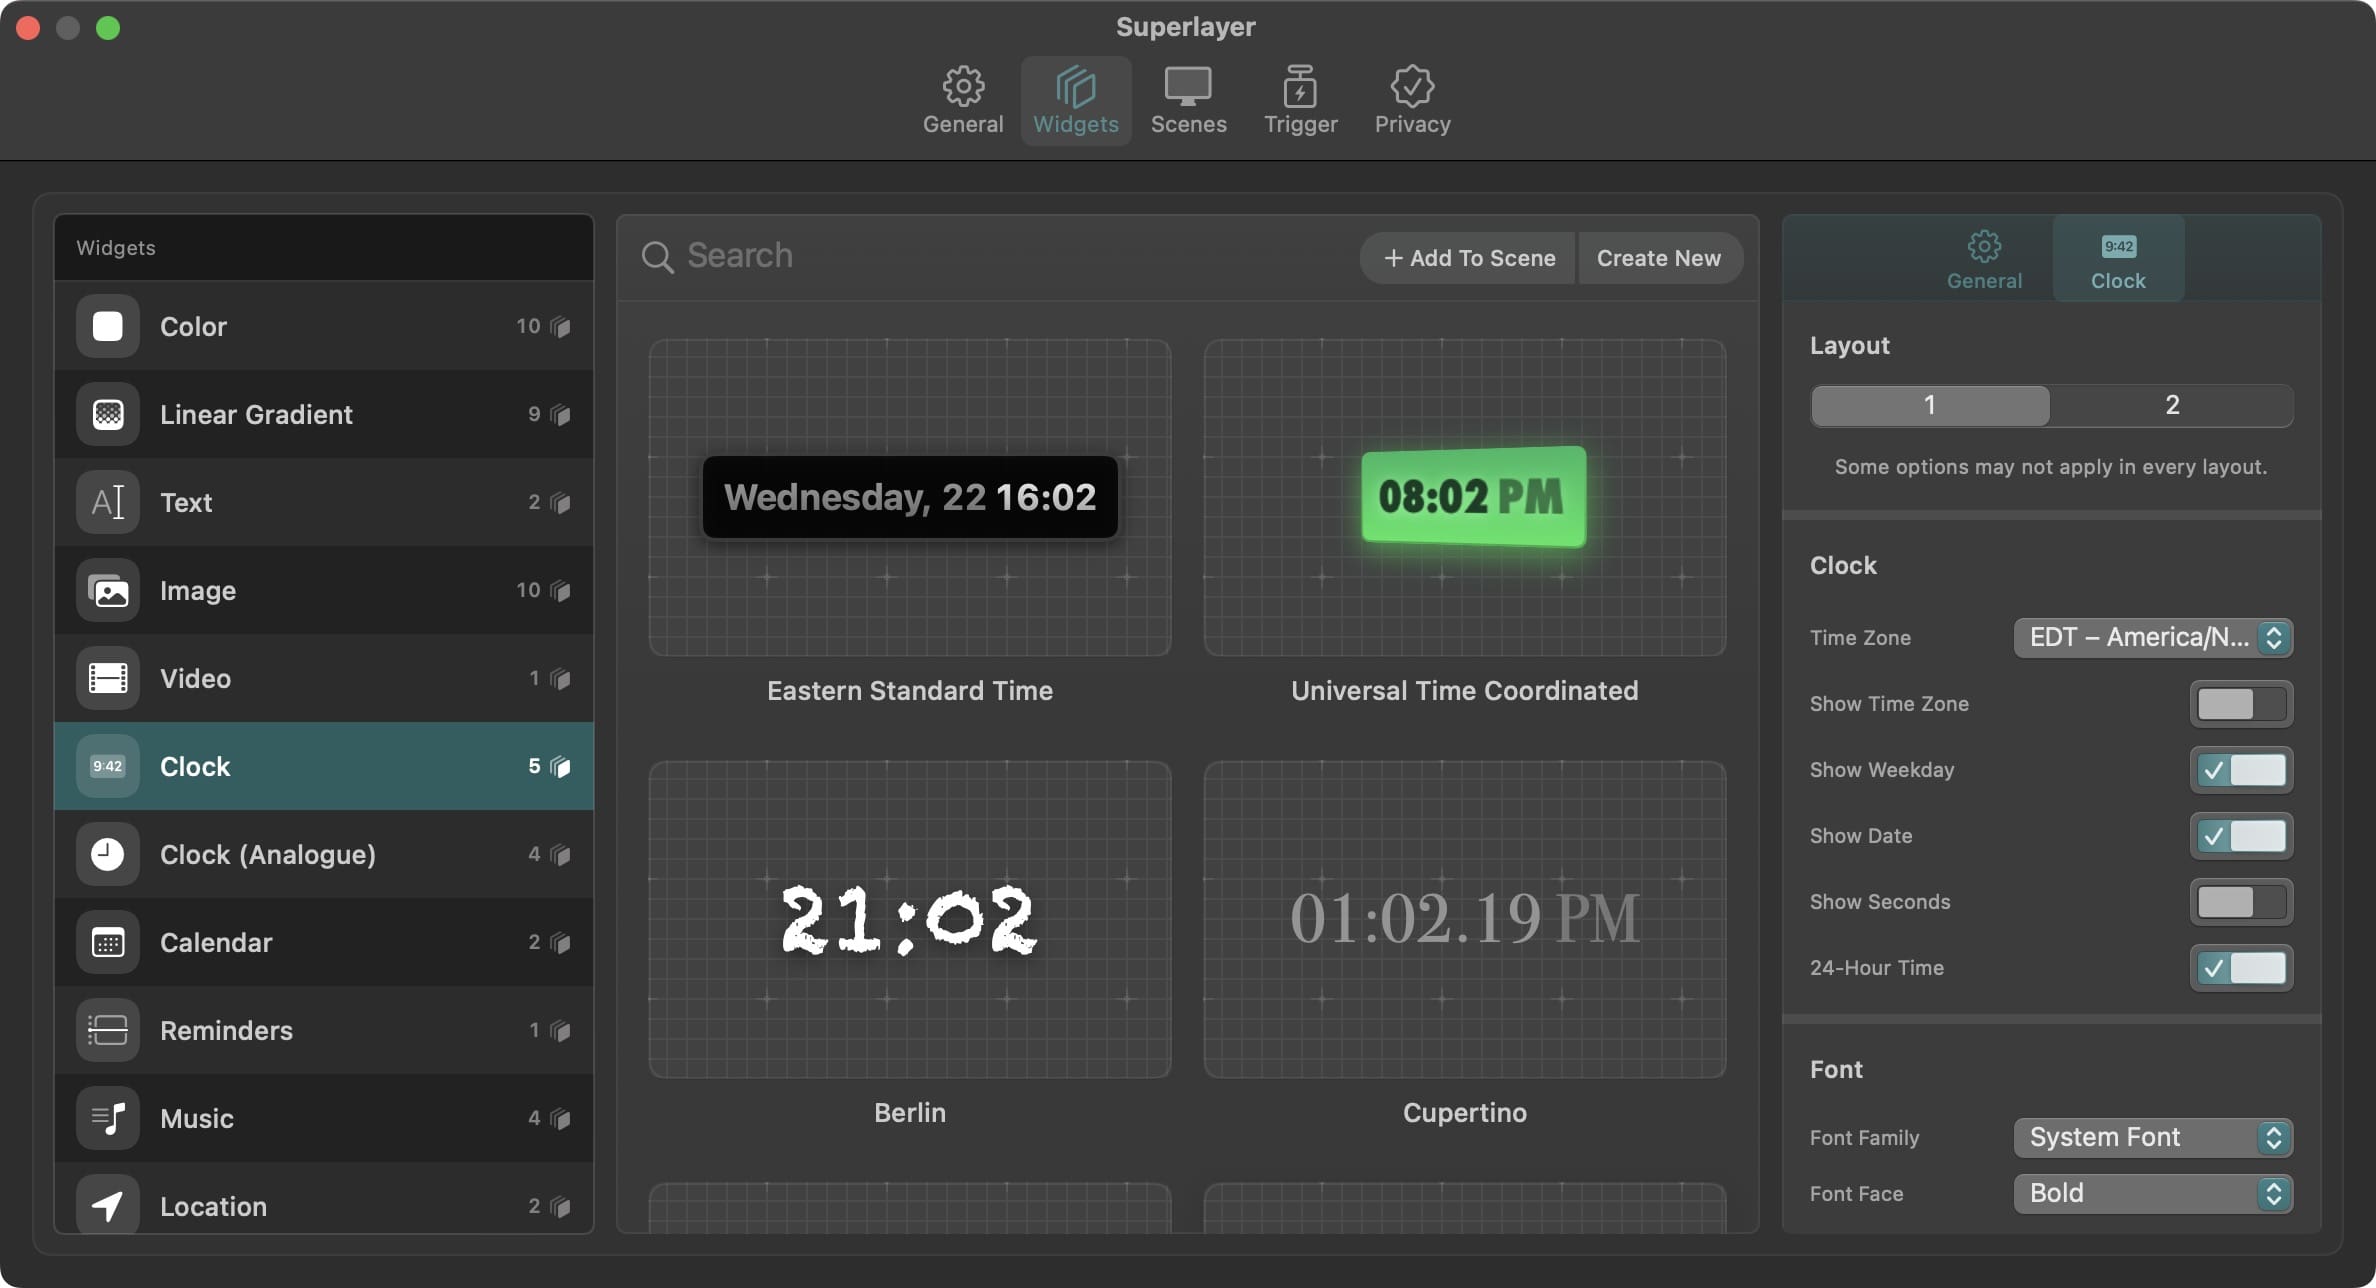
Locate and select the widget that you want to add to your Mac desktop.
Using the sidebar on the right, customize the widget to your liking.
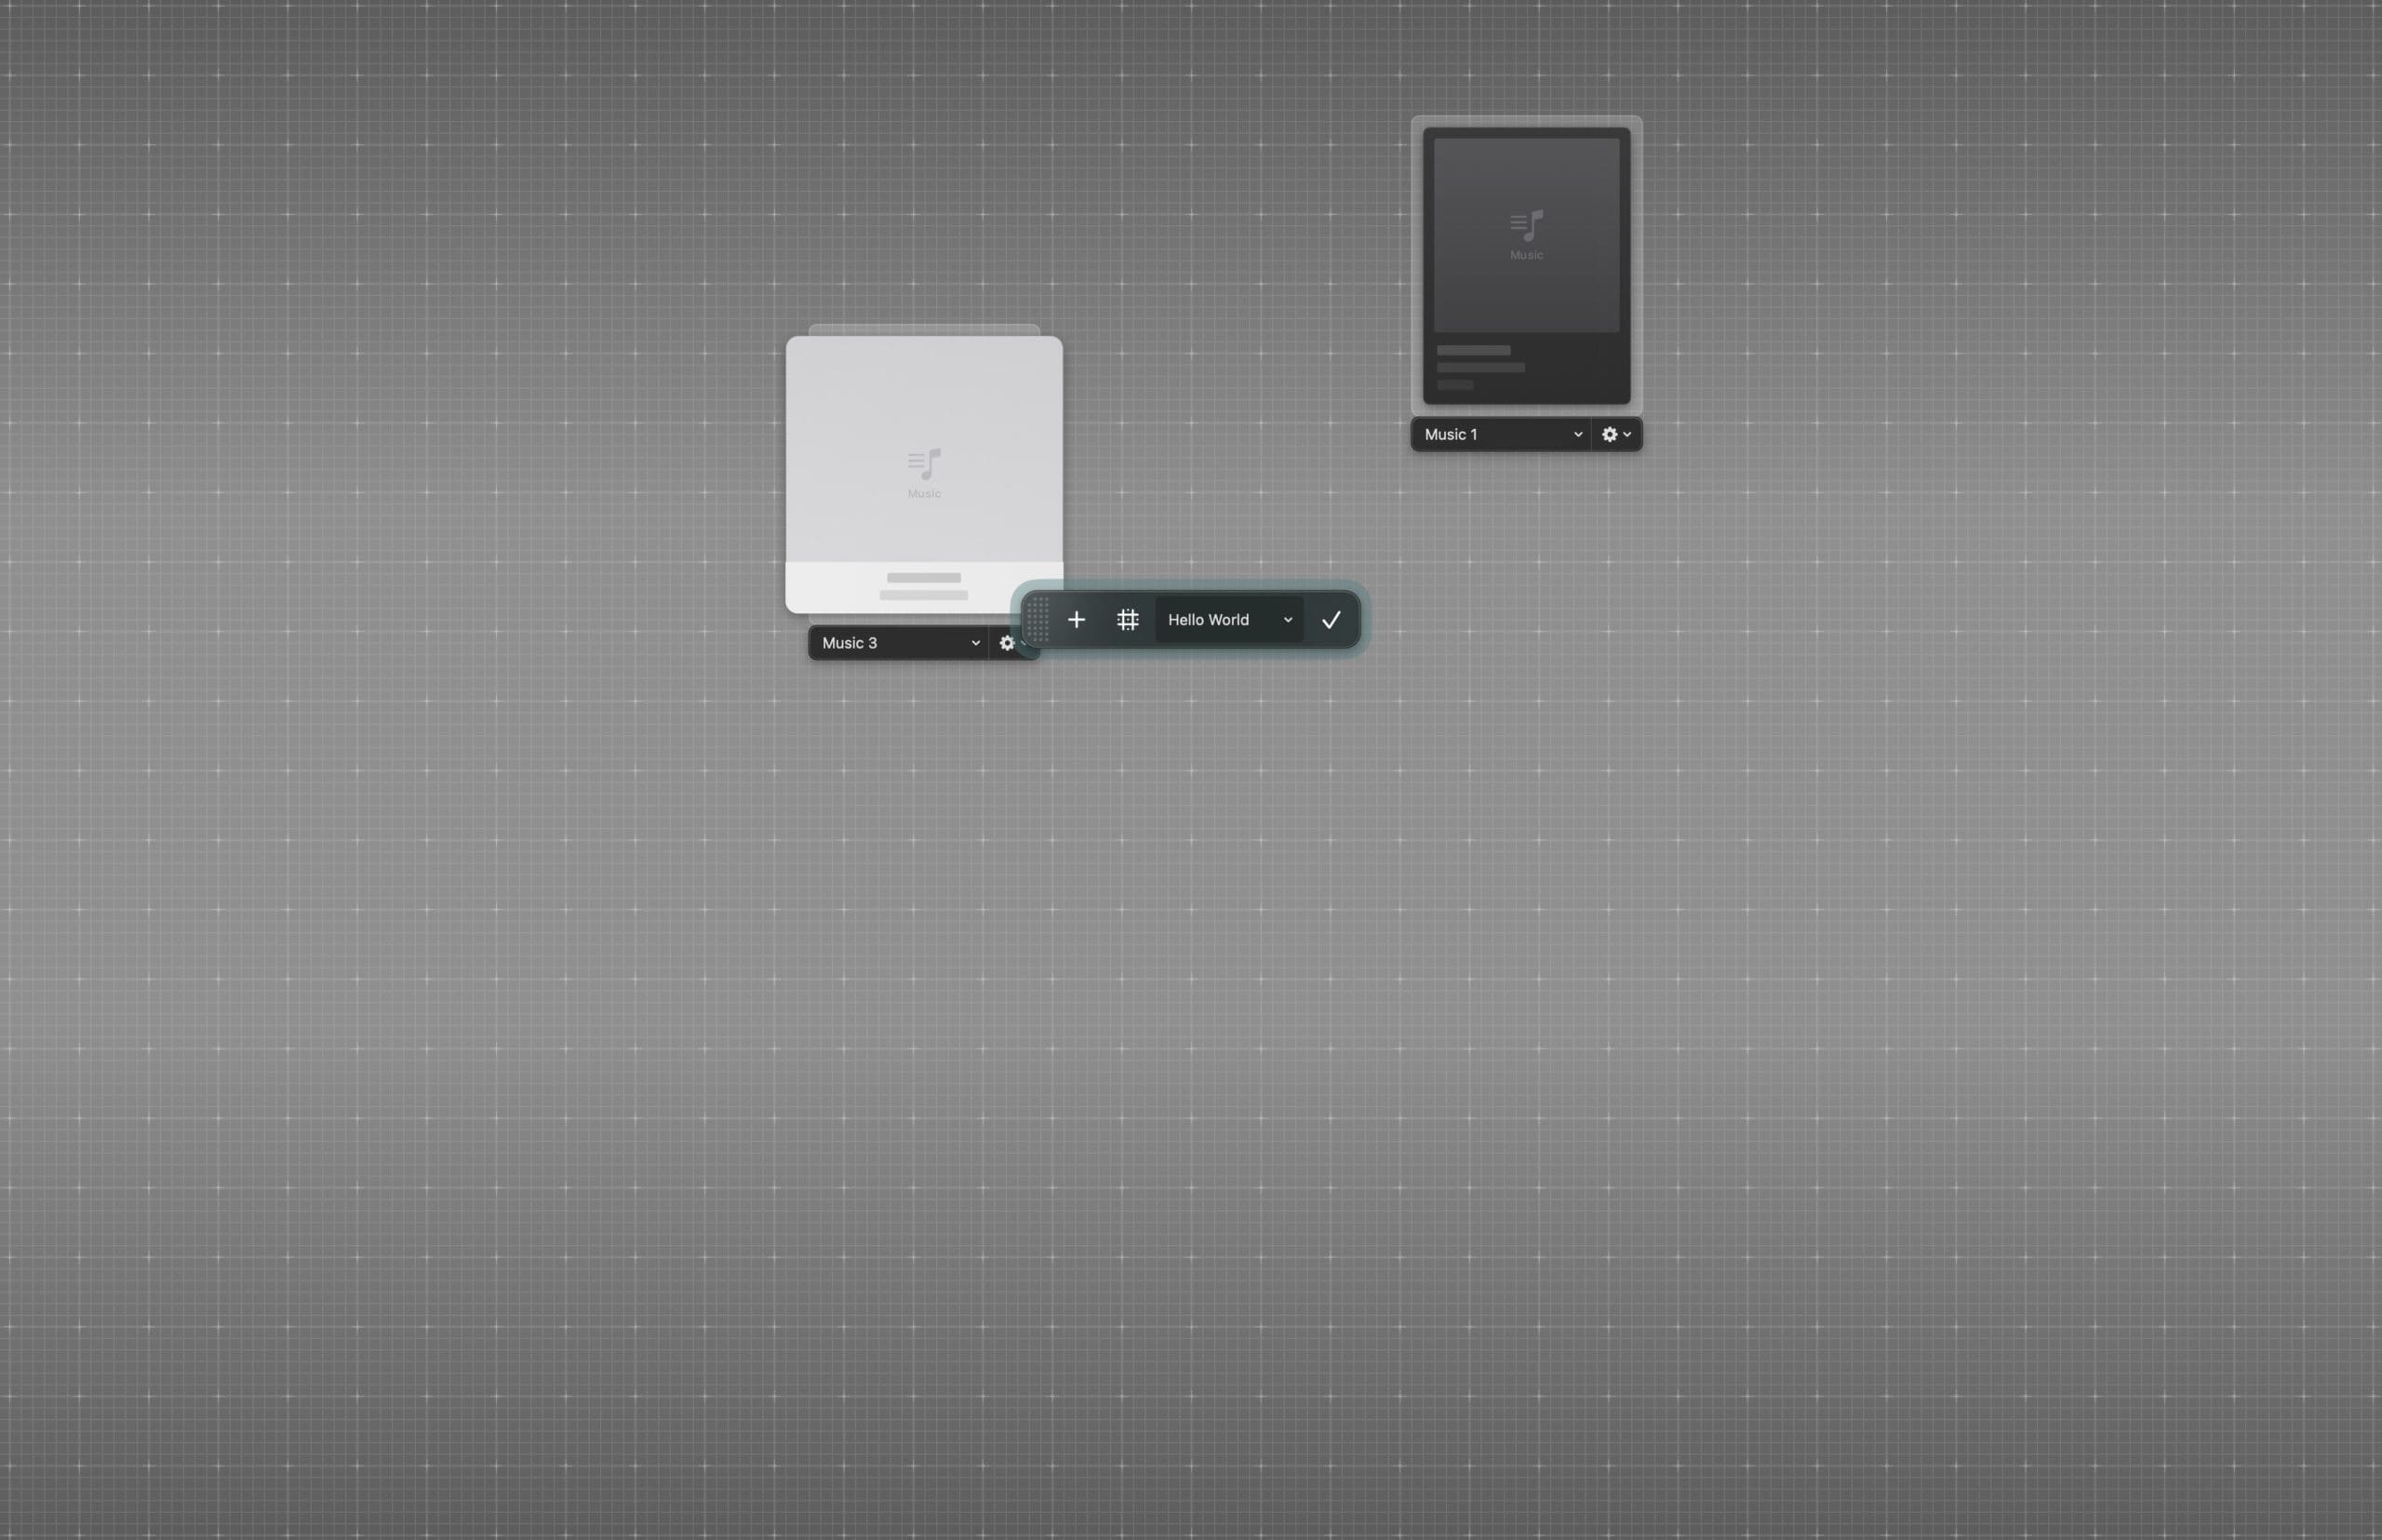
Once complete, drag the widget out of the Superlayer window.
Using the grid provided, drop the widget to your desired location.
Repeat the steps for any other widgets that you want to add.
Once complete, click the checkbox in the rectangular box in the middle of the window to save your changes.
What helps make Superlayer so great is that you can add a bunch of different widgets, or create your own custom ones based on your needs. It’s something that we need more of on the Mac, as it does a pretty good job at reminding me of the days when I used to customize my Windows PC with Rainmeter.
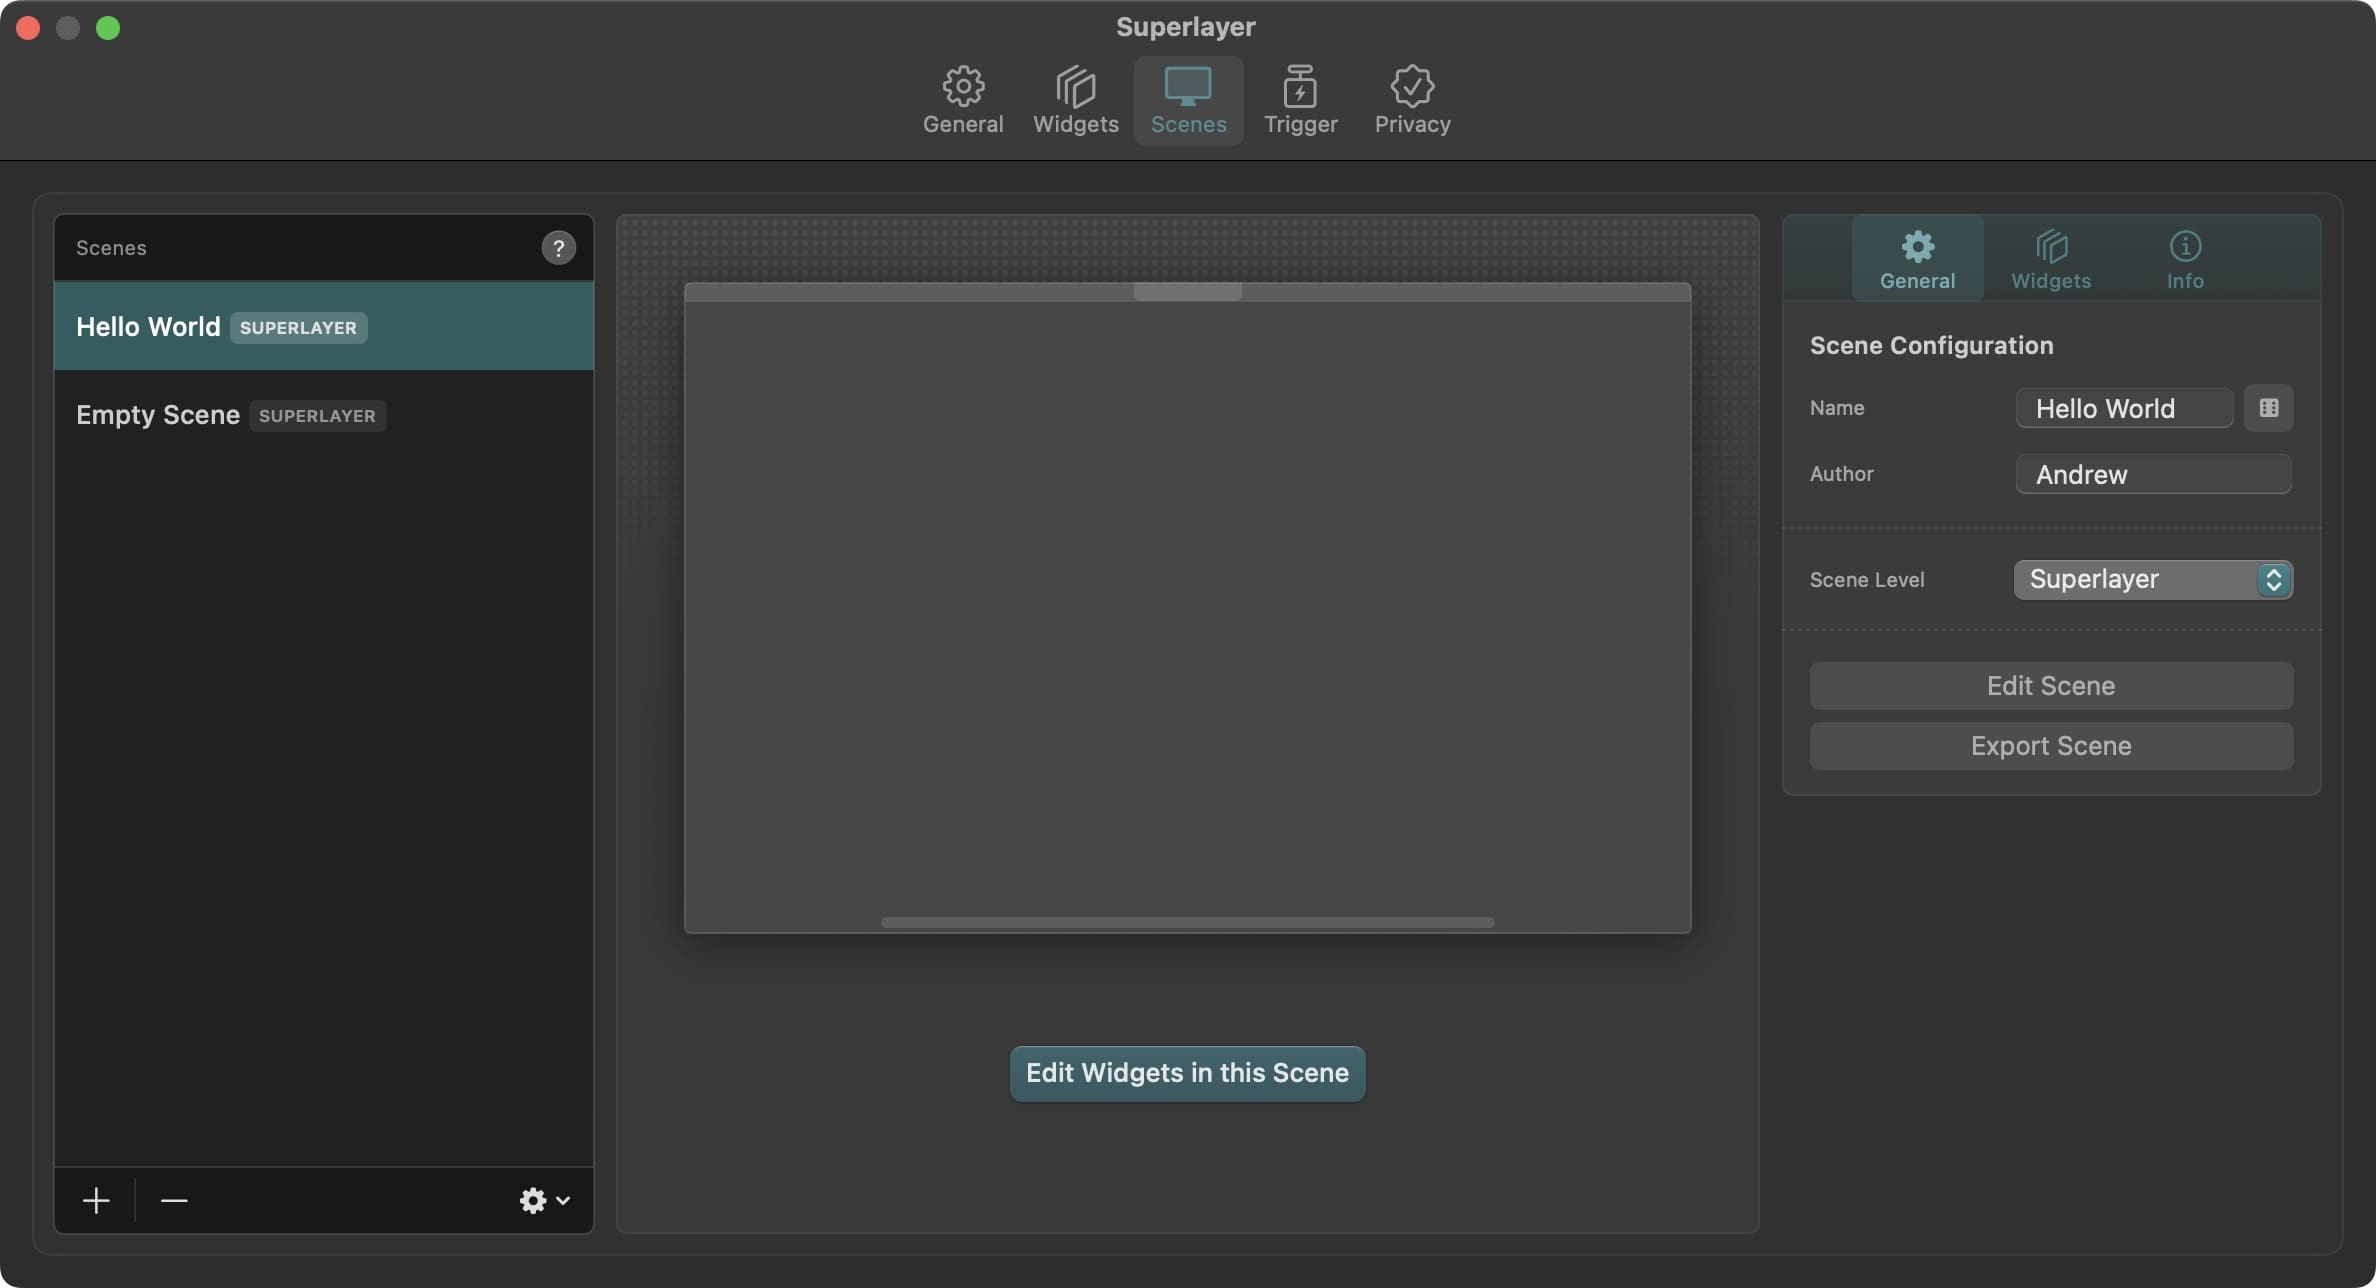
There’s something else that’s rather nifty about Superlayer, in addition to being able to add desktop widgets to Mac. At the top of the Superlayer window, there’s a Scenes tab which provides even further customization.
Essentially, this allows you to create different scenes based on what you’re doing on your Mac. Think of it in a similar fashion to Focus modes, as you can add desktop widgets to Mac that appear while you’re working. But as soon as it hits five o’clock, a different arrangement of widgets can appear.
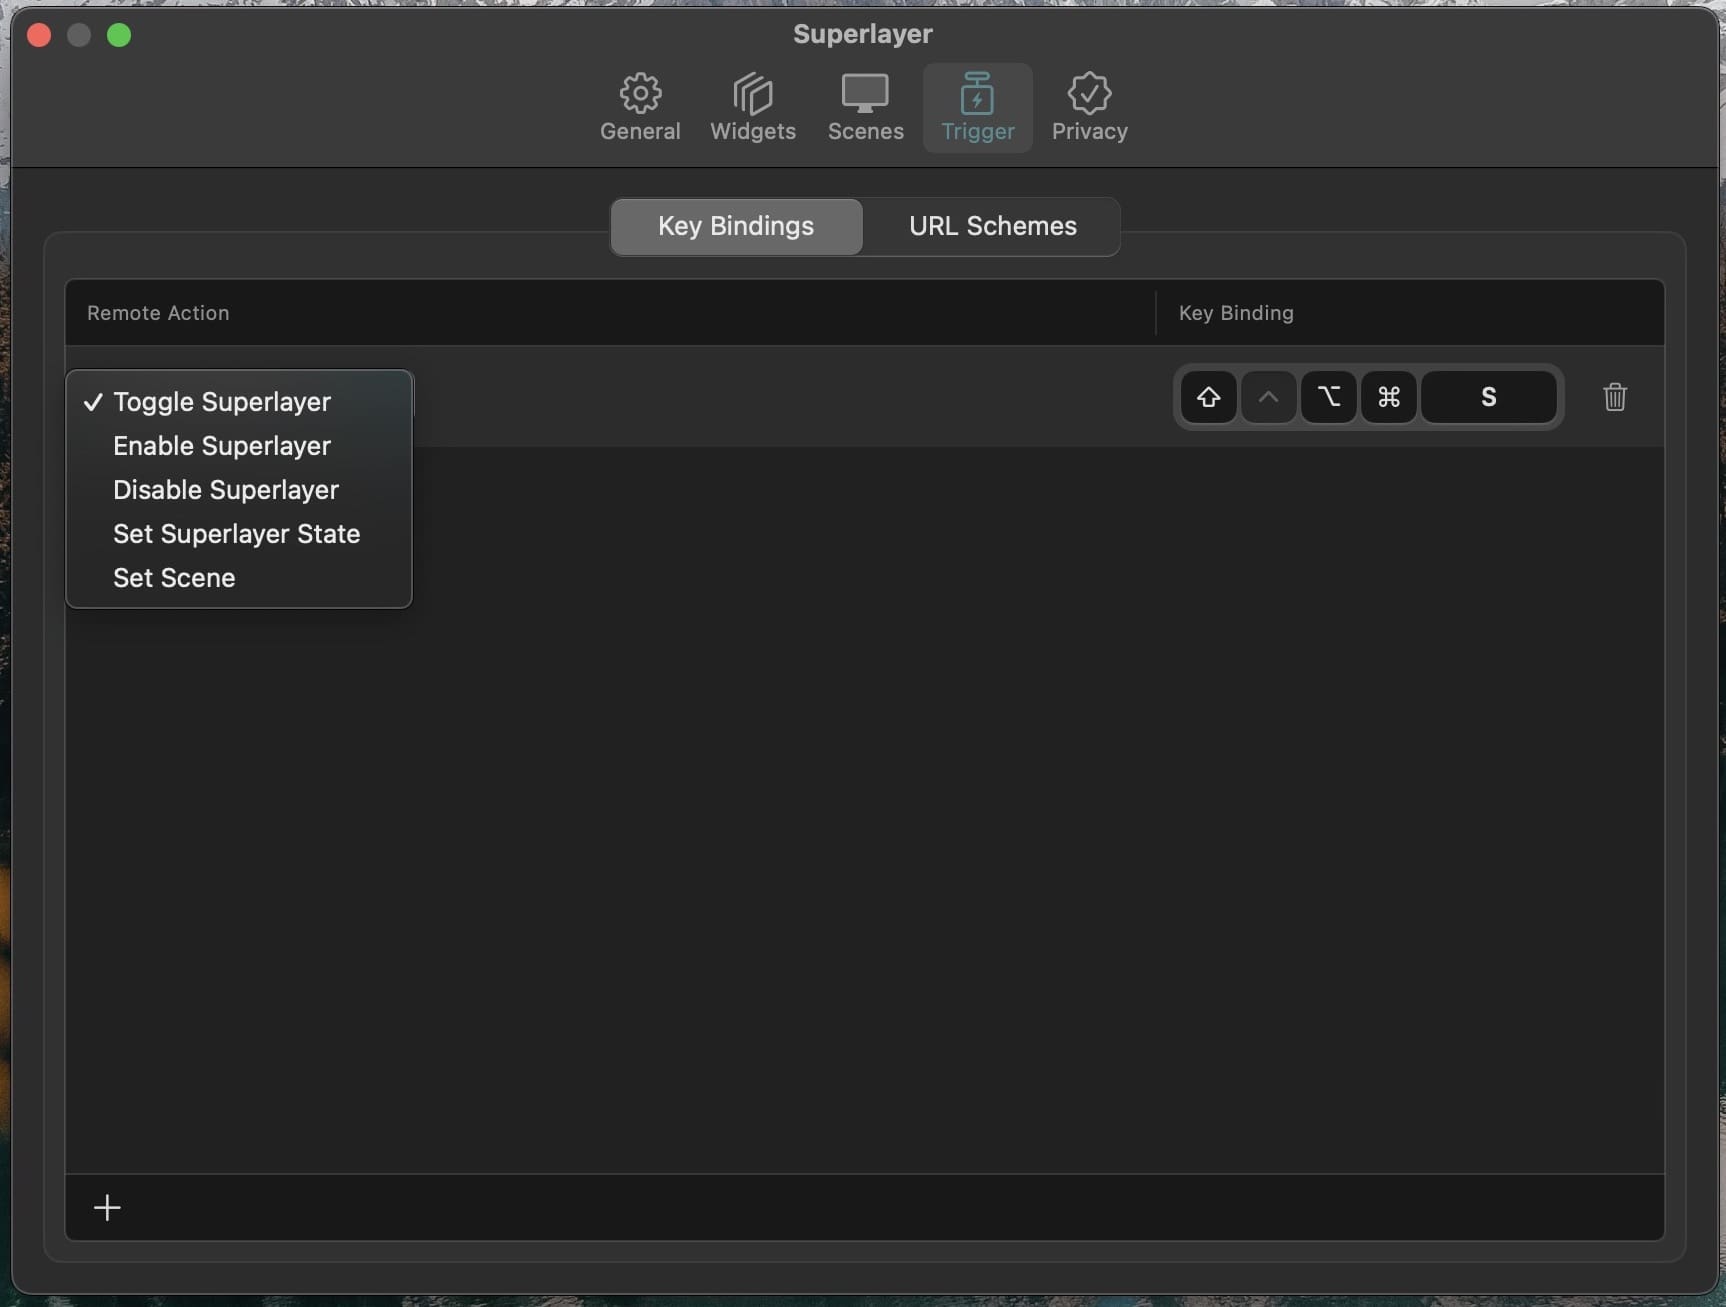
And thanks to the Trigger tab, you can set different keyboard shortcuts that will make the different widgets appear when you want. This can be done through a key binding, with the default option being to Toggle Superlayer by pressing Shift + Option + Command + S. Under the Remote Action section, you can choose one of the following actions to be performed based on your created Key Binding:
Toggle Superlayer
Enable Superlayer
Disable Superlayer
Set Superlayer State
Set Scene
In order to create a new trigger, just click the + button in the bottom left corner of the window. Then, select your Remote Action and create a Key Binding that will be used to perform the action.
Superlayer Widgets Hovering Over Windows? How-to Fix
One of the biggest complaints coming from those that are using Superlayer to add desktop widgets to Mac is that the widgets are hovering over windows. For one reason or another, this is the default solution when adding or setting up Superlayer widgets. Thankfully, there is a fix that will move the widgets out of the way, while still being viewable from your desktop.
Open the main Superlayer app.
Click the Scenes tab at the top of the window.
Select the Scene that you are experiencing issues with.
Click the General tab in the sidebar on the right.
Click the drop-down menu next to Scene Level.
Highlight and select Wallpaper.
Repeat these steps for any other scenes that you are having issues with.
If there’s one thing that we would recommend to the developers, it’s to add some type of thorough walkthrough for users who download the app for the first time. This is a great way to help improve the onboarding process while showcasing everything that’s possible with the app.
Otherwise, you might end up having a lot of frustrated users who ultimately decide to delete the app and cancel their subscription. Another recommendation that we have is to offer a free trial of some sort. If not only for a week, and you could even go so far as to limit the number of widgets that are accessible or maybe remove the ability to create custom widgets.
Andrew Myrick is a freelance writer based on the East Coast of the US. He enjoys everything to do with technology, including tablets, smartphones, and everything in between. Perhaps his favorite past-time is having a never-ending supply of different keyboards and gaming handhelds that end up collecting more dust than the consoles that are being emulated.


Write a Comment