• Skip to primary navigation
  • Skip to main content
  • Skip to primary sidebar
  • Skip to footer

AppleToolBox

Tools and Fixes for Mac, iPad, iPhone & iPod

Search posts

  • About
  • Contact

CONNECT WITH US

CATEGORIES

  • iPhone
  • iPad
  • Mac/MacBook
  • Apple Watch
  • Reviews
  • Mac
  • News
  • Reviews
  • Apple Services
  • AirPods

SITE

  • Home
  • About Us
  • Contact
  • Advertise

Search posts

You are here: Home / Mac / How to Use Studio Light

How to Use Studio Light

By Michelle Honeyager 0 comments Last updated June 30, 2022

Apple devices have come a long way with their cameras and the effects you can create on them. Whenever there’s a new iPhone, it feels like a newer, fancier camera is at the forefront of the features, which is excellent because it means we’re past the days of blurry cell phone photos if someone knows how to use the right features.

One of those features is the Studio Light feature on your iPhone. Below we’ll go into what it is and how to use it.

Contents

  • What is Studio Light?
  • How to Use Studio Light

What is Studio Light?

Studio Light is a light setting on your phone’s camera that helps get more professional-looking Portrait Lighting photos. The feature lights up the face brightly and cleans up the look of the overall photo.

As the name suggests, it’s set up to make it look like the photo was taken in a professional studio, complete with professionally placed lighting arrays.

How to Use Studio Light

Studio Light works on certain iPhone models that support Portrait Lighting. Generally, the iPhone SE 2nd generation and later support Portrait Lighting.

Using this feature is fairly simple. On many newer phone models, you can edit a photo using Studio Light as long as it was taken in Portrait Mode. Bear in mind that Portrait Mode only works if the camera recognizes that it is taking a photo of a person if the phone has only one camera.

  1. Open the camera app on your phone by tapping the camera icon.
  2. On the Photo line, swipe until the camera is in Portrait Mode and take the photo. You can also tap a photo that was taken in Portrait Mode.
  3. Tap Edit.
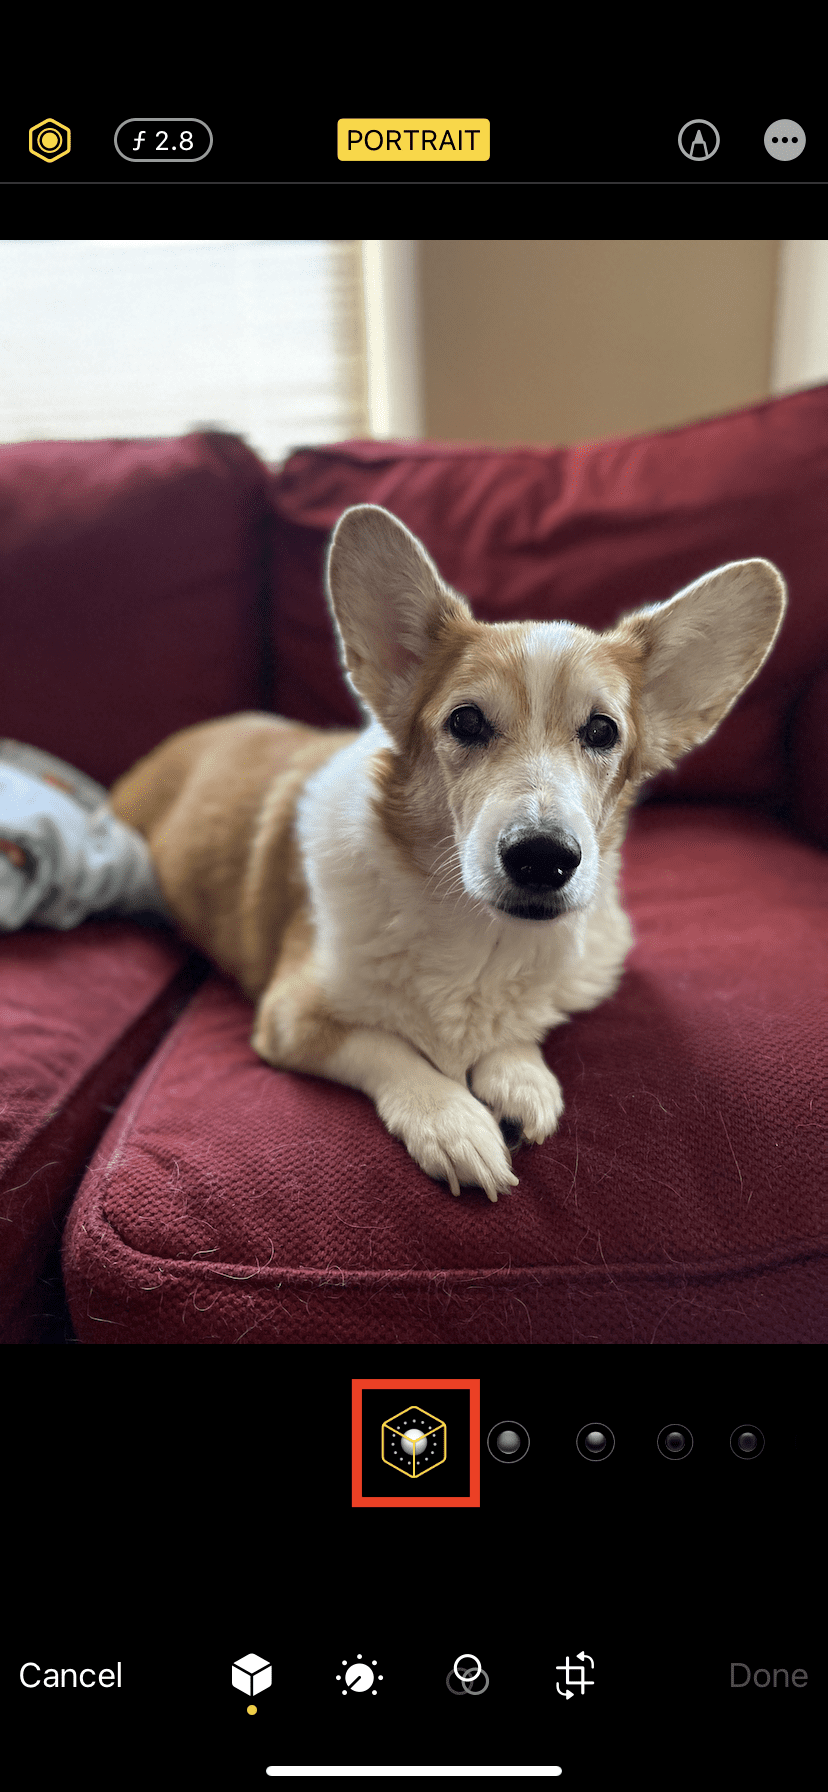
  4. You’ll see a little cube icon on the bottom of the screen. Tap it.
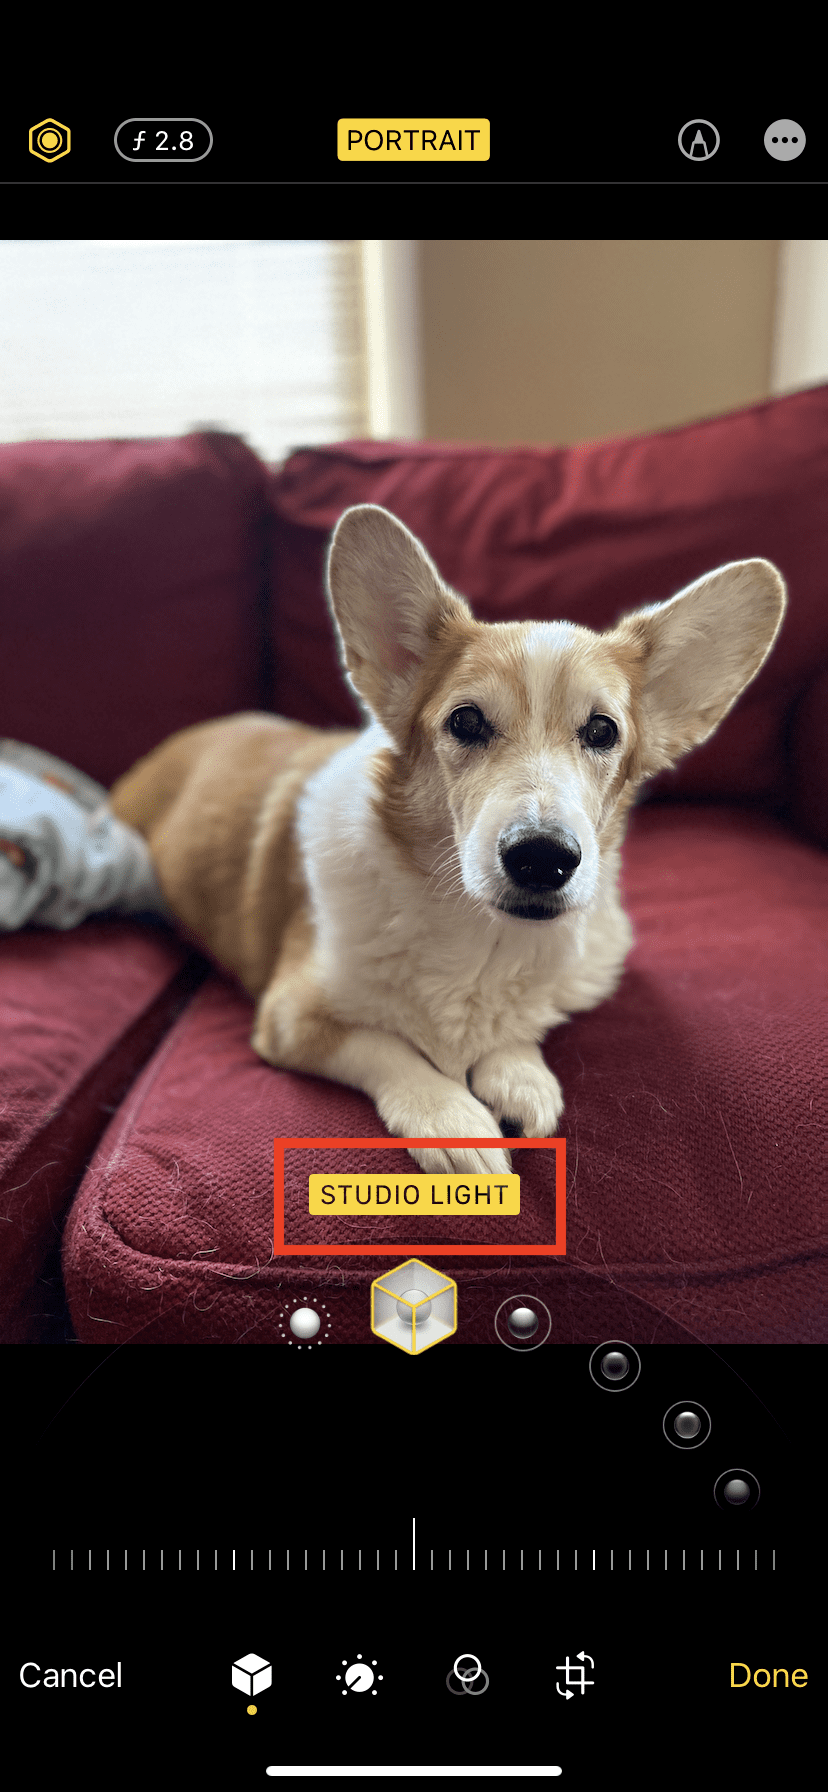
  5. Drag the icons under the photo to the left or right to choose the lighting feature you want. In this case, drag until it features Studio Light.
  6. You can then move the slider to the left or right to change how the lighting effect looks.
  7. Tap Done to save the new lighting.

You can also take a photo with Studio Lighting. Remember, it has to be of a person in Portrait Mode if the phone has one camera. To take the photo with this feature:

  1. Open your camera app and switch to Portrait Mode.

  1. At the bottom of the photo screen, slide the icons until it reads Studio Light.

  1. Take the photo of the person and the Studio Lighting should save on the photo.

Related Posts:

  • Live Photos on iPhone, A Complete Guide
    Live Photos on iPhone, A Complete Guide
  • The Definitive Guide to iCloud Photos (2020 update)
    The Definitive Guide to iCloud Photos (2020 update)
  • How to transfer your photos from iCloud Photos to Google Photos
    How to transfer your photos from iCloud Photos to Google…
  • Taking Photo But iPhone Says Storage is Full?
    Taking Photo But iPhone Says Storage is Full?
  • How To Use Numbers: The Basics
    How To Use Numbers: The Basics
  • iOS 13 or iPadOS problems and how to fix them - Troubleshooting Guide
    iOS 13 or iPadOS problems and how to fix them -…
  • Conditional Formatting in Numbers on iPad, A Complete Guide
    Conditional Formatting in Numbers on iPad, A Complete Guide
  • What to do if you can’t transfer photos from iPhone to Windows PC
    What to do if you can’t transfer photos from iPhone to…
  • Why Is My FaceTime Not Working in iOS 12 or iOS 13 and iPadOS? How-To Fix It
    Why Is My FaceTime Not Working in iOS 12 or iOS 13 and…

Reader Interactions

Write a Comment Cancel reply

Primary Sidebar

Recent Posts

  • How to Make Siri Announce Notifications on iPhone
  • iPhone 14 Release Date: When To Expect Apple’s Next iPhone
  • How to Set Favorites in Tab Groups in Safari on iOS 16
  • What’s New in iOS 16 Beta 6
  • How to Boot Mac From External USB Drive
  • How to Use YouTube Picture-In-Picture in Safari on Mac

Connect with us

Footer

ABOUT

  • About Us
  • Contact us
  • Advertise
  • Privacy
  • Terms of Use

DEVICES

  • iPhone
  • Mac & MacBook
  • Apple Watch
  • iPad
  • AirPods
  • Apple TV
  • iPod Touch

GUIDES

  • iOS 13 & iPadOS
  • Apple ID
  • iCloud
  • App Store
  • iTunes
  • FaceTime
  • iMessage
  • Siri
  • Books and iBooks
  • Game Center
  • AirPlay

CONNECT

  • Facebook
  • Twitter
  • FeedBurner
  • YouTube

© Copyright 2010-2022 AppleToolBox · All Rights Reserved

This site and its content are in no way affiliated or endorsed by Apple, Inc. · Reproduction without explicit permission is prohibited