Today, we’re going to be covering a topic that I’ve been wanting to cover for some time now. If you’re a long-time AppleToolBox reader, then you may remember times when we’ve covered how to use the Mac Terminal, Automator, Shortcuts, and more. Today, we’re expanding our tutorial resources with a series on how to use Numbers.
Numbers is Apple’s spreadsheet app and its alternative to the very popular Excel. Excel is so popular, in fact, that there’s a good chance you’ve used it, even if you’re a lifelong Apple user. It’s invaluable to the way a lot of businesses function, and while Numbers is nearly as good in many ways, Excel is still the preferred app for many companies.
That said, you may find that Numbers works best for you in your personal or professional use. After all, it’s built into the Apple ecosystem, integrates with other Apple apps and services, and best of all, is free to all Apple users.
This is our first post in this series, so we’re just going to be covering the basics here. You can look at the table of contents to get an idea of what’s going to be covered. In the near future, I’ll be adding more to this series, so stay tuned!
Before we get too deep into how to use Numbers for basic tasks, let’s cover why learning how to use this app is important.
Firsts, spreadsheet apps are, in my opinion, one of the core apps you should know how to use. Just like you should know how to use a calculator app, a word processor, and an internet browser, you should know the basics of how to use a spreadsheet.
That’s because they’re so widely used in the workplace and also so useful for at-home use. I use spreadsheets for a number of uses, from keeping track of my comic book collection to automating a portion of my monthly tasks.
Additionally, learning how to use spreadsheets can be a valuable skill to have in the workplace. Many businesses rely on spreadsheets for several reasons, and you may find that some jobs revolve entirely around knowing how to efficiently manage and use apps like Excel and Numbers.
Lastly, knowing how to use Numbers will make picking up Excel much easier, should you ever need to. That may not sound like a big deal, but again, Excel is a popular tool in the workplace, so knowing how to use its counterpart will help you learn to use it.
How to use Numbers: The basics
Alright, now that you have an idea of why you should want to learn how to use Numbers, let’s get into how it works. As mentioned, this is just going to be covering the basics. That includes creating a spreadsheet, understanding how rows and columns work together, and doing some basic calculations between cells. We’ll be covering more complex tasks later on, so think of this as the foundation for learning those more challenging ideas.
Let’s dive in!
Choosing a template
First things first, you’re going to want to choose a template when creating a new Numbers document. While you can choose Blank, which has no preset formatting, I do recommend going for one of the built-in templates. They do a lot of the early work for you and are surprisingly useful. This is one of the only Apple apps where I think selecting a template is a must.
Start by opening the Numbers app. You can do this by finding the app in your Applications folder or pressing command + spacebar, typing “Numbers”, then pressing return. Double-click New Document.
That will bring you to the following screen:
Here, you can scroll through all of the templates that Apple has to offer. We are going to be using a blank template for this tutorial, but still give them a look so that you get an idea of what the app has to offer.
Some of the best templates are:
Checklist
Shared Expenses
Invoice
Simple Budget
Schedule
For now, go ahead and choose Blank. That way, you can play around with the spreadsheet without worrying about the formatting. Double-click the template you want to open it.
Rows vs columns
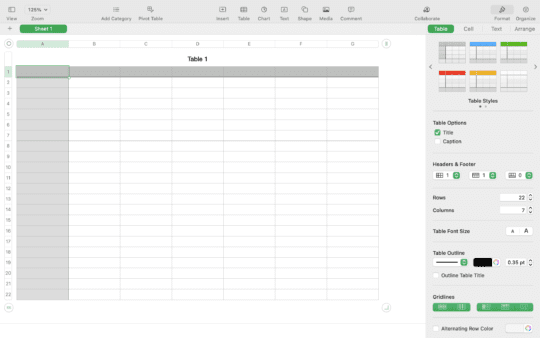
The next thing you’ll need to know is the difference between rows and columns. Once you choose the Blank template, you should be looking at this screen:
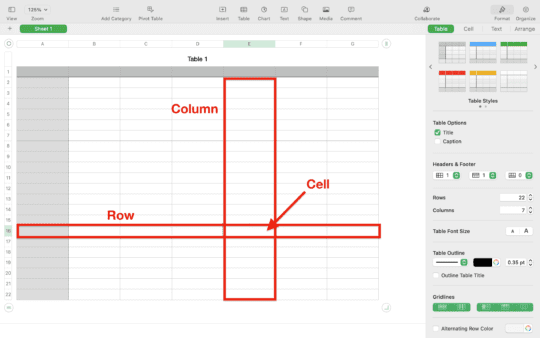
Though there isn’t any data on this screen, you can still see several rows, columns, and cells. Each blank rectangle is a cell. Every vertical stack of cells is a column, and every horizontal stack is a row. Here’s a breakdown:
As you can see, there is a cell at every point that a row and a column intersect. The cells make up these intersections.
The columns are labeled with letters, and the rows are labeled with numbers. Each cell is labeled after the column and the row that it intersects with. So the very top-left cells is the “A1” cell. The cell directly below it is “A2”, and the one to the right of it is “B1”.
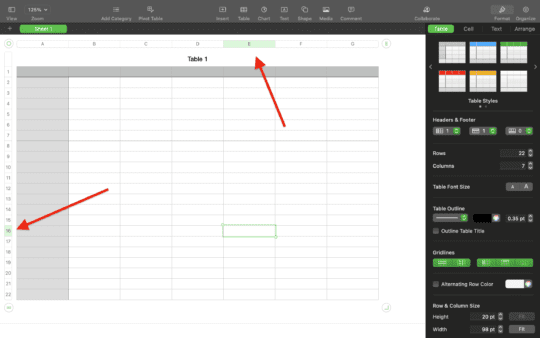
You can easily see which cell you’ve selected by looking at the column and row labels on the top and left of the spreadsheet. Whatever is highlighted is the indicator for which cell you’ve currently selected. As you can see in this screenshot, I’ve selected E16, which I can see without needing to count out where my cell is:
One last note on rows and columns: You may have noticed that you have a limited number of these. By default, the lower-right corner of the spreadsheet ends at G22. This is one of the differences between Excel and Numbers. Where Excel goes on forever, Numbers only shows you a fixed number of cells.
Fortunately, it’s easy to expand the number of cells by adding more columns and rows. At the top of the spreadsheet, just to the right of the column label “G”, you can see a circle with two vertical lines in it. Click it and drag it from left to right. You’ll see that new columns are automatically added or old ones are instantly removed.
The same goes for rows. There’s a circle with two horizontal lines in the lower-left side of the screen. Click and drag it up and down to add or remove rows.
Finally, you can drag the circle with the little arrow in it in the bottom-right of the screen to simultaneously add or remove rows and columns.
And that’s (mostly) everything you need to know about the basic structure of a spreadsheet!
Adding content to a cell
Now that you have a basic understanding of how a spreadsheet is set up, we can look at how to add content to a cell. As you may already know, this is the core functionality of a spreadsheet. You store data in each cell, and each cell is able to interact with each other, creating a powerful tool.
But again, let’s just focus on adding some content to cells in your spreadsheet.
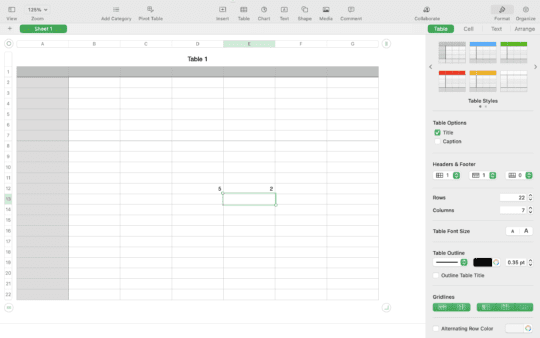
To get started, click on any cell, preferably one near the middle of your spreadsheet. Start by typing the number “5” in your selected cell.
Next, press the tab key on your keyboard. This will automatically take you to the cell directly to the right of your selected cell. In this cell, type the number “2”, then press return. Your screen should look something like this:
As you can see, the return and tab keys on your keyboard can be used to navigate from one cell to the next. You can also use the arrow keys on your keyboard to navigate as well. Combined, these keys make it easy to navigate an entire spreadsheet without ever lifting your fingers from the keyboard.
You can type anything into a cell, including words and symbols. Most of the time, though, you’re likely to find yourself entering numbers. But we’ll explore why that is in the Using formulas in Numbers section.
How to use Numbers to format your cells
Right now, let’s move on and talk about formatting your cells. This is an important part of learning how to use Numbers, as it is used to visually organize your spreadsheet.
Even in the blank template we’ve been using so far, you can see that your spreadsheet has a title at the top, “Table 1”. And there is a dark grey row across the top and a light grey column along the left.
None of these features of your spreadsheet do anything special. They’re just formatted to be visually distinct, so that you can put titles, labels, and other bits of descriptive data in them.
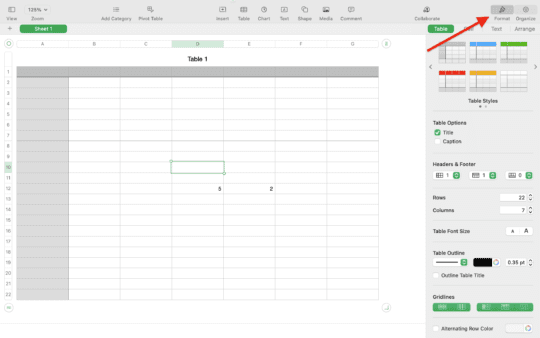
All you need to do to be able to format cells in Numbers is to click the Format button in the top-right of your screen:
There, you have options that will allow you to change the color of a cell, the font, the number of rows and columns, your table’s outline, and more. These feature’s don’t need much of an explanation, just have fun messing around with them and seeing how they work. You can easily undo any change you make by pressing command + Z on your keyboard.
Using formulas in Numbers
Next in this guide on how to use Numbers are formulas. In many ways, formulas are the key feature of spreadsheets. Remember how we’ve been saying that interactions between cells are what make Numbers such a powerful app? Well, it’s time to explore the most basic cell interactions.
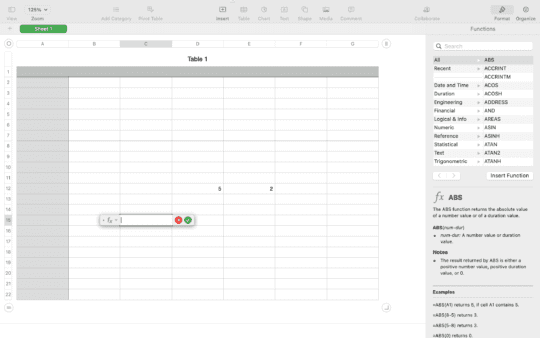
Formulas work just like the formulas you learned in grade school. To use them, click a blank cell and type the “=” symbol. The cell will show this popup:
Next, type a simple calculation, like “3+5”, then press return. When you hit return, the cell’s value will not show “=3+5”, even though that’s what you typed. Instead, it will show “8”, because that’s the answer to your formula.
You can do this with any kind of calculation. Just know that the “*” and “/” symbols on your keyboard represent the multiplication and division symbols, respectively.
You can also do math between cells. Remember how we typed “5” and “2” into two cells side by side? Let’s make a basic formula adding these two cells together.
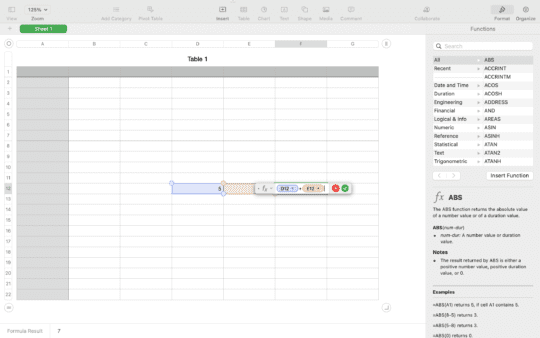
Select the cell directly to the right of these two cells and type “=” to start creating a formula. Next, click the cell that contains the number “5”. You’ll see that cell’s label instantly appear in your formula.
Next, type a “+” symbol, then select the cell with the number “2”. That should look like this, even if your cell labels are a little different:
Next, hit return.
The cell where you just created your formula should now show the number “7”. Not only that, but if you change the number values of your “5” or “2”, the value of the “7” will change automatically to reflect the correct sum of those values. You can see that in the screenshot below:
You can create extremely complex or simple formulas, incorporate as many or as few cells as you like, and they’ll automatically populate and solve themselves. It’s super easy to do, and it means that your spreadsheet basically works like a written calculator.
Creating simple calculations in Numbers
Now, we’re going to get into the basic calculations segment of our guide on how to use Numbers. This is pretty similar to formulas. So similar that Numbers actually uses the same word for it as when you create your own formula: Formulas. We’re just calling them calculations so that you know they’re a little different.
To perform these calculations, let’s start by deleting all of your existing cells. Just select them and press the delete key on your keyboard.
Next, let’s create a column of numbers. In the “B” column, starting at “B2” and working your way down to “B11”, type the following numbers: 3, 6, 2, 1, 8, 5, 9, 10, 4, 7. You may have noticed that these numbers are just 1-10 in a random order.
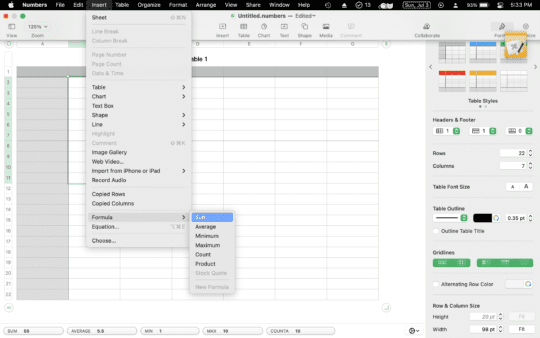
Now, select all of these cells, ten in total. In the Menu Bar at the top of the screen, choose Insert, Formula, and Sum.
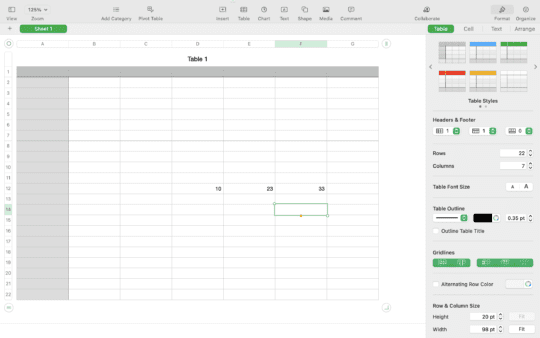
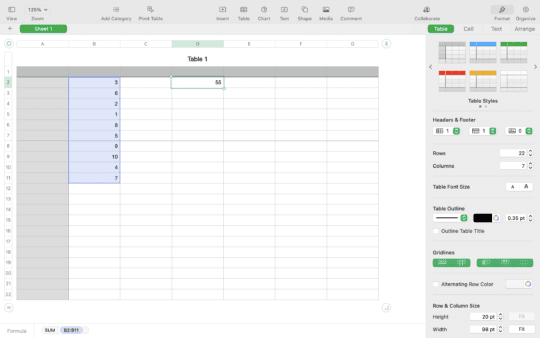
You should see the number “55” appear instantly in the “B12” cell. That’s the sum of all of the numbers you had selected. You can click and drag the “55” to another cell if you like. In fact, let’s move it to “D2”.
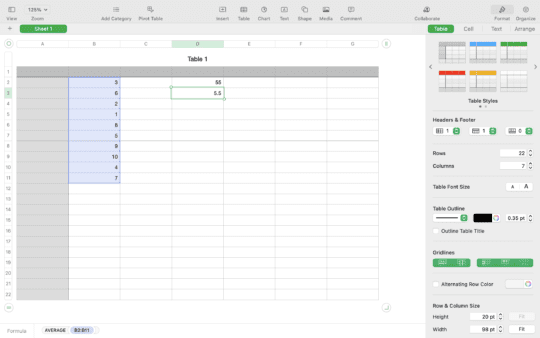
Select those ten numbers again, and this time choose a different formula from the Insert > Formula Menu Bar option. Move the calculation to “D3”.
And that’s it! Just a shortcut for creating basic formulas in your spreadsheets. Don’t delete anything, though, because we’re going to keep using these numbers!
How to use Numbers to sort your columns and rows
Another common feature of columns and rows is their ability to be sorted. You can enter information in whatever order you like, and then sort it by alphabetical or numerical order.
To do this, you just need to click the column or row label of the column or row you want to sort. Since we already entered an unsorted column of numbers in column “B”, let’s go ahead and sort it.
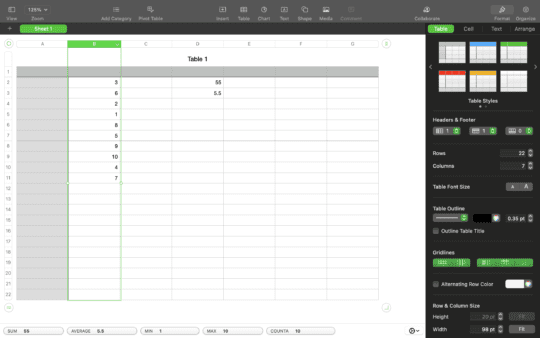
Go ahead and click the letter “B” at the top of the screen, the one labeling the column as “B”.
This will select the entire column. Next, right-click the letter “B” or click the little arrow to the right of the “B” that appears when you hover over it. From the dropdown menu that appears, choose Sort Ascending or Sort Descending. Then, choose the other option.
How the numbers arrange themselves is pretty intuitive, so you should be able to quickly grasp what’s going on. Additionally, it’s good to know that this also works with letters. You can sort letters, words, numbers, or a combination of the two.
Also, you may notice that the cells in column “D” move around as you sort the column. That’s just because their position is tied to specific rows in the column of numbers. So you can ignore it for now.
Adding pages to your Numbers spreadsheet
The last thing you need to know to learn how to use Numbers is how to add pages to your spreadsheet. You may have realized that even though you can infinitely expand a spreadsheet, you probably don’t want to. A better solution is to add pages for every month, year, or other differentiator.
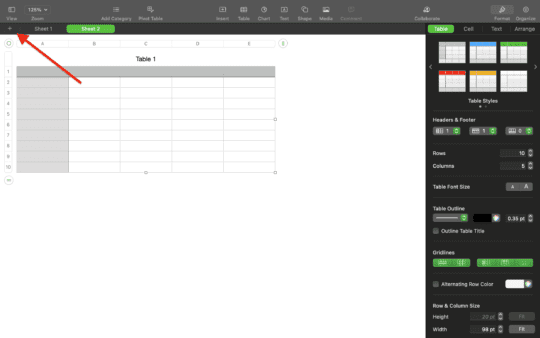
Adding a new page is super easy! Just click the “+” icon in the top-left of the screen. A new page will instantly be added.
You can now expand your spreadsheet as much as you want without becoming disorganized. You can do this to add content to a spreadsheet that you’ve had for a long time, that has grown too long, or even one that has a variety of content. For instance, you may have a page showing your monthly budget, one showing you partner’s, one showing your annual expenses, one showing rent, and so on.
Start organizing your life now that you know how to use Numbers
And that’s it! That’s all of the basic stuff you need to know about how to use Numbers. With this information, you should be ready to start cataloging your collections, organizing your budget, keeping track of your income, or even applying for jobs where knowing how to use a spreadsheet is a requirement.
Again, you may get more mileage from using Excel over Numbers since it’s the more popular option. Just know that there’s no significant difference between them other than popularity. So most of what you learn with Numbers can translate to Excel.


")


Write a Comment