Want to perform What-If Analysis or forecast on budgets, costs, incomes, and more? You can use the Solver add-in of Excel. Here’s how to add Solver to Excel on Mac.
In any business, you often get the task of accurately predicting an output figure from some input variables. For example, your manager assigned a few developers under your command.
Your task is to develop 10 apps in three months without exhausting the developers. Not exhausting the developers mean you can’t utilize their skill more than eight hours a day, and 40 hours a week.
Then how many developers do you need, and what app development strategy you must follow so you can deliver 10 applications after three months? It could be a complex and mind-bogging calculation, but with the Excel Solver tool, you can do the calculation in a few minutes.
But, in some Excel for Mac installations, users may not find the tool readily available. If you’re among one of those users who desperately looking for the Solver add-in of Excel but can’t locate it, find below how to get Solver in Excel on Mac.
Solver is an Excel add-in. It includes multiple mathematical, statistical, and logical functions in a simple interface of a data analysis tool.
Its primary task is to analyze the optimal value of a formula. In another word, you can use this data analysis add-in to figure out the minimum or maximum values of a specific cell by changing the values in other related cells.
For complex calculations, you can also set some constraints that the Solver tool will consider when generating values for the target cell by manipulating inputs of the variable cells.
Solver is a powerful Excel function and suitable for iterative calculations. It eliminates busywork and guesswork from data analysis and interpretation. All you need is to feed the tool with a target or objective value, a few variable values, and some constraints (optional), and the tool will accurately derive the output you’re looking for.
When Should You Use Solver in Excel on Mac?
Find below the scenarios when you need to utilize Solver to accurately assess a data model on Excel:
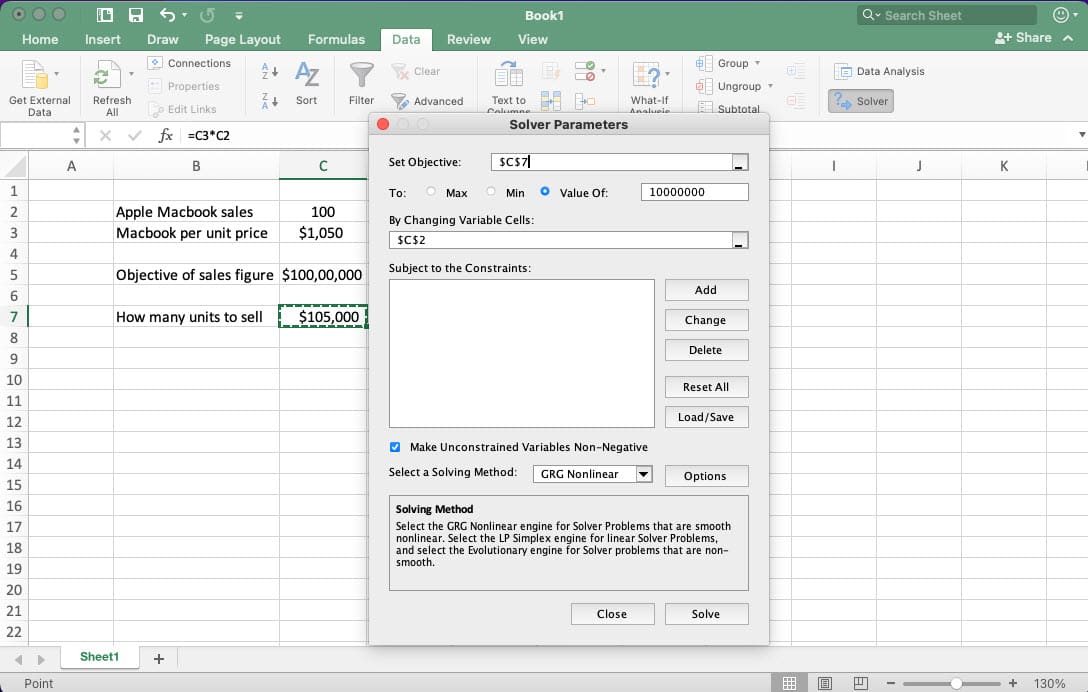
There are one or many target cells containing formulas that you want to test against a specific value, say profit or degree of risk, etc. These are called Objective cells.
Also, there are a few variable cells that are included in the formula you created for the Objective cells. Changing the values of these cells modifies the objective cell values.
Often, there are some restrictions that your data model must follow. For example, the budget for developing 10 apps in three months is $100,000.
Once you create a table by inputting the variables, constraints, and objective cell values, and call the Solver tool, it accurately predicts the inputs required in the variable cells.
What’s great is that Microsoft has made this powerful What-If Analysis tool available for all Excel for Mac users for free. You already have the tool on your Microsoft Office package. All you need to know is how to add Solver in Excel on Mac.
The process is pretty straightforward and explained below in a step-by-step manner:
How to Add Solver to Excel on Mac: From the Excel Ribbon
Suppose, you’re working on a workplace MacBook or iMac, where other colleagues also extensively use various complex functions of the Excel app. Then, there’s a high probability that someone has used the Solver tool as well. Here’s how you can find it if it’s the first time you’re using Solver in Excel on Mac:
Open the Excel app on your MacBook or iMac from the Launchpad or Dock.
Open the Excel for Mac app
Now, go to the Data tab on the Excel ribbon menu.
Go to the Data menu on Excel ribbon
Here, you’ll find various groups of commands related to data crunching and manipulation.
How to Add Solver to Excel on Mac Click the Solver icon
Look for the Data Analysis command group at the far end of the Data tab.
There, you may see an icon showing a question mark and an arrow. That’s the Solver tool.
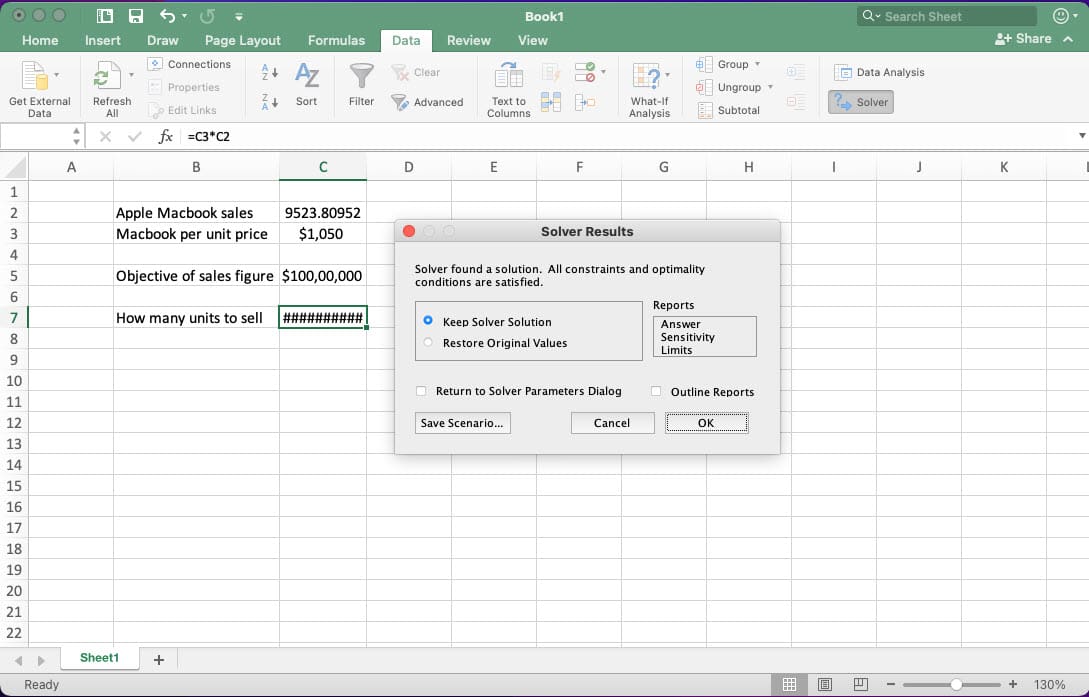
Click Solve to get the objective value from Solver
Select any cell that contains the objective or formula, and then click the Solver icon to run the tool.
How to Add Solver to Excel on Mac: From the Add-Ins
Now, it’s likely that you don’t see the Solver tool icon in the Data Analysis command group. Then, follow these steps to add Solver in Excel on Mac:
Open the Microsoft Excel app for Mac.
Go to the top menu bar on MacBook or iMac.
If the Excel app is selected, then you should see Excel to the right of the Apple icon.
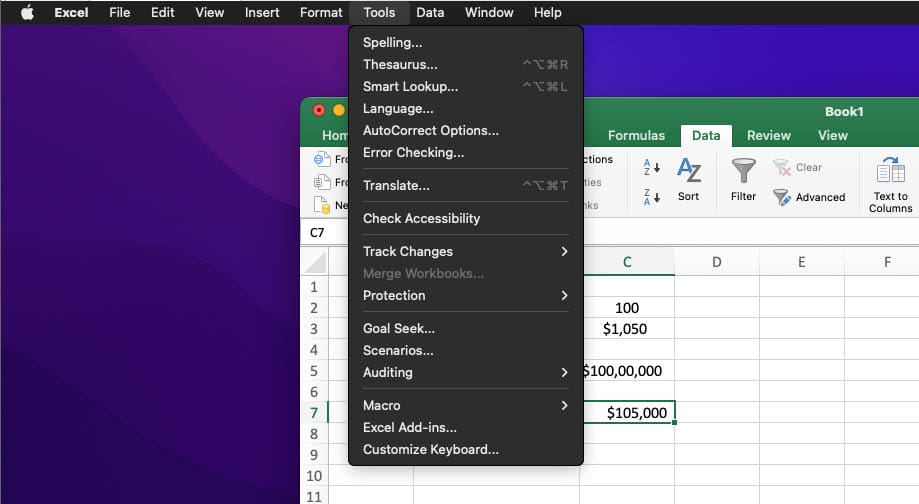
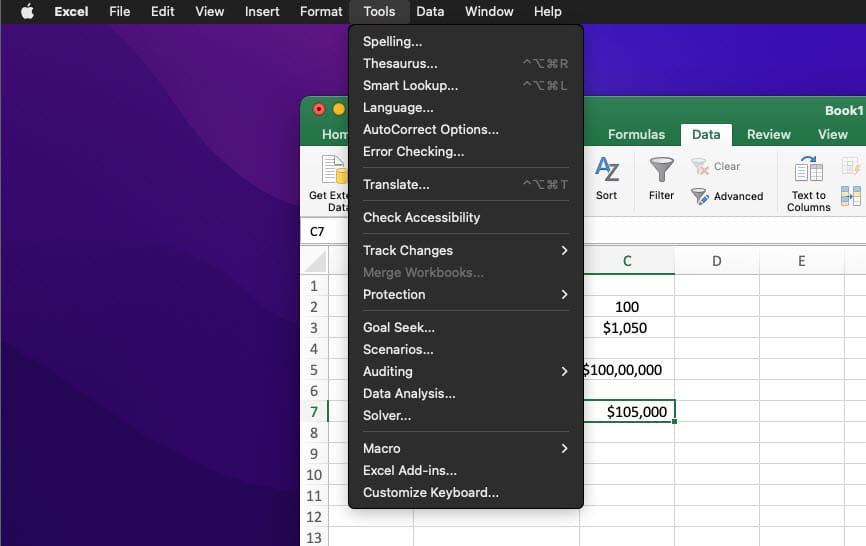
Click Tools on the top menu bar.
The Excel App Menu on macOS and going to the Tools
Select the second-last option, Excel Add-ins…, in the context menu that opens.
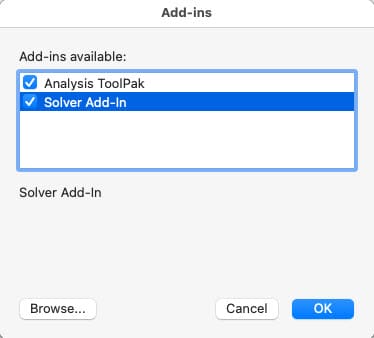
The Add-ins dialog box will open.
How to Add Solver to Excel on Mac checkmark the Solver add-in
Checkmark the checkboxes for both Analysis ToolPak and Solver Add-in.
Click OK to save the changes.
Solver tool on the Tool bar of Excel app on Mac
The Excel app will flicker a bit, and the Solver tool will get added to the Excel ribbon and Tools on the top menu bar on Mac.
Now, you can follow the steps mentioned earlier to run the Solver add-in on a formula.
Solver in Excel on Mac: FAQs
How Do You Install Excel Solver Add-In?
The Excel Solver add-in is already installed on your Excel for Mac installation package. All you need to do is load the Solver tool from Excel App Menu > Tools > Excel Add-ins > checkmark Solver Add-in and Analysis ToolPak.
How Do I Open Solver on Mac?
Let’s consider you already enabled the Solver add-in on Excel for Mac, here’s how you can open Solver:
Run the Excel app and go to the Data tab on the Excel ribbon menu.
At the top-right corner, you should see the Solver icon.
Click the icon to run Solver on Mac Excel.
Where Is the Solver Button in Excel?
The Solver button in Excel is available on the Data tab, near the Data Analysis command group on the Excel ribbon menu.
How to Add Solver to Excel on Mac: Final Words
So far, you’ve explored two approaches to add the Solver add-in to the Excel app on Mac. If you’re on a business Mac and your organization uses Excel a lot to analyze data models, chances are the tool is already available on your Excel app set up by the organization’s IT admin.
On the other hand, if you manage a small business yourself or use Excel for school or personal purposes, you can use the Excel add-in menu to add Solver to Excel on Mac.
If you know any tricks and tips on the Excel Solver add-in, don’t hesitate to let other Excel for Mac users know by commenting below.


")
")


Write a Comment