Without a doubt, Stage Manager stole the show during the WWDC ’22 Keynote. Not only is this new feature coming to the Mac, but it’s finally bringing window-ed app support to supported iPad models. With Stage Manager, are presented with a completely different interface designed to make it easier to multi-task. But Stage Manager was also confirmed to be one of the key features for macOS Ventura.
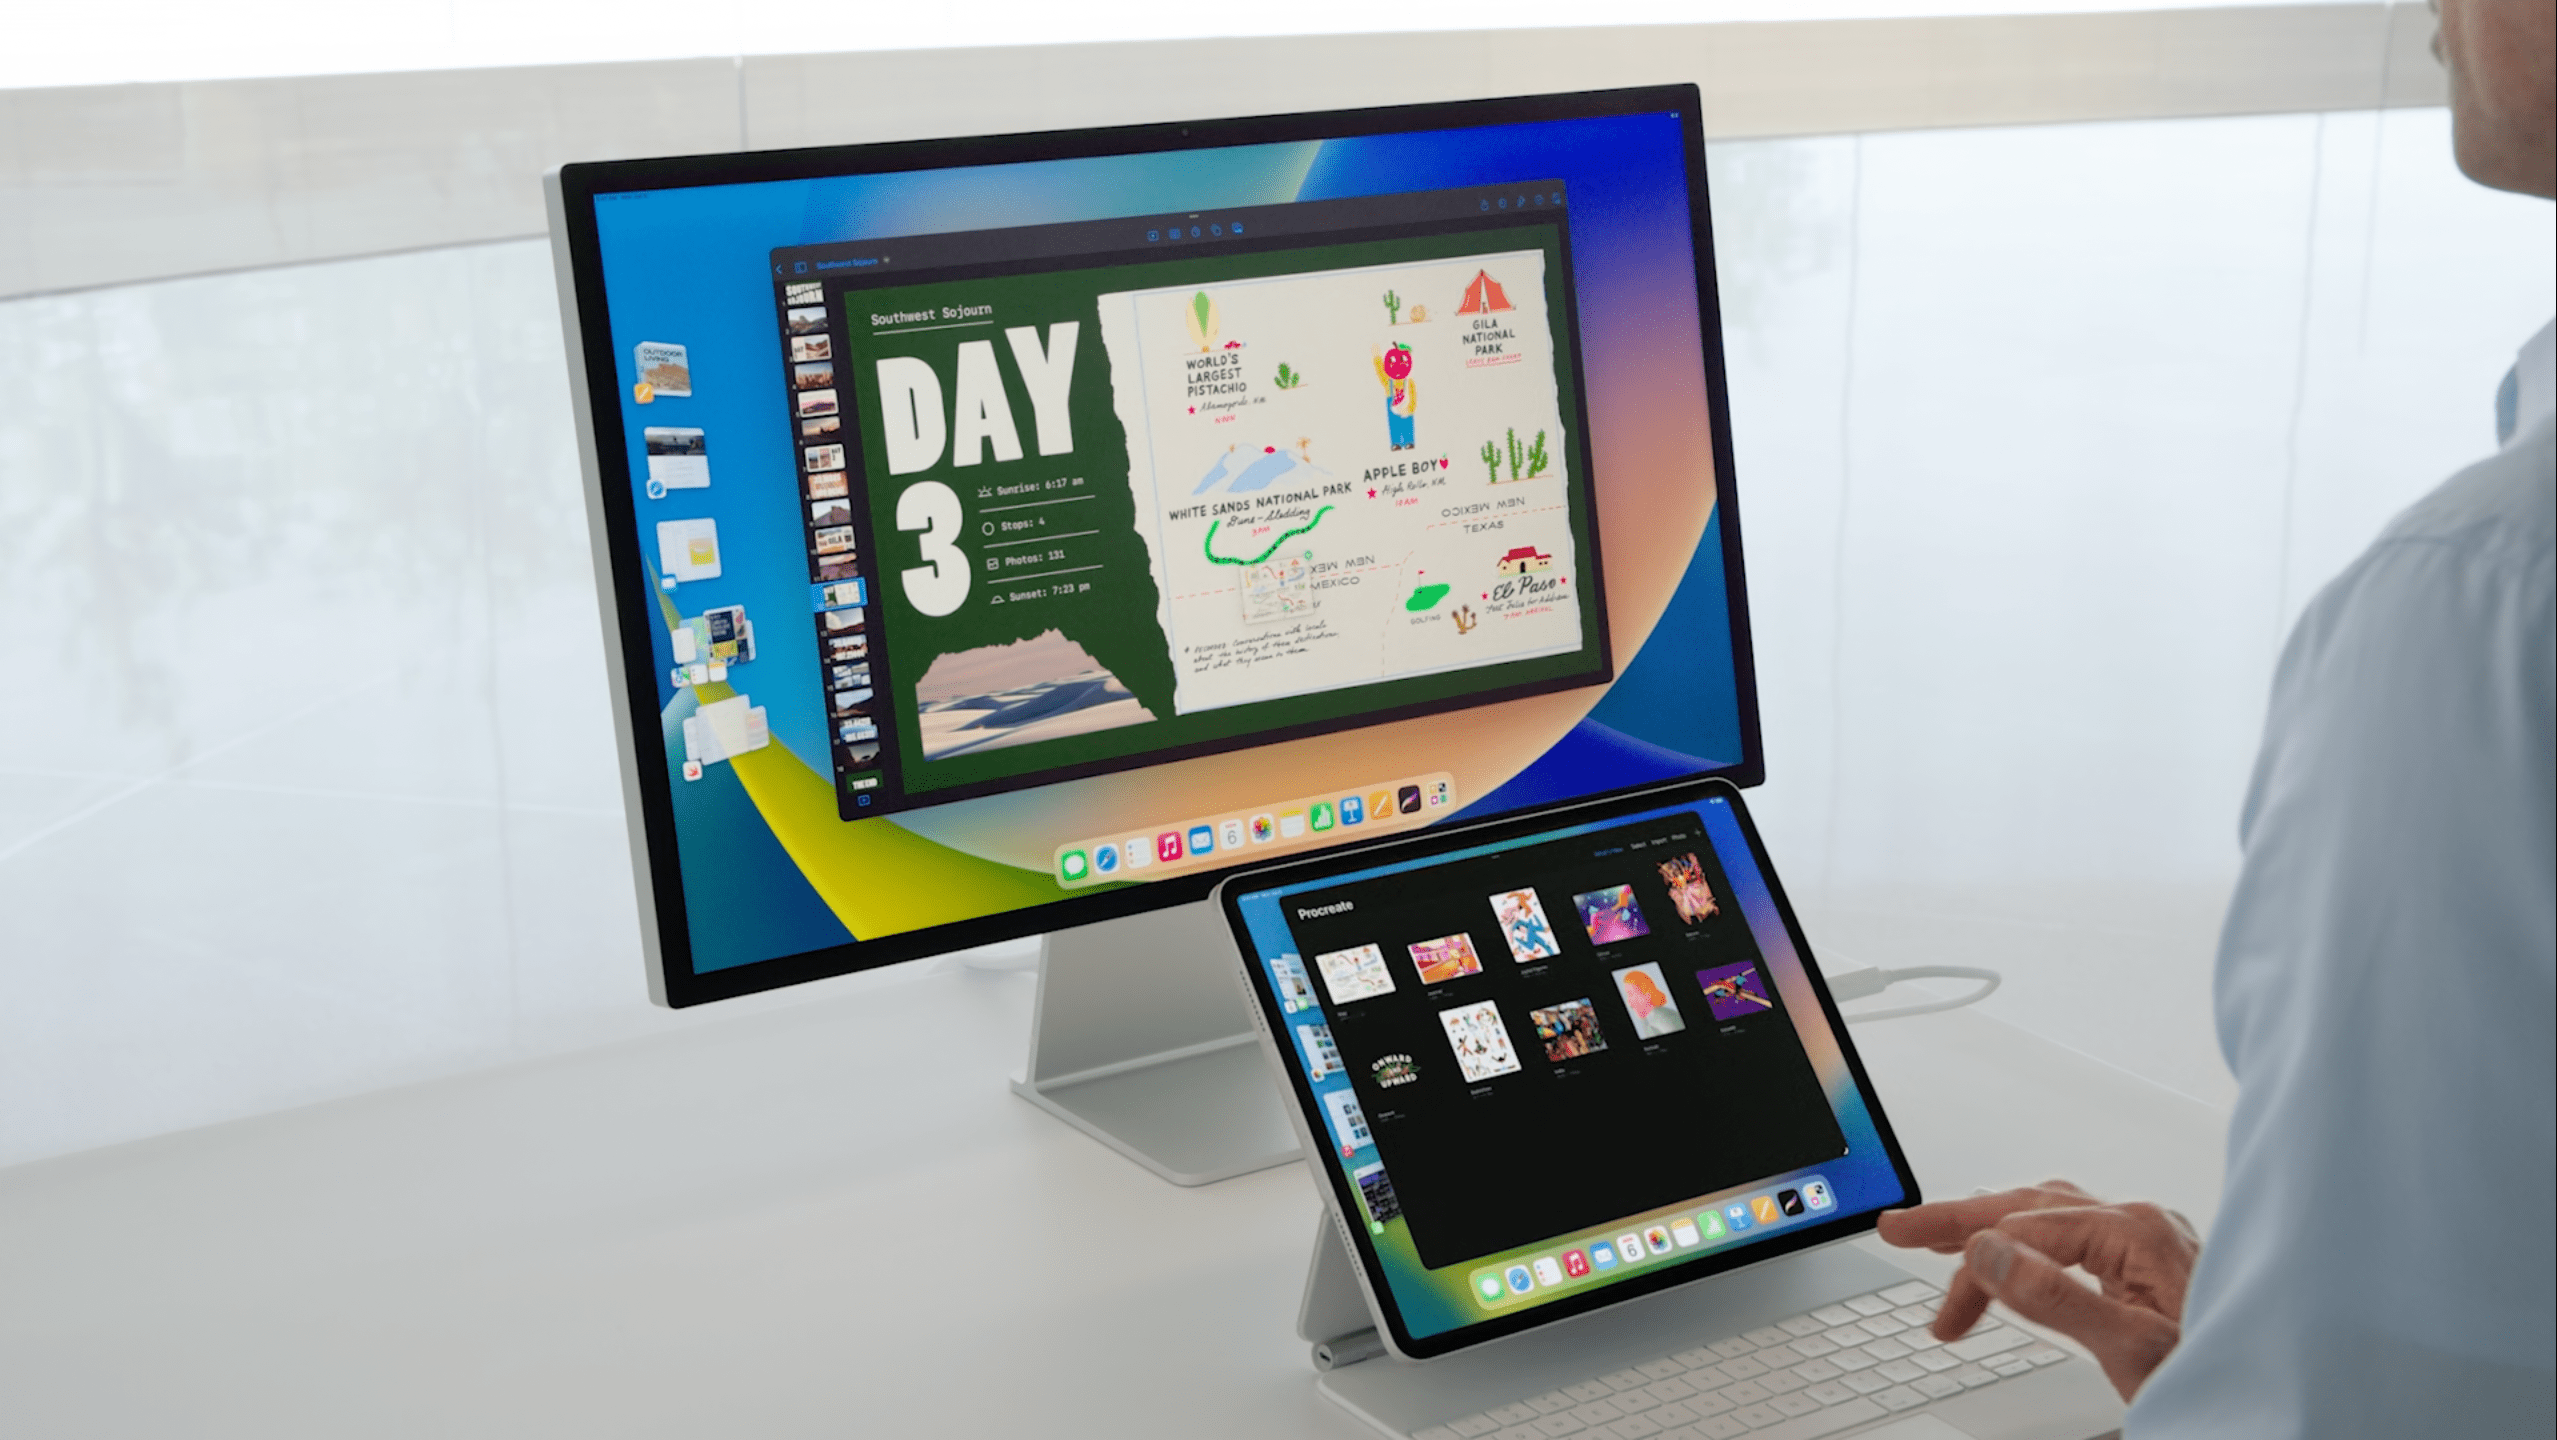
Stage Manager is a new way to interact with the various apps that you have opened at any given time. Instead of dealing with a bunch of app windows overlapping with no clear method of organization, Stage Manager aims to fix that for you. It’s easily the “defining” feature of iPadOS 16, giving iPad owners the ability to multi-task with “floating windows” similar to how you use apps on the Mac. But it’s still a feature that we were surprised to see would also be available on the Mac.
All of your recently-opened apps will appear on the side, with a single app focused in the middle of the screen. From there, you can tap on different apps to replace them, or you can create stacks of apps to “create your ideal workspace”. These different windows can be rearranged and resized, making it simple and painless to multi-task.
Compatible Devices
Unlike iPadOS 16, there isn’t nearly as much controversy when it comes to compatibility for Stage Manager. Part of this is simply due to the differences in software between an iPad and a Mac. And as you can see from the list below, as long as your Mac is compatible with macOS Ventura, you can take advantage of the new multitasking features that Stage Manager has to offer.
iMac (2017 and later)
iMac Pro (2017)
MacBook Air (2018 and later)
MacBook Pro (2017 and later)
Mac Pro (2019 and later)
Mac Studio (2022 and later)
Mac mini (2018 and later)
MacBook (2017 and later)
How To Use Stage Manager On Mac
If you’re someone who regularly uses a Mac for work, or even if you just like to keep things organized, Stage Manager on Mac is going to be incredible. Let’s dive into how to use Stage Manager on Mac.
Enable Stage Manager
When it comes time for you to tinker around with, and start using Stage Manager, there are a couple of ways you can enable it. The easiest method is as follows:
In the top right corner of your Menu Bar, click the Control Center button.
Beneath Focus, click the Stage Manager button.
As soon as you click the button, you’ll see your desktop transformed into something truly unique. Whatever app you were “focused” on when you activated Stage Manager will move to the center of your screen. Meanwhile, all of the other apps and windows will be moved to the right side of the screen.
Because these apps were all opened separately (before Stage Manager was enabled), they won’t be grouped together. Instead, you’ll need to do that yourself. But before we get that far, here’s another method for enabling Stage Manager on the Mac:
Open the System Settings app.
In the sidebar, scroll down and click Desktop & Dock.
Under the Windows & Apps section, click the toggle next to Stage Manager.
The same transformation will occur, leaving the System Settings application as the only app opened on your screen. Everything else will be moved into the Recent Apps section on the left side of the display.
Turn off Recent Apps
When you enable Stage Manager on Mac for the first time, you’ll notice that all of your apps are moved into a multi-tasking view on the left side. This is known as the Recent Apps or Strip area of the interface. Similar to Mission Control, it gives you an overview of the different apps that are currently open, along with any app groups that you have have created.
The problem with having the Recent Apps area enabled is that it cuts down on the workable screen real estate on your Mac. But just like using Stage Manager on iPad, you can turn off Recent Apps. Here’s the “easy” way to turn off Recent Apps when using Stage Manager:
In the top right corner of your Menu Bar, click the Control Center button.
Beneath Focus, click the Stage Manager button.
Click Hide Recent Apps.
And here’s the other method to turn off Recent Apps for those who like diving into the System Settings app instead:
Open the System Settings app.
In the sidebar, scroll down and click Desktop & Dock.
Under the Windows & Apps section, click the Customize… button next to Stage Manager.
Click the toggle next to Strip to the Off position.
This doesn’t remove the ability to access your recently-used apps when Stage Manager is enabled. Instead, it will simply hide those recent apps, which can then be viewed when hovering your mouse cursor over the left side of the screen.
How To Group Apps
One of the biggest benefits of using Stage Manager on Mac is the ability to group multiple (specific) apps together. This makes it easy to have a set of apps dedicated for things like communication, or work, without needing to open each app separately.
Open the first app that you want to use.
Move the cursor to the left for Recent Apps.
Drag and drop the app onto the main screen.
And that’s it! You’ve created an app group using Stage Manager, and those apps will remain grouped together until you remove one (or both) of them. This also means that they will be accessible from Stage Manager’s Recent Apps menu. Something to make note of is that, unlike the iPad iteration, you won’t be able to just drag and drop an app icon to create a new group of apps. Instead, you’ll need to actually open the app, make sure the window is viewable, and then drag it onto the main screen.
Add An App To A Group
When it comes to adding an app to a group that you’ve already created in Stage Manager on Mac, it’s the same process as the steps outlined under the “group apps” section above. Just make sure that the app you want to add has a window open, and then drag the app window from the Recent Apps section, onto the screen with the other apps. And whenever you click the desktop, all of the apps/windows in the group will collapse into the Recent Apps menu.
Using Stage Manager with Spaces
Spaces is a feature that debuted alongside OS X Leopard all the way back in 2006. Since then, it has become a staple feature for multitaskers who want different workspaces when using different applications. For example, you could create a Space (or Desktop) with just your research applications, and another for when you want to just watch some YouTube and chat with your buddies.
Spaces also have the added benefit of being able to use the same app across multiple desktops. So you could theoretically have a Safari window with a bunch of tabs in the aforementioned research workspace, and another set for when you’re just browsing Reddit.
Stage Manager operates in a similar fashion, albeit in a different manner entirely. The premise is the same, as Apple is providing macOS Ventura users with different ways to essentially multitask. But one thing you’ll notice when trying to use Spaces and Stage Manager in tandem is that it doesn’t work the way you think.
It is possible to use Stage Manager with different Desktops courtesy of Spaces. But as all of your windows will appear on your “primary” desktop, it’ll take a bit of management to get things in order.
Creating a New Space
Swipe up with three or four fingers on your trackpad.
Click the Plus sign at the top right of your screen.
You can also use Control + Right Arrow to create a new Space.
Navigating Between Spaces
Swipe left or right with three or four fingers on your trackpad.
Use Control + Left/Right Arrow on your keyboard.
Assigning Apps to Specific Spaces
Right-click on the app’s icon in the Dock.
Hover over Options, then Assign To, and choose the desired Space.
Deleting a Space
Hover over the Space you want to delete.
Click the ‘X’ that appears in the top left corner of the Space thumbnail.
Combining Stage Manager and Spaces
Organize Your Spaces: Start by creating different Spaces for various tasks or projects. Assign specific apps to each Space to keep everything organized.
Utilize Stage Manager Within Each Space: Within each Space, activate Stage Manager when you need to focus on a single app. This will push all other windows to the side, allowing you to concentrate on the task at hand.
Switch Between Spaces as Needed: Use the navigation methods mentioned above to quickly switch between Spaces, each with its own Stage Manager setup if needed.
Consider Using Mission Control: Mission Control provides an overview of all your Spaces and allows you to manage them more easily. You can access Mission Control by swiping up with three or four fingers or pressing Control + Up Arrow.
Potential Challenges and Solutions
Managing Multiple Spaces: If you have many Spaces, it can become challenging to remember what’s in each one. Unfortunately, macOS doesn’t allow you to name Spaces, but you can use specific wallpapers or app arrangements to differentiate them.
Stage Manager Limitations: Stage Manager’s simplicity might be a limitation for some users who want more control over how their desktop is organized. In this case, Spaces offers more flexibility.
This will take you to the newly-created space, complete with all of the apps and windows that you added. But what you’ll also notice is that if you added windows from an App Group on Desktop 1, they will still be grouped on this new desktop. All of the other apps and windows will appear in the Recent Apps area on the left side, just as they were on Desktop 1. It may seem a bit convoluted, at first, but once you get the hang of it, this can really help supercharge your multitasking capabilities.
Stage Manager and Spaces are two powerful features in macOS that can be used in tandem to create a highly organized and efficient working environment. While Stage Manager offers a quick way to focus on a single app, Spaces allows for more detailed organization across multiple desktops.
By understanding the specific functionalities and potential challenges of both features, you can tailor them to your unique workflow needs. Whether you’re a multitasker juggling various projects or someone who prefers a minimalistic approach, combining Stage Manager and Spaces can enhance your productivity on macOS.
Can You Drag and Drop App Groups to a New Desktop Space?
Unfortunately, we didn’t find any possible way to drag and drop entire app groups between Spaces. On the bright side, if you remember which apps were grouped together and you drag those to a new space, they will continue to be grouped together. And when you close a Space, the grouping will remain even as everything gets “pushed” or transferred back to the original Desktop.
Considering the fact that on macOS Ventura, you can’t rearrange the windows in the Recent Apps area, we’re hoping this is just a bug. Apple is still working on fixing bugs and implementing features in a way that makes sense for the end user. The company only just released the first macOS Ventura Public Beta, so there’s plenty of time for all of the kinks to get worked out before the final version is released.
Andrew Myrick is a freelance writer based on the East Coast of the US. He enjoys everything to do with technology, including tablets, smartphones, and everything in between. Perhaps his favorite past-time is having a never-ending supply of different keyboards and gaming handhelds that end up collecting more dust than the consoles that are being emulated.
Thanks for the article!
Is there a way to keep an app’s window “static” in Stage Manager but allow other app’s windows to be swapped out like the Stage Manager’s normal operation? For example, I’m working in an Excel file and I have various references I need to use – more than I really want to keep in the same group. Is there a way to keep my Excel window onscreen as I switch through those other windows?
Appreciate your help!