When you first buy a Mac computer, you’ll notice a lot of pre-installed apps. And while you probably won’t use most of these, some go under the radar and are well worth trying. Keynote is one of them.
If you’re used to Microsoft Powerpoint or Google Slides on your Mac before, you might be reluctant to try Keynote. But don’t worry; the app is pretty straightforward to use. On top of that, you will find several cool features to enjoy.
In this article, you’ll learn everything you need to know about using Keynote on Mac.
Keynote is Apple’s answer to Microsoft PowerPoint. The Silicon Valley giant released the app in January 2003; since then, it has become an important part of the iWork ecosystem. While the app remained native to Mac devices for the first seven years, Apple rolled it out to iPad devices in 2010.
With Keynote, you can create presentations for multiple scenarios – including college projects and important work announcements. The app is free to use; all you need is an Apple ID and a supporting device.
In addition to Mac and iPad, you can use Keynote on your iPhone and Apple Watch. You can sync your presentations across all of your devices, too – allowing you to continue working wherever you are.
How to Choose a Size for Your Keynote Presentation
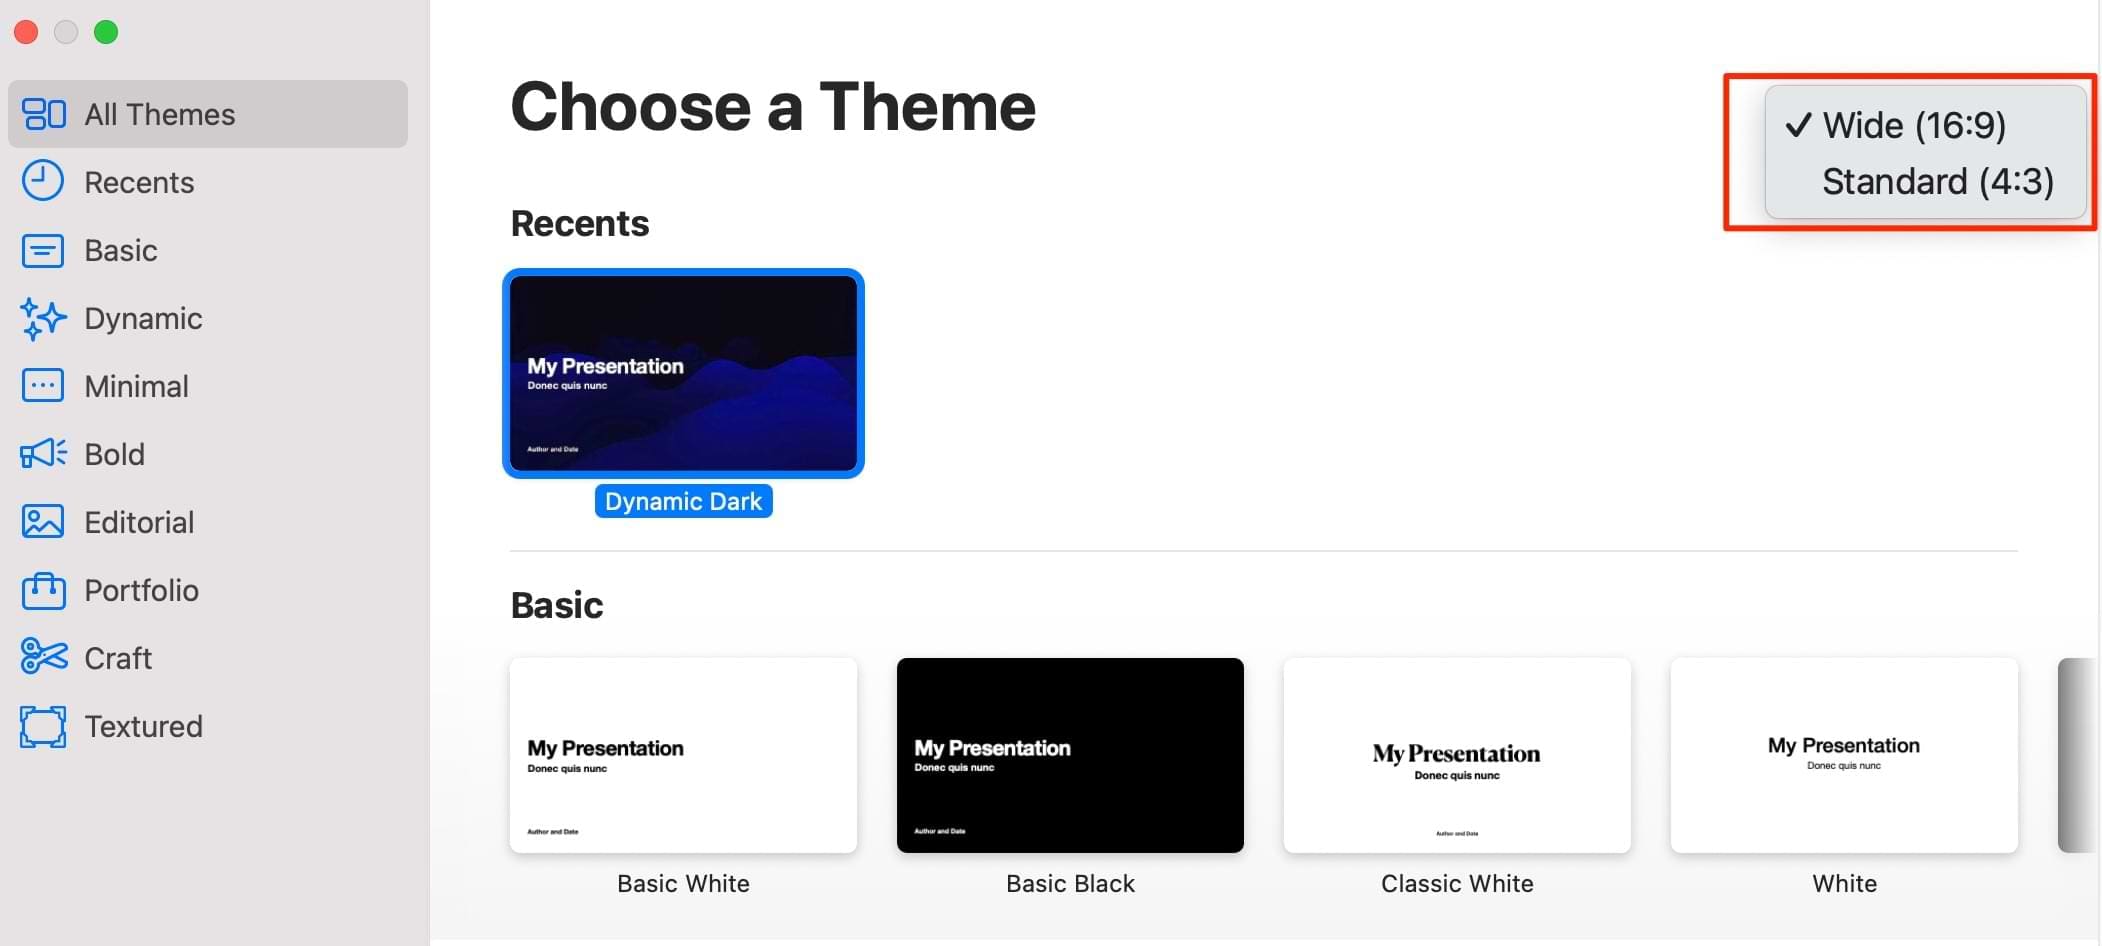
Before you create a presentation with Keynote on your Mac, you’ll need to choose a size. The app gives you two options: Wide (16:9) and Standard (4:3). To choose the right size for your needs, follow the instructions below.
On the New Document page, go to the top right-hand corner. There, you’ll see a dropdown menu.
Pick your preferred option. The slide templates will automatically resize based on your choice.
How to Choose a Template for Your Presentation
Once you’ve picked the preferred size for your Keynote presentation, you’re ready to choose a template to create your presentation on. After selecting New Document, you’ll find yourself on the Choose a Theme page.
As you scroll down, you’ll see a broad range of themes. The ones closer to the top focus more on block colors, while the others include more imagery. In the toolbar on the left, you’ll see each of them broken down into several categories.
When you’ve chosen the template that fits your presentation best, select it and hit the Create button in the bottom right.
What Customization Options Does Keynote Have?
Having read the previous sections, you’re now ready to begin customizing your presentation. Below are some of the main ways that you can tweak your Keynote document from your Mac.
Adding Charts and Tables
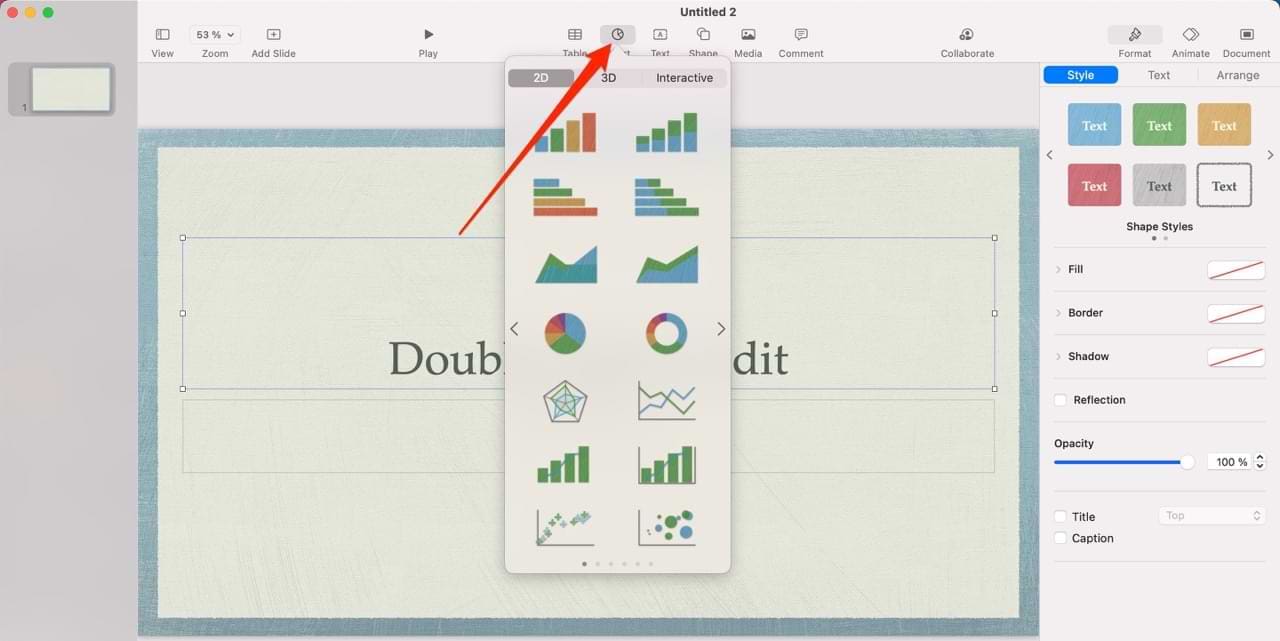
Charts and tables are excellent choices if you want to break down complex numbers. In the Keynote app, you can add multiple charts – including pie charts and bar graphs. You can add various 2D charts, and the app also has the option to include 3D and interactive graphics.
When customizing your charts, you can choose from several values – including percentages and currencies. To add charts to your Keynote presentation, go to Chart at the top of your screen and tweak everything as you feel is necessary from there.
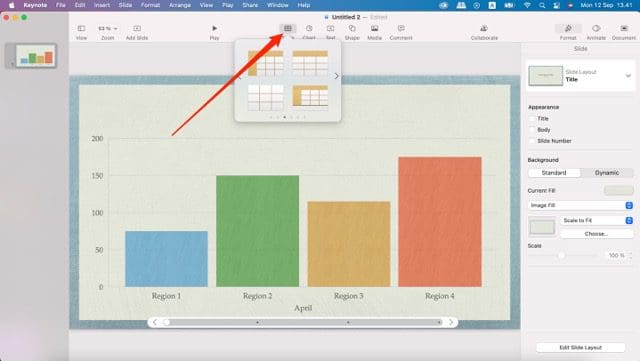
As for tables, you can choose how many rows and columns you want to include in your presentation. On top of that, you can change their colors and tweak the fonts – plus more.
To add tables to your presentation, go to the Tables tab. From there, scroll through until you find your preferred choice.
Including Media in Your Presentation
When delivering a presentation, you want to ensure that you keep your audience engaged throughout. One of the best ways to do that is by adding visuals, such as images, videos, and infographics. Adding media to a presentation on Keynote is pretty simple.
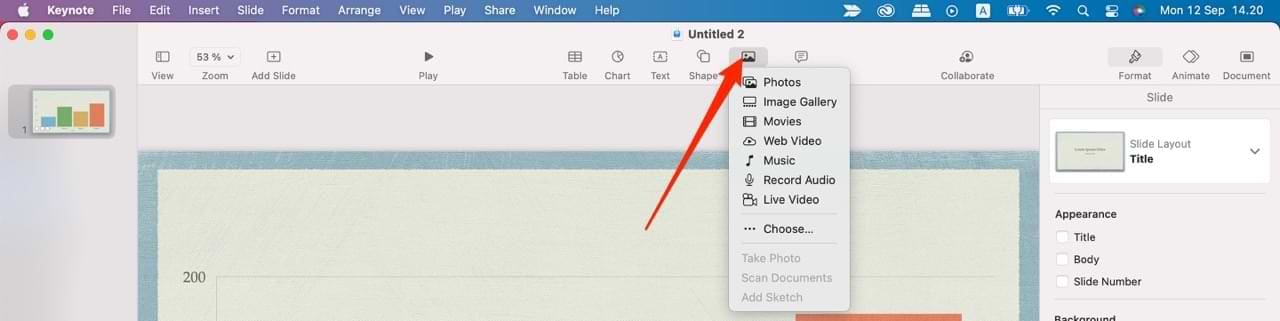
On the Keynote app for Mac, you can add multiple kinds of media. For example, you can include both single images and photo galleries. Moreover, you can add music, movies, and live video. You also have an option to record audio.
To add media to your Keynote presentation, go to the Media icon. There, you can choose the exact content you want to include.
Collaborating With Others
Many presentations require other people to either work on or see them and having options that make it easy to share them is crucial. Keynote has a wide selection of tools you can use to share your work with others when needed.
Within the Keynote app for Mac, you can choose to Airdrop your presentation to another nearby Apple device. Moreover, you can copy the link for your content and share that with collaborators as and when is necessary.
You can also share your Keynote presentation via Mail or Messages. Go to the Collaborate icon before choosing your preferred sharing method. In the same window, you can change access and editing permissions. Click Share once you’re done.
Animations
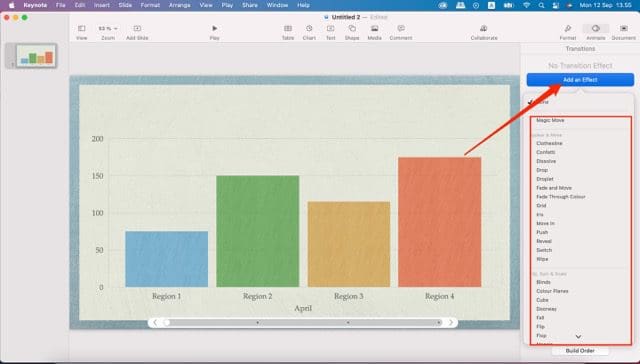
If you want to make your Keynote presentation more interesting, you can add animations to your slides. You can pick from several options, including fading and confetti. To get to these, you’ll need to first select the Animate tab in the top right. Once you’ve done that, hit the Add an Effect button.
From the dropdown menu, choose the effect you want to add. If you want to see what it looks like before officially putting it on your slide, hover over the animation effect and select Preview.
Adding New Slides
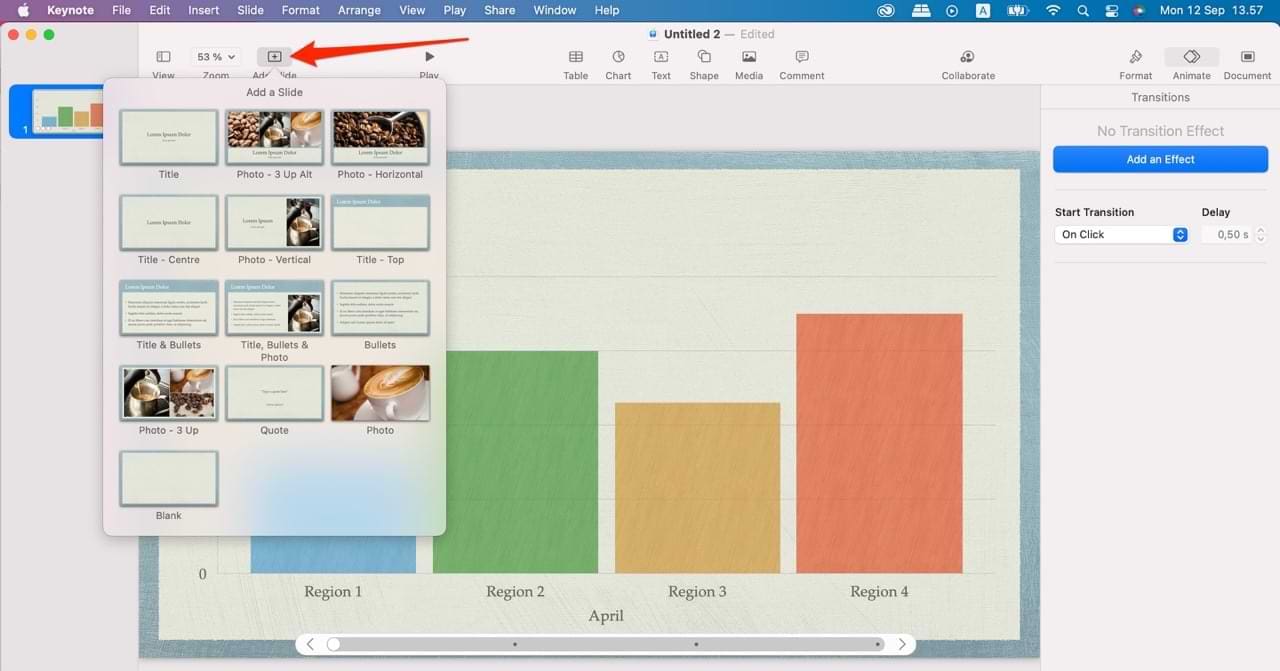
If you need to go in-depth on a topic, you’ll probably need to explain what you’re talking about over several slides. Adding new slides in Keynote is simple; go to the Add Note icon in the top left-hand corner of your presentation.
When the menu expands, pick the type of slide you’d like to add.
How to Export Your Keynote Presentation
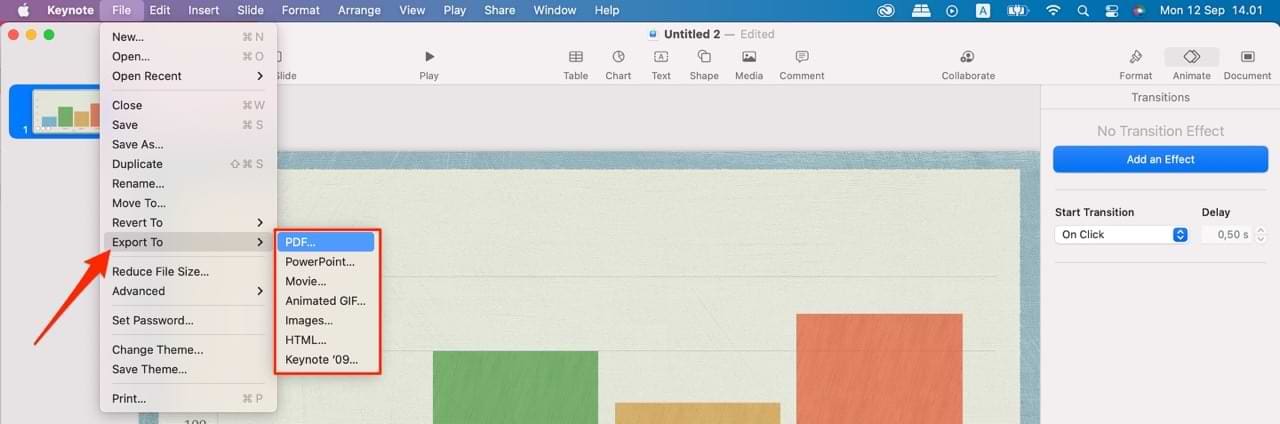
Once you’ve finished customizing everything in your Keynote presentation, you might want to export it elsewhere. The app gives you several choices in this respect, including the option to create a PDF file.
To export your completed Keynote presentation, Go to File > Export To. Choose your preferred exporting format, and you’re good to go.
Keynote Is Well Worth Trying Next Time You Have to Create a Presentation
Keynote is an excellent tool for creating presentations on your Mac. It’s user-friendly and free, and you’ll find most of the tools you need to make something that’ll wow your audience. If you haven’t already tried using Keynote, it’s well worth doing so next time you have a presentation to make.
Regardless of whether you’re a student or in a professional role, you’ll find plenty of use from the Keynote app for Mac. And if you need to edit on the go, you can do so from your iPhone and iPad with minimal issues.
Danny has been a professional writer since graduating from university in 2016, but he’s been writing online for over a decade. He has been intrigued by Apple products ever since getting an iPod Shuffle in 2008 and particularly enjoys writing about iPhones and iPads. Danny prides himself on making complex topics easy to understand. In his spare time, he’s a keen photographer.


Write a Comment