When working or learning remotely, you may need to periodically scan homework or documents to your classmates, teachers, colleagues, or bosses. Or, you may find yourself needing to manually sign and add your signature to official documents. The good news is that you don’t need a scanner! Apple offers a few ways to scan almost anything using just your iPhone, iPad, or iPod touch and a few of the native iOS or iPadOS apps.
This article focuses on just how to scan any documents or homework on your iPhone, iPad, or iPod touch using the Notes app or the Files app. And it’s pretty straightforward!
With more and more people working or learning from home often with children taking classes from home, you may run into some new problems. These range from getting your desk set up properly to be more efficient while making sure the children have access to everything that is needed.
One instance that may arise is the need to scan your homework or documents and share them with a classmate, teacher, co-worker, boss, or others. Instead of needing to download a third-party app, Apple turned both the Notes and Files app into productivity powerhouse applications where you can do just about everything you need.
Use the Notes app to scan your homework or documents
Although the Notes app has this document scanning feature, you may not know where exactly how or where to find it. Apple has updated the interface of the Notes app itself to give the users easier access.
Here’s how you can use the Notes app to scan homework or documents.
Open the Notes app on your iPhone or iPad.
Tap the New Note (+) button.
On the toolbar above the keyboard, tap the Camera icon.
Select Scan Documents
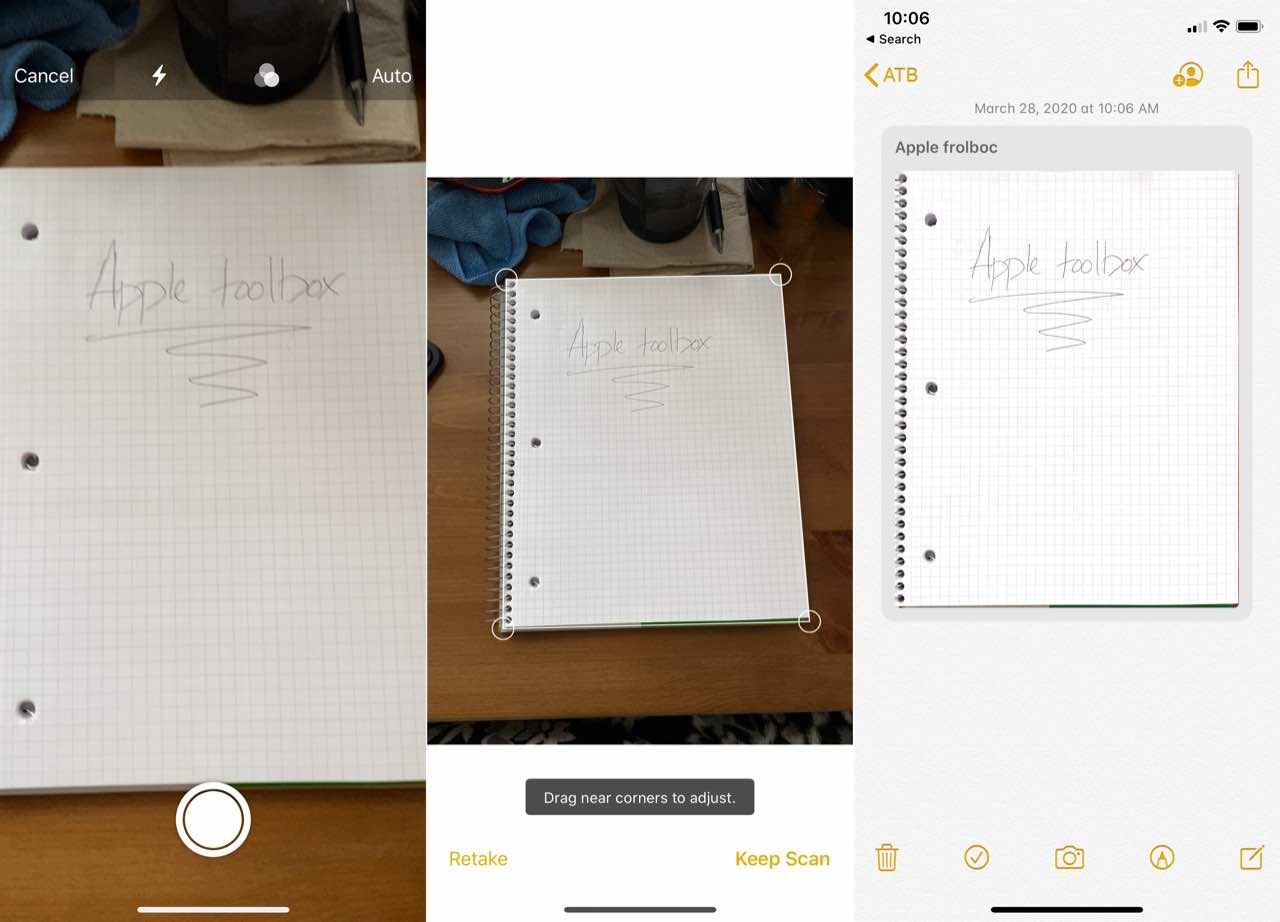
From here, you’ll need to line up the document as best as you can, and then tap the shutter button in the camera view. This will snap a quick picture of the document, and then you are given a few options.
The Notes app actually makes it possible for you to adjust the frame of the scan, so you don’t have a bunch of extra stuff in the background. Then at the bottom, there are options to Retake or Keep Scan.
If you keep the scan, it’s moved to the bottom left corner, and the camera view reappears in the event that you have multiple scans to make. Once all the pictures have been taken, tap the Save button in the bottom right-hand corner. This adds the scan to the newly-created note and you can then add any other text, charts, or checklists to the Note itself.
Use the Files app to scan your homework or documents
The Files app is also extremely useful and powerful, and you can also scan documents and more directly from the app.
Here’s how you can use the Files app to scan homework or documents.
Open the Files app on your iPhone or iPad.
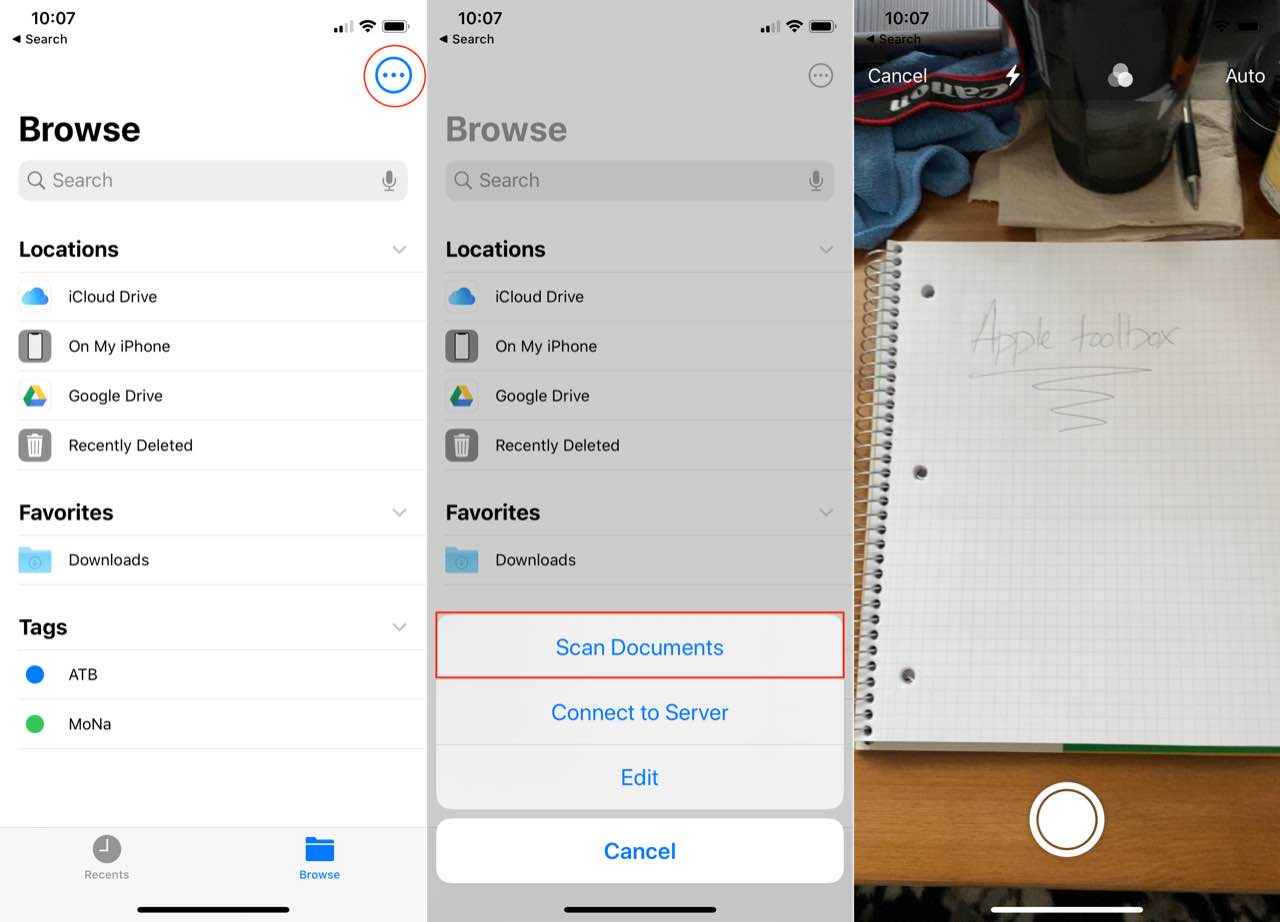
From the Browse screen, tap the icon in the top right-hand corner (circle with three dots).
Tap Scan Documents from the menu that appears.
When the viewfinder appears, line the document up and then tap the Shutter button at the bottom.
The scanning editor will then appear, giving you the ability to better lineup the edges of the scan.
After tapping Done, you can continue to scan more documents, or just tap the Save button to save the scan.
Once you have scanned the document in the Files app, you will be asked to select the folder that you wish for it to be saved to. Simply go through the file manager, find the right folder (or create a new one), and tap Save in the upper right-hand corner.
The biggest benefit to this is being able to not only save it to your iCloud Drive instead of just inside of a note.
But if you have already logged into third-party cloud storage solutions like Google Drive or OneDrive, then you can choose folders in those services to save the scanned documents.
In the event that you are sharing this with your teacher or business associate, being able to choose a shared folder is extremely convenient.
There are also some great third-party scanning apps on the App Store
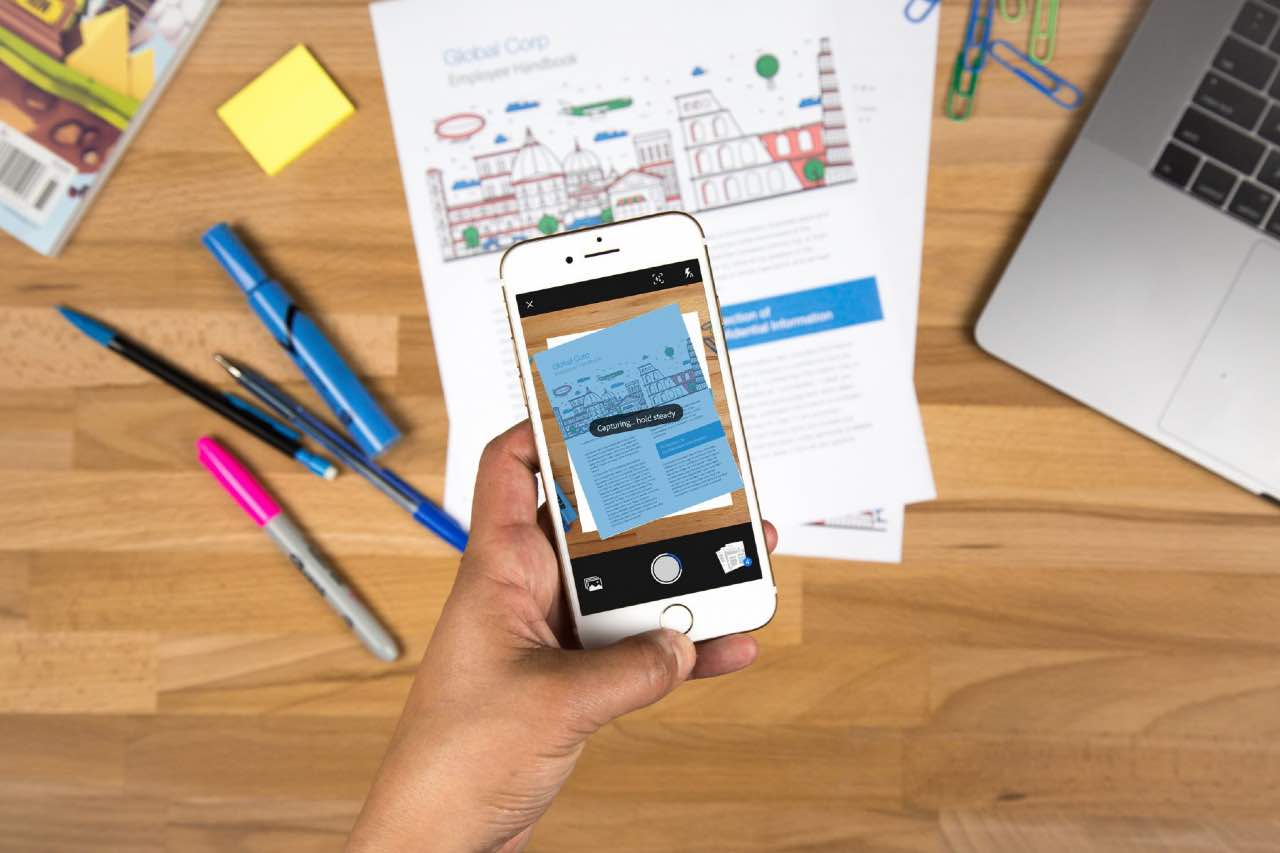
Courtesy of Adobe
Although using the Notes and Files app is great, enough can’t be said for the App Store. There is a slew of applications available that can help you scan documents. Some of these may even be quicker than using Apple’s solution.
Adobe Scan (Free w/ in-app purchases) – Adobe Scan allows you to scan anything and turn it into a PDF instantly. But the app takes advantage of “Advanced Image Technology” to detect borders, sharpen the image, and recognize text. Once scanned, Scan lets you search the content if you need to find something specific.
Office Lens (Free) – Instead of automatically determining what you are scanning, Office Lens offers options at the bottom of its scanner. These options include the ability to scan a Whiteboard, Business Card, Document, or just take a photo. And then the scan can be saved to OneDrive or your other favorite Cloud Storage solution.
Evernote Scannable (Free) – The benefit of Evernote Scannable is its integration with Evernote. Scan a document, and export it directly into Evernote, or send it to colleagues or your teacher via email or text. And Scannable will automatically crop anything you scan, so that you aren’t left with extra space behind documents.
Scanbot (Free w/ in-app purchases) – Scanbot may one of the more popular options on the App Store thanks to its versatility. You’ll get the standard document/PDF scanning features, but you can use Scanbot to send the document via Fax and more. The app even recognizes QR codes and offers password protection for your PDFs.
Wrapping it up
As a quick note, you’ll see a few controls at the top of the viewfinder when you are scanning. This toolbar gives you the ability to turn flash on or off, adjust the color of the scan, and Auto. If your phone is set to Auto, then your iPhone will automatically scan the document as soon as it’s recognized. But if this is something you would rather not have, just tap the Auto button and it will switch to Manual.
The best part about all of this is that it works with either the iPhone or the iPad. So you are not limited to what device you use to scan these and send them off.
Drop us a line
Let us know how you manage to share your homework or work with your classmates, teachers, and colleagues.
If you have any questions, let us know in the comments below and we’ll be sure to help out!
Andrew Myrick is a freelance writer based on the East Coast of the US. He enjoys everything to do with technology, including tablets, smartphones, and everything in between. Perhaps his favorite past-time is having a never-ending supply of different keyboards and gaming handhelds that end up collecting more dust than the consoles that are being emulated.


Write a Comment