There are different features your iPad has to offer to help the elderly and impaired. For example, it can make app buttons bigger and easier to use. You can also make the text bigger to make it easier to read. In this guide, you’ll see what Accessibility offers to help the elderly and impaired easily use their iPads. Discover what the iPad accessibility features have to offer.
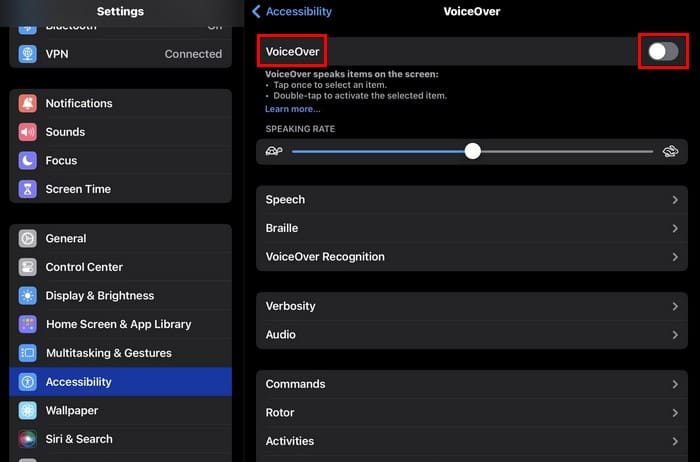
One of many iPad accessibility features is VoiceOver. You can enable it by going to Settings > Accessibility > VoiceOver; your iPad can read what’s on your screen for you. Tap once to choose what you want to read, and tap twice to select the option. But you can also use Siri to turn on VoiceOver. Say,” Siri, turn on VoiceOver.” You’ll see the VoiceOver option on your display for a few seconds, so if you change your mind and want to turn it off, you can use the onscreen option. You can customize the VoiceOver option using the slider to adjust the speaking rate. There are other options to choose from, such as:
Speech – You can change the voice, pronunciations, voice pitch, pitch change, add a new language, and change the pitch.
Braille – You can launch apps with your braille device.
VoiceOver Recognition – With this option, your iPad can describe images in apps and on the web, automatically make apps more accessible by recognizing items on the screen, and communicate descriptions of text found in images.
Verbosity
Audio
Commands
Rotor
Activities
Typing
Quick Settings
Navigation Style
Navigation Images
Large Cursor
Caption Panel
Caption Panel
Double-tap Timeout
Get a Better View of Things With the Zoom Feature
To start using this feature, toggle the option on at the top after going to Settings > Accessibility > Zoom. You’ll need to double-tap three fingers to zoom and move around the screen. You have different options you can customize, such as:
Follow Focus
Smart Typing
Zoom Filter
Keyboard Shortcuts
Zoom Controller
Zoom Region
Show while mirroring (Controls whether zoom appears while sharing your screen and during screen recordings).
At the bottom, you’ll see the slider you can use to adjust the maximum zoom level.
Display Large Text on a Separate Window With Hover Text
Hover Text is a great feature to help you view text that would otherwise be too small to read. Thanks to this feature, you can move a pointer on your screen, such as text, and in a separate window, see the enlarged text. You will need a pointing device, such as a trackpad or mouse, to use this feature.
In Settings > Accessibility > Hover Text, you can make all sorts of changes to the feature, such as changing the
Display Mode
Scrolling Speed
Font
Size
Text Color
Insertion Point Color
Background Color
Border Color
Activation Modifier
Activation Lock
Increase Display and Text
With Display and Text Size, you can make text easier to read by adjusting various options. For example, you can make text bold, add button shape labels, increase the text size in Larger Text, and use the slider.
Other helpful options include:
Reduce Transparency
Increase Contrast
Differentiate Without Color
Prefer Horizontal Text
Smart Invert
Classic Invert
Color Filters
Reduce White Point
Auto-Brightness
Turn Off Effects With Motion
Some text has too much animation or effects, but with Motion, you have various options to adjust. You can change options such as:
Reduce Motion
Auto-Play Message Effects
Auto-Play Animated Images
Dim Flashing Lights
Auto-Play Video Previews
Have Siri Read the Text for Your in Spoken Content
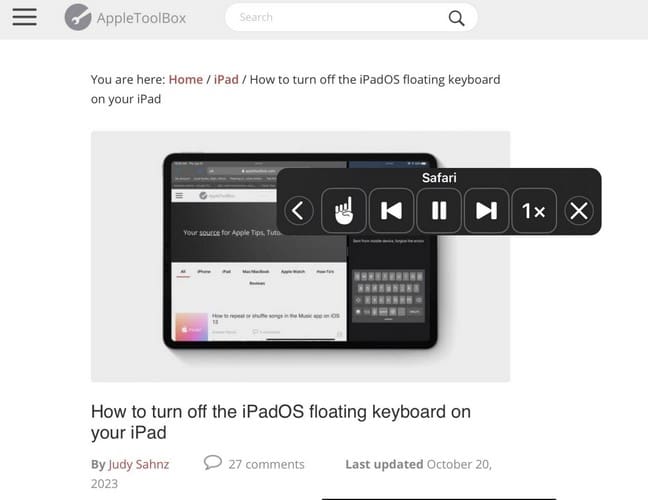
Spoken Content is the option if you need help and want Siri to read what’s on your screen. In this section, you’ll find an option that, by swiping two fingers from the top of your screen, you can have Siri read what’s on your display. You’ll even have audio control to pause or stop the audio. Tap the finger button and tap on the text you want Siri to read.
Other useful options include:
Speak Selection
Speech Controller
Highlight Content (as it is spoken)
Typing Feedback
Voices
Default Language
Detect Languages
Speaking Rate Slider
Pronunciations
When available, you’ll also see an Audio Descriptions option to play audio descriptions.
More Accessibility Options in the Physical and Motor
In this section, you’ll have six options to help you use your iPad. You’ll have access to options such as:
Touch – In this section, you can access options such as Assistive Touch, Haptic Touch, Touch Accommodations, Tap to Wake, Shake to Undo, Prevent Lock to End Call, and Call Audio Routing.
Switch Control – With Switch Control, you can use your iPad by highlighting items that can be turned on using an adaptive accessory. In this section, you’ll also find various options to adjust to customize it, such as changing the scanning style and adjusting the sound effects.
Voice Control – It lets you control your device, even on a call. You’ll also see options you can adjust, such as Language, Vocabulary, Overlay, Play Sound, and Show Confirmation, among other options. You can tell your iPad what to do without having to use Siri.
Top Button/Touch ID – You can change what the top button does, such as turning on Siri or having it do nothing. You can also adjust the Click speed and turn on/off the option to rest your finger on the Touch ID to open your iPad.
Apple TV Remote – Use buttons on the iPad Apple TV Remote instead of using swipe gestures.
Keyboards – Use an external keyboard with your iPad.
Hearing Accessibility Options
Those with hearing problems will find the following helpful section. In the Hearing Devices section, you’ll find Pair Made for iPhone aids and sound processors. All paired devices will be listed, but you must pair them as Bluetooth devices.
Sound Recognition – With this feature, your iPad will always listen for specific sounds. You’ll also be notified when sounds may be recognized.
Audio and Visual – In this section, you can do things such as customize the audio for supported Apple and Beats headphones. You can also add some relaxing background, such as rain and ocean sounds (among others). You’ll also see sliders to adjust the volume for volume with media and the soothing background sound you choose. Toggle on the last option to stop sounds when you lock your iPad.
Subtitles and Captioning – This is an excellent option for the deaf and hard of hearing since you can turn on subtitles or closed captioning whenever the feature is available. You can also change the style of how they will look and even create your personal. There will also be an option to show Audio Transcriptions.
Live Captions – With this option, your iPad will display captions across apps. Choose the appearance option to give it some style, and if you want in-app live captions, there will be an option to toggle on that option as well.
Hearing Control Center – You can remove or reorganize the included control in this area.
Speech Section in Accessibility
Live Speech: – This iPad accessibility feature feature lets you type and then have your words spoken. You can use it in FaceTime calls and assistive communication apps. Toggle on the Live Speech option and triple-tap the power button to activate it. You can create favorite phrases and change voices; there is a long list of voices to choose from.
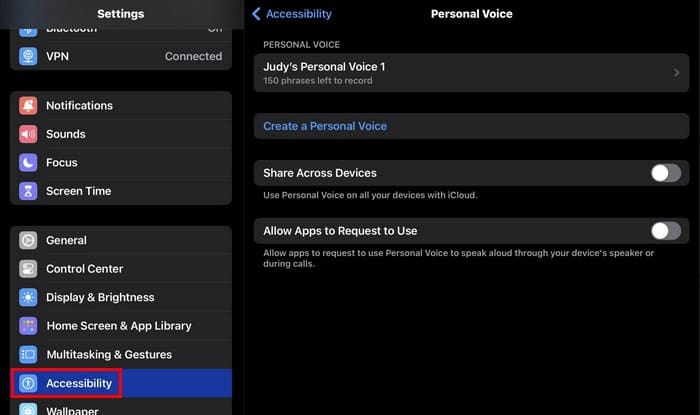
A new feature you’re going to find in Accessibility is called Personal Voice. You can access this new feature via Settings > Accessibility > Personal Voice. With this feature, you can record 150 phrases you can use on different occasions, for example, if you are losing your voice. This way, you can communicate with others without having to speak.
Once you’ve created your Personal Voice, you can access them by entering your passcode. You’ll see options to Continue Recording, Export Voice Recording, and Delete Voice. There will also be options to Share Across Devices and Allow Apps to Request to Use.
Live Speech and Personal Voice work together to speak without using your regular voice and use what you type to talk to others.
General Accessibility Options for iPad Accessibility Features
Guided Access – With this feature, you can limit the use of the iPad to a single app. Not until you end the session will another app be accessible. You can turn off specific areas of the app you authorize so that whoever uses the iPad can’t use those options. You’ll need to create a passcode, and you can also set time limits. If you want to create an Accessibility Shortcut and set a time when your iPad will lock automatically, there will also be an option.
Assistive Access: This feature will make the apps you include bigger so that they are easier to see. You can customize settings by tapping Manage Apps and deciding what app you want to have when it’s enabled.
There will also be options to:
Change wallpaper
Allow Volume Buttons
Show Time on Lock Screen
Show Battery Level on Home Screen
Show Notification Badges
Allow Siri
Passcode Settings
Siri – If you allow Siri, you can customize it by changing things such as speaking rate and other listed options.
Accessibility Shortcut – In this section, you can select the options you want to see when you triple-tap the power button to access the Accessibility Shortcuts.
As you can see, your iPad has much to offer to make it easier for the elderly and impaired. But since no device is perfect, here is a guide on how you can fix your iPad problems if they should ever occur. These iPad accessibility features are a must to make using the iPad easier.
Conclusion
Thanks to Accessibility, the elderly and impaired can enjoy their device. You can make the app icons bigger and tell your iPad what to do so you don’t have to do it. There is always room for improvement. What features would you like to add to Accessibility? Share your thoughts in the comments below, and remember to share the article with others on social media.
I am a tech geek who loves technology. I have been writing about tech for over a decade, covering various devices and programs. I write about the latest Apple products and services and never go far without my Apple devices. I always stay updated on the latest gadgets, upgrades, features, and news. I aim to make complicated tech information easy for everyone to read. I’ve been with TechniPages from the beginning to help others fix their tech issues with the easy-to-follow guides.


")
Can telephone conversations be close captioned?
Hi, thanks for the useful info