Whether you are an experienced photographer or just someone who wants a good camera for those special moments, the iPhone 11 Pro is perfect. With three different lenses on the back, this should give you the ability to take any type of photo you would want.
And that’s just the hardware. On the software side, we now have a proper “Night Mode”. Plus, Apple has improved the image processing and even lets you record with more than one camera at a time. But what are you supposed to do if your iPhone’s camera is acting up?
This is not a problem specific to the iPhone 11 Pro, although it has become more prevalent. The Apple Support Forums have continued to see cases of users experiencing issues with their cameras. Sometimes, the camera is simply just blurry (which is an easy fix), or the camera is completely blacked out through the viewfinder.
There are some instances where users have found that just a portion of the camera is blurry, while the rest is perfectly fine. While all of these instances can be annoying, you shouldn’t assume that there’s a hardware issue right off the bat.
How to fix my iPhone 11 Pro Camera
The Camera app has been given an overhaul alongside other more minor camera updates.
Thanks to the iPhone community, you are not out of luck and don’t have to go straight to your Apple Store. We’ve found a few different methods to try and get your iPhone working again.
Make sure you are using the right lens
The first step that you want to take if you are experiencing blurriness with your photos is checking which lens you are using. There’s a lens for every moment, and you don’t want to be using the wrong one. Here’s a breakdown of what each lens can be used for:
The telephoto lens (52mm) lens is designed for portrait and macro photography (read-as: close-up).
The wide-angle lens (25mm) is usually used for architectural, interior, and landscape subjects.
The ultra-wide-angle lens (3mm) is designed to capture a scene that highlights its subject to appear larger than its background.
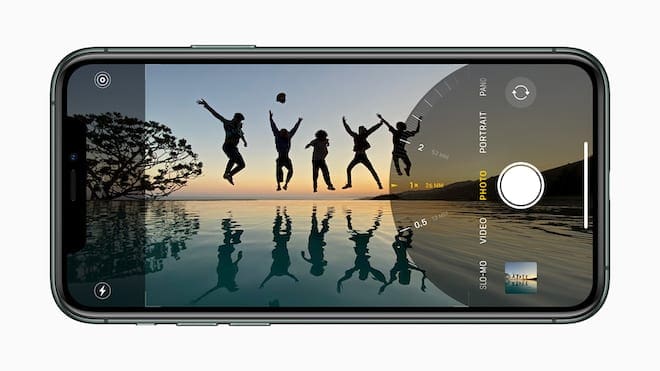
In order to switch between the three, follow these steps:
Open the Camera app.
Make sure you are on Photo in the app.
At the bottom of the viewfinder, there three options: .5x, 1x, and 2x.
The .5x option is your ultrawide angle lens, the 1x is your standard wide-angle lens, and the 2x is your 52mm telephoto lens. Tapping the number will switch between the lenses and you will notice a difference in the viewfinder.
Clean the lens
So one of the biggest issues that folks come across when taking pictures is that their lenses are dirty. Taking your phone in and out of a pocket or a purse will very likely result in you putting your fingers on the camera module at some point in time.
So, if you find that you have some blurriness, try taking a microfiber cloth and wiping it off. You don’t have to use one of the bigger microfiber cloths, but even something like a wipe for your glasses will do the trick.
Remove your case
Over the course of time, your case tends to get worn out and won’t fit or feel the same way that it did when you first got it. This can cause some issues if the portion around the camera gets loose and ends up partially covering one of the lenses.
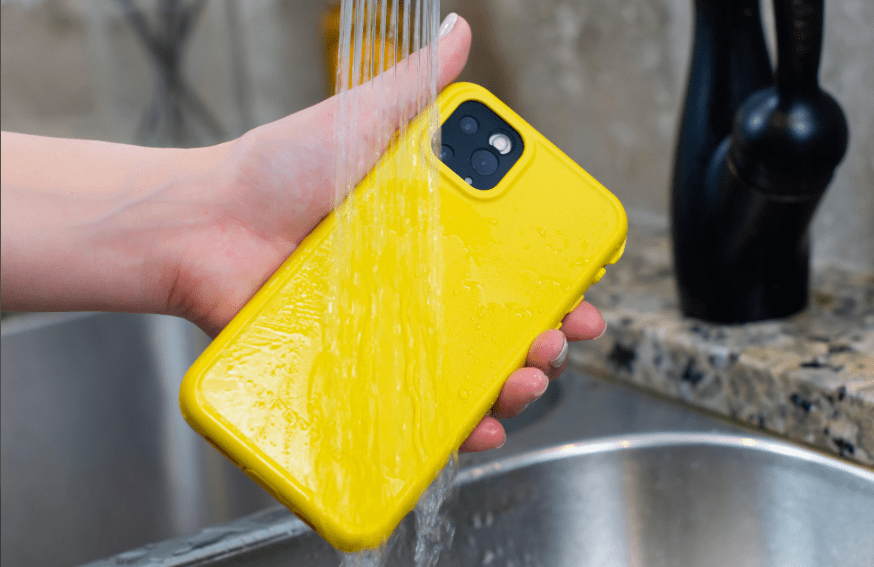
Another potential issue is for those that use waterproof cases like the LifeProof FRE. These cases are designed to protect your iPhone from all of the elements, but there is still a piece of plastic over the lenses. This can cause distortion and will make your pictures less than stellar.
In an effort to cross-off all the potential issues, trying taking your iPhone out of the case and take the picture again. If that was the issue, it might be time for a new case.
Force close your apps
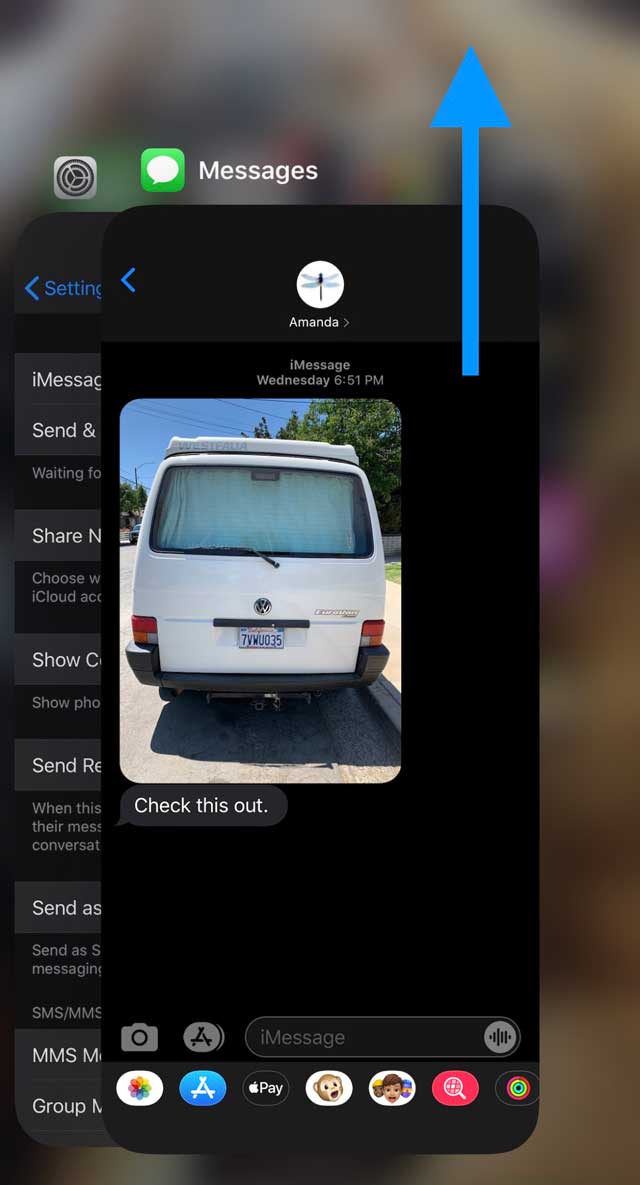
Another common remedy for any application that is not acting properly is to close it. But in this case, you don’t want to just close the Camera app. Instead, you’ll want to close all of your open applications before trying to take the picture again.
Unlock your iPhone.
Swipe up from the bottom and pause momentarily to bring up multi-tasking.
Swipe up on each app preview to close all of your open apps.
Go back to the Home Screen by tapping the display.
Open the Camera app.
Check for a Software Update
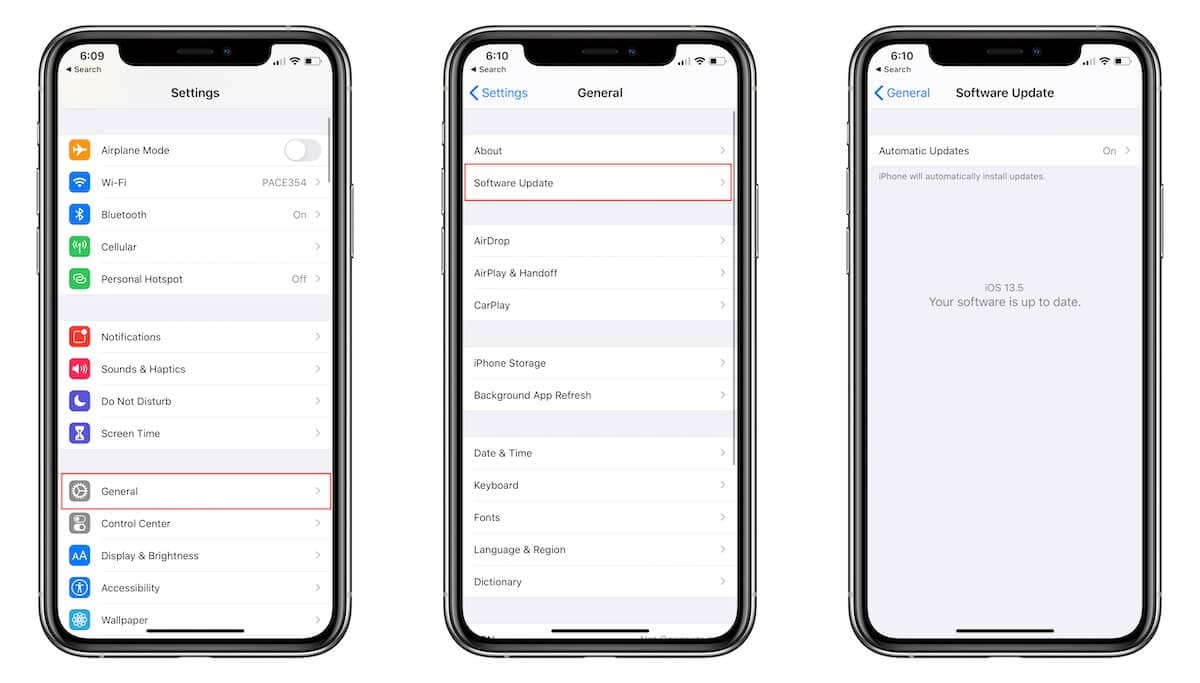
When it comes to diving into more troubleshooting, one useful step is to double-check and make sure that your software is up to date. This is especially true as of late, as Apple has been releasing some “point” updates at a more frequent pace. Here’s how to check your software:
Open the Settings app on your iPhone.
Tap General.
Select Software Update.
Another reason for this is if you happen to be on the iOS beta cycle, as releases are coming even more frequently than the stable releases. So it’s important to make sure that your iPhone is up to date, as there could be some bugs causing your iPhone 11 Pro to overheat.
Clear the cache
Sometimes apps that take up a lot of space or haven’t been used in quite a while can cause your iPhone to act up. That’s when you’ll want to head into your storage options on your iPhone and get things cleared up.
Open the Settings app on your iPhone.
Tap General.
Tap iPhone Storage.
From here, you will want to locate apps that are using a lot of storage as those could pose potential issues. For instance, the Podcasts app is using almost 4GB of storage, while not having been opened for more than a month. One other trick is to enable Offload Unused Apps, as this is a great way to save on storage while keeping the data from that application stored.
Restart your iPhone
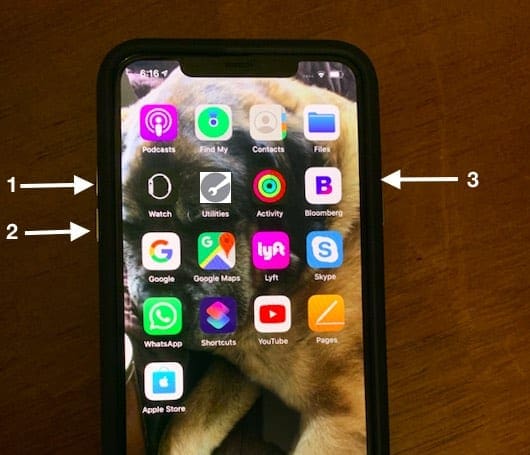
Three easy steps to force restart your iPhone 11 Pro
Speaking of restarting your phone, you can go ahead and power your phone down like normal, but that may not always do the trick. That’s where a “force restart” comes in handy, which essentially shut your phone down, just like hitting the power button on your computer.
Press and release the Volume Up button.
Press and release the Volume Down button.
Then, press and hold the Side Button until the Apple logo appears.
Release the Side button after the logo appears.
Factory Reset
So you’ve exhausted all of the other options and are just at your wits end with your iPhone 11 Pro camera blurry or having a black screen. The next to last step you’ll want to try is to wipe your iPhone completely clean and start anew.
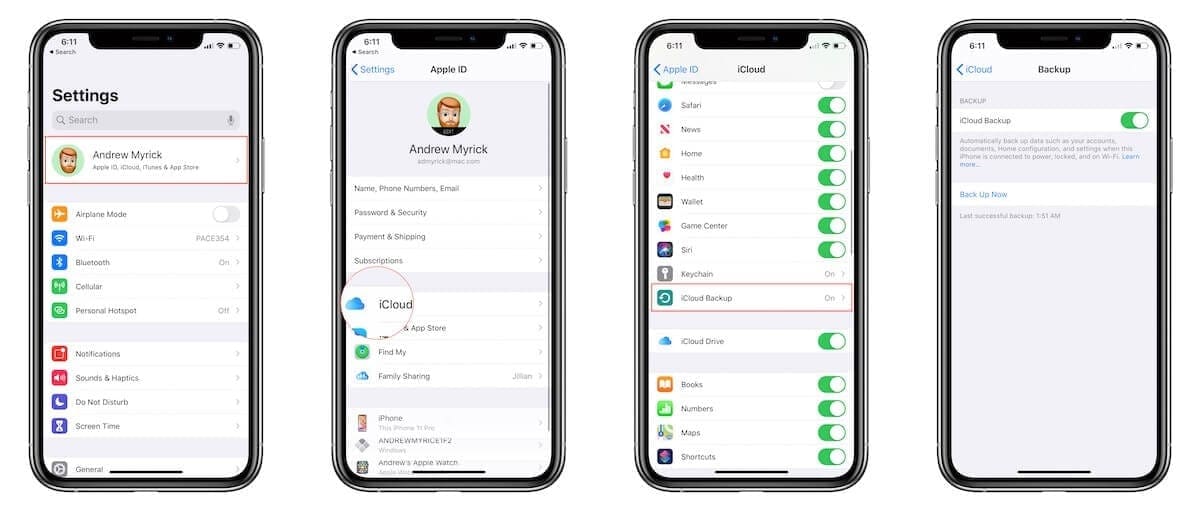
Before just wiping everything, make sure that you have an iCloud backup saved, so that you can restore pertinent pieces of information. Here’s how to backup your iPhone to iCloud:
Open the Settings app on your iPhone.
Tap your name at the top of the page.
Select iCloud.
Scroll down under Apps using iCloud, and select iCloud Backup.
Tap Back Up Now.
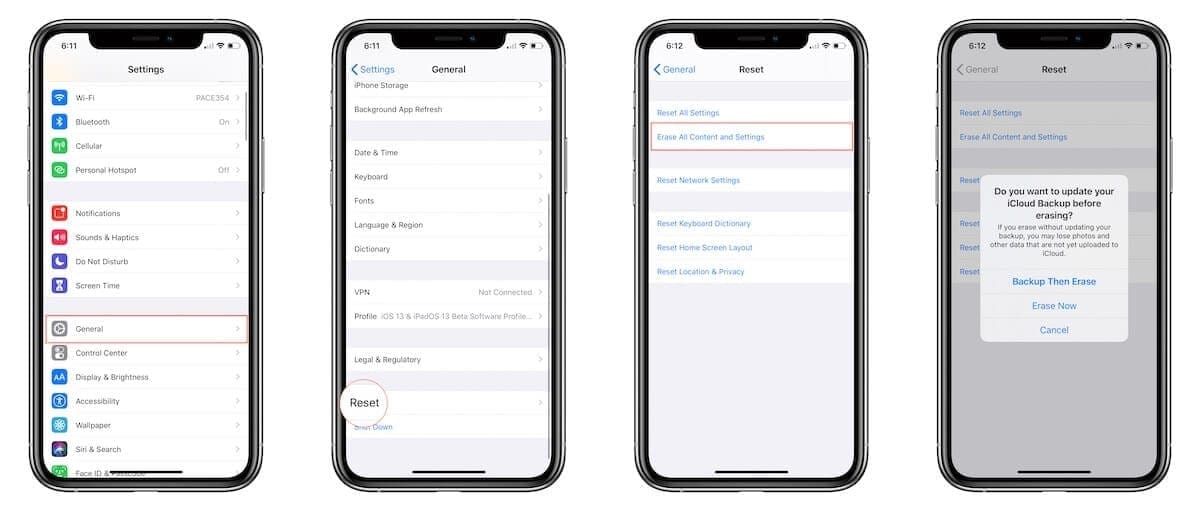
This may take a few moments before the fresh backup of your iPhone is completed. Once it’s finished, proceed with resetting your iPhone to its Factory Settings.
Open the Settings app on your iPhone.
Tap General.
Scroll down and select Reset.
Tap Erase All Content and Settings.
Enter your passcode or Apple ID password, when prompted.
Wait
After your iPhone has wiped itself clean, you will need to go through the setup process again. If you want, you will have the option to restore the recently-created iCloud backup, which will put everything back on your iPhone 11 Pro.
Andrew Myrick is a freelance writer based on the East Coast of the US. He enjoys everything to do with technology, including tablets, smartphones, and everything in between. Perhaps his favorite past-time is having a never-ending supply of different keyboards and gaming handhelds that end up collecting more dust than the consoles that are being emulated.


Write a Comment