When it comes to Apple Pay, the iPhone and Apple Watch get most of the attention. But Apple’s proprietary payment platform is also supported on the Mac. Once it’s set up, it makes checking out when shopping online extremely easy and secure — so it’s worth checking out. Here’s what you need to know about Apple Pay on the Mac.
Related Articles:
- Manage Apple Pay Subscriptions, How-To
- Is Apple Pay Really Safe? What you need to know
- Apple Pay Cash: Answers To 10 Commonly Asked Questions (Q&A)
- No None Option When Setting Up Apple ID Payment?
Contents
How Apple Pay on Mac works
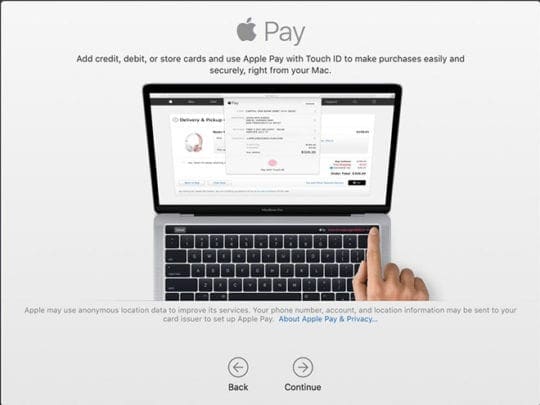
At first, Apple Pay on a computer may seem like a counterintuitive idea. For the most part, Apple Pay is a mobile system that’s great for purchases on the go.
But on Apple’s Mac devices, Apple Pay can actually speed up the checkout process at dozens of participating websites. If a retailer or site supports Apple Pay, you can buy your items with a single touch on your Mac, iPhone or Apple Watch. It’s the perfect feature for frequent online shoppers and offers unmatched security.
No matter which platform it’s on, Apple Pay is also an extremely private and secure payment system. You can rest easy knowing your sensitive financial information is being kept under lock-and-key, no matter where you use it. Just as one example, Apple Pay on Mac will use a device-specific account number when checking out — meaning that websites won’t get access to your card’s actual number.
Setting up Apple Pay on Mac
Now that you know about Apple Pay on Mac, you can go about setting it up. Here’s how.
Apple Pay for Macs with Touch ID
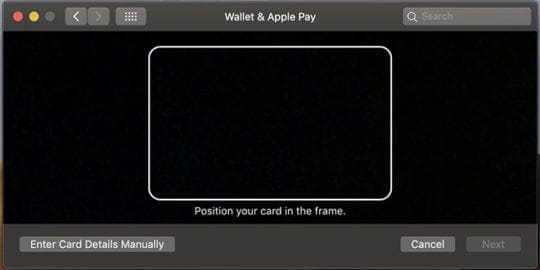
Using Apple Pay is a breeze on any Mac device with Touch ID built in. That includes MacBook Pro models with a Touch Bar, as well as the new 2018 MacBook Air.
In fact, macOS probably asked you to add a card to Apple Pay during your Mac’s initial setup. But if you skipped that part of the process, or you just want to add a new card, here’s how to set up Apple Pay at any time.
- Launch System Preferences.
- Click on the Wallet & Apple Pay option.
- Press the + icon to add a new card to your Mac Wallet.
- Position your card in front of the Mac’s webcam to automatically add its information. Alternatively, you can manually input that information, too.
- Accept the terms of conditions of usage.
Once your card is approved for usage by your issuer or bank, you’ll get a notification.
Apple Pay for older Macs
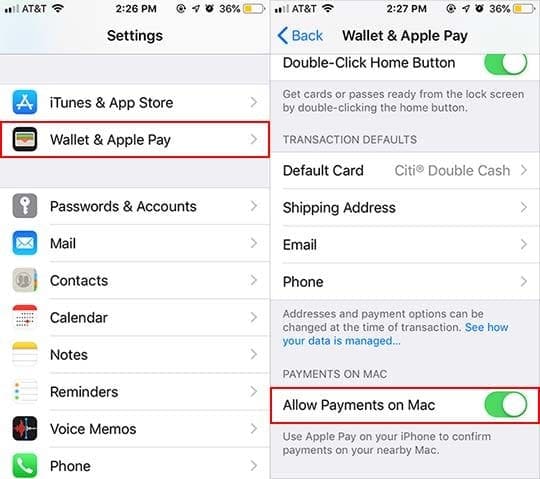
If you have an older MacBook model or a Mac that doesn’t have Touch ID, you can still use Apple Pay — but you’ll need to set it up on your iOS device first.
- On your iOS device, launch the Settings app.
- Tap on Wallet & Apple Pay.
- Next to Allow Payments on Mac, make sure that the toggle is switched on.
Set Safari preferences for Apple Pay
Once you have Apple Pay set up on your Mac, there’s still one additional step before you can go about using it: enabling the feature on Safari.
- Open Safari.
- Tap on Safari in the top menu bar.
- From the dropdown menu, select Preferences.
- Click the box next to Apple Pay. This will allow websites to prompt you with Apple Pay as a payment option.
How to use Apple Pay on Mac
Apple Pay on the Mac is pretty simple to use, but it requires that you’re making a purchase from a participating retailer website. Basically, it does away with needing to input any credit card or debit card details manually.
But, as long as you are, it’s an extremely simple process that uses the built-in Apple Pay wallet in macOS to make checking out a breeze.
On Touch ID devices
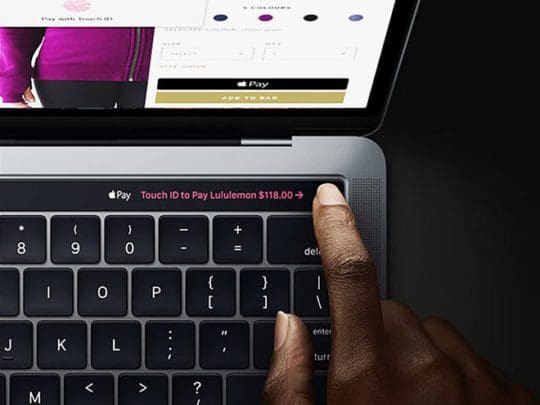
Here’s how to use Apple Pay on a MacBook Pro or MacBook Air with a Touch ID sensor.
- Open a participating retailer website in Safari.
- Pick the items you’d like to buy and navigate through the checkout process.
- When you get to payment, tap on the Apple Pay or Checkout with Apple Pay button.
- Double-check your contact data to ensure that shipping and billing info is still current.
- If everything’s good, just authenticate using the Touch ID sensor on your Mac.
On non-Touch ID devices
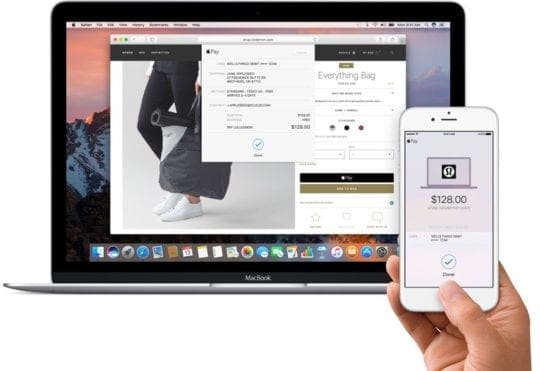
Here’s how to use Apple Pay on an older Mac. The process is slightly different, since you’ll need an iPhone or Apple Watch nearby to actually wrap up the process.
- Open a participating retailer website in Safari.
- Pick the items you’d like to buy and navigate through the checkout process.
- When you get to payment, tap on the Apple Pay, Checkout with Apple Pay or Pay with Apple Pay button.
- At this point, grab your iPhone or lift your Apple Watch-equipped wrist up.
- Rest your finger on your iPhone’s Touch ID sensor to authenticate. Alternatively, press the Side button on your Apple Watch.
Managing your Apple Pay cards and settings on Mac
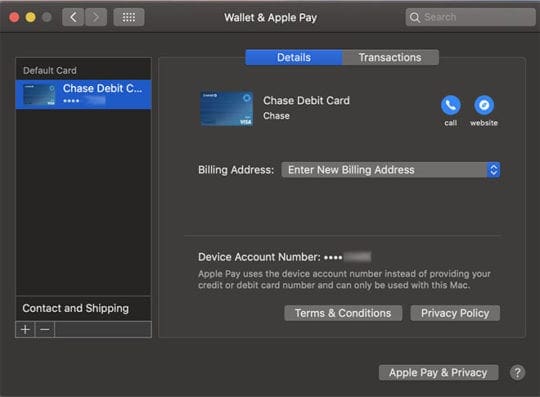
You can always change, modify or otherwise manage your Apple Pay settings on Mac, even after the initial setup process. Just navigate to System Preferences —> Wallet & Apple Pay.
- Adding a new card: Just click on the Plus (+) icon at the bottom of the sidebar to add a new card. You’ll be walked through the process.
- Removing a card: Select the card you’d like to delete from your wallet and press the Minus (-) icon at the bottom of the sidebar.
- Changing contact information: To change your shipping address or other contact information, just click on Contact and Shipping in the sidebar.
- Changing billing addresses: To change your billing address, you’ll do so individually for each card. Just select a card from the sidebar and click on the Billing Address dropdown menu. From there, select Add a new Billing Address.
- View recent transactions: You can view recent transactions made with an Apple Pay card by selecting a card from the sidebar and clicking on the Transactions tab. From here, you have also set macOS to send you an alert you every time a transaction is made.
Troubleshooting Apple Pay on Mac
Apple Pay on Mac is pretty simple, but sometimes things can go wrong. Here’s how to troubleshoot some of the more common issues people run into.
‘Wallet and Apple Pay’ is missing
If you find that there’s no Wallet and Apple Pay tab in System Preferences, it’s probably because you don’t have a MacBook with Touch ID.
You’ll have to enable Apple Pay on your connected iPhone. See our instructions on setting up Apple Pay. Also check Apple’s support site for Apple Pay.
An Apple Pay transaction was declined
It’s rare for an Apple Pay transaction to be declined when checking out online, but it can happen.
First, check the balance on your card. If there’s enough to cover the purchase, contact your card issuer. They may have blocked it for fraud protection purposes.
Apple Pay won’t accept my card
Occasionally, you can run into trouble adding a card to Apple Pay. If you’re entering its details manually, make sure to double-check that you’re inputting them correctly.
But there’s also a chance that your card issuer doesn’t support Apple Pay, or there’s another underlying reason why it isn’t being accepted. We recommend contacting your bank or card issuer.
We hope that you found this short article useful. If you have not yet set up your Mac to use Apple Pay, go ahead and give it a try! Please let us know in the comments below if you have any questions or run into issues.

Mike is a freelance journalist from San Diego, California.
While he primarily covers Apple and consumer technology, he has past experience writing about public safety, local government, and education for a variety of publications.
He’s worn quite a few hats in the journalism field, including writer, editor, and news designer.






Write a Comment