Despite the fact that your PC or Laptop is running on Windows, yes, you can actually install a fully working Mac OS X on that boring Windows. Today we’re going to show you how easy it is to do that. At the end of this tutorial, you’ll realize that you don’t need to buy an expensive Mac in order to enjoy its unique features
Before we jump straight to the tutorial, let’s start with what you’ll be needing.
VMWare Player 12 (or whichever is the latest at the time). You can download the latest version from here
Grab a copy of Mac OS X El Capitan, which can be downloaded from here
Step 1: Install the VMWare Player you have just downloaded above. It’s easy, just follow the on-screen instructions and you’re good to go
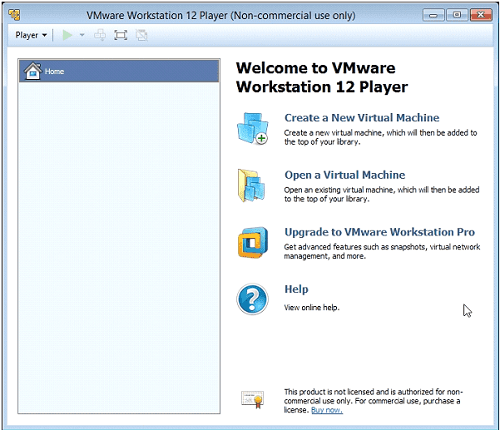
Step 2: Run the program after you have installed it. Enter your email and click Continue
Step 3: You have successfully configured the VMWare software. Close the window and move onto the copy of Mac OSX Capitan that you also downloaded
Step 4: This will be a zip file, so you just have to extract it to the folder of your choosing. Be patient as it’s going to take some time
Step 5: Open the extracted folder, then “unlocker” and then “unlocker” again
Step 6: Right click on the “win_install” file and Run as Administrator. This will open a new window, which should be allowed to run
Step 7: Open your VMWare now and then click “open a virtual machine”. Browse through the folder where you have extracted the OS X and click Open
Step 8: A new window will open. Click “edit virtual machine settings”. Most settings are good to go here but if you want to change anything you can do so
Step 9: Now click “play virtual machine” and you’ll see the lovely Apple icon loading up.
Step 10: You can choose to install “download tools” when notified at the bottom of the screen (recommended).
Step 11: Go through the remaining setup options as per your liking (this is where the setup asks for your Apple ID, whether to enable locations services and all that good stuff)
That’s it – you’re done! Mac OS X El Capitan is now installed on your Windows PC BUT…..
Fixing Bugs
You’ll find the Mac a bit laggy here but you don’t have to worry. Once you install some tools, the Mac will be pretty smooth and amazing.
Click on the VMware tools on your Mac’s desktop and click “Install VMware tools”
Installation is easy and once it is installed you have to restart
Bottom Line
Congrats, you now have a fully functional Mac OSX El Capitan on your Windows computer. You can even do a full screen, which gives you a complete Mac feel. Change the settings, the wallpapers, magnification, access App Store and anything else you want.
Obsessed with tech since the early arrival of A/UX on Apple, Sudz (SK) is responsible for the original editorial direction of AppleToolBox. He is based out of Los Angeles, CA.
Sudz specializes in covering all things macOS, having reviewed dozens of OS X and macOS developments over the years.
In a former life, Sudz worked helping Fortune 100 companies with their technology and business transformation aspirations.


Hardware requirements? Could I install on my older Windows XP desktop, eg?