Are you facing graphics issues and other glitches when running a guest macOS on your VMware Workstation? You must download and install the VMware Tools on macOS.
VMware Workstation is one of the popular hypervisor and virtualization tools to install and run several operating systems on a physical computer. Thus, you can run Linux, Red Hat, macOS, etc., on a Windows PC without owning the necessary hardware devices for these operating systems.
Besides IT businesses and software development companies, VMware Workstation usage increased multifold among personal users for several reasons like content creation, app testing, running a small business, and so on.
However, VMware, Inc. didn’t develop the Vmware Workstation for macOS operating systems. Usually, personal users use the VMware Workstation macOS unlocker from GitHub to set up a macOS-based guest OS on VMware Workstation.
This workaround has a fundamental system flaw. Though the macOS would work just fine, you’ll experience laggy and choppy performance. Not to mention, several other issues with the graphics processing, mouse acceleration, and file drag & drop between the host and guest computer.
To resolve this, VMware, Inc. developed and published the VMware Tools for macOS for free. Read on to learn more about macOS VMware Tools, how to download the package, how to install the tools, and other secret tips for VMware Tools on macOS.
VMware Tools is a software package delivered as an ISO file by the publisher VMware, Inc. It contains several services, algorithms, and modules to manage guest operating systems on VMware Workstation effectively.
It enhances the hardware resource usage by the guest operations system. Also, VMware Tools facilitates effortless data and media communications between the host and guest operating system.
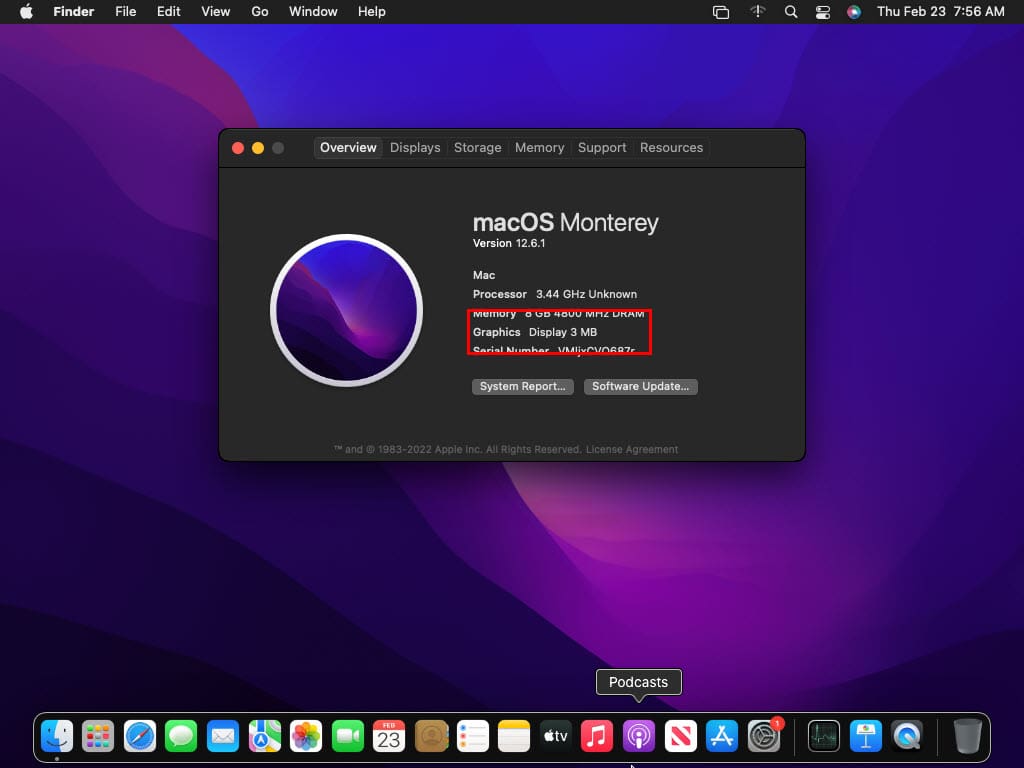
When you need to install a macOS guest operating system on VMware Workstation, you must install the VMware Tools package on the guest macOS after the OS installation. It resolves many issues including the following:
Color display issues of the guest macOS system
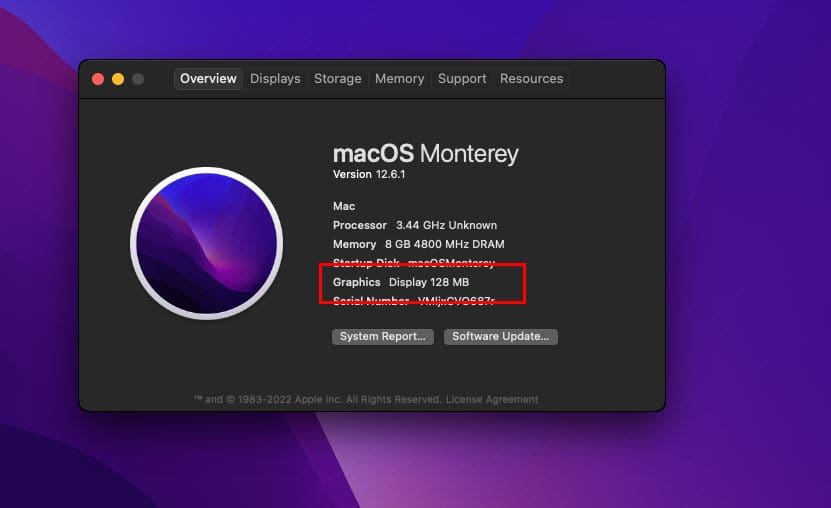
Increases the video memory from 3 MB to 128 MB
Fixes low-resolution issue of the macOS desktop
Enables full-screen mode for macOS
Allows drag and drop content from the host PC to guest macOS seamlessly
Resolves the guest macOS audio output issues
Increases the mouse acceleration
Syncs the time of guest and host operating system
You can take a quiesced snapshot of the guest macOS
In a nutshell, VMware Tools for macOS enhances the user interface (UI) and user experience (UX) when you use any macOS guest on VMware Workstation.
Installation of a guest operating system like macOS Monterey or any other VMware Workstation is effortless. A few clicks and you’re done. However, the setup of the guest operating system doesn’t end here.
Right after installation and boot of the guest macOS to its Home Screen, you’ll feel that the OS isn’t responding the way it should. Also, you won’t be able to see the whole Home Screen. Several interfaces of the macOS will be missing.
Here, you must download and install the macOS VMware Tools to get the following on the guest operating system:
VMware device drivers
Hypervisor VMware Tools service
VMware Tools control panel
VMware user process
The Downsides of macOS VMware Tools
After setting up any guest macOS version like Monetery and installing the macOS VMware Tools, you’ll find that the virtual computer is almost perfect. However, due to several shortcomings of VMware Workstation and VMware Tools, guest OS lacks the following features:
Limited VRAM or Graphics memory before using VMware Tools on macOS guest
No 3D graphics acceleration using graphics card or GPU. macOS display adapter will only support Super VGA (SVGA).
There will be limited file copy-and-paste support between the host and guest macOS.
Multimonitor support will be unavailable in fullscreen mode.
The Unity feature won’t be supported as well.
How to Download VMware Tools on macOS
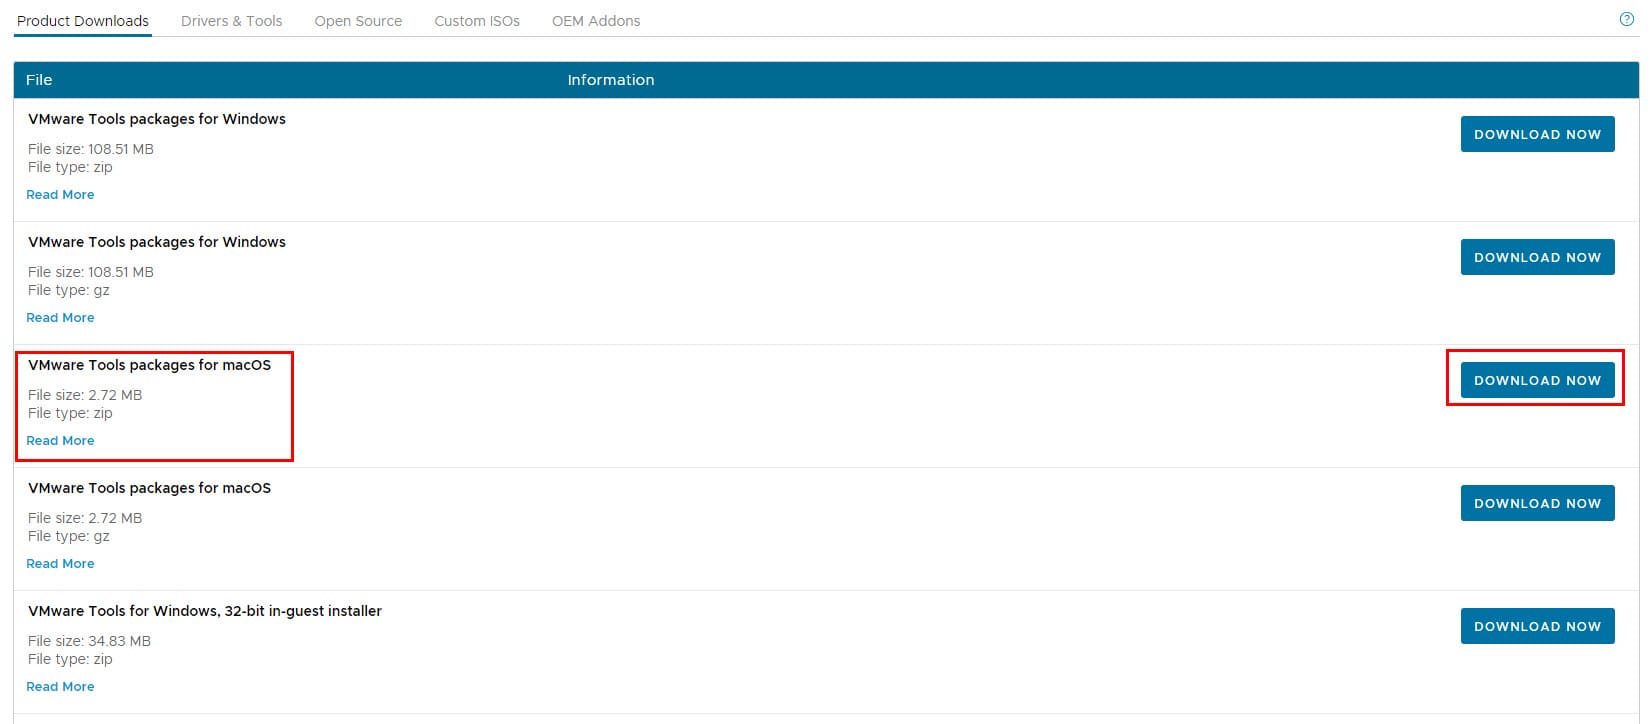
Here’s how you can download the macOS VMware Tools for free:
In the Select Version drop-down list, choose 12.1.0.
VMware Tools packages for macOS will show up as the third download option.
Click the Download Now button to get the ISO file.
The package will download on your Windows or macOS computer as a ZIP file.
Unzip it using an appropriate program.
Upon unzipping, you’ll find the following files: darwin.iso, darwin.iso.sha, and darwin.iso.sig.
How to Install VMware Tools on macOS
Find below the methods to install the downloaded VMware Tools packages on the macOS guest operating system:
macOS VMware Tools Installation Via VMware Toolbar
Some dated macOS versions may allow you to install the VMware Tools directly from the VMware Toolbar. Follow these steps on a compatible guest macOS system:
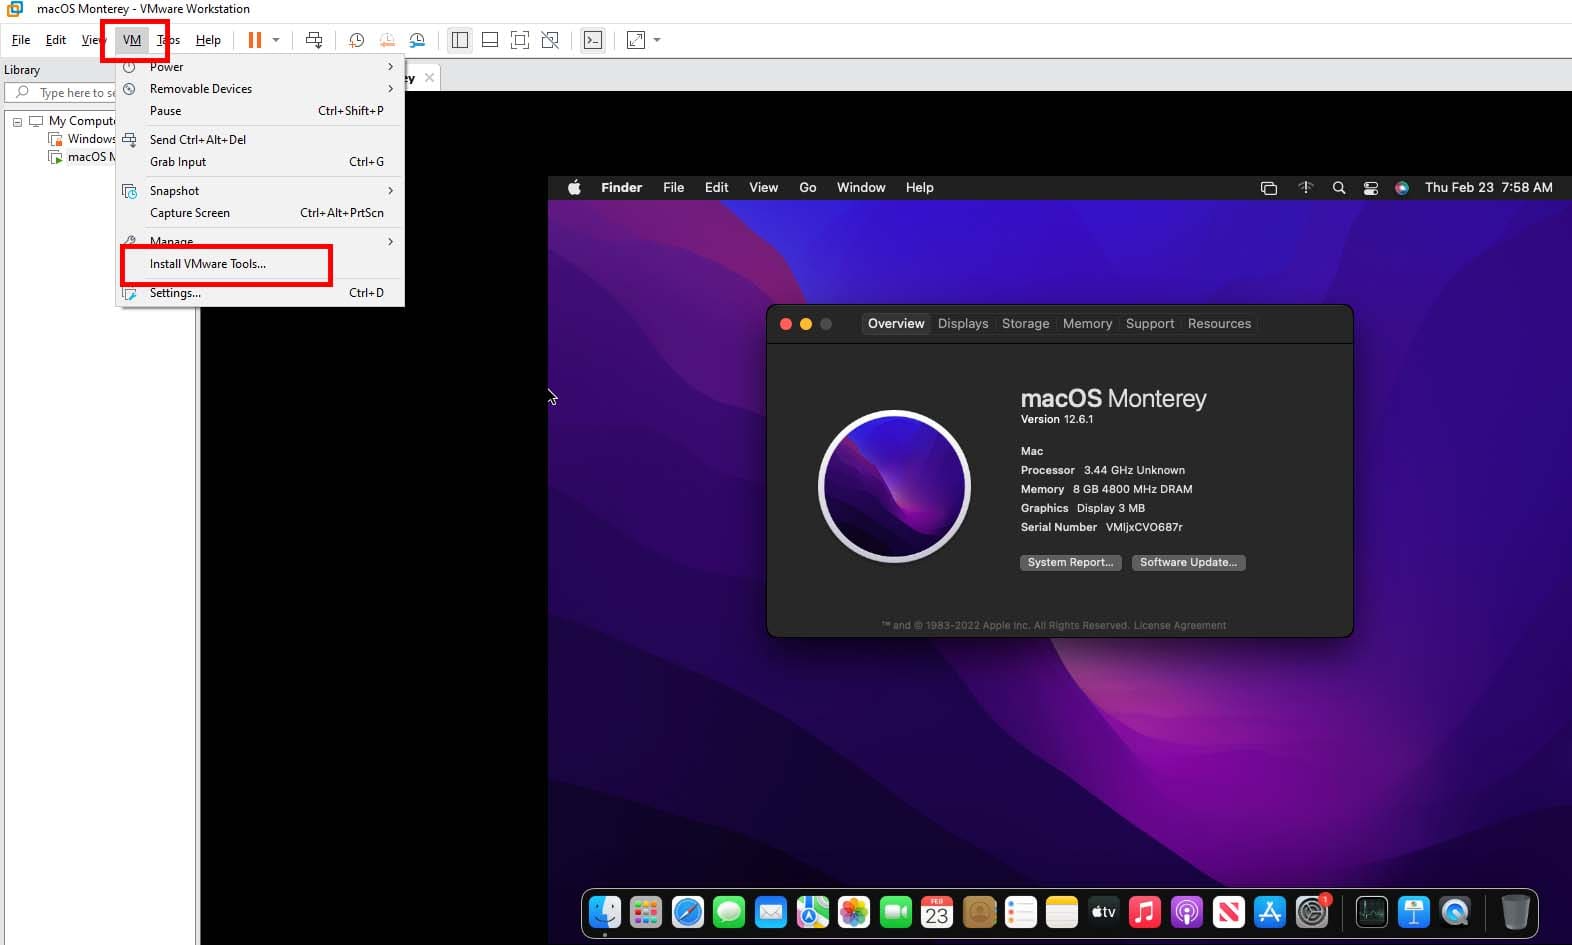
Open VMware Workstation and initialize the guest macOS.
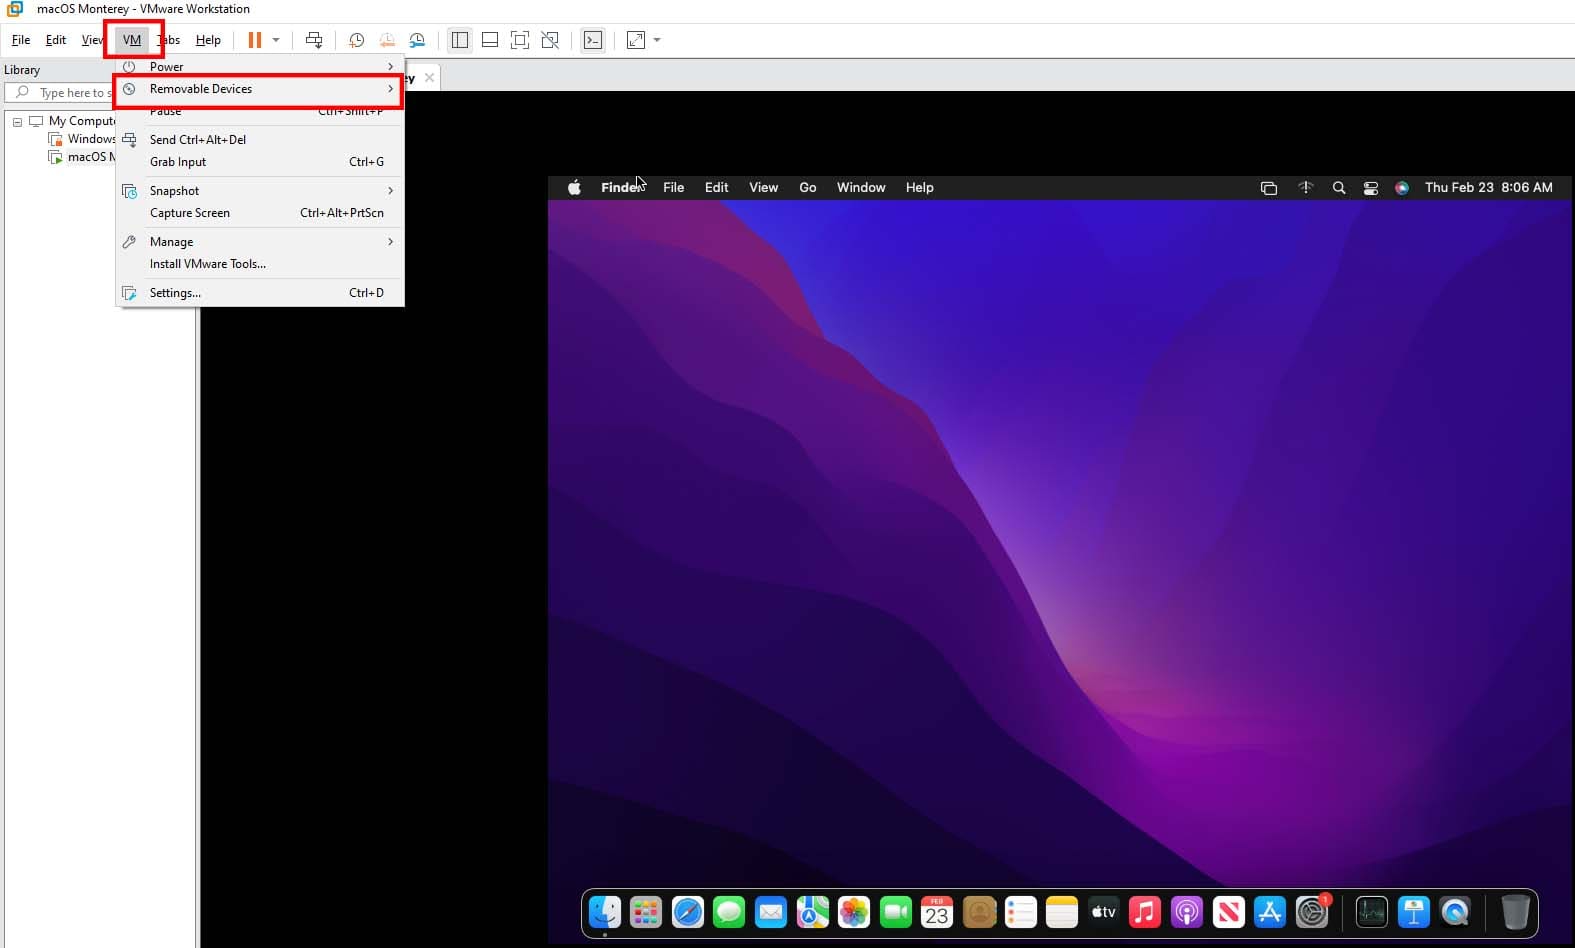
Once the macOS enters the Home Screen, click the VM option on the VMware toolbar.
Install VMware Tools from VMware Workstation Toolbar
A context menu will open. Click the Install VMware Tools option from that context menu.
How to install VMware Tools macOS from the VMware Toolbar
VMware Workstation will automatically load the necessary packages, and the VMware Tools installation wizard will show up.
Sometimes, the above method may not work, and you’ll get an error message. The pop-up will ask you to manually install the VMWare Tools for macOS. In that scenario, follow the method mentioned in the below section.
Manual Method to Install macOS VMware Tools
To install macOS VMware Tools manually, you must remember the download location of the VMware Tools package. Once ready, follow these steps:
On the VMware Workstation toolbar, click the VM tab.
The removable devices option on VMware Workstation Toolbar
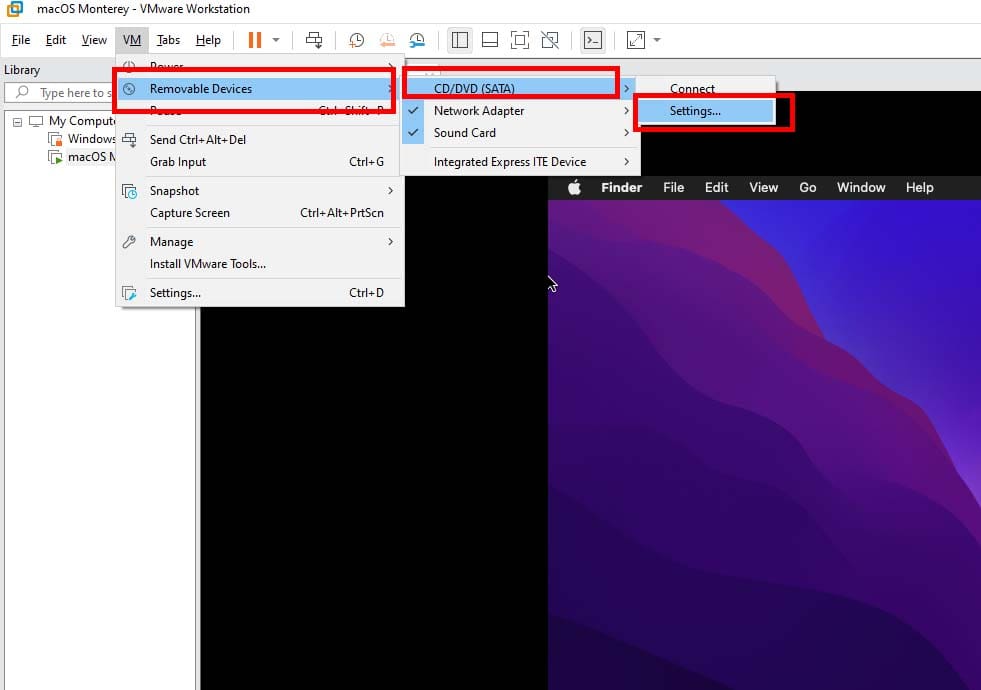
Hover the mouse cursor over the Removable Devices option to find the CD/DVD (SATA) menu.
How to enter settings of removable devices on VMware Toolbar
On the CD/DVD (SATA) menu, click Settings.
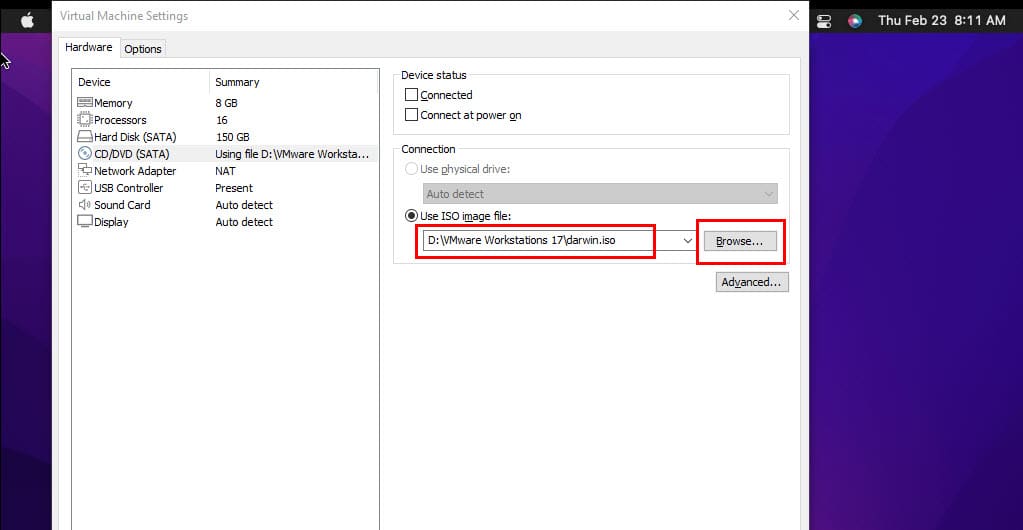
On the Virtual Machine Settings window, click the Use ISO image file option.
Locate the VMware Tools macOS ISO image
Now, locate the downloaded and extracted darwin.iso file by clicking the Browse button.
Click OK to close the window.
Now, click VM on the VMware toolbar, and hover the cursor over Removable Devices to get CD/DVD (SATA).
Click Connect on CD/DVD (SATA) to mount the darwin.iso on the guest macOS’s virtual CD/DVD drive.
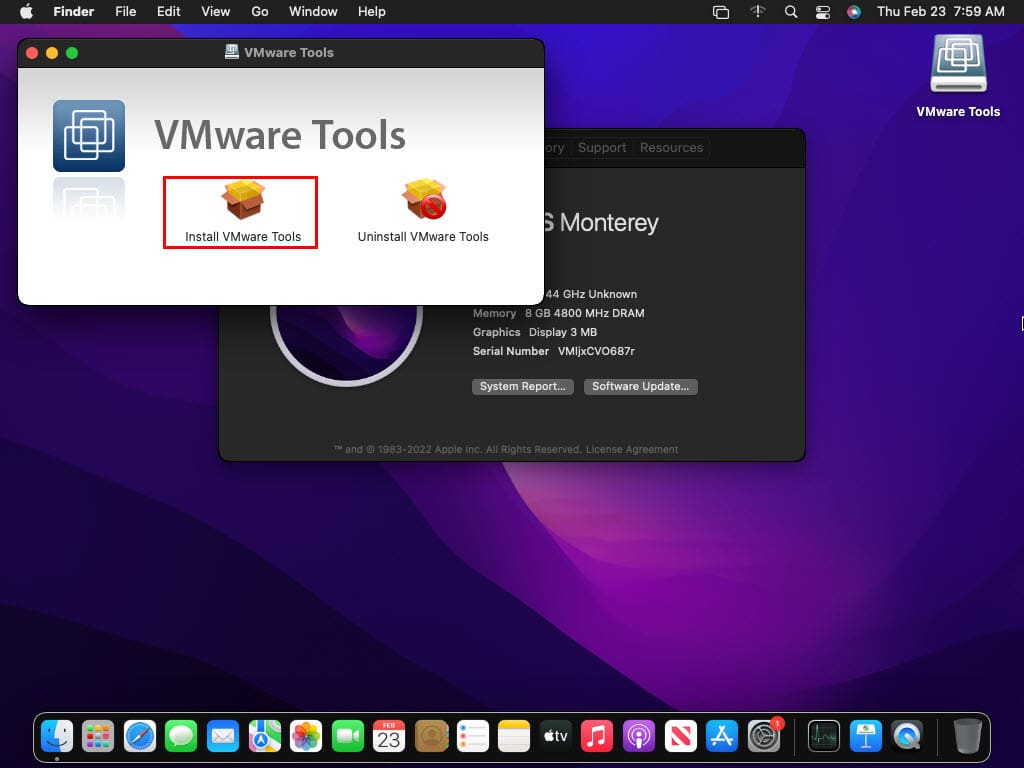
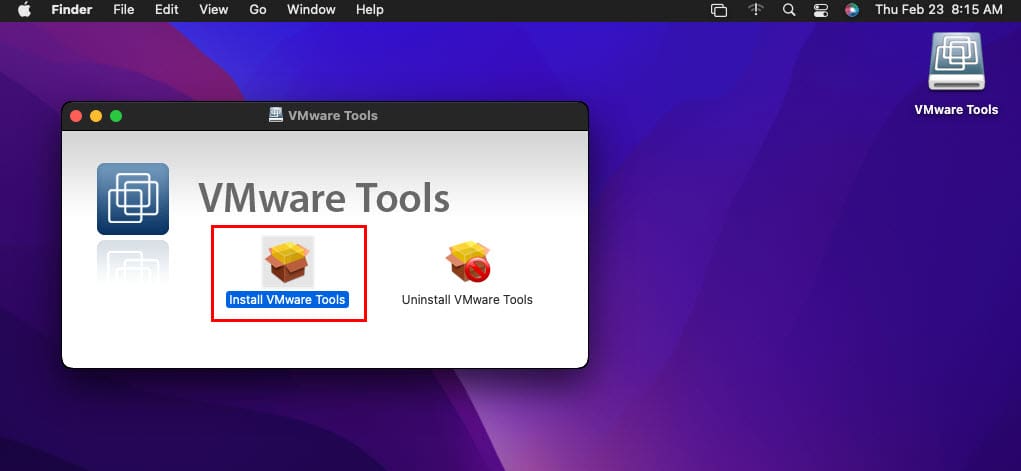
The VMware Tools setup wizard will pop up.
Complete Installation of VMware Tools on Virtual Mac
Click the Install VMware Tools package option.
Select Install VMware Tools
Select Continue on the Introduction screen.
Click Install on the Install Type screen.
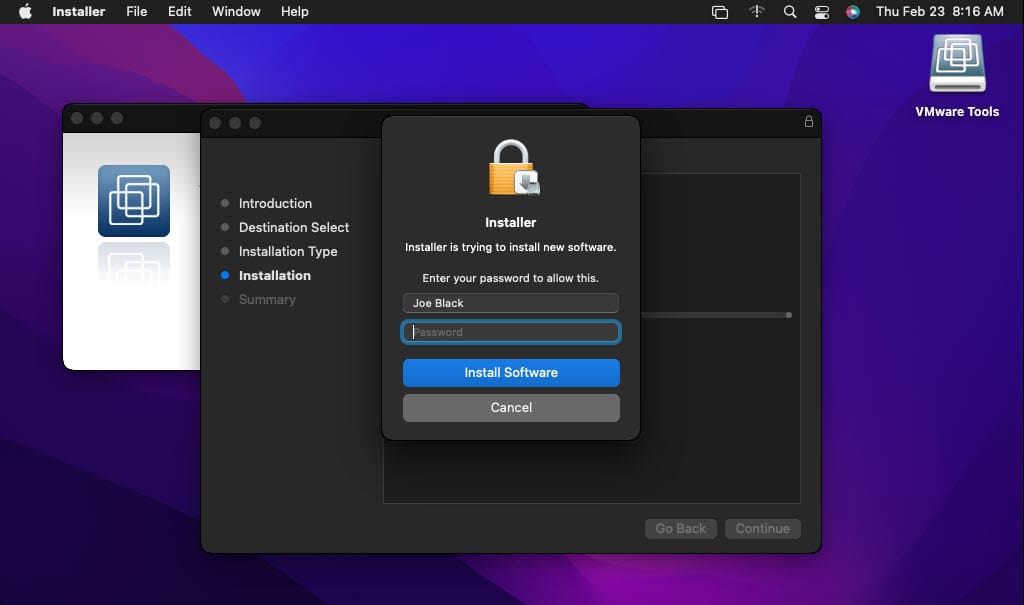
Enter password to begin installation
macOS will ask you to enter the password of the device to allow installation.
Click OK on the System Extension Updated pop-up.
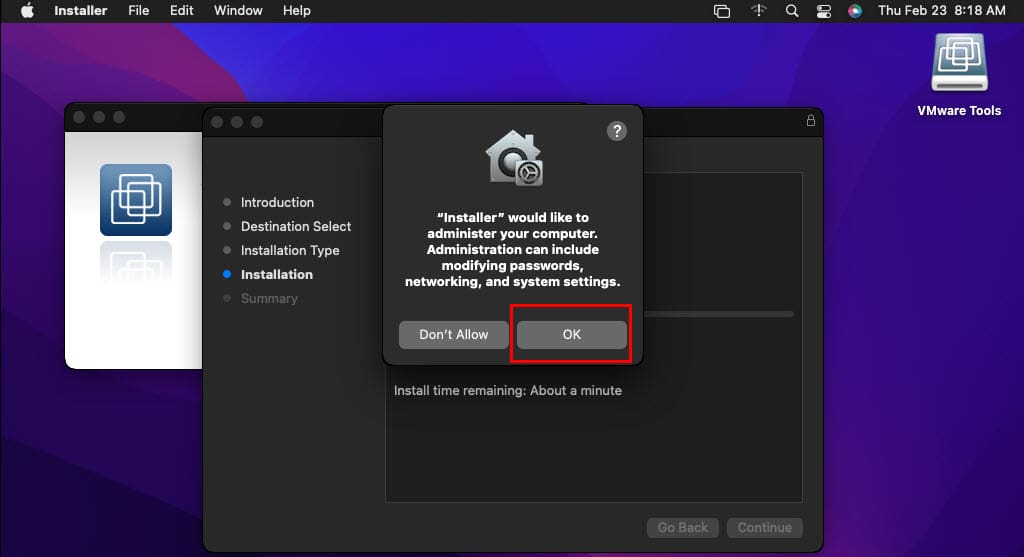
Select OK to allow the installation to complete
Select OK on the installer wants to administer macOS pop-up.
Security and privacy set up for VMware tools package of macOS
On the Security & Privacy window, click the lock icon in the bottom left corner.
Enter your password and then click Allow to add the VMware Tools macOS as a system extension to the guest operating system.
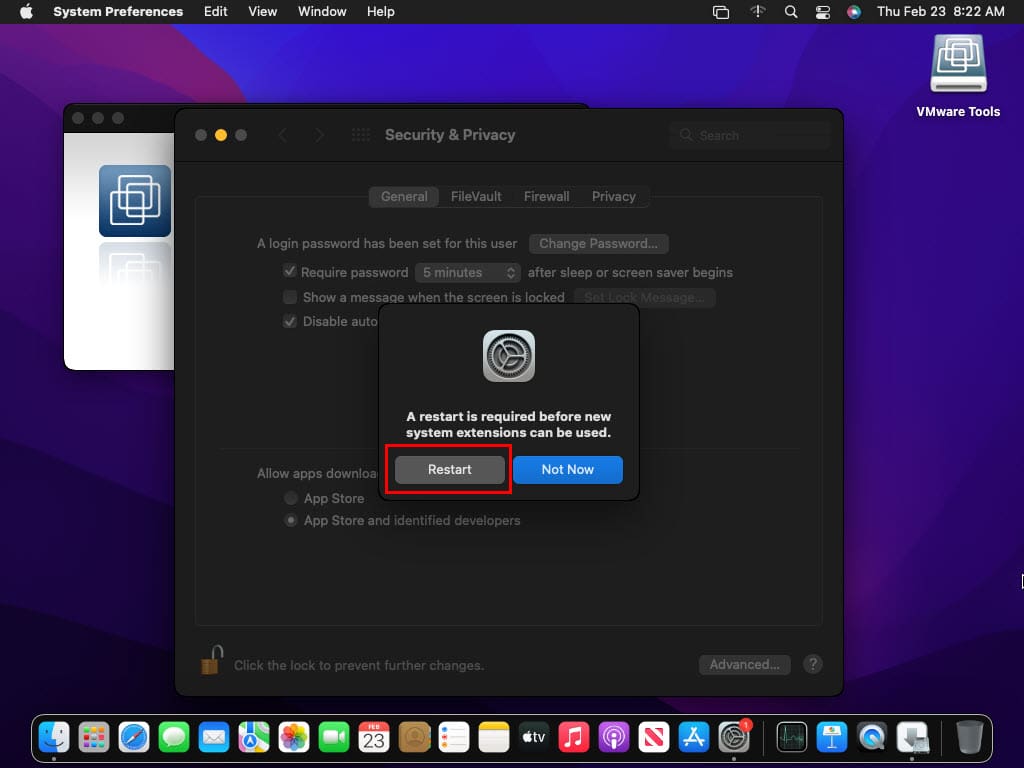
Click restart to install VMware Tools macOS
Click Restart to apply the changes.
Again, click Restart on the installer interface.
Enhanced graphics or VRAM memory after installing VMware Tools macOS
Once the guest macOS restarts, you’ll see a fullscreen view of the login screen. Once logged in, you’ll experience faster movements and better display graphics on the macOS setup on VMware Workstation.
VMware Tools macOS: Final Words
So far, you have gone through the methods and steps to download and install the VMware Tools on a guest macOS instance. Give the above methods a try, and comment below about your experience.


Write a Comment