The allure of iMessage, Apple’s exclusive messaging platform, often leaves Windows users yearning for a piece of the action. While iMessage has traditionally been confined to the Apple ecosystem, there are now ways to break down those barriers and bring iMessage to your Windows PC. This article aims to provide a comprehensive guide on how to achieve this feat, offering step-by-step instructions and exploring various methods, including third-party software solutions.
Whether you’re looking to maintain seamless communication across your devices or simply curious about expanding the capabilities of your Windows PC, this guide will equip you with the knowledge you need. Let’s delve into the intricacies of making iMessage accessible on a Windows platform.
You’d think Apple would have an online browser-based service for iMessage, so checking in no matter where we are is easy. But alas, there currently is no service for getting iMessages online!
The conventional thought is that Apple wants to keep its services limited to its own iPhones, iPads, and Mac computers. That leaves millions of us, maybe even billions of us in the dark, unable to access iMessage when we are at work or using our home Windows PC.
Following these relatively straightforward steps makes it easier than ever to stay in contact with the people that matter most across your iPhone, iPad, iPod touch, Mac, and even your own Windows PC.
So without further ado, here’s how we do it.
What You Need
First off, you will need at least one Mac (work, home, school, or otherwise) unless you want to jailbreak your phone.
A Quick Word for Mac Personal Computer Users
Back in 2012, Apple released iMessage as a stock application in Mountain Lion (10.8.) From that OS onwards, your Mac’s Messages app lets you pick up conversations on your computer right where you left off on your iPhone, iPad, and iPod touch. Messages for Mac is completely free and works with anyone who has iMessage activated on their iOS, OS X, and macOS devices.
To get iMessage on your Mac computer
First, verify that the application is on your machine. Look for “Messages” in Spotlight Search or via your Applications folder. In case you do not have Messages installed, verify that you are running OS Mountain Lion (10.8) or higher. If not, download the latest OS that your Mac computer allows.
Supposing your OS is up-to-date and you still do not have Messages, visit the Mac App Store and download the Messages application from there.
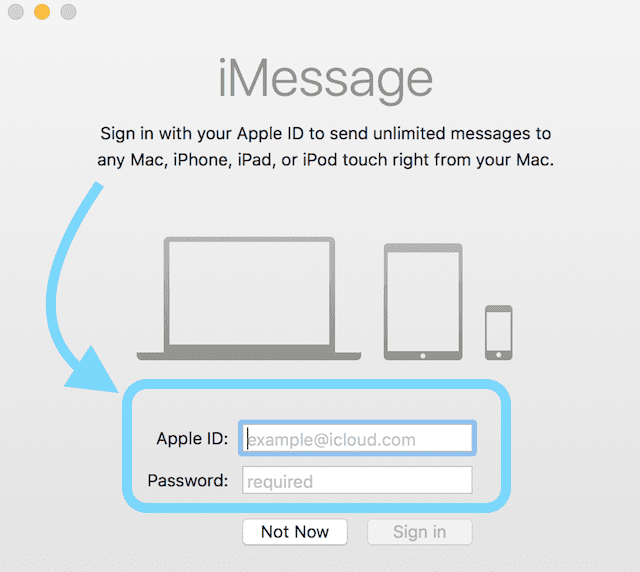
Once Messages is on your computer, open the application and sign in with your Apple ID and password. Messages only work with your Apple ID and password, so you must have an account to use iMessage on any device, including iPhones, iPads, and computers.
If you do not have an Apple ID, check out this link to create yours. Remember that every Apple ID comes with 5 GB of iCloud storage at no charge.
After signing in with your Apple ID and password, Messages automatically downloads and syncs any previous conversations used with that Apple ID. So you pick up right where you left off and that new conversation syncs with all your iPhones, iPads, and Mac computers associated with that same Apple ID.
You can even send SMS texts with your Mac using the feature called Continuity!
Once Messages is set-up, you’re free to send text messages, voice messages, pictures and videos all through the internet.
What about multiple Apple IDs and iMessage
You cannot log into multiple accounts at once. You can use more than one Apple ID with Messages and iMessage. But you must switch between those Apple IDs and passwords manually every time you want to use a different Apple ID.
How to Access iMessage and Messages With Your Windows PC
iMessage Through Remote Access to Mac
One workaround for getting iMessage on your PC is to utilize Chrome’s great Remote Desktop feature. To get this going, you do need a Mac computer to set things up. What Chrome Remote Desktop provides is access to iMessages by connecting your Windows PC to your Mac computer remotely.
The major downside is that you are only able to access iMessages when the Mac computer is turned on (not asleep) and connected to the internet. And you need your Apple ID.
With Chrome Remote Desktop, all connections are fully secure. Access other computers or even allow another user to access your computer securely over the Internet. Everything is done via Chrome browser.
Using the Chrome Remote Desktop
#1: Set Up Chrome Remote Desktop
Sign into Google in Chrome Browser (or create a new Google account)
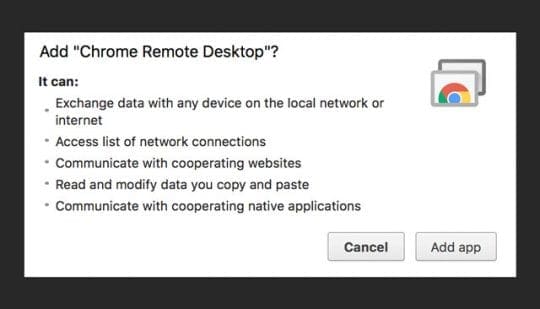
Download the Chrome Remote Desktop App from the Chrome App Store (MUST USE CHROME AS YOUR BROWSER!)
Select Add App to Chrome
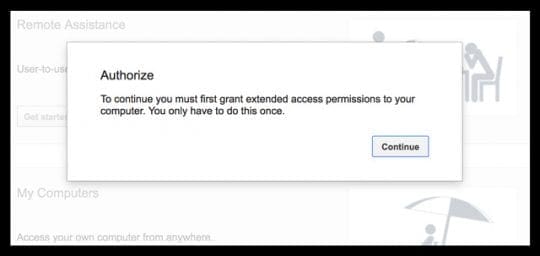
If setting up for the first time, you may see a message requesting authorization. Click Continue if you see this message:
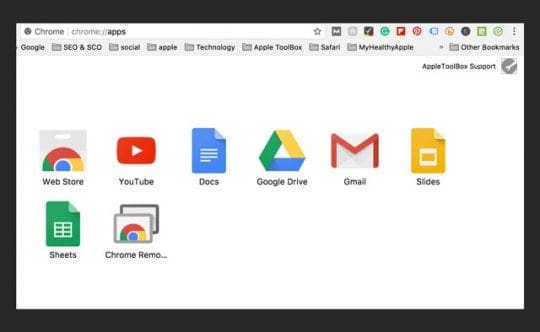
The Chrome Remote Desktop App appears in your chrome://apps list
Click on the App
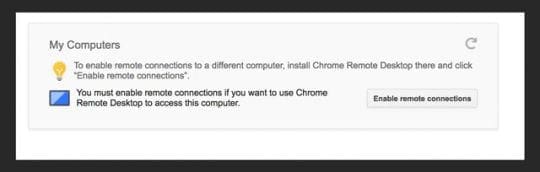
In the pop-up, under My Computers tap Get Started
Choose Enable remote connections
Follow the on-screen instructions to download Chrome’s remote host installer
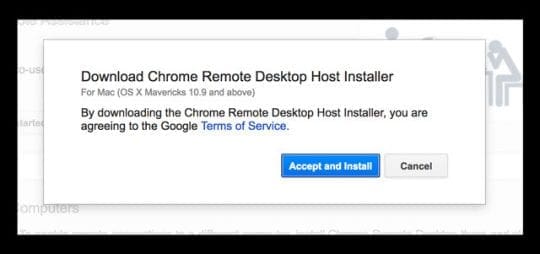
In the Download Chrome Remote Desktop Host Installer, choose to Accept and Install
Save the chromremotesektop file to your desktop, downloads folder, or preferred destination
After the file downloads, open it
Double-Click the Chrome Remote Desktop Host package
Follow the instructions on-screen to install
Enter your admin password when asked
After successful installation, open the Chrome Remote Desktop App again
Tap Enable remote connections
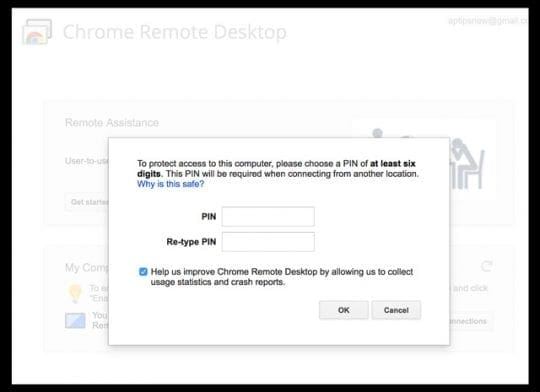
Create a new PIN of at least 6 digits
You’ll need this PIN to connect from another computer
Choose something you’ll remember or write it down and keep it secure
Enter your Mac’s admin password if asked
If successful, a message appears letting you know remote connection are enabled
When accessing your Mac remotely, make sure it’s ON, connected to the internet, and not set to sleep when idle to ensure access
#2: Use Chrome Remote Desktop on Another Computer
To access your Mac on another computer, open Chrome and sign in using the same Google ID you used to set-up Chrome Remote Desktop
Open the Chrome Remote Desktop App or type chrome://apps in the address bar to locate the app
Look for your Mac under My Computers
Double-Click to establish a connection
If you see Get Started, click this first then double-click the remote computer’s name
Type in your PIN and tap Connect
You see your Mac’s Desktop once a connection establishes
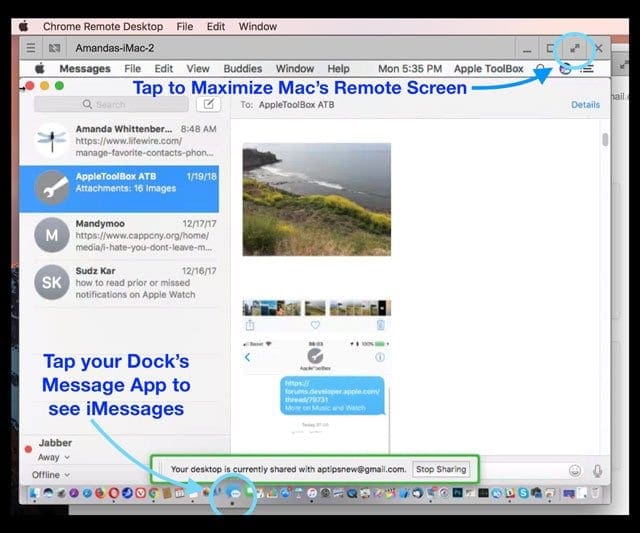
Maximize your window to full-screen to better see your Mac’s Desktop
To check your iMessages, tap the Message App in your Mac’s Dock (if available) or tap Launchpad to locate the Messages App
Your iMessages should appear on screen in Chrome
To end your connection to your Mac, tap the Stop Sharing button located at the bottom of your shared screen
If you accidentally end a session, choose Reconnect (enter your PIN again)
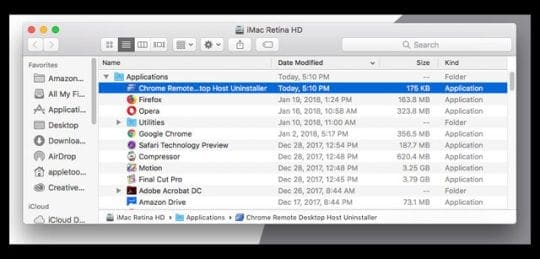
Remove the Chrome Remote Desktop from your Mac
First, uninstall the Chrome Remote Desktop Host app
In your Mac’s Application folder, find the Chrome Remote Desktop Host Uninstaller app
Launch the uninstaller and click Uninstall
Enter your Mac’s admin password, if asked
If successful, a message appears confirming uninstall
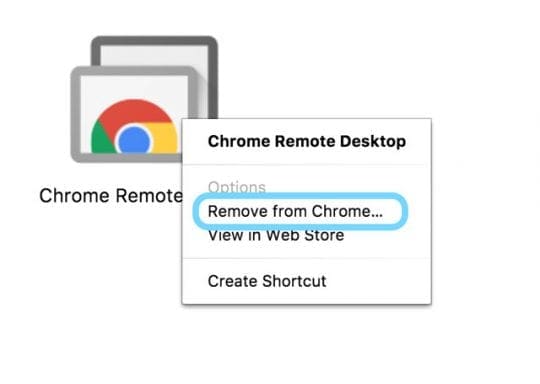
Next, remove the Chrome Remote Desktop app from your Google account
On your Mac, open Chrome
Locate your Chrome Remote Desktop app or type chrome://apps in the address bar
Control-Click (or right-click) the app and choose Remove from Chrome
At the dialog, click Remove
As a reminder, you need access to a Mac computer when implementing this method. And that Mac must be turned ON and connected to the internet Otherwise; this tip won’t work.
Chrome Remote Desktop is also fully cross-platform, providing remote assistance to Windows, Mac, and Linux users and access to your Windows (XP+) and Mac (OS X 10.6+) desktops at any time, all from the Chrome browser.
Windows Phone Link
Phone Link is available on the most recent versions of Windows 10 and Windows 11. However, until recently, it was only available for those using Windows with an Android phone. A recent update has made it possible to text from Windows with an iPhone, which naturally came as a bit of a surprise. But in order to take advantage of this new feature, you’ll first need to set up Phone Link to work with your iPhone.
Open the Microsoft Store on your Windows machine.
At the top of the page, search for Phone Link.
Open the listing from Microsoft.
If necessary, download any available updates.
Once installed, open the Phone Link app.
Under the Select your device section, click iPhone.
Open the Camera app on your iPhone.
Point the camera at the QR code that appears on screen.
Tap the Pair your devices prompt that appears in your camera’s viewfinder.
Tap the Open button when you see the Pair your devices pop-up window.
From the Continue pairing with Bluetooth page, tap the Continue button.
When prompted, tap the OK button.
From the Bluetooth Pairing Request prompt, tap the Pair button.
Tap the Pair button your Windows computer, verifying that the codes match.
On your iPhone, tap the Allow button to provide your Windows computer access to your iPhone notifications.
In order to take full advantage of Phone Link, open the Settings app on your iPhone.
Tap Bluetooth.
Locate and tap the I button next to your Windows computer under the list of My Devices.
Tap the toggle next to Show Notifications to the On position.
Tap the toggle next to Sync Contacts to the On position.
If necessary, tap the toggle next to Share System Notifications to the On position.
If you’re looking for a way to stay connected to your phone and be more productive, Phone Link is a great option. It’s easy to use and it can help you get the most out of both your devices.
How to Text From Windows With an iPhone Using Phone Link
Now that Phone Link has been set up and is connected to your iPhone, here’s how you can text from Windows with an iPhone:
Open the Phone Link app on your Windows computer.
Click the Messages tab at the top of the window.
Click the Compose button next to Messages.
Enter a contact that you want to send a text message to.
Type out the message and click the Send button.
There are a few limitations to be aware of if you want to use Phone Link to text from Windows using an iPhone. For one, you’ll notice that your message history doesn’t sync, so you’ll essentially be starting from scratch. Additionally, Microsoft notes the following:
“Messaging feature is limited by iOS. Image/video sharing and group messaging is not supported. Messages are session-based and will only come through when phone is connected to PC.”
Regardless of that, this is definitely a big step in the right direction, and we hope that these limitations are removed in the future.
Intel Unison
To establish a connection between your iPhone and Windows PC, you’ll initially need to install Intel Unison on both devices. Fortunately, the Intel Unison app is readily accessible in both the App Store and the Microsoft Store, eliminating the need to search for a specific file or visit an unreliable website to initiate the setup.
From your Windows PC, open the Microsoft Store.
Search for Intel Unison.
Select the appropriate listing from the results shown.
Once installed, open the Intel Unison app on your iPhone.
Now that the Intel Unison app has been downloaded and installed on both your iPhone and your Windows PC, you’ll need to make sure that Wi-Fi and Bluetooth are enabled on both devices. This is how the Unison app is capable of connecting the devices, while also being able to show your incoming notifications and other features.
In order to enable Wi-Fi and Bluetooth on your Windows PC:
In the bottom right corner of the taskbar, click the Wi-Fi/Volume/Battery indicators next to the Time and Date.
Click the Wi-Fi and Bluetooth buttons to ensure that they are highlighted, indicating that these features are turned on.
In order to enable Wi-Fi and Bluetooth on your iPhone:
Open the Settings app on your iPhone.
Tap Wi-Fi.
At the top of the page, tap the toggle next to Wi-Fi to the On position.
In the top left corner, tap < Settings.
Tap Bluetooth.
At the top of the page, tap the toggle next to Bluetooth to the On position.
With Wi-Fi and Bluetooth enabled on both devices, you can now proceed with the steps to set up and use Intel Unison to connect iPhone to Windows.
How to Use Intel Unison to Connect iPhone to Windows
Now that you have finished installing Intel Unison on both your iPhone and Windows, you’ll need to follow a few more steps to get your devices working and syncing appropriately. Here’s what you need to do:
With the Intel Unison app open on your Windows PC, open the Unison app on your iPhone.
From the Welcome to Intel Unison landing page, tap the Accept & Continue button.
When prompted, tap the Allow button to provide Intel Unison access to your contacts.
Tap the Allow button when prompted to allow Intel Unison access to the photos and other media on your device.
Tap the Scan QR code button.
Point your iPhone’s camera at the QR code that appears in the Intel Unison app on your Windows PC.
After the QR code is recognized, a verification code will be shown on both devices.
Verify the code is the same on both devices, and click the Confirm button on your Windows PC.
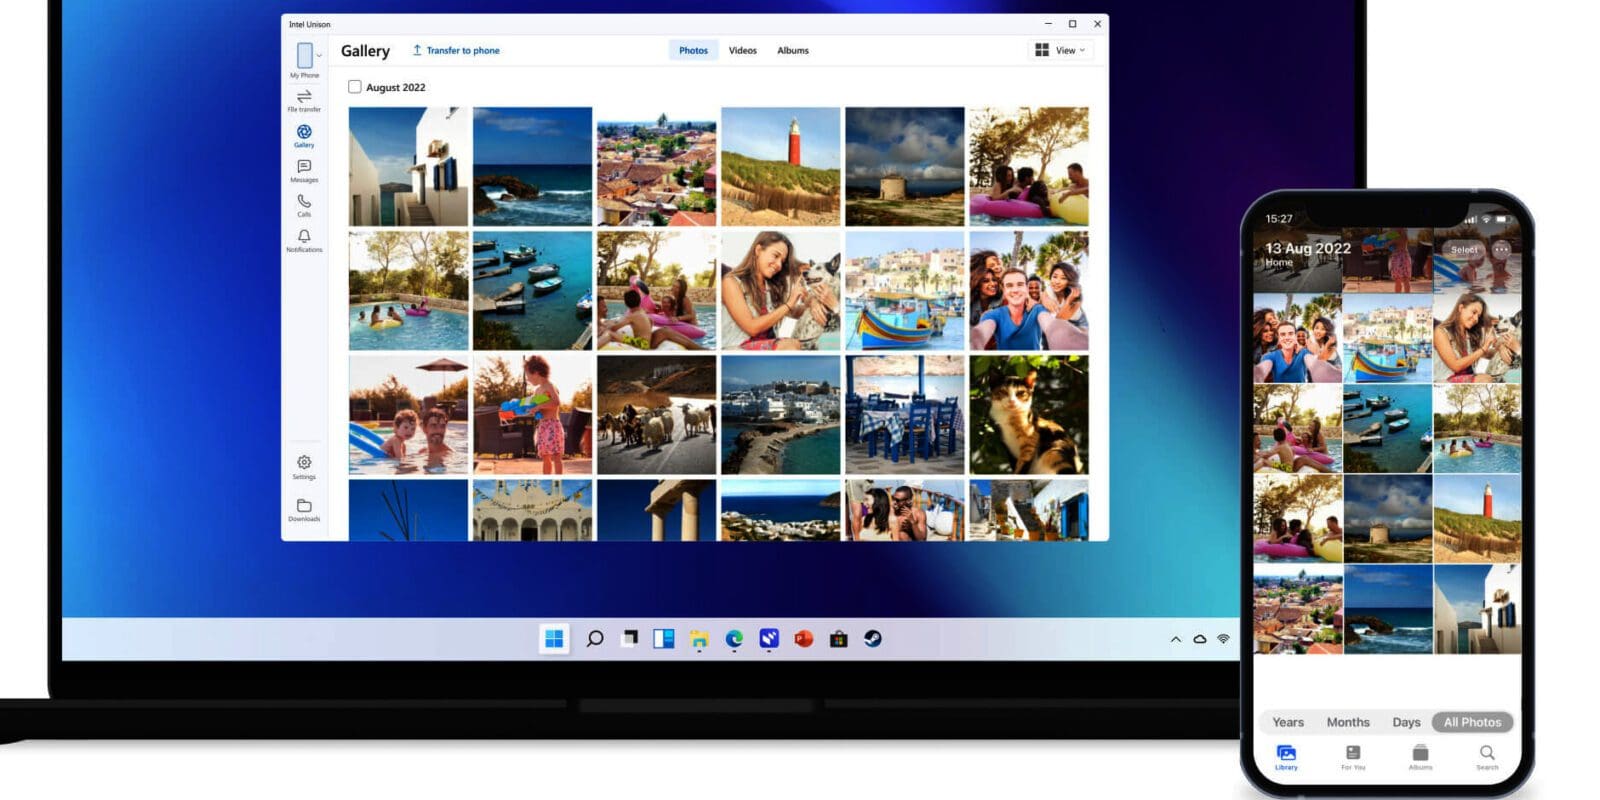
After a few moments, you’ll see the name of your iPhone appear in the top left corner of the Intel Unison app on your Windows PC. From here, there are a few different options that you can access from your PC, which include the following:
File transfer
Gallery
Messages
Calls
Notifications
Settings
Downloads
With the Intel Unison app open on your iPhone, there aren’t as many options available. At the top of the page, you’ll be able to see whether your iPhone and Windows PC are connected, along with tabs for Received and Sent. In the top right corner, there’s a Settings (gear) icon that allows you to clear any of your transfer history along with changing the permission settings for your device.
How to Use iMessage on Your Windows PC with Intel Unison
After you’ve finished setting up Intel Unison on your Windows PC, there’s nothing else that you need to set up! The only “steps” that are left if you want to text from Windows with an iPhone are as follows:
Open the Intel Unison app on your Windows computer.
Make sure your iPhone is still connected and recognized.
You’ll see an outline of your phone along with the name of your phone in the top left corner.
Click Messages.
Click the Compose icon next to Messages.
Enter a contact.
Within the Start a new message prompt on the right side, start typing.
Click the Send button.
It’s noteworthy that Intel has managed to make iMessages, along with standard text messages, compatible through their Unison software. This has been a longstanding issue for Windows users seeking to text from their Windows devices using an iPhone. Previous solutions existed but were less than ideal. Intel’s Unison, however, successfully bridges this divide without disrupting your existing iMessage threads, chats, or group conversations.
The one drawback is that upon setting up Intel Unison for iPhone texting, it doesn’t automatically import your existing conversations from the Messages app on your iPhone. While this is somewhat disappointing, it also presents an opportunity for Intel to enhance Unison’s capabilities, assuming the company continues to invest in the platform’s development.
iMessage for Android
Unfortunately, another year of iOS releases has come and gone, and there’s still no easy way to enjoy or even use iMessage on Android without jumping through a bunch of hoops. But on the bright side, there is one app that we recommend, simply because it’s the easiest out of the bunch to set up and doesn’t require you to provide your Apple information to a company or developers you don’t know.
AirMessage is a third-party software solution that allows Android users to send and receive iMessages, Apple’s proprietary messaging service. The software essentially acts as a bridge between the Android device and a macOS computer, which is required to facilitate the iMessage service.
Once set up, AirMessage reroutes iMessages sent to the macOS computer to the Android device, allowing for seamless communication across platforms. This enables Android users to participate in iMessage conversations, complete with features like read receipts, message effects, and group messaging, without needing an Apple device.
If you want to try to use AirMessage to get iMessage for Android, we’ve written a full tutorial on how to do just that and you can check it out in the link below:
We eagerly await the day when Apple rolls out a cross-platform iMessage service compatible with various devices and operating systems. Ideally, an online messaging platform would allow us to access our iMessages and conversations from any location, including the workplace.
As of now, that day remains in the future, necessitating the use of alternative methods like Chrome Remote Desktop. However, numerous messaging apps already offer cross-platform support, including but not limited to WhatsApp, Viber, Kik, Facebook Messenger, Telegram, and Skype.
Among these, Facebook Messenger and Telegram stand out for their robust functionality, accessible through any web browser. We find this feature incredibly convenient. Feel free to share your preferred messaging app that functions seamlessly across all your devices and PCs in the comments section. We’re always interested in hearing from our readers.
Andrew Myrick is a freelance writer based on the East Coast of the US. He enjoys everything to do with technology, including tablets, smartphones, and everything in between. Perhaps his favorite past-time is having a never-ending supply of different keyboards and gaming handhelds that end up collecting more dust than the consoles that are being emulated.
While this article is technically correct and easy to follow, all this article is showing you is how to remotely control a Mac or an IOS device so you can, in essence, use that device to do iMessaging for you.
You can’t do iMessages on a Windows machine unless you already have a Mac or a jailbroken IOS device. Those devices need to be turned on all the time as well.
Yeah, I agree you need a MAC to use iMessage on your PC with this solution. Essentially all you are doing is sharing a connection with a MAC. Not only do you need a MAC, but it also needs to be ON if you are to use iMessage.
While I can see the limited need for this solution, it is difficult for most of the people searching for a way to use iMessage on a PC easily.
Jailbreaking does NOT void your warranty. This is patently false. It only invalidates your warranty if it’s the cause of your issue. In otherwords, if you break your screen, they will fix it if under warranty because that’s not caused by jailbreaking.
With the way that the encryption works even if they had the data it would take someone over a lifetime to brute force the key to decipher it with today’s computing power.
They just want to keep people in their walled garden. (I own an iPhone xs and love it but hate Apple’s closed-door policies)
A good idea: you should indicate at the VERY BEGINNING of the article that “you will need a Mac as well as a PC unless you want to jailbreak your phone. If you do not have a Mac, you are out of luck unless you want to jailbreak your phone.”
This would help a number of people who read through this entire article (including the section on how to use iMessenger on a Mac… seems an odd bit to include) and then realized “hey that was pointless. I don’t own a Mac!” I imagine this is the vast majority of people reading this article.
If you have any pipeline into Apple, please let them know how much I utterly and completely detest them. This asinine fixation with keeping iMessage only usable for people who own Macs is … asinine. I’ve had my iPhone for about 2 years now and I can’t wait until the service contract is up and I can upgrade to an Android phone, which will allow me to sync and receive my text messages on my PC. So long Apple – and keep in mind that business entities (whether they be companies or countries) who insist on insularity, eventually always lose.
I mean the only solution that comes CLOSE is a remote desktop, but that requires a Mac – so basically, there is no way to view iMessages purely off of a Windows computer itself.
can anyone tell me how i can send imessages from my windows laptop without having my iphone with me at the time? and also does the iphone aswell as the laptop have to be connected to internent?
You can probably combine these” re the 10.6 comment, apparently Chrome needed to be updated.
But here’s the weird thing, after 10-12 failed attempts with “the access code is invalid”, I closed the CRD then reopened on the client; surprise it prompted me for the PIN! Connected perfectly…
A few more
The passcode generate by GRD is NOT to be typed with spaces
The host will require a PIN set, this is NUMBERS only, true it says “digits” but many probaby type their fave password it’s just numbers.
But in the end, as thousands have posted, you’ll get “the access code is invalid”, which is odd as we know the machines are communicating, as the host asked to allow the client to connect, then the client threw up that error message…


Take a look at Dell Mobile Connect. (No, you don’t need a Dell to use it. Google is your friend.)
Thanks to the author Andrew Martin, this information helped me. Like the Android to Mac file transfer article
Really? Is this a solution? I have both ios and Android device and day after day it seems Android is more intuitive and easier to use then iOS
that’s because it is.
While this article is technically correct and easy to follow, all this article is showing you is how to remotely control a Mac or an IOS device so you can, in essence, use that device to do iMessaging for you.
You can’t do iMessages on a Windows machine unless you already have a Mac or a jailbroken IOS device. Those devices need to be turned on all the time as well.
Yeah, I agree you need a MAC to use iMessage on your PC with this solution. Essentially all you are doing is sharing a connection with a MAC. Not only do you need a MAC, but it also needs to be ON if you are to use iMessage.
While I can see the limited need for this solution, it is difficult for most of the people searching for a way to use iMessage on a PC easily.
Jailbreaking does NOT void your warranty. This is patently false. It only invalidates your warranty if it’s the cause of your issue. In otherwords, if you break your screen, they will fix it if under warranty because that’s not caused by jailbreaking.
Helloooooo
I propose that (at least partly) Apple does not want to trust the world with its end-to-end imessage encryption.
With the way that the encryption works even if they had the data it would take someone over a lifetime to brute force the key to decipher it with today’s computing power.
They just want to keep people in their walled garden. (I own an iPhone xs and love it but hate Apple’s closed-door policies)
A good idea: you should indicate at the VERY BEGINNING of the article that “you will need a Mac as well as a PC unless you want to jailbreak your phone. If you do not have a Mac, you are out of luck unless you want to jailbreak your phone.”
This would help a number of people who read through this entire article (including the section on how to use iMessenger on a Mac… seems an odd bit to include) and then realized “hey that was pointless. I don’t own a Mac!” I imagine this is the vast majority of people reading this article.
FYI, you need ios 9 or earlier for remote message from jailbreak. The developer is not developing anymore.
If you have any pipeline into Apple, please let them know how much I utterly and completely detest them. This asinine fixation with keeping iMessage only usable for people who own Macs is … asinine. I’ve had my iPhone for about 2 years now and I can’t wait until the service contract is up and I can upgrade to an Android phone, which will allow me to sync and receive my text messages on my PC. So long Apple – and keep in mind that business entities (whether they be companies or countries) who insist on insularity, eventually always lose.
I mean the only solution that comes CLOSE is a remote desktop, but that requires a Mac – so basically, there is no way to view iMessages purely off of a Windows computer itself.
can anyone tell me how i can send imessages from my windows laptop without having my iphone with me at the time? and also does the iphone aswell as the laptop have to be connected to internent?
So miserable to follow an article and then go through what MArk did above…
You can probably combine these” re the 10.6 comment, apparently Chrome needed to be updated.
But here’s the weird thing, after 10-12 failed attempts with “the access code is invalid”, I closed the CRD then reopened on the client; surprise it prompted me for the PIN! Connected perfectly…
to a screensaver. Rats.
A few more
The passcode generate by GRD is NOT to be typed with spaces
The host will require a PIN set, this is NUMBERS only, true it says “digits” but many probaby type their fave password it’s just numbers.
But in the end, as thousands have posted, you’ll get “the access code is invalid”, which is odd as we know the machines are communicating, as the host asked to allow the client to connect, then the client threw up that error message…
Chrome Remote Desktop said it needed Mac OSX 10.6…. from years ago…