There’s been an age-old frustration when it comes to Android and iOS users. While those with Android phones have access to things like RCS for messaging, it still doesn’t quite match up to what iMessage has to offer. Because of this, it’s created a “green bubble vs blue bubble” conversation that continues to rage on. But did you know that if you use an Android phone and a Mac, you can actually use iMessage on Android?
It seems that AirMessage has been around for years, but we only recently discovered it. Since then, we have been able to leave our iPhone at home and use whatever Android phone is on hand, while still receiving all of the iMessage chats that come through. If you want to use iMessage on Android, you’ll need to get AirMessage set up on your different devices.
Get Your Mac Ready
Because the Mac is acting as a “server” of sorts, you’ll need to download and configure the AirMessage Server app for macOS. Here’s how you can do so:
Move the app to the Applications folder if it isn’t automatically done.
Open the AirMessage app on your Mac.
Click the Connect an Account (Recommended) button.
Create an account or log into your Google account.
Enable Automation and Full Disk Access
Before you proceed, there are a few more steps that you need to take. When setting up the app, you’ll need to provide access to the built-in macOS Automation functionality, along with providing AirMessage with Full Disk Access.
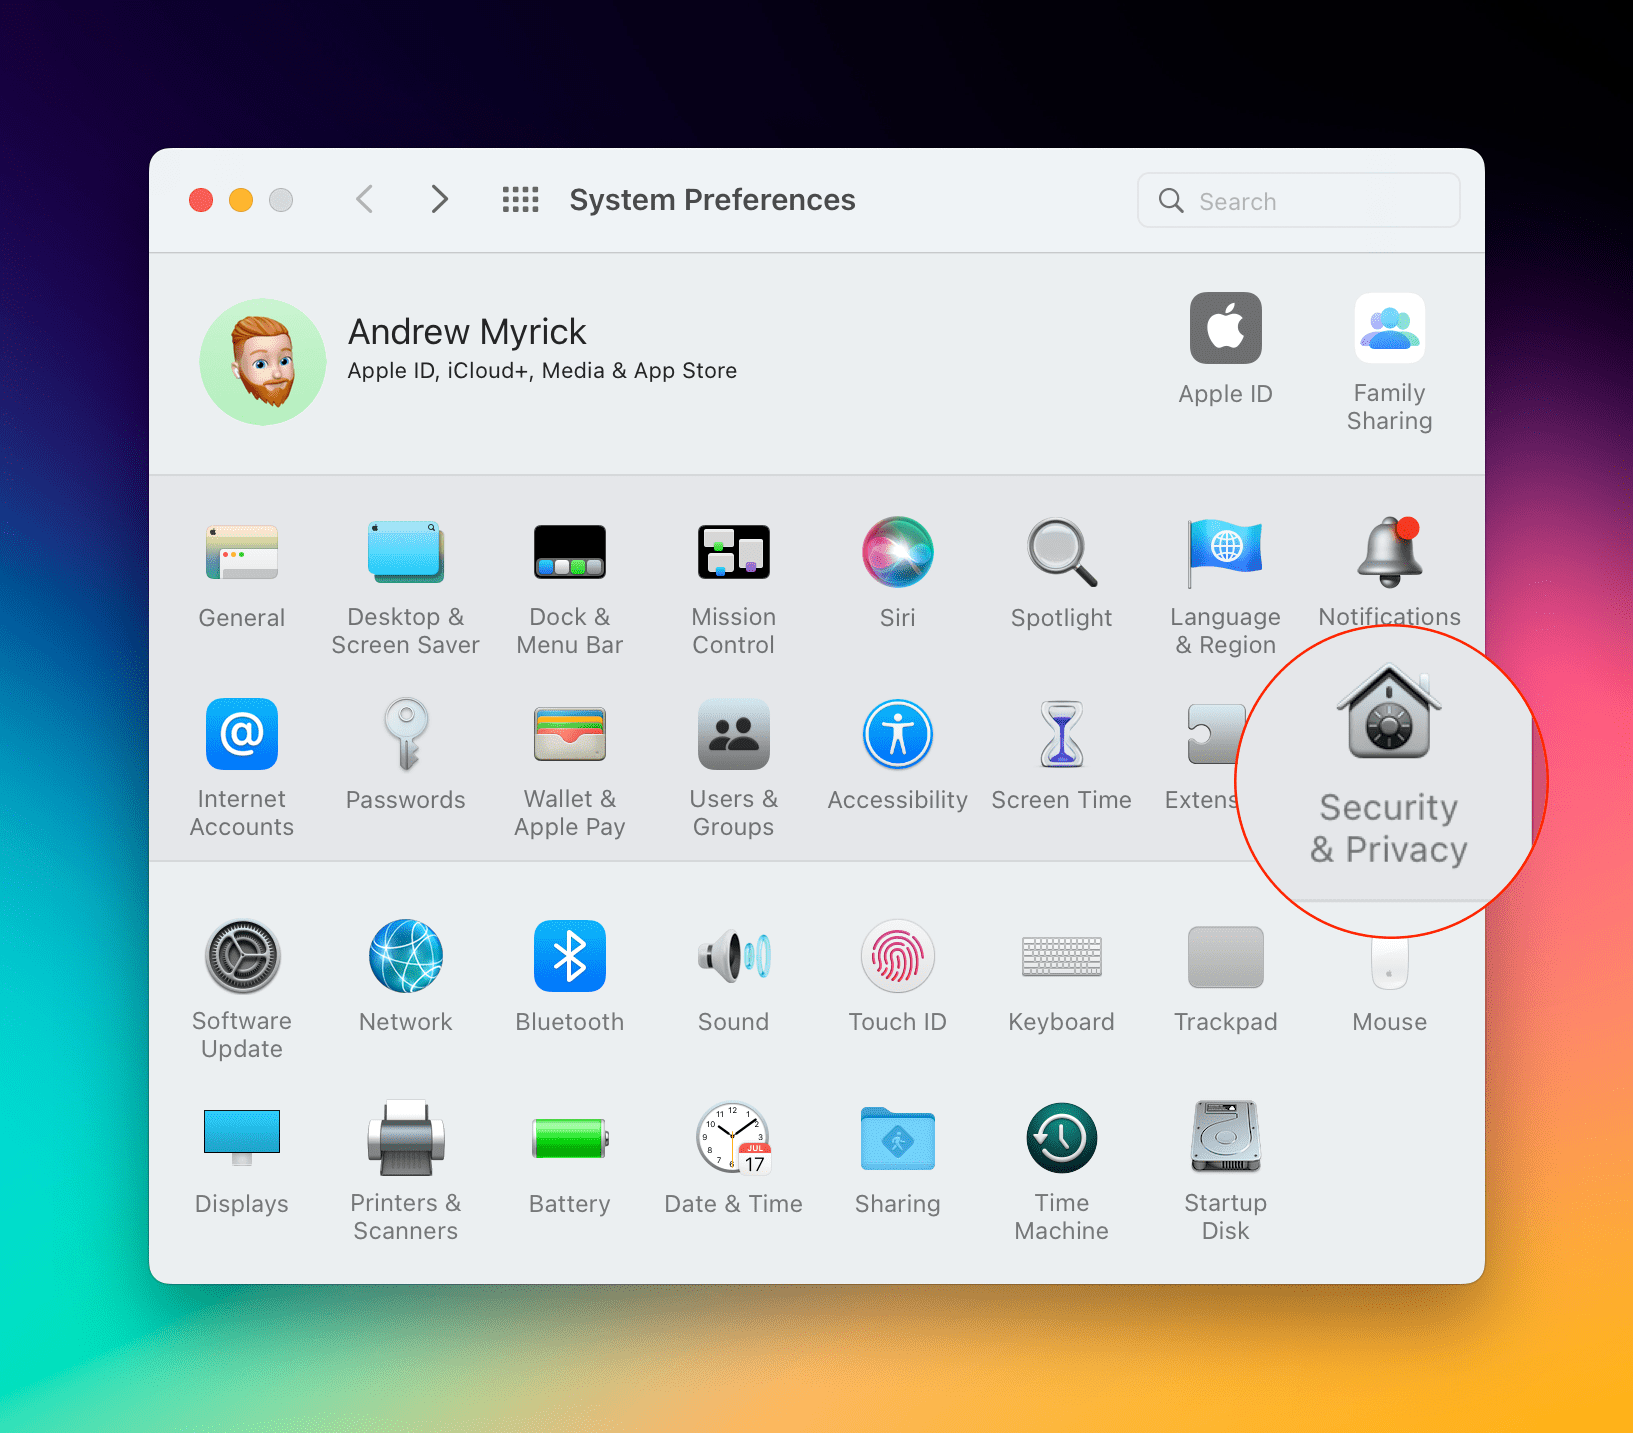
Open the System Preferences app on your Mac.
Click Security & Privacy.
Select Privacy at the top of the window.
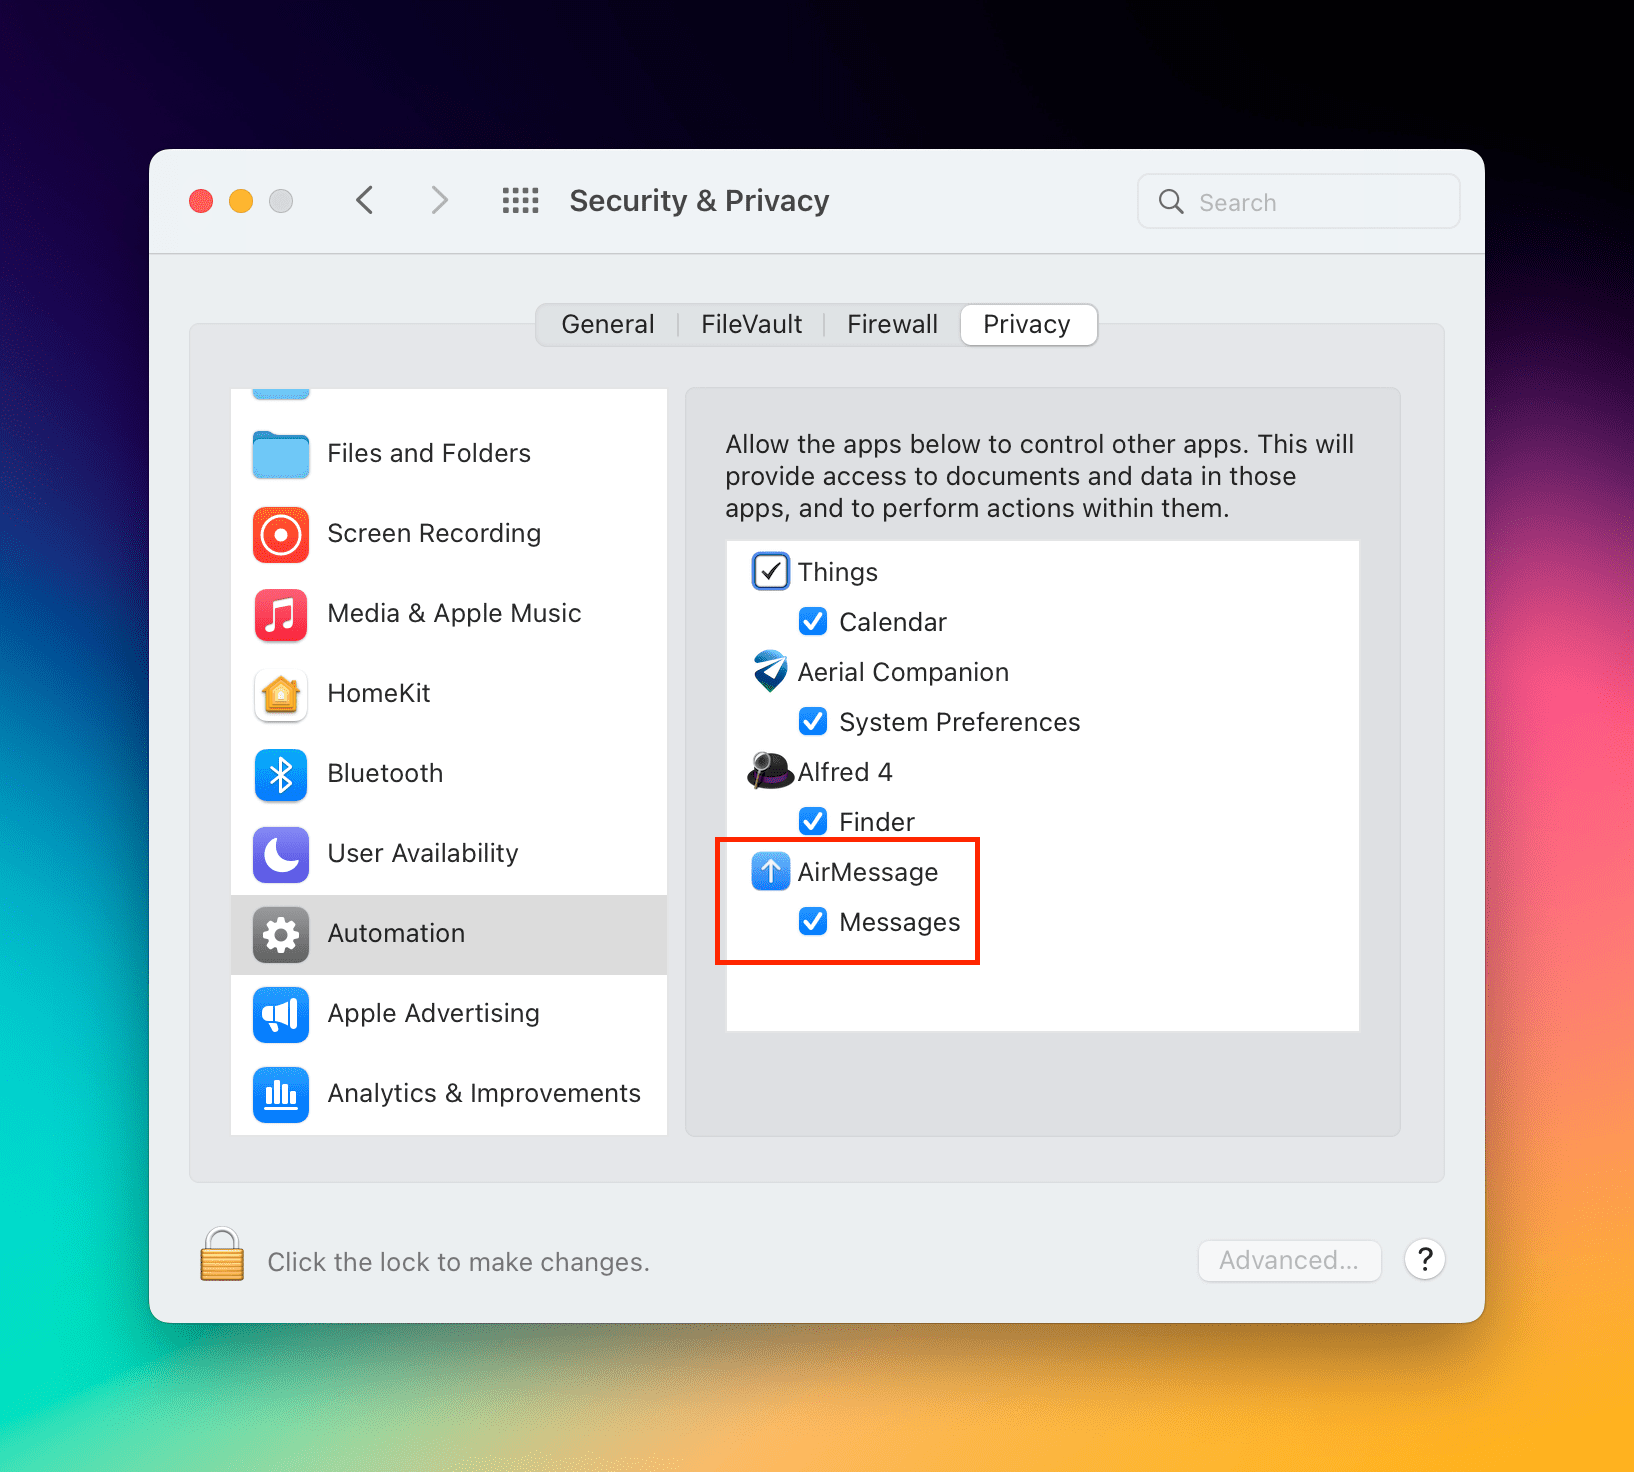
In the sidebar, scroll down and select Automation.
Click the Lock icon in the bottom left corner.
Enter your password (or use TouchID).
Under AirMessage, click the checkbox next to Messages.
Click the lock again to save the changes.
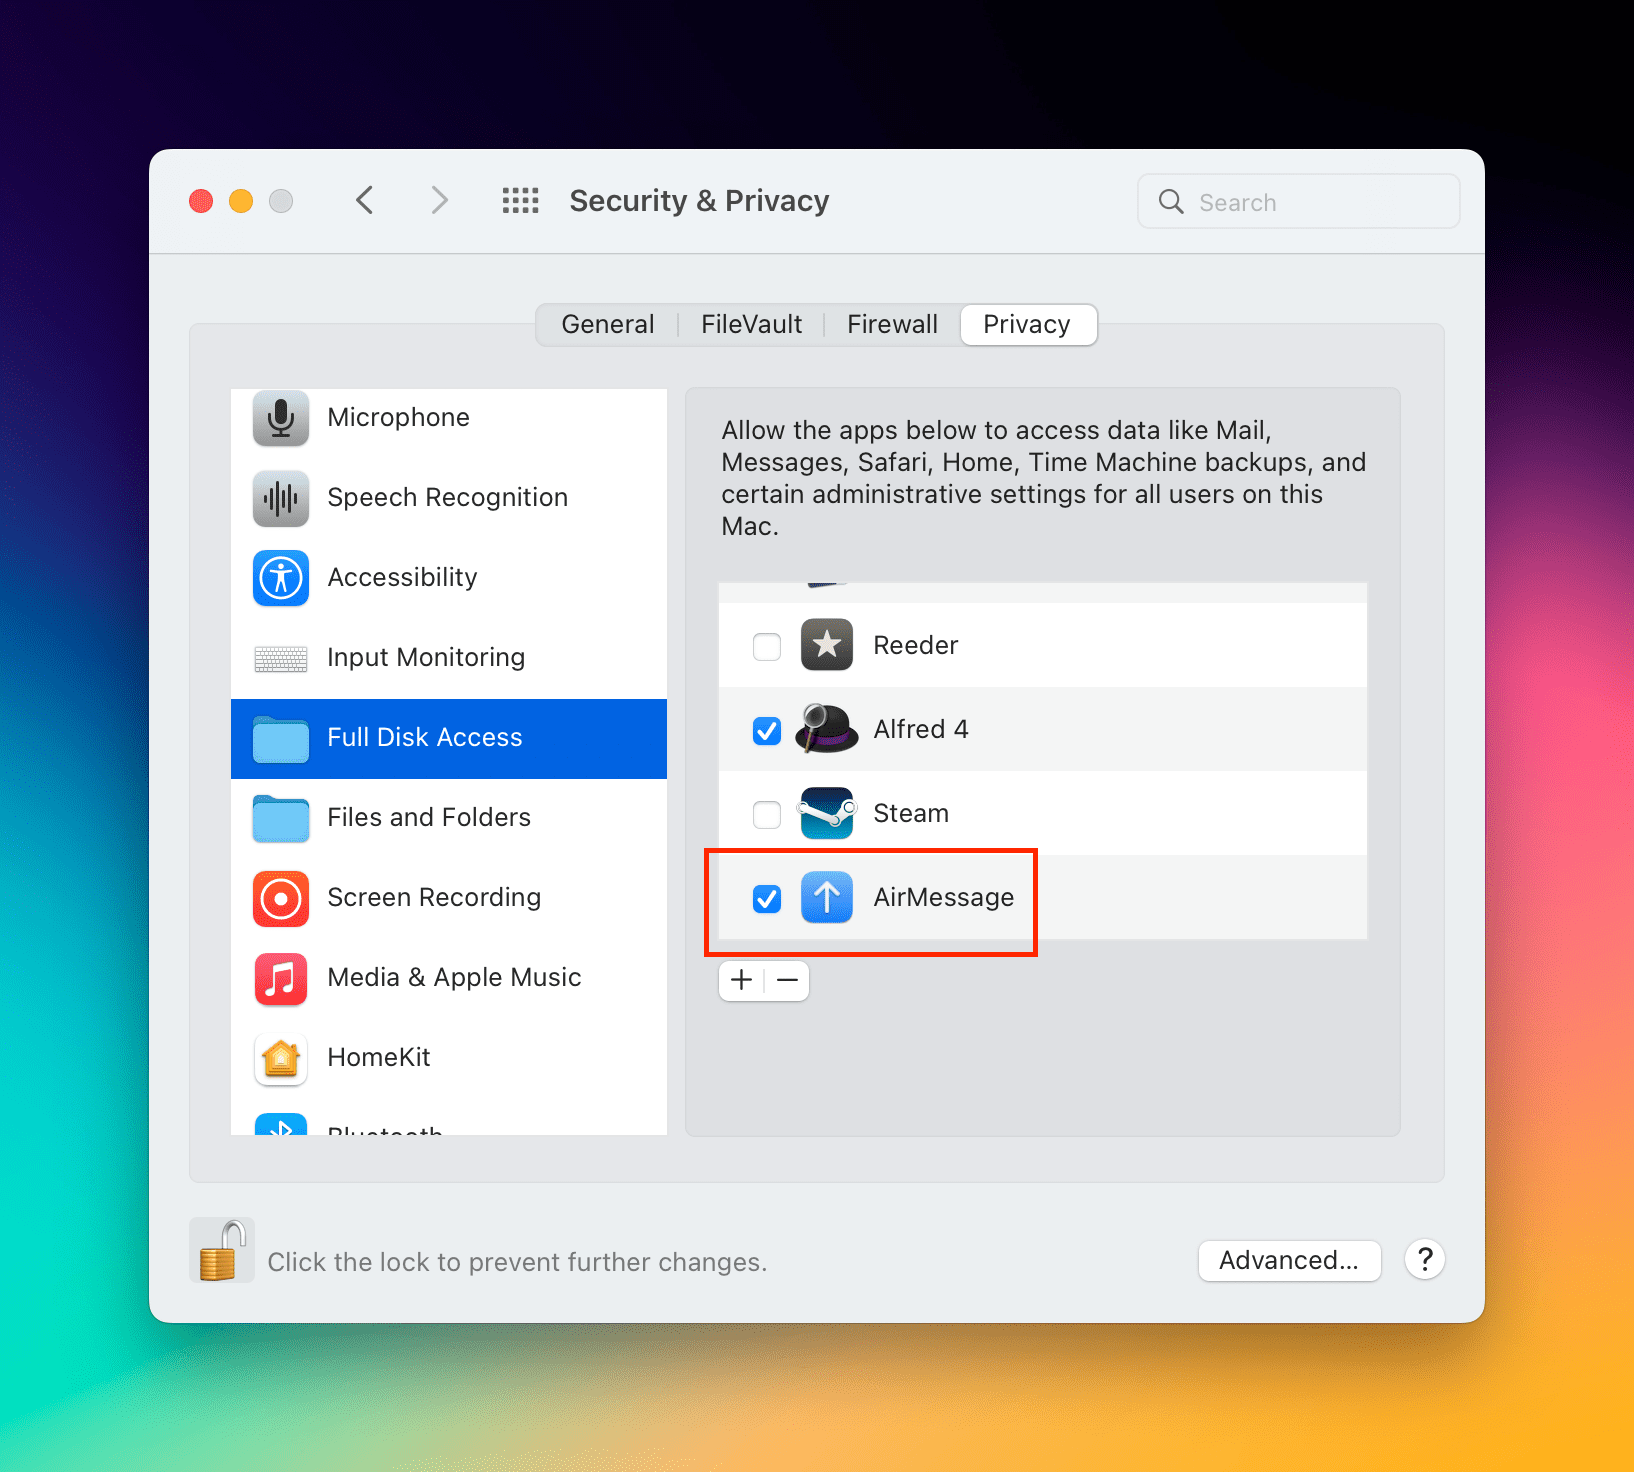
With Automation for AirMessage enabled, the next step you’ll need to take is to enable Full Disk Access. This is required for those running macOS Mojave 10.14 or later, and the developer promises that the app does not read any data other than your Messages data.
Open the System Preferences app on your Mac.
Click Security & Privacy.
Select Privacy at the top of the window.
In the sidebar, scroll down and select Full Disk Access.
Click the Lock icon in the bottom left corner.
Enter your password (or use TouchID).
Click the checkbox next to AirMessage.
Click the lock again to save the changes.
With these enabled, you’re well on your way to getting iMessage on Android all set up.
Sleep Settings
Unfortunately, AirMessage requires your Mac to essentially be “awake” all of the time. That’s why it’s best to use a Mac that never leaves your home and is always connected to Wi-Fi. Otherwise, the AirMessage server won’t work properly, and you won’t receive the messages on your Android phone until the Mac is connected to a network again. Here’s how you can change the Energy Saver settings:
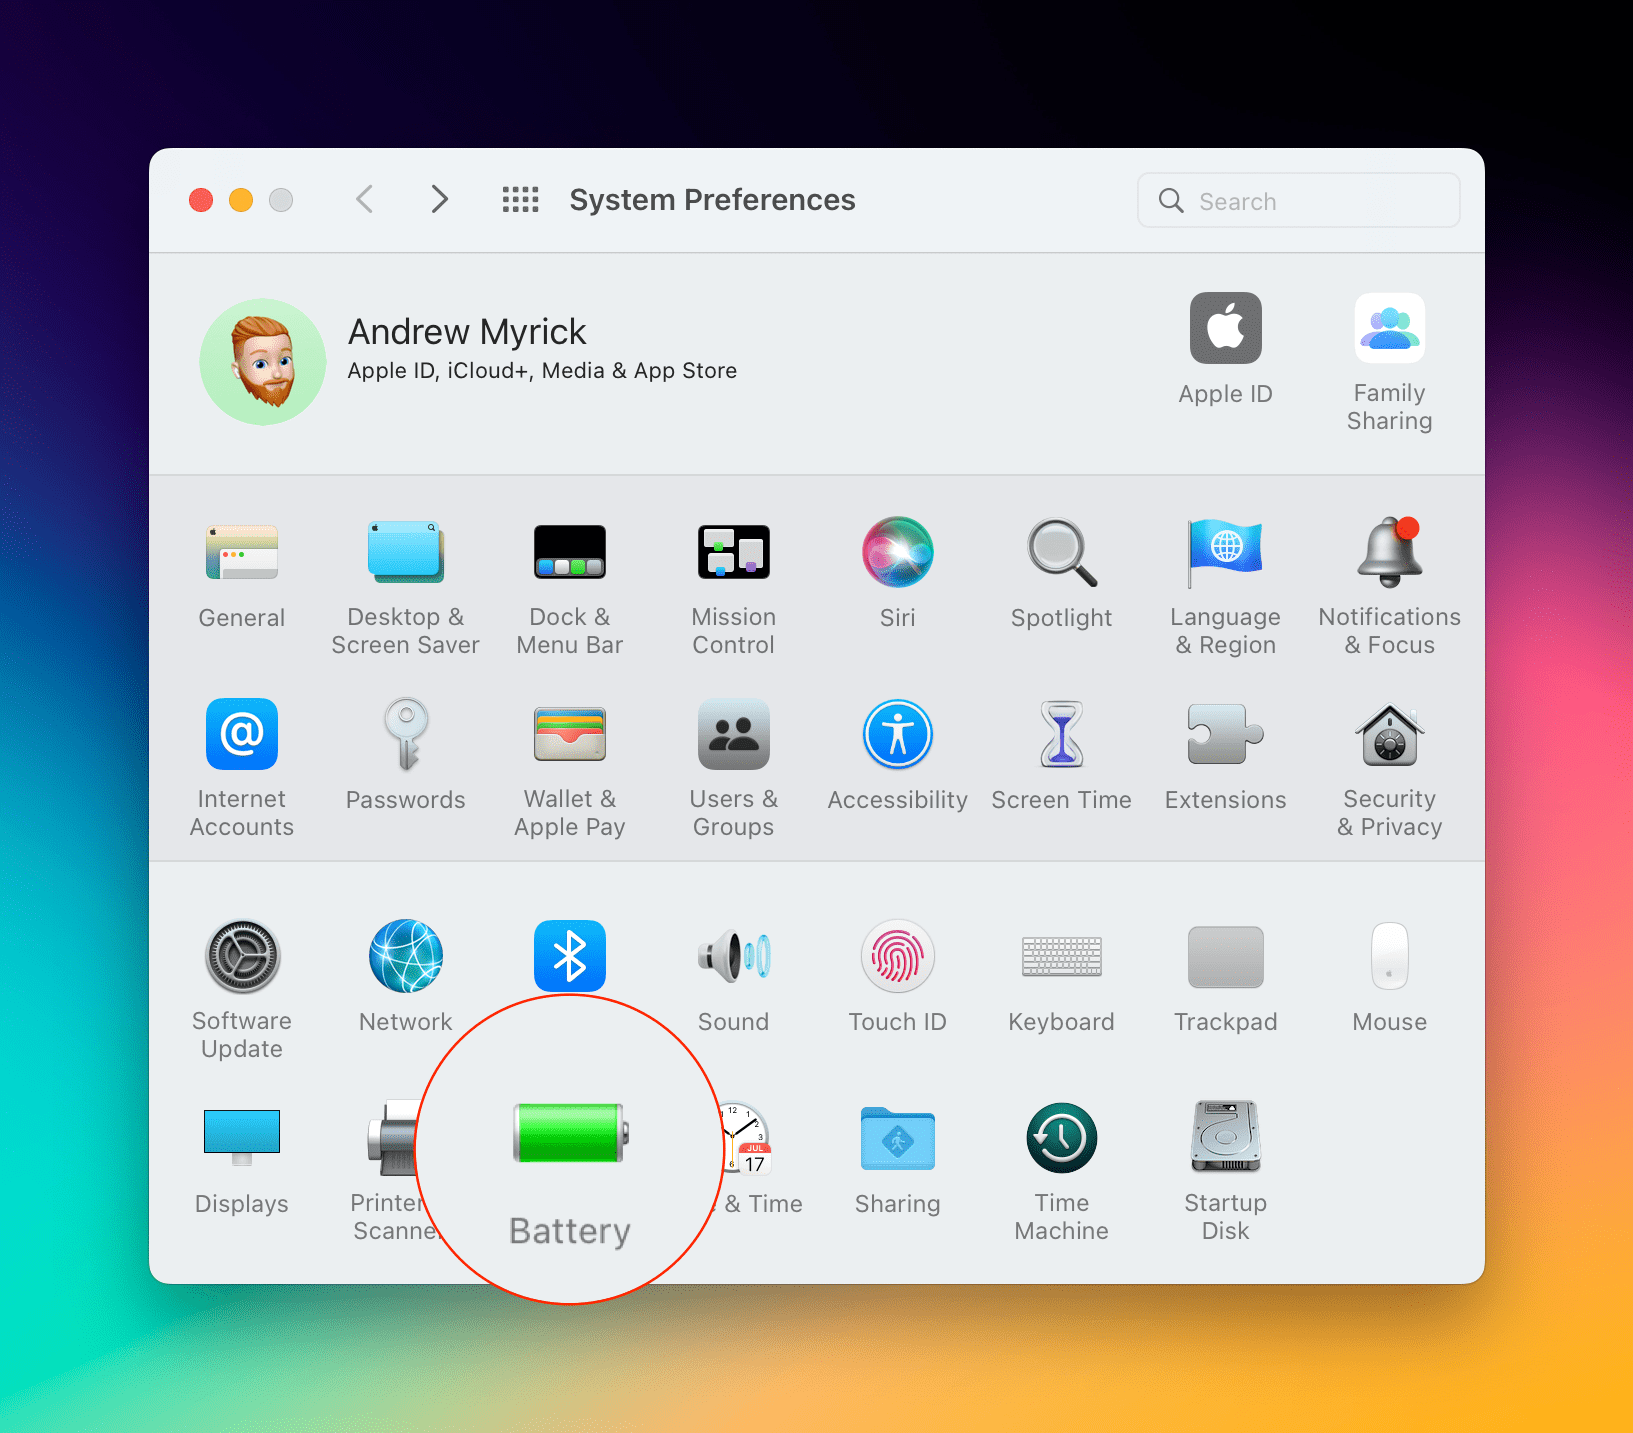
Open the System Preferences app on your Mac.
If you are on a MacBook, click Battery.
In the sidebar, click Power Adapter.
Drag the slider to change when your display will automatically turn off.
Click the checkbox next to the following:
Prevent your Mac from automatically sleeping when the display is off.
Wake for network access.
Exit the System Preferences app.
If you’re not using a MacBook, but are instead installing AirMessage on something like the Mac Mini, iMac, or Mac Studio, these are the steps you’ll need to take:
Open the System Preferences app.
Click Energy Saver.
Next to Computer sleep, drag the slider to the right until it hovers over Never.
Click the checkbox next to Wake for Ethernet network access.
There are no specific settings required for when your display can go to “sleep”, so you can have this set to whatever you like.
Set Up AirMessage
With your Mac all ready to go, now it’s time to get everything set up on your Android phone. Here’s how you can set up AirMessage on your phone:
Download the AirMessage app from the Google Play Store.
Once the app is installed, open it on your Android phone.
Log into the same account that was either created or attached to the Mac.
In the bottom right corner, tap the Chat icon.
Enter a number or contact that you want to send a message to.
When prompted, click the Allow button on your Mac to complete the AirMessage integration with the Messages app.
Once you have provided access on the Mac, there are no more steps left! You’ll finally be able to use iMessage on Android, something that we truly never thought would be possible.
Can You Use iMessage on Android Without a Mac?
Unfortunately, there is no reliable way to use iMessage on Android without relying on a third-party solution such as AirMessage. But if you go through and follow all of the steps properly, then you won’t have to worry about needing an iPhone or iPad just to use iMessage.
This has truly removed the need to carry multiple phones for those like us who use both Android and iOS on a regular basis. Perhaps Apple will finally provide iMessage access to those on Android, but there has been no indication of that happening. Until then, AirMessage will do the trick just perfectly.
How to use iMessage on Android with Beeper Mini
Thanks to a new app called Beeper Mini, that green bubble envy might finally be a thing of the past. Beeper Mini allows you to access and use iMessage directly on your Android device, bridging the communication gap between iOS and Android platforms. Whether you’re an Android user looking to stay in touch with iPhone-using friends and family, or simply someone who wants a more unified messaging experience, Beeper Mini offers a compelling solution.
What is Beeper Mini?
Beeper Mini is a standalone app available for Android devices that allows you to access and use iMessage directly. This means you can send and receive iMessages with your iPhone-using friends and family, even though you have an Android phone.
Here are some key features of Beeper Mini:
Access iMessage: Send and receive iMessages with your iPhone-using contacts.
No Apple ID required: Sign up with your phone number and optional Apple ID.
Full iMessage features: Enjoy all the features you’re familiar with from iMessage, including typing indicators, read receipts, full resolution attachments, emoji reactions, voice messages, editing/unsending, stickers, and more.
Secure communication: Beeper Mini uses end-to-end encryption to secure your chats.
Intuitive interface: The app is designed to be easy to use and navigate.
Beeper Mini is a great option for Android users who want to:
Stay connected with iPhone-using friends and family: No more green bubbles!
Experience the iMessage platform: Enjoy all the features and functionality that iMessage offers.
Have a unified messaging experience: Use the same app to chat with all your contacts, regardless of their platform.
Beeper Mini is still in its early stages of development, but it has already gained popularity among Android users. The app is constantly being updated with new features and improvements, so you can expect an even better experience in the future.
How to use iMessage on Android with Beeper Mini
Before you dive into the wonderful world of iMessage on your Android device, a quick sign-up process awaits. This section will guide you through the steps involved in creating your Beeper Mini account, ensuring a smooth and hassle-free entry into the platform. Whether you prefer a phone number or Apple ID login, we’ll explore both options, making sure you find the perfect fit for your existing online ecosystem. So, grab your Android device and prepare to embark on your Beeper Mini journey!
Download the Beeper Mini app from the Play Store.
Once installed, open the app.
Tap the Continue with Google button.
Sign in with your Google account.
Allow notifications.
Tap the Next button.
Tap the Start my 7 day free trial button.
Provide your payment information through the Google Play pop-up.
Tap the Next button.
Provide access to your SMS and contacts.
Customize your profile.
Tap the Next button.
Tap the Let’s go button.
Now that you’ve successfully signed up and entered the world of Beeper Mini, it’s time to familiarize yourself with the app’s intuitive interface and discover all the incredible features it has to offer.
Tap the New chat button in the bottom right corner.
Enter a name, phone number, or email.
Select the contact that you wish to message.
If you want to share your name and photo, tap the Share button in the bubble that appears at the top of the conversation.
Type out your message.
Tap the Send button in the message bar.
Already a proud owner of an Apple ID and excited to leverage its iMessage capabilities on your Android device? The developers have made it possible for you to link your Apple ID with Beeper Mini. This provides seamless syncing across all of your devices, and will eventually include access to your existing iMessage conversations.
Tap the Settings button in the top right corner.
Tap Manage connection.
Tap Connect Apple ID.
Enter your Apple ID and password.
When prompted, enter the six-digit code from one of your Apple devices.
Tap Next.
After you are signed in, you’ll be taken back to the Manage Connection screen. From here, you can select which phone number or Apple ID email you want to use when creating new chats. Just pick the one you want to use, then you’ll be able to start sending iMessages from your own Apple ID.
Conclusion
Beeper Mini offers a revolutionary solution for Android users who want to experience the iMessage platform. With its simple setup process, intuitive interface, and full range of iMessage features, Beeper Mini removes the communication barrier between iOS and Android users. Whether you’re exchanging text messages, sending photos and videos, or participating in group chats, Beeper Mini ensures seamless communication across platforms.
So, if you’re tired of the green bubble blues, download Beeper Mini today and experience the world of iMessage on your Android device. Remember, the app is still in its early stages, so you might encounter occasional glitches or limitations. However, the developers are actively working on improvements, and the future of Beeper Mini looks bright. As the app continues to evolve, it has the potential to revolutionize the way we communicate across different mobile platforms.
Andrew Myrick is a freelance writer based on the East Coast of the US. He enjoys everything to do with technology, including tablets, smartphones, and everything in between. Perhaps his favorite past-time is having a never-ending supply of different keyboards and gaming handhelds that end up collecting more dust than the consoles that are being emulated.
Wow, I appreciate you Andrew!
Thanks for sharing this extremely helpful information.
I for one think this is a wicked clever hack to utilize imessage on non-apple devices via a little help from the middle man aka Mac.


Wow, I appreciate you Andrew!
Thanks for sharing this extremely helpful information.
I for one think this is a wicked clever hack to utilize imessage on non-apple devices via a little help from the middle man aka Mac.
HUGE KUDOS!