macOS Monterey and macOS, in general, are pretty incredible their own right. But despite all of the power offered by the new M1 Pro and M1 Max chips in the MacBook Pro, there are still the usual limitations. The biggest limitation is that playing AAA games is practically impossible, as these games just aren’t available on the Mac even through Steam.
There are also other reasons why you may want or need, to use Windows on a semi-regular basis. But instead of going out and buying a new Windows PC, you can still install Windows 11 on MacBook Pro.
With Apple’s transition away from Intel and to its own series of processors, this means that installing Windows 11 on MacBook Pro with Boot Camp is impossible. Boot Camp no longer exists on these newer machines, leaving MacBook Pro owners looking for alternatives if they need to use Windows 11 for anything.
What Is Parallels?
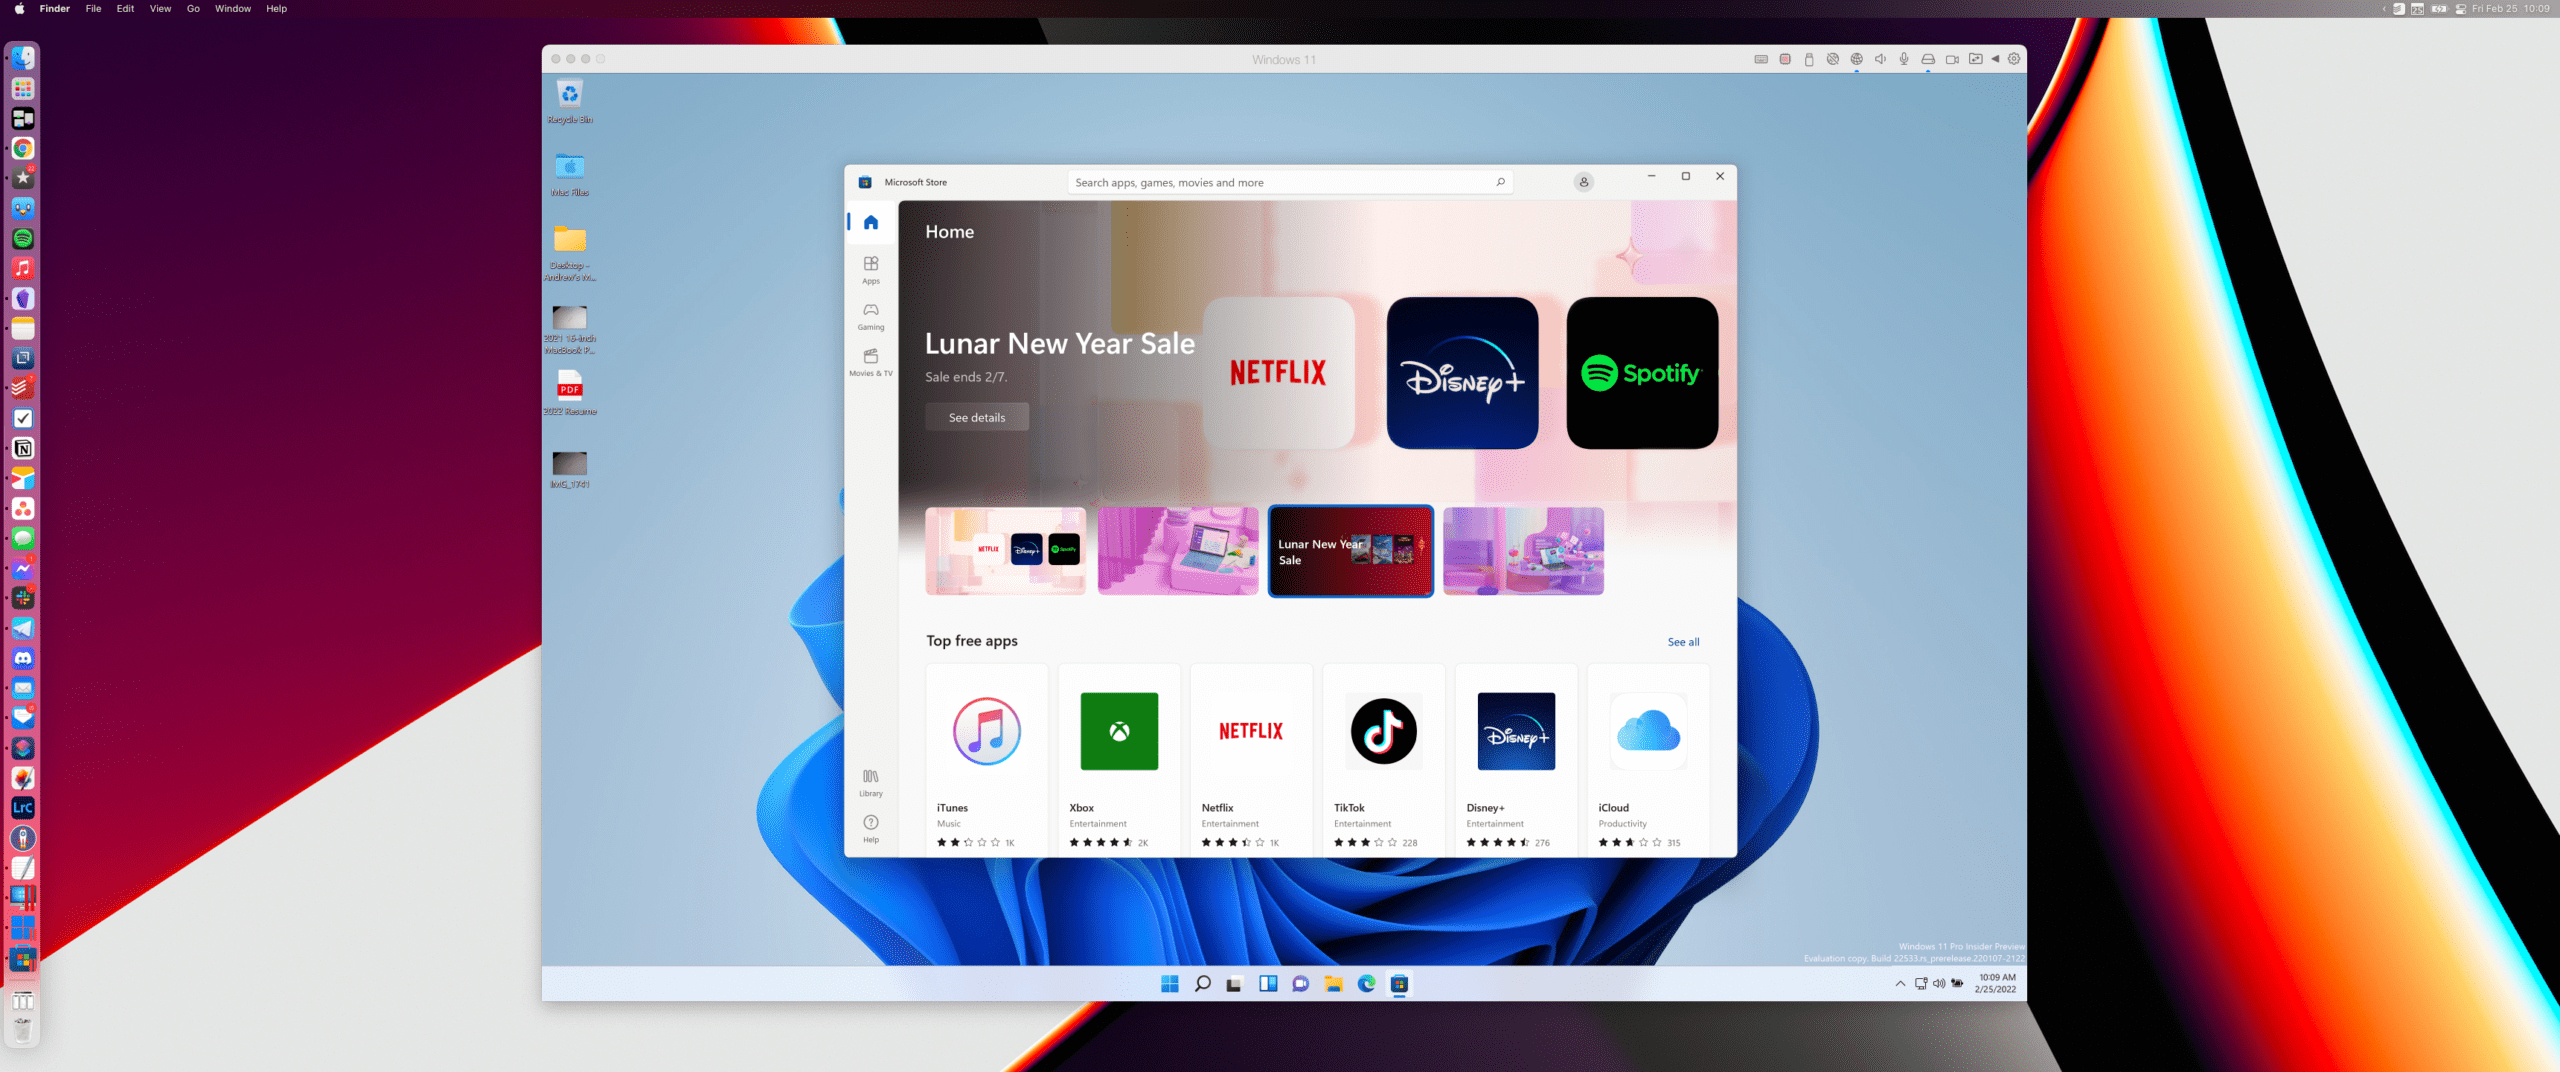
Without a doubt, the best and easiest way to get Windows 11 on MacBook Pro is through the help of Parallels. Essentially, you’ll be running Windows 11 on MacBook Pro through a virtual machine that is created on your Mac. This gives you the flexibility to use all of the Windows apps that you need, while also being able to transfer files between the different operating systems since you don’t have to manually move between different computers.
Parallels has been the de-facto option for those looking to run Windows in a virtual machine for years. Late in 2021, the company finally updated its app to work natively with the M1 architecture. This means that if you can download the ARM-version of Windows 11, you can use Parallels to install and use Windows 11 on MacBook Pro with ease.
How To Install
The installation process is pretty straightforward, at least for the most part. There are different versions of Parallels available, each of which offers something a bit different:
Parallels Desktop: Standard Edition ($79.99)
8GB vRAM
4 vCPUs
30-days phone & email support
Parallels Desktop: Pro Edition ($99.99 per year)
128GB vRAM
32 vCPUs
Unlimited phone & email support
Parallels Desktop: Business Edition ($99.99 per year)
128GB vRAM
32 vCPUs
Unlimited phone & email support
Centralized administration and management
Unified Volume License Key for mass deployment
Outside of the Business Edition, the biggest difference between the Standard and Pro Editions comes down to the amount of vRAM and vCPUs that are accessible. The Pro Edition is also only available with a subscription, as you’ll need to pay per year. Meanwhile, the Standard Edition is a one-time charge as it’s designed to be used for Home and Students.
The best thing about Parallels is that you can sign up for a free trial. This gives you the ability to test things out before deciding which version is right for you and your needs.
Once you’ve figured out what version you need, here’s how you can install Windows 11 on MacBook Pro:
Download the latest version of Parallels to your Mac (version 17).
Once downloaded, install it to your Mac, and follow the prompts to allow access.
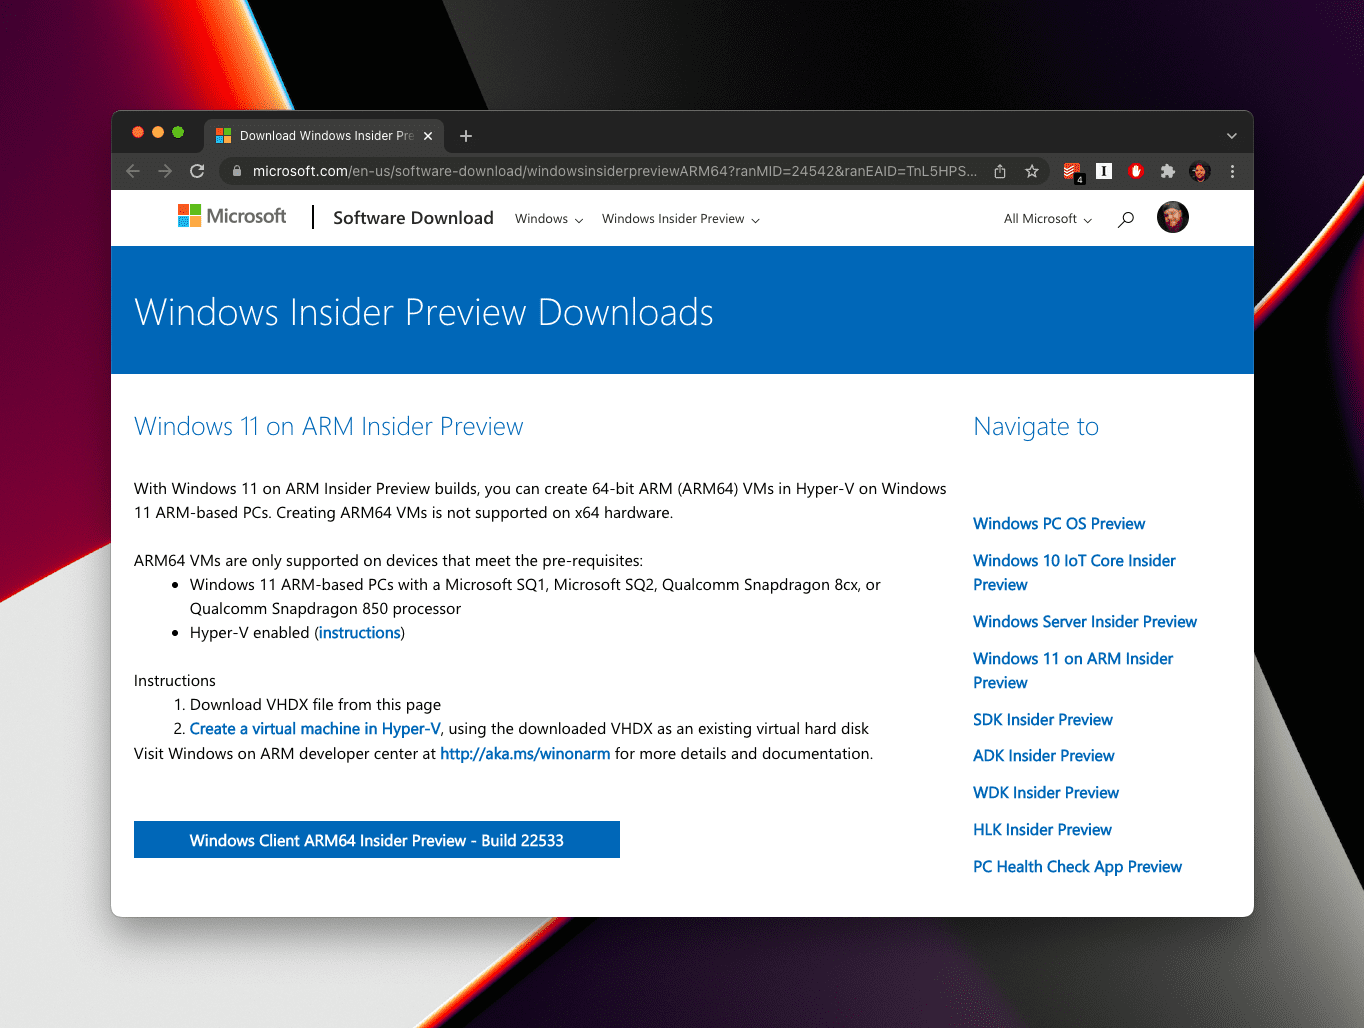
Click the Windows 11 on ARM Insider Preview – Build 22533 button.
Wait for the Windows 11 on ARM Insider Preview to finish downloading.
Open Parallels back up, and select Create New.
Drag and drop the Windows ARM file to the Parallels page.
Click Continue.
Choose whether you plan to use this for Productivity or Games Only and click the Continue button.
Enter a name and location that you wish to have the VM installed and press Continue.
Go grab a cup of coffee or a quick snack while the Parallels installs Windows.
Allow access to your Bluetooth devices, microphone, and webcam (if applicable), when prompted.
After the installation is completed, create or sign in to your Parallels account
Enjoy!
Since Parallels makes use of the resources on your MacBook Pro, you may want to adjust some things. Namely, you can adjust the number of cores that are utilized, along with how much RAM the virtual machine can use.
However, if you have 16GB of RAM we would recommend using up to 8 or maybe 10GB. But it just depends on what you plan on using the VM for. If it’s for some casual gaming, then you’ll likely be fine with the recommended settings. But if you plan on playing something more intense, then you’re likely going to want to bump things up a notch or two.
Try Out Coherence Mode
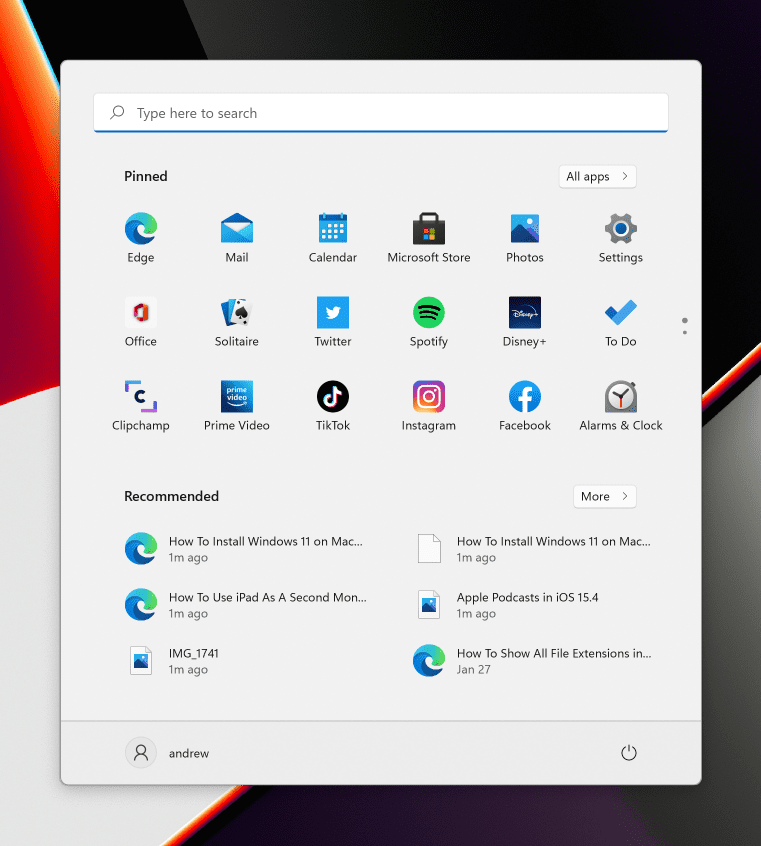
Along with bringing support to the M1, M1 Pro, and M1 Max models, there’s an awesome new feature in Parallels Desktop 17. Coherence Mode has been introduced, which allows you to open and use Windows apps just like they were installed directly onto your Mac.
But instead of needing to access them through Parallels, just press Control + CMD + C on your keyboard. Now, you’ll see the Windows 11 Start Menu button appear on your macOS dock. Then, you can go through and open any Windows apps that you may need that aren’t already available on macOS. It’s just one of those nifty features that you didn’t know you needed until it was implemented.
Andrew Myrick is a freelance writer based on the East Coast of the US. He enjoys everything to do with technology, including tablets, smartphones, and everything in between. Perhaps his favorite past-time is having a never-ending supply of different keyboards and gaming handhelds that end up collecting more dust than the consoles that are being emulated.


Write a Comment