Apple Mail, or Mac Mail as many like to call it, is Apple’s default way of sending and receiving emails across its ecosystem, be it a MacBook or iPad. Adding attachments is not only easy to do, but there’s no shortage of ways to do so.
In this article, we’ll be covering ways to add attachments to Mac Mail on both iOS and macOS.
Below are our four solutions for adding those attachments, depending on your device:
The Paperclip (iOS and MacOS)
Let’s start simple. The Paperclip icon is present within both the Mail app and program and is an easy way to add an attachment. On your PC:
1. Create a new email and click the Paperclip icon.
2. Finder will open up. Navigate to the folder or directory your attachment is stored in, locate it, and click the “Choose File” button when ready.
3. Your file will be attached to your mail.
If you want to attach an image, click the Attach Image icon in the top right corner.
For iOS:
1. Open the app and create a new email.
2. On the grey strip above your keyboard, where your predictive words appear, you should see the Paperclip icon. If not visible, just tap the arrow icon (“<”) on the strip to reveal it.
3. A popup screen will ask you what you’d like to attach. Select your option and it will be attached.
In iOS, you’ll have the option to take a real-time photo or video and attach it, select an image from your library, scan a document or text with your camera, or attach a file from your “Files” app.
Drag and Drop (MacOS)
Another simple solution is to take advantage of that interface and drop your attachment directly into your email. Here’s how:
1. When creating your new email, open the Finder window where your file is located.
2. Click, hold, and drag the file over to your email from Finder. You should see a Plus icon appear on the file.
3. The file will then be attached to your email.
If you haven’t started an email yet, you can also drag your file directly onto the Mail icon in the Dock to create one with your file embedded.
The Share Button (iOS and MacOS)
You can also perform the entire process backward and select your attachment before even creating your email. All you need is the Share icon. Here’s what to do for macOS:
1. The Share icon can be found at the top of any window in Finder, even in Quick View. When you’ve found the attachment you want to include, click the Share button.
2. You’ll see a dropdown menu appear with a list of programs to share the file with. Choose “Mail.”
3. Your attachment will then appear in a new email. Fill out the rest of the details and you’re good to go.
Share is also accessible through the Finder menu. Click “File” and navigate down to “Share” for the same menu.
For iOS, the process is quite similar:
1. Open your file and look for the Share icon in the top right corner of the screen.
2. Tap it and a dropdown menu will appear with a list of compatible apps. Choose “Mail.”
3. The app will open and the attachment will appear embedded in a new email.
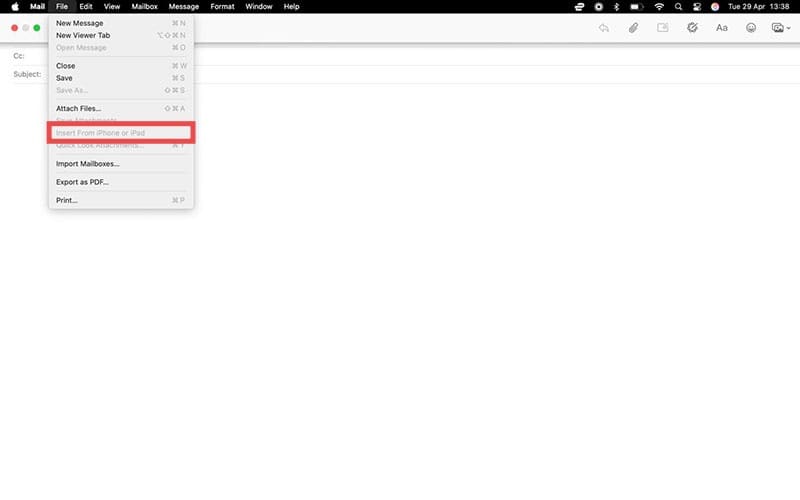
Insert From an iOS Device (MacOS)
If you’re wired into the Apple ecosystem and have an iOS device in addition to your MacBook or iMac, then you can insert media directly from one to another. Here’s how:
1. Open Mail and click “File” from the top menu.
2. Scroll down to “Insert from iPhone or iPad,” choose your device, and capture method.
3. A new email will be created and an icon will pop up in the body stating what the phone will do. You can hit the “Cancel” button to stop the process.
4. Your iPhone will enter into the mode you chose (scanning, camera, files, or sketches). Once done you can send the file to your Mac.
5. Your file will then be inserted into the email.
As an avid gamer, I’ve run into my fair share of error codes and weird faults that have forced me to find fixes to problems I never anticipated. That gave me a passion for sharing those fixes with others so we can all game without feeling like our hardware is rebelling against us.


Write a Comment