Error code 50 indicates your Mac could not copy or move files from external storage devices. The whole process gets stuck with no visible progress. At the same time, error 50 may also pop on the screen when your Mac fails to delete certain files.
The complete error message reads as follows: “Sorry, the operation could not be completed because an unexpected error occurred (Error code -50).” Use the solutions listed below to troubleshoot the problem.
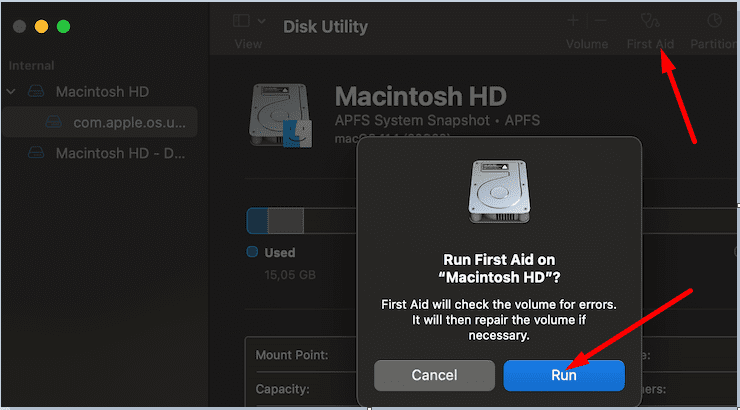
Launch Disk Utility and let your Mac detect and repair the problem automatically. Scan the storage volume where you want to move the file. Launch the Disk Utility, click on the First Aid tab and select the Verify Disk option.
If your Mac detects any errors, hit the Repair button and your computer will take care of the rest. Restart your machine and check if the error is gone.
Use a Different File Name
Renaming the problematic file may help you troubleshoot the problem. If the first copy got corrupted, your Mac may not be able to replace it with a new file version. Rename the file and check the results. If the issue persists, try renaming the file in the source folder as well.
Use Terminal
A number of users managed to copy the problematic file using Terminal. You basically force the system to copy or move the file.
Navigate to Applications, select Utilities, and go to Terminal.
Then type cp -R . Make sure to type a space after the R otherwise the command won’t work.
From Finder, drag the problematic file into your Terminal window. The pathname of that file should immediately be visible on the screen.
Next, locate the destination folder in Finder and then drag it into your Terminal window. Again, the pathname should be automatically filled in.
Press the Return key, exit Terminal, and check the results.
If you’re comfortable using the Terminal and you don’t like the drag and drop method, you can move the file using the following commands:
cp source destination
mv source destination
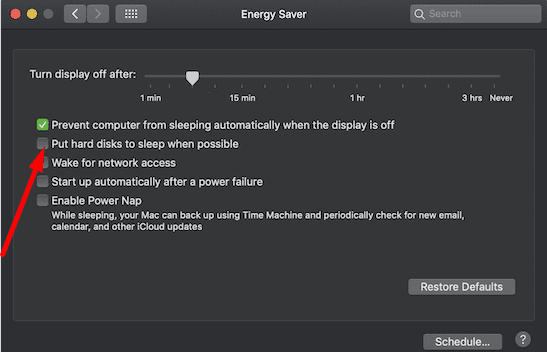
Check Your Power Settings
If your current power settings automatically put your disk to sleep in order to extend your Mac’s battery life, that may explain why you’re getting error 50. Your disk is dormant and the copy or move functionalities are unavailable.
Click on your Apple menu and go to System Preferences.
Then select Energy Saver and uncheck the option that says Put the hard disks to sleep when possible.
Save the settings and check if error 50 is gone.
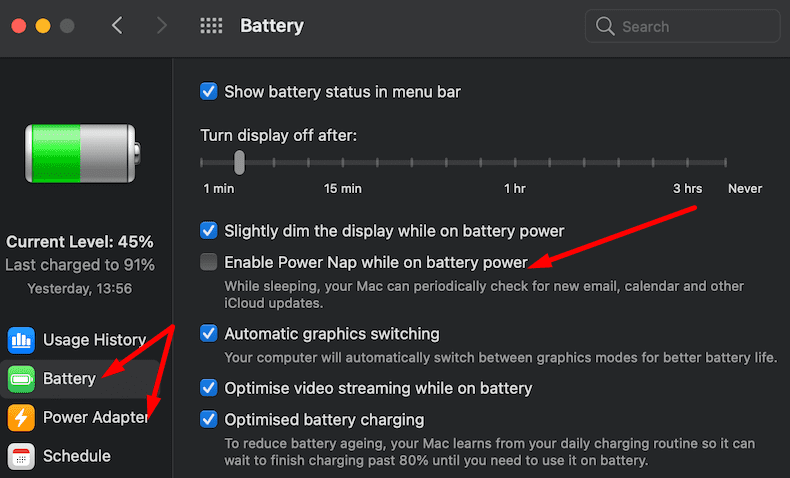
On newer macOS versions, go to Battery, select Battery and Power adapter, and disable Power Nap.
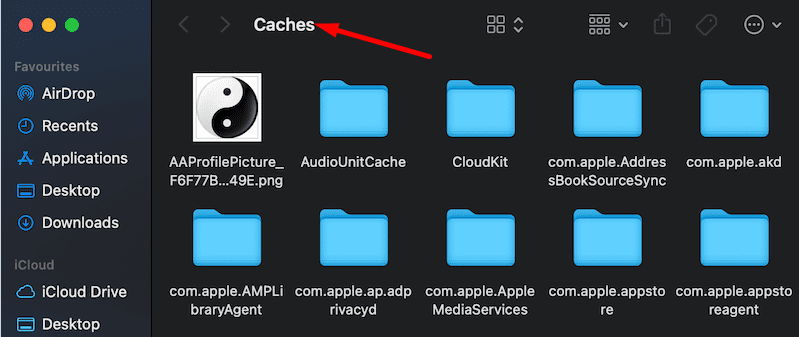
Clear Your Cache and Update Your Mac
All the programs and webpages you open on your Mac save plenty of temporary files on your machine. The cache files may sometimes interfere with the programs you’re running during your current session. That’s why you should regularly clear your cache.
Launch Finder, click the Go menu, and then select Go to Folder.
Enter ~/Library/Caches in the dialog window.
Select all the files from the Caches folder and move them to Trash.
Then empty your Trash folder to permanently remove the cache files from the system.
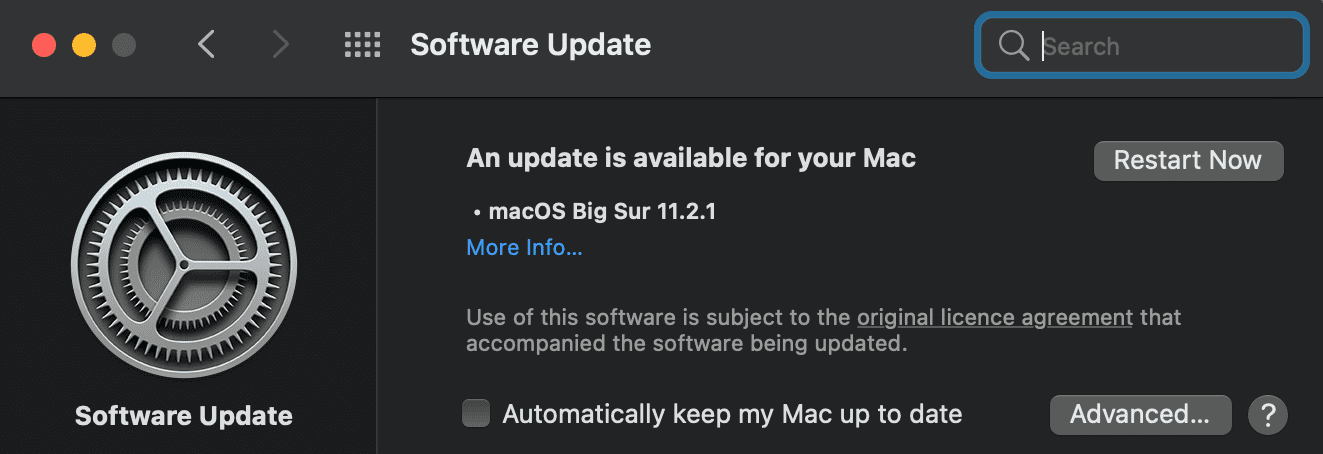
Navigate to System Preferences, select Software Update, and install the newest macOS version available for your device.
Conclusion
Pinpointing the exact cause of error code 50 on your Mac is not that easy. The error could be triggered by a temporary glitch, in which case a simple reboot should do the trick. If the issue persists, try clearing your cache, rename the file that triggered the error, and prevent the OS from automatically putting your disk to sleep.
So, what worked for one particular user may not necessarily work for you. Nevertheless, we hope this guide helped you fix error code 50 on your MacBook. Hit the comments below and tell us which method worked for you.
Madalina has been a Windows fan ever since she got her hands on her first Windows XP computer. She is interested in all things technology, especially emerging technologies — AI and DNA computing in particular.
Nothing worked! After researching and scouring the internet, nothing I’ve tried has worked! Can’t unmount or eject, disk utility says disk is in use but it’s not. Can’t repair permissions (read only), user name gone from list
Error Flag -50
I did various things to clear the error, including the following (not in strict chronological order):
• I checked to make sure the drive hadn’t somehow run out of space (Apple symbol > About This Mac > Storage). It hadn’t.
• I ran a simple test to make sure the issue wasn’t that (a) some filename was too long or (b) a file was being placed “too deep” in the hierarchy. To do this, I created and gave a short filename to a new blank Word document and attempted to import it into the drive. That failed.
• I tried to delete the contents of Trash from the taskbar and also by attempting to open Trash, in case I needed to move a file back out of it. I couldn’t access Trash either way, and the -50 error flag showed up when I tried to.
• I found this web page (appletoolbox.com/fix-macbook-error-code-50/), and the first time I ran Disk Utility > First Aid (with Show Details twirled open), the action failed because First Aid was unable to dismount the drive.
• I backed out of Disk Utility and then did a manual dismount (forced) and remount of the drive.
• When I then went back into Disk Utility > First Aid, the cleanup program ran fine. Trash was also working properly again afterward.
Renaming a Filename
On occasion I have not been able to delete a file from the Trash folder. I tried Put Back and renaming it, but that still didn’t work. The answer I found was to (1) open the particular file by using the program I usually use to open it, and (2) do a Save As to overwrite the old filename—that is, working from inside the program rather than simply changing a file label in a directory.
HI! After 3 painful days of looking at this stuck file, I finally found a solution!
All I had to do was go into…
– “System Preferences”
– “Apple ID”
– “iCloud Drive (Options…)
– and switch off and on “Desktop & Documents Folders”
HOPE THIS HELPS!!!
Brayden’s fix was the winner! Thanks for posting.
Also tried all the above options and still have the same problem.
Sorry tried all of the options above and still have the problems. Any more solution ? Thank you