Like many of you, I’ve watched and waited for Apple’s annual coming out party in June–it’s World Wide Developers Conference WWDC. I’ve read a zillion rumors, leaks, and other news. I just can’t seem to get enough info on what is going to happen and when…
source: apple
But finally, it’s here and with the WWDC kickoff, Apple released its much anticipated iOS 10. And if you’re anything like me, you are on this bandwagon 100% and went full throttle and updated all your beloved iDevices straightaway. Hopefully, you were a bit smart in all the exuberance and did perform a backup of your iPhone and other iDevices BEFORE you jumped in and upgraded your iDevice.
We trust in Apple, we believe that they thoroughly tested this iOS before releasing it into the world. But let’s face it, there just aren’t enough Apple testers to work out every kink and bug. And now that the update is in the hands of us regular folks, a billion of us and counting, we will and should expect to encounter “issues.” Let’s think of it as a learning experience, a chance to get to know our iDevices just a little bit better.
If you are one of those enthusiastic early adopters, like me, you keep your fingers crossed that your iPhone or other iDevice will make it though the upgrade smoothly and let at the end of that process (why does it always feel like doom is approaching???), you breathe a sigh of relief in that it worked! Your iPhone, iPad, or other device did not turn into a brick at midnight, instead it’s a Cinderella in fancy dress, looking good and working perfectly. Yes, that’s what we all want–the happy ending to each and every upgrade Apple provides us.
But if that happy ending eluded you this time–I am so sorry, what a total PITA (pain in the ass.) At Apple ToolBox, we are here to help you through these challenging moments. So here are a few tips to downgrade to an earlier version of iOS so your iPhone, iPad, or other iDevices works AND so you can wait however impatiently until some of those kinks and hiccups of the iOS10 release get sorted out.
So maybe you forgot to backup your iPhone, iPad, or other iDevice before you jumped into that shiny new updated iOS. Well, it shouldn’t be too late unless your iDevice had a total meltdown, like a blue screen of death. If you have any these serious problems, please check out our tips of dealing with these major problems.
So hopefully, you are not in that category of MAJOR PROBLEMS. If so, let’s move onto backing up our iDevices if we have not yet done that…or it’s been awhile.
So first things first, backup your iPhone or iDevice using iCloud or iTunes on your computer
A backup ensures that if something goes wrong during the downgrading process, you can always revert back without losing any applications, images, and other data.
At Apple ToolBox, we recommend backing up 2X2 (2 cloud and 2 local) just in case so if you ever find yourself in trouble, you have multiple places to get things back in order. At Apple ToolBox, we call this 2X2 rule our insurance policy!
If you are not already backing up your iPhone, iPad, or iDevice, check out this article and please, please DO THIS BACKUP NOW before anything else!
Downgrade from iOS 10 Beta to iOS 9
Make sure that you’re using the latest version of iTunes.
Turn off Find My iPhone in the iCloud section of the Settings app.
Turn off the iPhone or the iPad.
Hold down the Home button while plugging the device into a PC or Mac running iTunes.
Continue to hold down the Home button until the iTunes logo pops up on the device display. This is called recovery mode.
When recovery mode is successful, an iTunes popup will show up on your Mac or PC. Click on “Restore.” A warning will pop up letting you know the device will be erased.
Put your device in recovery mode and restore it. If you turned on Find My iPhone, enter your Apple ID and password after the restore to activate your device.
After the restore is complete, you can set up your device from your archived backup. This backup should be from an earlier version of iOS.
The downgrade steps above will work for both the developer beta and the public beta.
When the install is complete, your iOS device will be restored to the condition that it was in prior to the beta. If you do not have an archived backup to work with, your device will need to be set up from scratch.
Downgrade from iOS 10 to iOS 9
The steps highlighted below will be useful when you are trying to downgrade from the regular iOS 10 to the iOS 9 version. At the time of writing, the public release of iOS 10 is expected by fall of this year. We are hoping that the iOS 10 is released with iPhone 7 models in the September time frame.
Next, let’s locate the version of iOS best for your iDevice
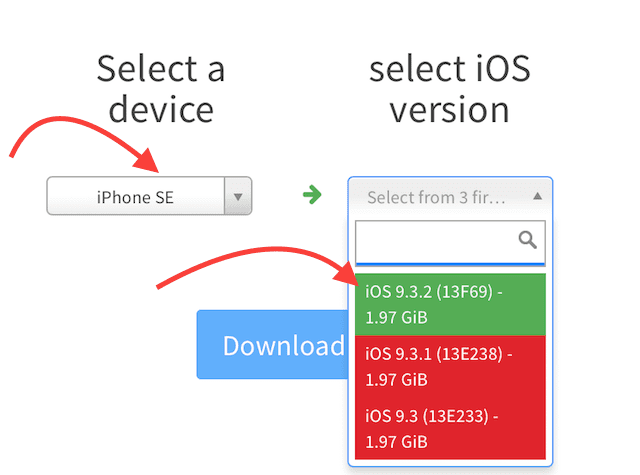
Locate the iOS IPSW file for your iDevice by finding it as this site
Choose your device from the menu
Locate the available iOS 9 versions–these are highlighted green
Download your selected iOS 9 version to your computer
Make a note of where you saved this download (you’ll need this later)
Disable both iCloud and Find my iPhone from your iDevice
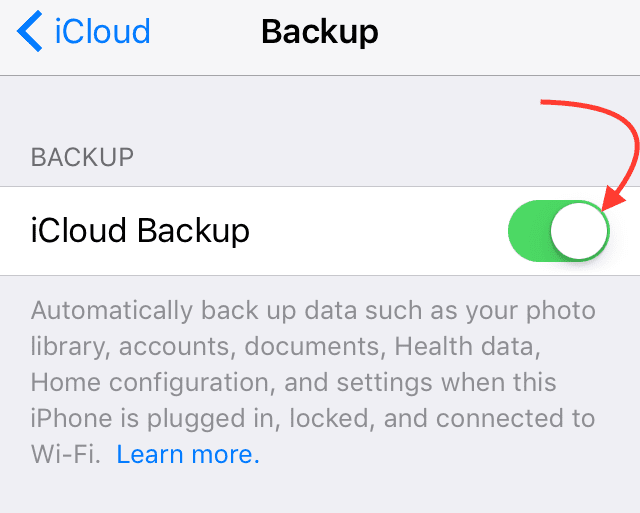
Go to Settings>iCloud>Backup
Disable Backup by sliding to the left (should go from green to grayed out)
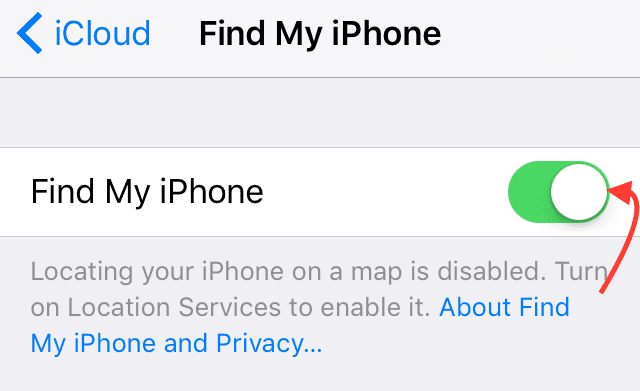
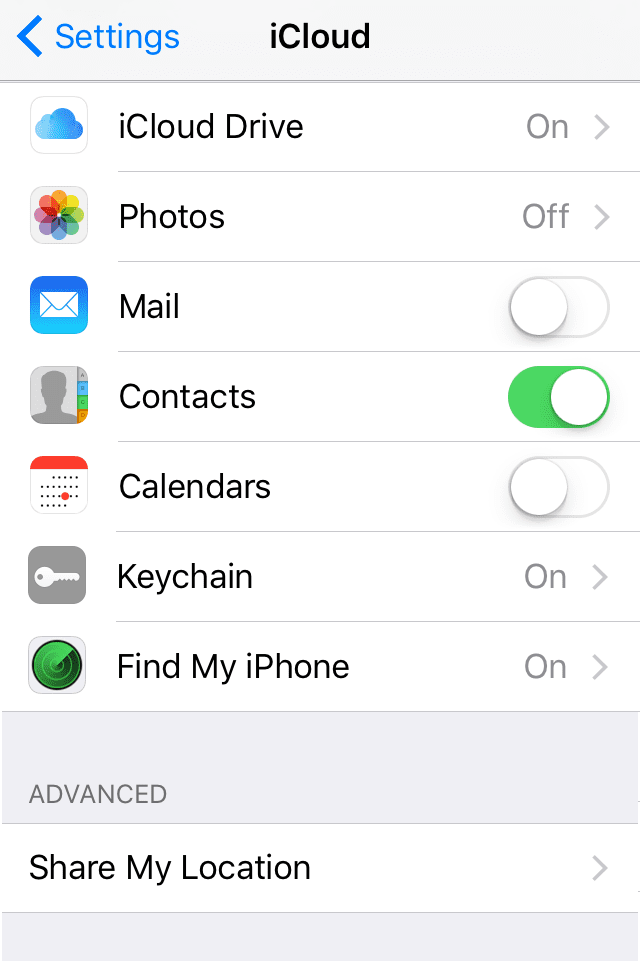
Go to Settings>iCloud>Find My Phone
Disable Find my Phone by sliding to the left (should go from green to grayed out)
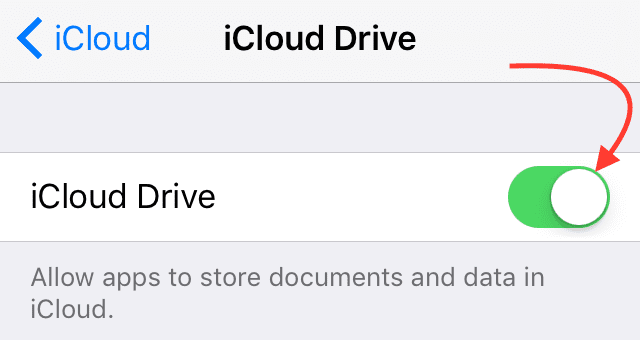
Go to Settings>iCloud
Disable iCloud by sliding to the left (should go from green to grayed out)
You will turn all of these features back on at the end of this process. For now, it’s critical that these features are turned off so your iPhone or other iDevice can communicate with iTunes.
Connect your iPhone or iDevice to Your Computer
Launch iTunes
Select your iPhone or iDevice from the iTunes panel located in the upper left
Verify your iDevice is selected by looking in the left sidebar
You should see the following icons below your iDevice
Summary
Apps
Music
Others (TV Shows, Movies, ect)
Let’s Get it Restored!
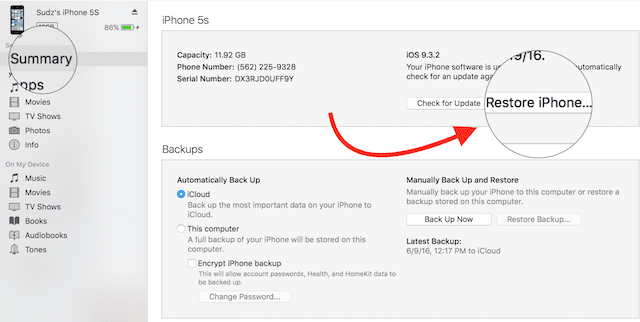
In iTunes, Select Summary from the left side bar menu
On Mac Computer, hold both the Option + Alt keys and click the Restore iPhone Button
This opens a finder window
Navigate to where you stored the download from ipsw.me
If you need to do this again, click this link and follow the steps under section iTunes on your computer
Open the file you downloaded and follow the steps to restore your iDevice back to the iOS that was working–this can take a bit of time, so be patient
Once you have restored your iDevice to the downgraded iOS, check that the iPhone, iPad, or other iDevice is working as normal
Getting your Apps and Personalization Back
Your iDevice should work normally, but it will not have all your apps and other data. To get those back, you will want to restore an older backup. Make sure this older backup is NOT a backup from iOS10.
Restore via iTunes (Recommended)
Launch iTunes
Select your iPhone or iDevice from the iTunes panel located in the upper left
Verify your iDevice is selected by looking in the left sidebar
You should see the following icons below your iDevice
Summary
Apps
Music
Others (TV Shows, Movies, ect)
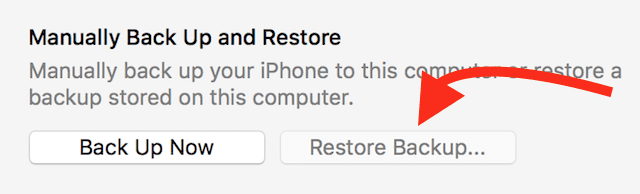
Select Summary
Under Manually Back and Restore, Click Restore Backup
Or Go to File > Devices > Restore from Backup
If you’re using Windows and don’t see a File menu, press the Alt key
Look at the date and size of each backup and select a backup that was created before the iOS10 upgrade
Click restore and wait for the process to finish. Your device will restart and then sync with your computer. Stay connected until the sync finishes.
Restore via iCloud (not recommended)
Unfortunately, the only way to restore from an iCloud backup is through Setup Assistant. Here’s the really bad news: to get to Setup Assistant on an iDevice you already set up, you’ll need to erase all the content on your device and set it up again.
Erase all content and settings on iDevice
Take note that you will likely need your passcode and Apple ID before you erase anything!
For iPhone, iPad, or iPod Touch
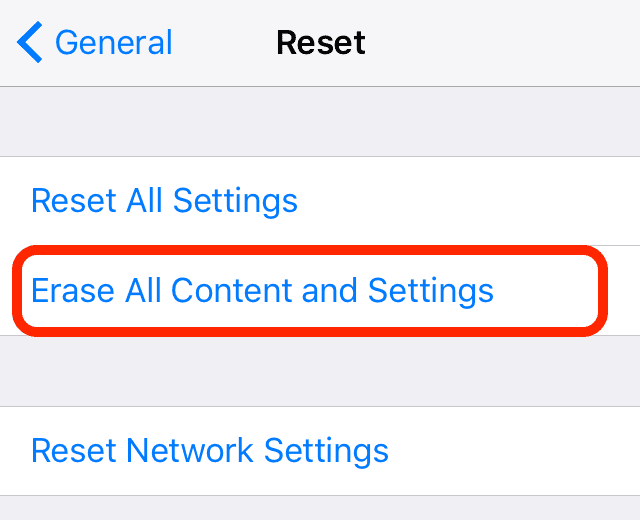
To erase your iPhone, iPad, or iPod touch, tap Settings > General > Reset > Erase All Content and Settings
For Apple Watch
To erase your Apple Watch, tap Settings > General > Reset > Erase All Content and Settings
Erasing the content and settings on your Apple Watch doesn’t remove Activation Lock
If you need to turn off activation lock, check this article
Erasing all content and settings on an iPhone 3G or earlier and iPod touch (2nd generation or earlier) can take hours. So please connect your “senior” iDevice to a charger and leave it connected until your device completely resets. In fact, this is good practice for all iDevices, no matter the generation.
Your iCloud Restore
Turn on your device. You should see a Hello screen
Follow steps in the iOS Setup Assistant. Join a Wi-Fi network and follow steps until you see the Set Up Device screen
Tap Restore from an iCloud Backup. Then sign in to iCloud
Choose a backup. Look at the date and size of each and pick the most relevant. After you choose a backup, the transfer starts
If you’ve purchased iTunes or App Store content using multiple Apple IDs, you’ll be asked to sign in to each. If you can’t remember a password, you can tap Skip this Step and enter it later
Stay connected. If you disconnect from Wi-Fi before the process completes, the restore process pauses until you reconnect. Give the process time to finish. Restoring from a backup can take a while, depending on the size of the backup and the network speed
Once you have restored your iDevice using the older iOS, verify that your iPhone or other iDevice is working as you normally expect. Make sure you open your apps and run a check. Breath a long sigh of relief!
Enable both iCloud and Find my iPhone from your iDevice
Go to Settings>iCloud>Backup
Enable Backup by sliding to the right (should go from grayed out to green)
Go to Settings>iCloud>Find My Phone
Disable Find my Phone by sliding to the right (should go from grayed out to green)
Go to Settings>iCloud
Enable iCloud by sliding to the right (should go from grayed out to green)
Summary
Upgrades are exciting! I can’t wait to see what’s new and take a look at all the features and conveniences Apple thought of. And the WWDC is something all us iFolks want to take part in, even if we can’t be there in person (and afford the tickets). Upgrading is one way to join the fun but it can have major drawbacks with software releases…which can f’up your iPhone, iPad, or other iDevice. NOT FUN.
So, let’s be aware of what we are getting into, or potentially getting into, when we jump on that bandwagon. Apple ToolBox always recommends waiting a week or two before you upgrade to any new operating system–that goes for iPhones, iPads, iPod Touch, and even your desktops/laptops. You never know, it could be your iDevice that gets buggy and acts wonky or worse, doesn’t work, after a new update is out.
By waiting a week or so (and yes, that is hard to do–so I totally understand if you find you cannot resist TRYING the new upgrade), you give yourself and Apple time to evaluate all those other user experiences. Apple maybe will push out fixes so you don’t have to go through the pain of others.
In the end, it’s your decision. So do what works best for you and your iDevice. If you do decide to early adopt, just be prepared that things may not go smoothly and actually enjoy that good quality time in getting to know the ins and outs of your iDevice and the new iOS. It’s all about attitude–it can be fun or it can be misery. Your choice–always. For me, I live risky…but that isn’t and shouldn’t be for everyone.
For most of her professional life, Amanda Elizabeth (Liz for short) trained all sorts of folks on how to use media as a tool to tell their own unique stories. She knows a thing or two about teaching others and creating how-to guides!
Her clients include Edutopia, Scribe Video Center, Third Path Institute, Bracket, The Philadelphia Museum of Art, and the Big Picture Alliance.
Elizabeth received her Master of Fine Arts degree in media making from Temple University, where she also taught undergrads as an adjunct faculty member in their department of Film and Media Arts.
Mary E Tyler--yes, the known Macintosh journalistsays
Don’t bother following the directions in this POS article. It is a waste of your time and bandwidth. I wasted my time trying to downgrade my BRICK OF AN IPAD, bc I have a broken HOME BUTTON and cannot “press the Home Button” to UNLOCK JACK FvCK in iOS 10.
THIS DOESN’T WORK.
I did the Manual back up thing. I did the iCloud restore thing. Both of them left me with–you guessed it, iOS 10.0.2 on my BRICK OF AN IPAD, which STILL DEMANDS that I “press the HOME BUTTON” to open the Lock Screen. And THE HOME BUTTON DOESN’T WORK!!!
And yes, as a now, 27 year Mac User, this is NOT The Macintosh Way.
This has to be the WORST design decision I have ever seen in my NEARLY THIRTY YEARS of using Apple products! What BRAINIAC thought THIS ID10TIC thing up.
HOME BUTTONS BREAK CONSTANTLY!!!!!!!!
I don’t think I have ever had a device that *hasn’t* broken the home button at least once in 2 years!
SMH
SMFH