It’s great to have the option to edit photos to a truly staggering quality on your iPhone, but let’s be honest: not every picture needs that many pixels, not to mention how quickly large photos can take up space. If you’re running out of storage and want to keep things economical, this is the article for you. We’re looking at iPhone photo sizes and how to rein them in.
Let’s get straight into it. Below, we’ve arranged a few different methods for reducing image sizes taken with your camera:
Change Your Camera Resolution
If your iPhone supports it, you can lower the camera’s default resolution, one of the simplest ways to reduce photo size. Here’s what you need to do for iPhone photo size adjust:
Step 1. Open the Settings app on your iPhone.
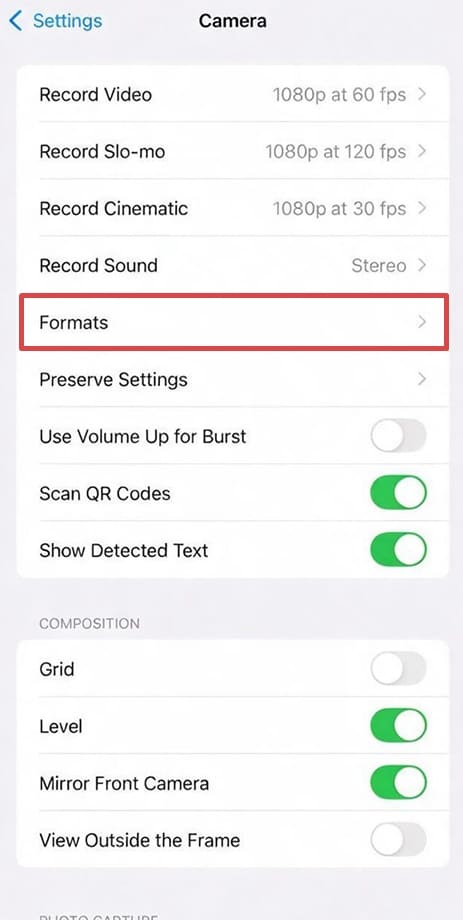
Step 2. Scroll down to “Camera,” then “Formats.”
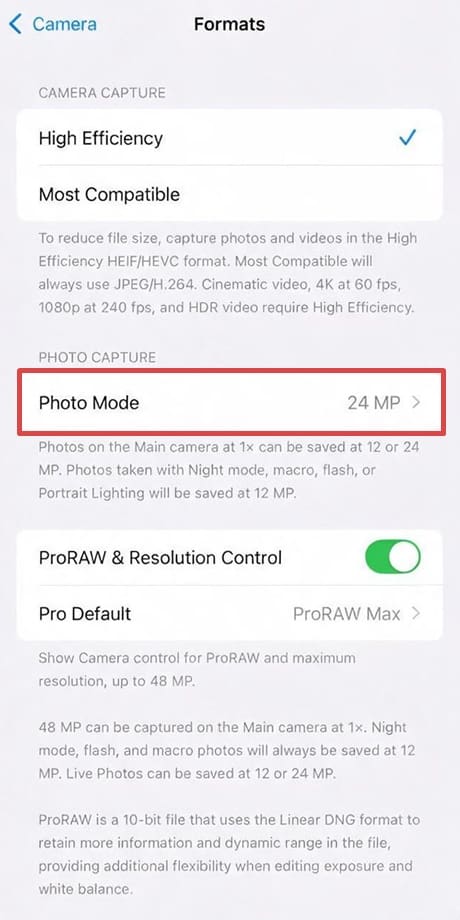
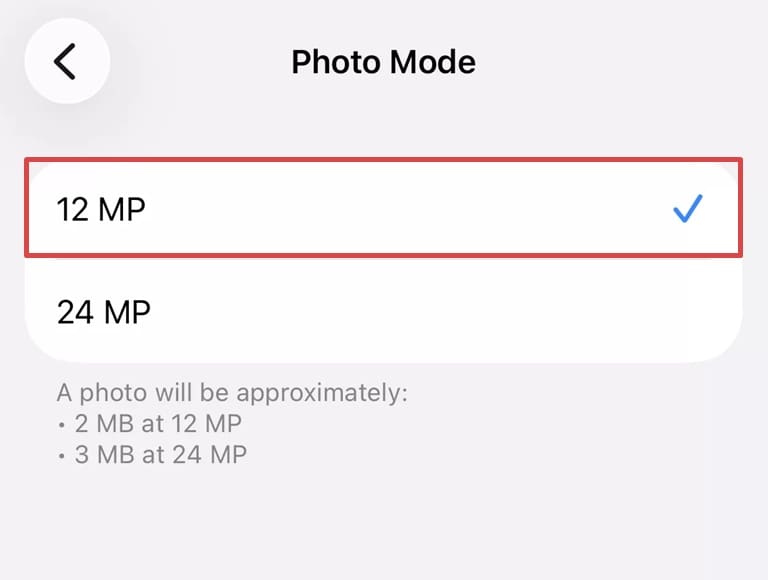
Step 3. Tap “Photo Mode” and choose 12 MP instead of 24 MP, if your iPhone offers the option.
Step 4. If you have an iPhone Pro and don’t need RAW images, make sure you’re not shooting in Apple ProRAW, which creates files that are significantly larger than standard “High Efficiency” (HEIF) or “Most Compatible” (JPEG) images.
Step 5. For maximum storage, leave HEIF selected rather than switching to JPEG.
Resize Existing Photos
Adjusting the camera settings is well and good, but what about image files already on your phone? Not to worry, there’s a solution for that too, in the form of image resizing, and it can be done in Preview:
Step 1. Open Preview.
Step 2. Select the image to resize. Tap the “More” button (three dots).
Step 3. Choose “Adjust Size.”
Step 4. In the next window, choose the desired image dimensions and tap “Done.”
Note that this method only works for images stored in Files and in your iCloud folder.
Automate With Shortcuts
Resizing one photo is fine, but menu hopping for every image can get exhausting. Thankfully, Shortcuts allows you to automate the busywork and get straight to resizing. Here’s how to create such a shortcut:
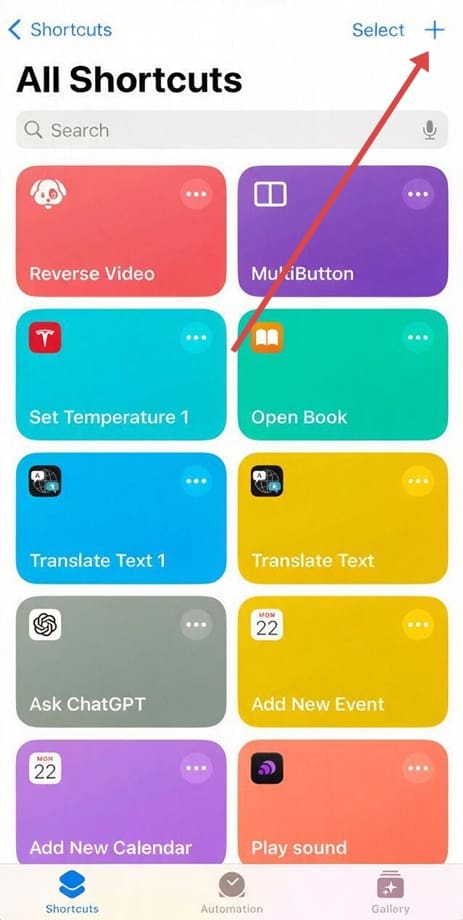
Step 1. Open the Shortcuts app.
Step 2. Tap the “Plus” button to create a new shortcut.
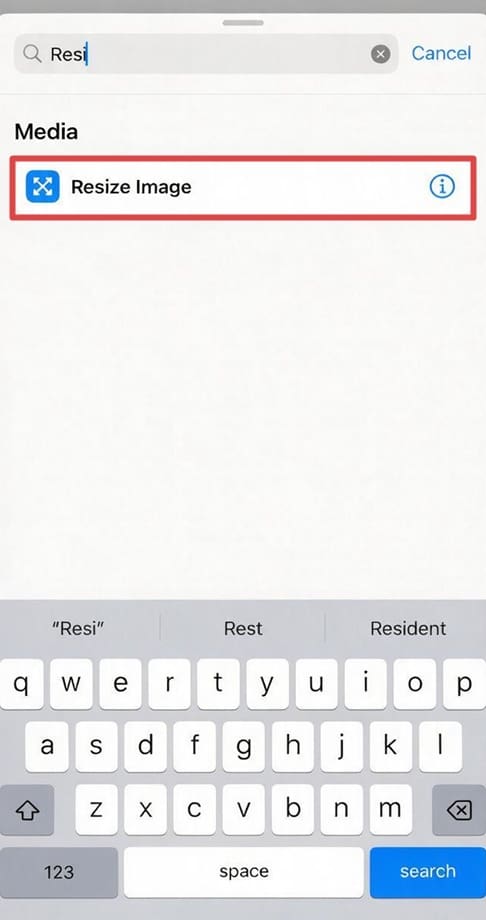
Step 3. In the search bar that appears, type “Resize Image” and select the option when it appears.
Step 4. In the newly created shortcut, define the dimensions that you’d like the image to be. You can also choose whether you want certain aspects (height, for example) asked about each time, which allows more customizability.
Step 5. Press the “Play” button to test, and your new shortcut is set.
Crop Your Images
If it’s one or two photos you’re looking to reduce in size, a quick method for cutting unnecessary pixels is by cropping. Here’s what to do:
Step 1. Select your image in Photos.
Step 2. Tap the Edit button at the bottom of your screen.
Step 3. In the next menu, tap the Crop button.
Step 4. Trim your image and then tap “Done” in the top-right of the screen when finished.
Apps and Sites
If Apple’s options aren’t cutting it for you (or cutting enough), then there’s no shortage of apps and compression services out there that offer the ability to compress individual photos or entire galleries. We can’t put them all here, but they’re more out there – free, paid, and freemium – waiting for you to try.
As an avid gamer, I’ve run into my fair share of error codes and weird faults that have forced me to find fixes to problems I never anticipated. That gave me a passion for sharing those fixes with others so we can all game without feeling like our hardware is rebelling against us.











Write a Comment