Macs have a reputation for doing things their own way. When it comes to file systems, the tech giant has become more accessible in recent years, as all Macs can now read the NTFS file system, but Macs still cannot write to NTFS drives by default. That can be more than a little frustrating.
It’s not the end, though. In this article, we’ll be sharing a few ways to get your NTFS drives working with your Mac for reading and writing.
Mac’s default file system is the in-house APFS (or HFS for older machines). For easy transfer between Windows, Mac, and Linux, the ExFAT file system is the one-size-fits-all solution. If your external drive is formatted in NTFS, though, here are ways to get it to work with a Mac.
Use a Third-Party Tool
The good news is you’re not the only one frustrated with the lack of NTFS support. In fact, enough users want it that there are many third-party apps happy to provide it. Paragon, Tuxera, and iBoysoft are the three go-to names in this department. The first two charge a single one-off license fee, while iBoysoft offers a perpetual license and a subscription plan. All will get the job done, and automount to enable quick reading and writing.
Format Your Drive
If your external drive is still blank, and you’ll be using it frequently with a Mac machine, you can always save yourself the headache and format it to ExFAT. Here’s how:
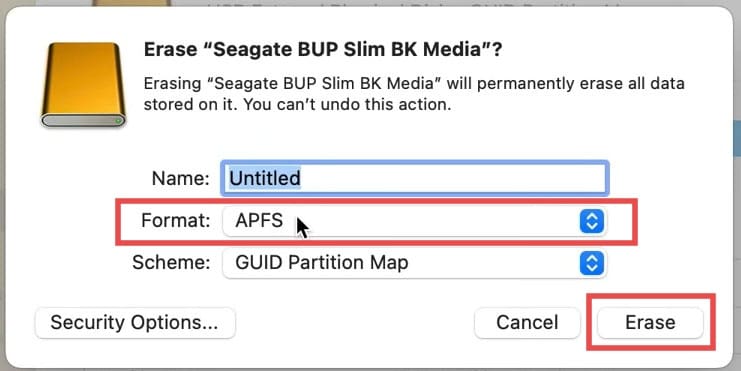
Step 1. Open Disk Utility in your “Applications/Utilities” folder.
Step 2. Choose the storage device from the sidebar and choose the topmost level of your drive (indicated by the drive icon).
Step 3. Click the “Erase” icon at the top of the window to clear all data currently on the drive. It’s blank, so it should be quick.
Step 4. In the new pop-up window, you can name the drive, choose its format, and partition scheme. If using solely for Mac, go with “APFS,” or choose “ExFAT” for Windows PC dual use. Click “Erase” to begin the format.
Enable NTFS Write Support with a Free Tool
If the idea of a paid product isn’t appealing to you, and you’re up to the challenge, you can enable NTFS write support with a free tool like Mounty. It’s a toold that will detect an NTFS drive, but to run it successfully, you’ll have to first install the right drivers via Terminal. Let’s take a look at how to do it:
Step 1. Open Terminal and enter the following commands to install the drivers for Mounty.
You can download Homebrew manually from the web or via terminal typing “/bin/bash -c “$(curl -fsSL https://raw.githubusercontent.com/Homebrew/install/HEAD/install.sh)”
Step 2. Once this is done, download Mounty itself. Follow the steps to download and install Mounty on your machine and accept the license agreement. The process will run on Terminal.
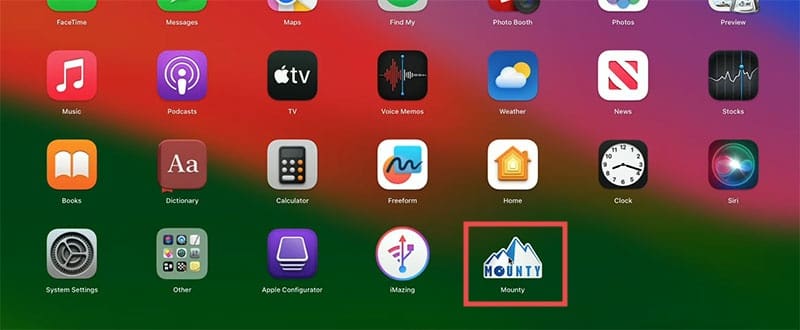
Step 3. Once done, you’ll find Mounty in your Apps. Click it to open and follow the final setup steps.
Step 4. Mounty will appear in your menu bar. Click it to mount your disk and enter your password if necessary. Ensure that “Start at Login” is checked.
Step 5. Restart your machine, and Mounty should enable NTFS writing on your mounted disk at startup.
As an avid gamer, I’ve run into my fair share of error codes and weird faults that have forced me to find fixes to problems I never anticipated. That gave me a passion for sharing those fixes with others so we can all game without feeling like our hardware is rebelling against us.


Write a Comment