We’ve all been there before. You’re in a rush, so you disconnect your MacBook from its docking station, only to forget that you didn’t actually eject the attached hard drive or SD card. When you return to the Mac later on, you’re presented with an annoying little pop-up message that says “Disk Not Ejected Properly. Eject “DRIVE NAME” before disconnecting or turning it off.”. Sometimes this happens even when your Mac just goes to sleep, and you haven’t been able to figure out a way how to automatically eject external drives from Mac.
The main reason you should always eject your USB devices properly is to prevent data corruption. This is because your computer and USB device communicate with each other, transferring data back and forth. When you simply unplug the device without notifying your computer, it may be in the middle of writing important data to the device. This can result in incomplete file transfers, or worse, a corrupted device.
So, let’s dive in and learn how to safely remove these devices from your Mac!
Ejecting USB Devices using Finder
Open the Finder app on your Mac.
On the left-hand sidebar, you should see your USB device under ‘Locations’. It will often be named after the manufacturer, or you may have given it a custom name.
To the right of your USB device’s name, you will see a small eject symbol (a triangle above a line). Click on this icon to eject the device. If the eject process is successful, your USB device will disappear from the Finder sidebar.
Ejecting USB Devices from the Desktop
If your settings allow USB devices to show up on your desktop, you will see an icon representing your USB device on the desktop screen.
You can eject your device by dragging its icon to the Trash bin in the dock. The Trash bin will change to an Eject icon as you drag the USB device over it. Let go of the device, and it will be safely ejected.
Alternatively, you can right-click (or control-click) on the USB device’s icon, then select ‘Eject’ from the drop-down menu that appears.
Ejecting USB Devices Using Disk Utility
Open Disk Utility: You can find Disk Utility by opening your Applications, then going into the Utilities folder. You can also access it quickly by pressing Command + Space to open Spotlight Search, then typing in ‘Disk Utility’.
Select the USB device: In Disk Utility, you’ll see a list of drives on the left. Find your USB device in this list – it may be nested under another drive name. Click on it to select it.
Eject the USB device: With your USB device selected, click on the ‘Eject’ button at the top of the Disk Utility window. Once the device is ejected, it will disappear from the list of drives.
What to Do If Your USB Device Won’t Eject
Sometimes, you may find that your Mac won’t let you eject a USB device, usually because the system thinks it is in use. If you’re sure you’ve closed all files and applications that might be using the device but still can’t eject it, there’s another method to try:
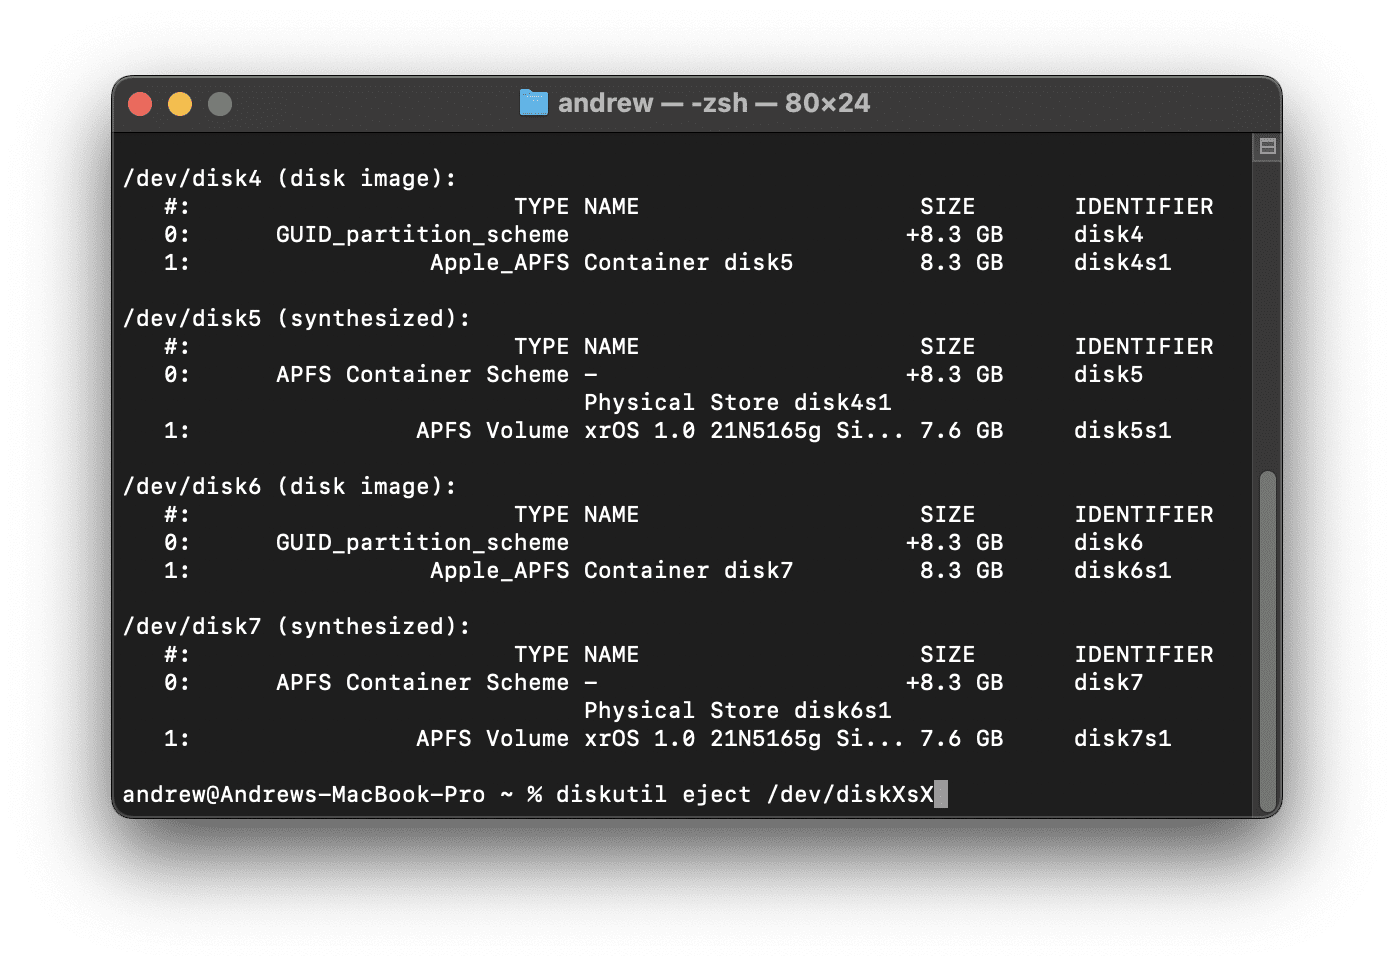
Open Terminal: You can find the Terminal application in your Utilities folder, or by searching for it using Spotlight Search (Command + Space).
Type in the ‘diskutil’ command: In the Terminal window, type diskutil list and press enter. This will display a list of all connected drives. Find your USB device in this list – it will have an identifier like ‘disk2s2’.
Eject the USB device: To eject the device, type diskutil eject /dev/diskXsX (replace ‘X’ with the appropriate numbers from your device’s identifier) and press enter. If successful, you’ll see a message saying ‘Disk /dev/diskXsX ejected’.
It’s important to note that if the device is in use, the ‘diskutil eject’ command might not work. If this is the case, you could use the ‘diskutil unmountDisk’ command instead.
Remember, always safely eject your USB devices to protect your data. It’s a quick and simple habit that could save you from losing important files.
How to Automatically Eject External Drives From Mac
There’s a good reason why Apple shows that little message every time an external drive is just “yanked” from your Mac. It harkens back to the days of floppy disks and CD’s where you had to physically remove them from your Mac. Even with fast SSD’s and external storage solutions, there’s still a potential for damaging the drive itself, and losing all of the stored data in the process.
The traditional method to eject external drives from Mac is to simply right-click the drive image on your desktop, and select Eject from the drop-down menu. Or, you could fire up the Finder app on your Mac and press the Eject button that appears next to the drive. However, none of these solve the problem of being able to automatically eject external drives from Mac. Luckily, there are a few great options out there for you to experiment with to see what works, or what doesn’t.
Ejectify
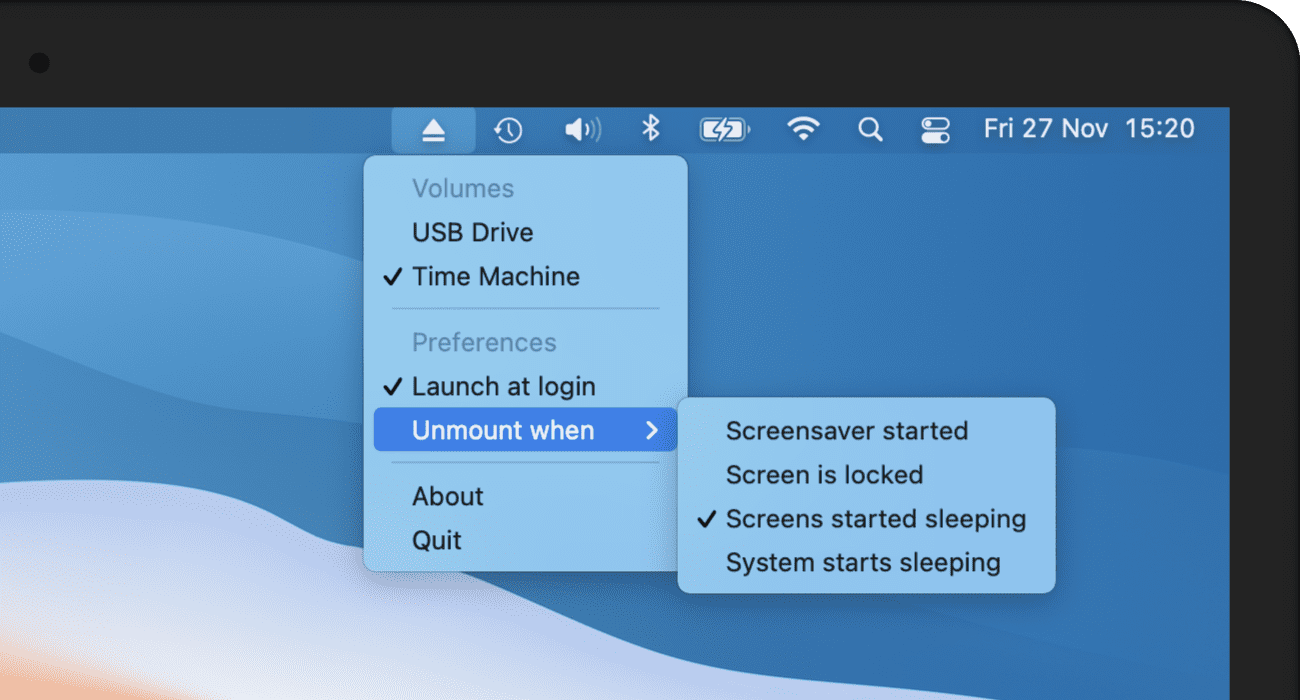
Ejectify is the first app on the list, and for no reason other than it was the first one in my notes. As with the other apps you can use to automatically eject external drives from Mac, Ejectify makes it easier than ever to avoid the annoying pop-up notification that appears. The app offers a bunch of flexibility, as you are provided with the following configurations:
Prevents annoying Disk not ejected properly warning when your Mac wakes up.
Prevents connected external disks and their volumes to get corrupted.
Configure what disks should be (un)mounted automatically.
Configure when disks should be unmounted automatically:
When screensaver started.
When screen is unlocked.
When screens started sleeping.
When system starts sleeping.
Automatically mounts disks again when your Mac or screens wake up.
You can purchase Ejectify directly from the developer for just $3. Or, you can compile the app from the source code found on Github for free.
Unlike Ejectify, Jettison has been around on the Mac for quite awhile. Despite still being compatible with macOS 10.9 Mavericks, the developers are on-top of the ever-changing macOS landscape. If you’re a proud owner of an Apple Silicon-powered Mac, you’ll be happy to know that Jettison also supports the new architecture natively. As for how it works, whenever your Mac goes to sleep, Jettison will automatically eject any external disks. Then, it will remount any connected disks when you wake your Mac again.
The app is free to download and includes a 15-day free trial. After that, you can purchase a single license for $4.95, or multiple licenses starting at $3.95 per license.
You might not have heard of EjectBar before, but if you’re entrenched in the Apple ecosystem, you’ve likely heard of its developer, Benjamin Mayo. In addition to being an app developer, Benjamin also moonlights as a blogger, writing for his own personal blog, along with covering Apple news for 9to5Mac. With EjectBar, this simple application is only accessible from your Menu Bar, and makes it easy to unmount all of your external (or connected) drives at the same time. EjectBar also supports the option to assign a keyboard shortcut to eject your drives, and can even be set up to automatically eject drives at scheduled times.
EjectBar is available from the Mac App Store for a one-time purchase of $1.99.
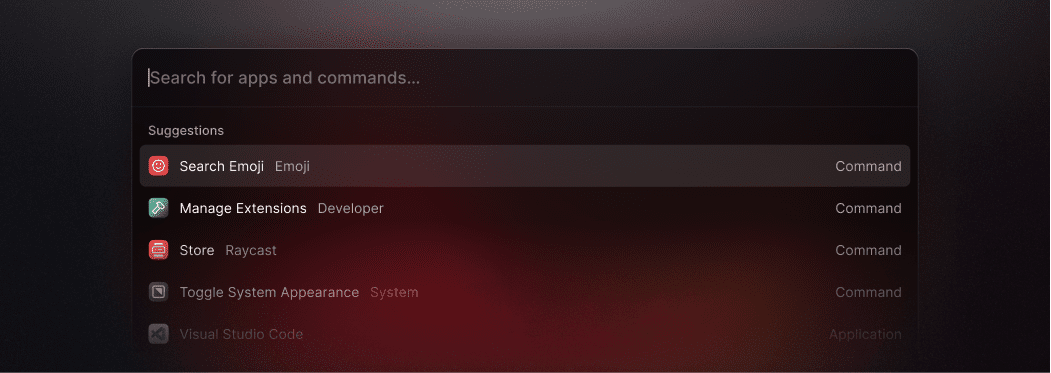
When it comes to replacement apps for Spotlight, Alfred has reigned supreme for years. But there’s another app, known as Raycast, that was released back in 2020 which has garnered a lot of hype and excitement. Both of these apps do a fantastic job at replacing Spotlight along with supercharging the quick action experience. And regardless of whether you use Alfred or Raycast, you can automatically eject external drives from Mac right from the interface.
The last option on this list was one that I hadn’t really thought about, and then it sent me down a rabbit hole before I had to resurface. David Sparks, aka MacSparky, has been one of the biggest proponents of Keyboard Maestro over the years, so it should come as little surprise that he created a Macro for ejecting external disks. But instead of just trying to build a complicated macro, MacSparky also went so far as to create an AppleScript that works in tandem with the Keyboard Maestro Macro. If you’re interested in using this yourself, you can download the script from the link below.
Andrew Myrick is a freelance writer based on the East Coast of the US. He enjoys everything to do with technology, including tablets, smartphones, and everything in between. Perhaps his favorite past-time is having a never-ending supply of different keyboards and gaming handhelds that end up collecting more dust than the consoles that are being emulated.


")
Write a Comment