When in Target Disk mode, your Mac behaves like an external storage device that lets you transfer files to another computer. It’s easy to put your Mac in Target Disk mode by holding T while it boots up. But it’s not so easy to fix if Target Disk mode isn’t working properly.
It’s impossible for us to say exactly why Target Disk mode isn’t working on your Mac. You might experience problems for any of the following reasons:
Your hard drive is in the wrong format
You’re using the wrong cable or port for your Mac
Finder is set to hide external drives
A hardware fault is stopping Target Disk mode from working properly
Whatever the reason Target Disk mode isn’t working, you should be able to fix it with the simple troubleshooting steps below.
Step 1. Update macOS or reformat your Mac
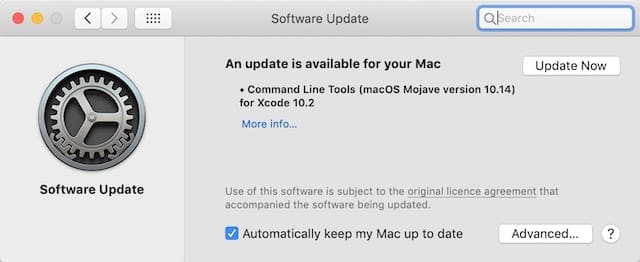
Apple releases new software updates all the time, make sure your Mac is up to date.
If the Mac you want to boot in Target Disk mode is formatted as APFS, then you need to use a computer running macOS High Sierra or later to connect to it. Earlier software can’t read APFS so won’t recognize your Mac.
The easiest solution for this is to update the Mac you want to transfer files to. Open System Preferences and click on Software Update to check for new updates.
If you can’t update that Mac to High Sierra or later, you should check which format the Mac you put into Target Disk mode is using.
How to check the format of your Target Disk Mac
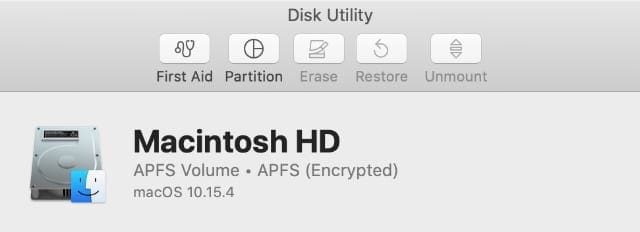
Check your hard drive format in Disk Utility.
If your Mac is currently in Target Disk mode, press and hold the Power button until it turns off, then restart it. Open the Disk Utility app from your Utilities folder and select your Macintosh HD in the sidebar.
Disk Utility lists the hard drive format at the top of the window, beneath the hard drive name. If your Mac is in APFS format, Target Disk mode only works if you connect to another Mac running High Sierra or later.
If that isn’t possible, you need to reformat your Mac storage, which you can only do by erasing the drive.
After backing up, go to View > Show All Devices in Disk Utility and select the parent folder for your Mac’s hard drive in the sidebar. Click Erase and choose a Name, Format, and Scheme to use. We suggest you select Mac OS Extended (Journaled) and GUID Partition Map.
Click Erase to erase and reformat your Mac. After you recover your data from your backup, Target Disk mode should work with older operating systems.
Step 2. Change your preferences in Finder
Make sure Finder is set up to show connected drives.
It’s possible that Target Disk mode is working on your Mac but you can’t see it due to a problem with Finder. The first thing to do is to adjust your Finder preferences. But if that doesn’t work, you still might be able to find your Target Disk using Disk Utility instead.
Put your Mac into Target Disk mode and connect it to another Mac, then open Finder on that other Mac. Go to Finder > Preferences from the menu bar, then open the Sidebar tab.
Check the box to show Hard disks and External disks in the sidebar. This should make your Target Disk appear in the sidebar of Finder, beneath the Location heading.
If that doesn’t work, open Disk Utility and look for your Target Disk in the sidebar. If it appears grayed-out, select it and click the Mount button. Then look for it in Finder again.
Step 3. Check the cables and ports are working
Thunderbolt ports are best for Target Disk mode.
If Target Disk mode looks like it’s working, but you can’t connect it to another Mac, there might be a problem with the cable or port you’re using.
Test the connection using different ports on your Mac. If that doesn’t help, try using a different cable instead. Just make sure you use a cable that’s compatible with Target Disk mode.
What cables do I need for Target Disk mode?
Apple suggests you use one of the following ports and cables for Target Disk mode:
Thunderbolt 3
Thunderbolt 2
FireWire
Take a look at Apple’s website to find out which ports are on your Mac. And make sure you use official, high-quality cables when connecting your devices. If possible, get the exact cable you need instead of using an adapter.
Can I use USB-C cables for Target Disk mode?
The Thunderbolt 3 port uses the same form-factor as USB-C. In fact, every Thunderbolt 3 port on a Mac also functions as a USB-C port. This means you can use a USB-C cable to connect your Mac in Target Disk mode.
Step 4. Disable FileVault encryption on your Target Disk
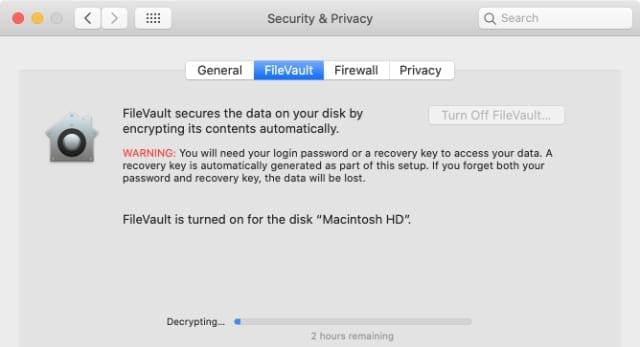
Disable FileVault so you don’t need to enter an encryption password.
If the Mac you put in Target Disk mode uses FileVault encryption, you need to enter the admin password for that Mac before you can access its data. You should see a prompt for this password appear when you try to access the Target Disk in Finder.
If you never see a FileVault prompt, it could be worth turning off FileVault encryption on that Mac and trying again.
Hold the power button on your Target Disk Mac to restart it normally. Then go to System Preferences > Security & Privacy. Go to the FileVault tab, then click the Padlock and enter your password to unlock changes.
Click the option to Turn Off FileVault. This unencrypts your Mac’s hard drive, which might take several hours to complete.
Be warned, your data is more secure when it is encrypted. So you should turn FileVault on again after using your Mac in Target Disk mode.
Does Target Disk mode work with Windows?
No. Target Disk mode doesn’t work with Windows. This is because Windows can’t read your Mac hard drive. The only file format that works with macOS and Windows is FAT-32, but you can’t install macOS on a FAT-32 drive.
To transfer files from a Mac to a Windows computer, you should use an external drive in FAT-32 format. Alternatively, upload files to a cloud storage service from your Mac, then download them from the Windows PC.
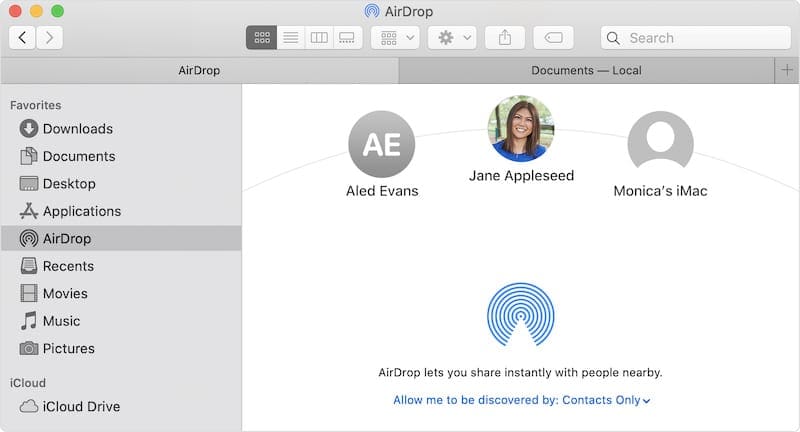
Transfer files wirelessly with AirDrop
Use AirDrop to transfer files to another Mac wirelessly.
If Target Disk mode still isn’t working on your Mac, you might be able to transfer files wirelessly using AirDrop instead. AirDrop uses Wi-Fi and Bluetooth connections to transfer files at high speeds, without depending on an Internet connection.
In fact, you can even use AirDrop to send files to iOS devices as well as other Macs. Although it’s not quite as fast as Target Disk mode, it’s far more convenient because you can still use your Mac while transferring files.
Dan writes tutorials and troubleshooting guides to help people make the most of their technology. Before becoming a writer, he earned a BSc in Sound Technology, supervised repairs at an Apple Store, and even taught English in China.


Write a Comment