Migrating data from your old MacBook to your new device may not always be as simple as a walk in the park. The data transfer process may sometimes fail with the following error message: “This Mac can’t be used to migrate data“. As a matter of fact, many Mac users encountered this error when they tried to transfer data from their old devices to their new MacBook M1 computers. If you’re experiencing the same problem, pursue the troubleshooting solutions below.
The safest way to migrate data from your old Mac to your new device is to simply connect your old Mac’s Time Machine External Hard Disk to your new Mac.
Use a USB cable, connect the two devices and start your new computer.
The Setup Assistant should appear on the screen. Follow the on-screen instructions to complete the setup process.
At one given point, the Setup Assistant will ask you if you’re migrating from another computer. Click on Yes, and keep on following the instructions that appear on the screen.
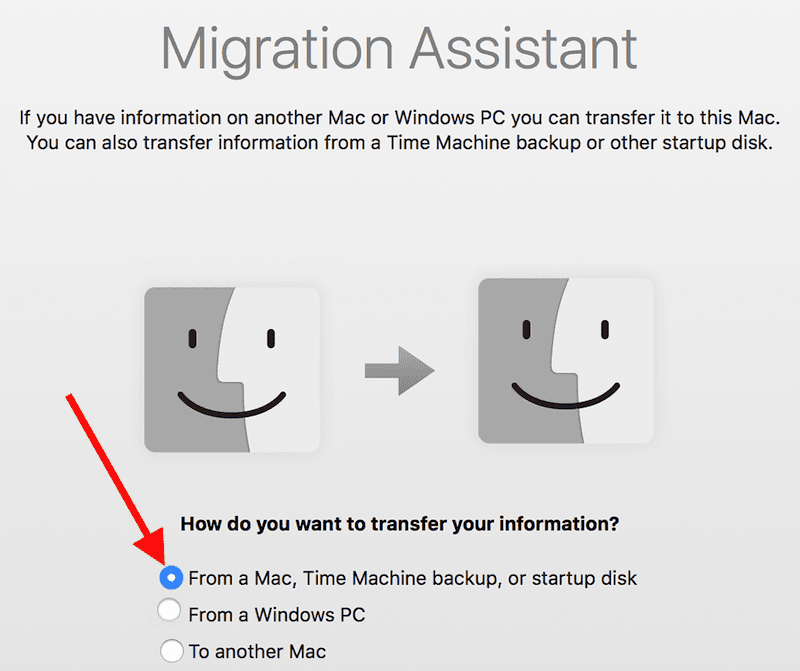
On the other hand, if you already completed the Setup Assistant phase, connect your Time Machine Hard Disk to your new Mac and launch the Migration Assistant. To do that, navigate to Applications, select Utilities, and then click on the Migration Assistant. Keep in mind that the Migration Assistant automatically creates a new user account. Use that account to log in to your computer and access data from your old Mac.
Another important thing to keep in mind is that you may need to install certain apps again. Generally speaking, professional and premium programs such as Adobe’s suite of tools cannot be migrated. But you can use the security keys to reinstall these programs on your new Mac.
Update Your OS
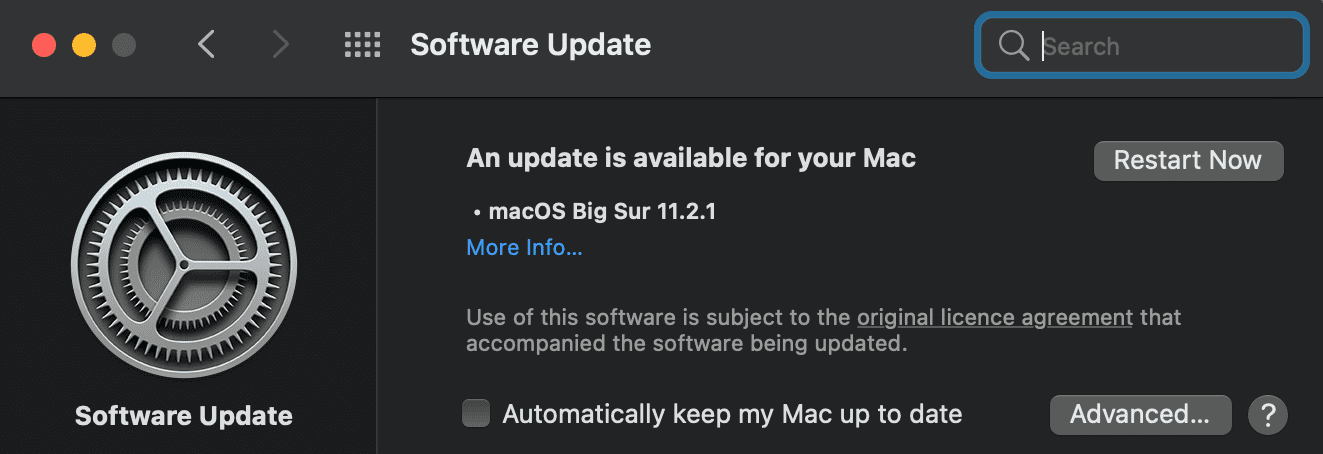
Before you try to migrate data from your old Mac to your new computer, ensure you’re running the latest macOS version on your devices. When the migration process fails, the error window that pops up on the screen also prompts you to update your system. The error message usually reads as follows: “This Mac can’t be used to migrate data. Due to an issue unlocking this system, you can’t migrate. Please update this Mac and retry.“.
Click on your Apple menu and go to System Preferences.
Then click on System Update and install the latest macOS version.
Restart your machine and check if you can complete the migration process.
Set a Password for Your Account
If you’re using a user account that doesn’t have a password, set up one and check if the issue is gone. A number of users confirmed that setting up a password for their accounts solved the problem.
Go to your Apple menu and click on System Preferences.
Then select Users & Groups.
Select your user account and hit the Reset password button. Enter the password you want to set up and save the changes.
Try to migrate your data again and check if it works.
Revive Your Mac with the Apple Configurator 2
Reviving your Mac may help you to bypass this problem. In order to use this method, you need to install the latest Apple Configurator 2 version on your computer. You also need a USB-C to USB-C charge cable and a USB-A to USB-C cable.
First, you need to launch the Apple Configuration on your second device. Use the USB-C cable to connect your Mac computers.
Restart your Mac using a special key.
In the Apple Configurator, go to Actions, select Advanced and then select Revive device. This option allows you to reinstall the latest recoveryOS version.
If the issue persists, select the Restore option. Keep in mind that this option will remove all the data from your computer, and then reinstall your recoveryOS and macOS versions.
The quickest and safest way to migrate data from your old Mac to your new MacBook is to use the Time Machine External Hard Disk. If this method fails, update your OS and set up a password for your user account if it doesn’t have one already. As a last resort, revive or restore your OS. Hit the comments below and let us know if you managed to migrate your data to your new Mac.
Madalina has been a Windows fan ever since she got her hands on her first Windows XP computer. She is interested in all things technology, especially emerging technologies — AI and DNA computing in particular.
I can’t use Migration Assistant to transfer my files from my trusty old MacBook Pro (OS 10.6.8) to my newer Macbook Pro OS 13.3.1. Error message says “INELIGIBLE_OSX_TOO_OLD”! Honestly Apple, if people can transfer stuff from a PC, is it too much to ask that your loyal customers should be able to do the same??
I don’t have an external time machine disk. I don’t know what you are talking about “Special Key”
Here’s the thing Apple, if you have a utility setup to transfer the info as a backup , WHY DOnt YOU MAKeIT woRK? We’re not talking APPLES TO ORANGeS HERE! It’s apple to apple
I’m running into the same message with TimeMachine Backup HD. Running latest macOS Version 11.4. Is there any other workaround?