So you’ve decided to transition from using a Windows PC to a Mac. Welcome to the fold. (Or maybe you’ve been using a Mac for years and just want data off a secondary computer.)
If you are new to Macs, there is a learning curve. You can learn about how to manage your windows and open apps on the Mac in our guide. This difference is the top issue that trips up new Mac users since it can be so different from Windows.
Of course, you need all your old files to really feel like the Mac is even yours. So below we’ll go into how to transfer data from a Windows PC onto a Mac.
The Manual Flash Drive Method
One easy method is to simply stick your whole documents folder, all of your photos, key documents from your desktop or whatever documents you are trying to transfer onto a very large flash drive. You can find flash drives that handle Gigabytes of data. For instance, a 128GB flash drive was enough to absorb 10 years of Windows documents for a backup in my case.
However, you will have to make sure you have the same software on your Mac so that it can support specific documents. For instance, if you are pulling Microsoft Word documents off of your PC, you will need Microsoft Office for Mac installed on the Mac device.
This method works best if you’re just backing up or transferring certain documents to work in. It does nothing for migrating all of your data like contacts, calendars, email accounts, etc. from the PC. That’s where the Windows Migration Assistant comes in.
How to Use Windows Migration Assistant to Transfer Data from Windows to Mac
The Migration Assistant can transfer a larger amount of data. It handles:
Emails, calendar data and contacts
Outlook data from 32-bit versions of Outlook, as well as Windows Live Mail and Windows Mail
Bookmarks on your browsers
Systems settings like language and location settings
Pictures
iTunes content
Important top-level folders
Before you use Windows Migration Assistant, you need to have a few elements in place. Make sure Windows is up to date. The Migration Assistant works best with Windows 7 or later. You should have the name and password of the administrator account ready, as you will need to enter them. Your Mac and PC must also be connected to the same network, like your home Wi-Fi network. You can also connect the Mac and PC using an Ethernet cable. Your Mac may need an Ethernet adapter. Turn off any firewall or antivirus software if your migration runs into issues.
Now you can begin using the Windows Migration Assistant:
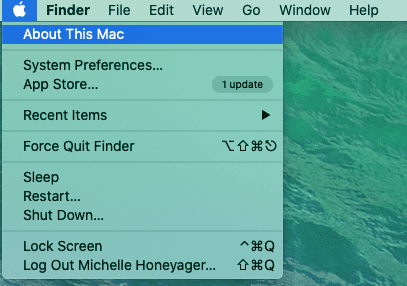
Start by downloading to your PC the correct version of the Windows Migration Assistant that aligns with the type of Mac you have. To find what type of Mac you have, select the apple icon at the top left of the screen. Select About This Mac:
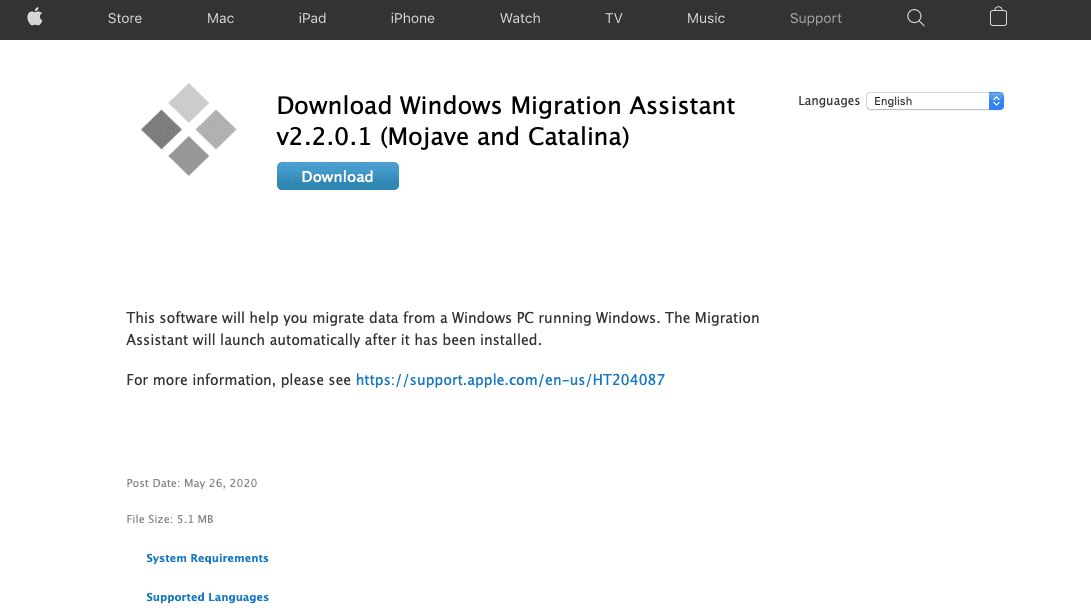
It will tell you what type of macOS you are running. You can find the correct version of Migration Assistant to download by searching Windows Migration Assistant and your macOS on the Apple Support page:
Download the software.
You should close any open Windows apps.
Open the Windows Migration Assistant. You’ll see a couple of prompts, one explaining the program and another prompting you to turn off automatic installation of updates so it doesn’t interrupt the migration. When you are ready, click continue. There now should be a screen saying that the Migration Assistant is waiting for the Mac to connect.
The Migration Assistant comes already installed on your Mac. To open it, go to Applications, Utilities and double click the program:
Follow the prompts until you can select From a Windows PC and then select the computer icon.
Now your Mac and PC should be showing a passcode, make sure it’s the same. Click Continue.
Now your Mac will scan the files on your PC. Once complete, you can select which you want to transfer. Then select Continue. Keep in mind it might take hours if you’re transferring a large number of files or a large amount of data.
After you’re finished, log into the new user account on the Mac.
You should have iTunes Store purchases authorized to help play contact that might have come from the iTunes Store.
This option should transfer all data in the easiest possible manner.


Write a Comment