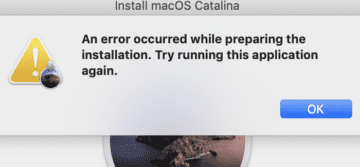
When you try to reinstall macOS, the following error message may sometimes pop on the screen: “An error occurred while preparing the installation. Try running this application again”. If you retry the installation, the error returns. Restarting your MacBook doesn’t help either. Follow the troubleshooting steps below to fix the problem. But first, don’t forget to back up your data before pursuing the solutions below.
How to Fix “An Error Occurred While Preparing the Installation” on Mac
Boot Into Safe Mode
Restart your Mac with the Shift key pressed to boot into Safe Mode. If you own an Apple Silicon device, you need to shut down your Mac, turn it on, and then continue to press the Power button until the Startup Options appear on the screen. Check for updates while in Safe Mode. If the error persists, restart your device two or three times in a row and try again.
Check Date and Time Settings
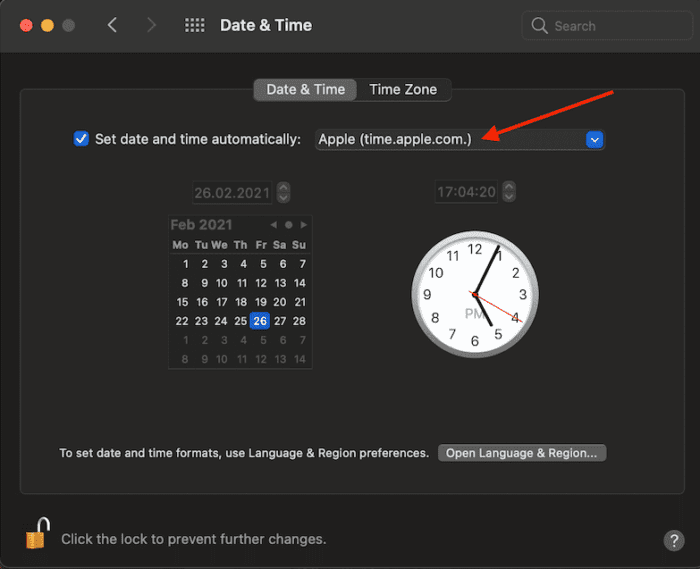
Additionally, check your date and time settings. Let your Mac set up the date and time settings automatically. Go to System Preferences, click Date and Time, and set the date and time zone automatically. Restart your Mac, and try to reinstall the OS.
If you can’t boot up your Mac properly, use macOS Utilities and Terminal to edit your date and time settings.
Shut down your Mac.
Then turn it on, and immediately press and hold the Command, and R keys to enter Recovery Mode.
Release the keys when you see the Apple logo on the screen.
Click on Utilities, and then select Terminal.
Run the ntpdate -u time.apple.com command to set the date and time automatically. If this command doesn’t work, try running sntp -sS time.apple.com.
If you’re offline, edit the settings manually using the date [mm][dd][HH][MM][yyyy] format. There are no spaces between [mm][dd][HH][MM][yyyy].
Reinstall the OS Without Erasing the Drive
Restart your MacBook, and press and hold the Command and R keys right after you hear the chime.
Release the keys when the Utility menu appears on the screen.
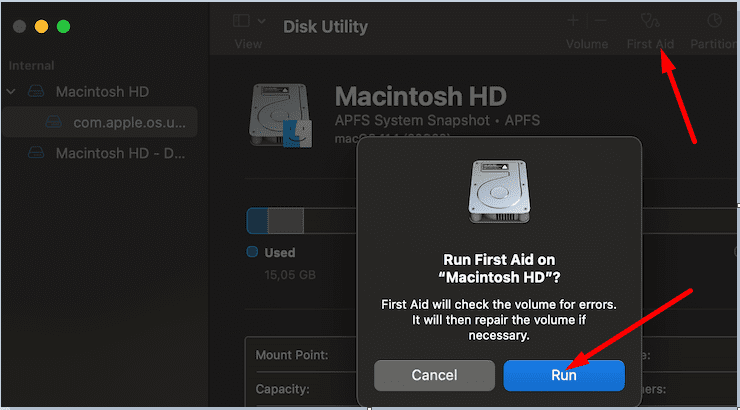
Select Disk Utility and click on Continue.
Select your disk. For most users, it’s Macintosh HD.
Then, click on the First Aid option.
You may need to wait for a few seconds, or a couple of minutes until the Done button becomes clickable. Hit Done.
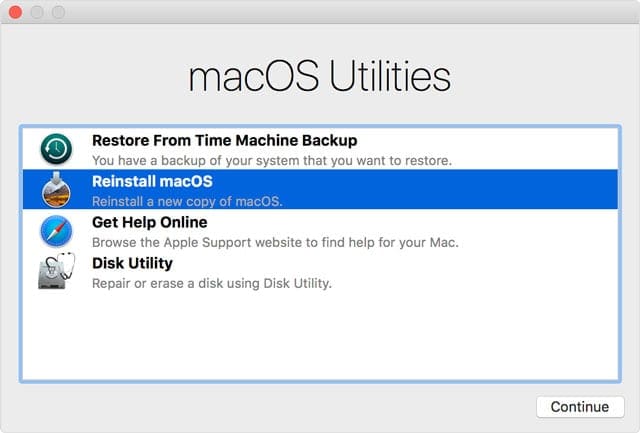
Exit Disk Utility, go back to the Utility Menu, and select Reinstall OS X.
If reinstalling the OS won’t work, try erasing the drive first.
Erase the Drive Before Reinstalling the OS
Restart your Mac, and press and hold the Command, Option, and R keys right after the chime.
Release the keys when the globe or Apple logo appears on the screen.
Wait between 5 to 10 minutes until the Utility menu appears on the screen.
Then select Disk Utility and hit Continue.
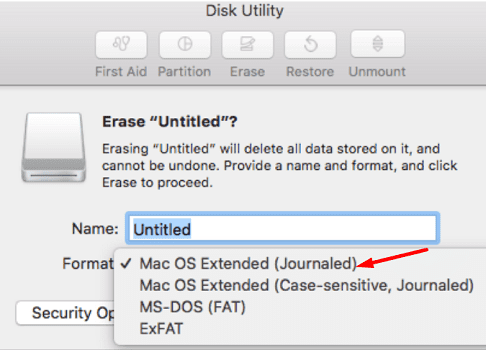
Select your drive and then click on the Erase tab.
In the new panel, set the partition scheme to GUID, and select the format type to Mac OS Extended (Journaled).
Click on Apply and Done, and then quit Disk Utility.
Go back to the Utility menu, and select Reinstall OS X.
Recreate Your Fusion Drive and Add a New Volume on It
Use this solution only if your macOS device is equipped with a Fusion Drive. As its name suggests, a Fusion Drive consists of two different drives fused together. This is usually a combination of a Serial ATA drive (HDD) and an SSD.
First, erase the disk with Disk Utility and reformat it using the macOS Extended (Journaled) option. Then, follow the steps below.
Use the Utility menu and launch Terminal.
Check your drive Unix names by running the #> diskutil list internal command.
It’s important to note which is the HDD, and which is the SSD. For most users, the HDD is disk 1, and the SSD is disk0.
Now, run the #> diskutil unmount force disk2s1 command to force-unmount the logical volume.
Reformat your drives by running the following commands:
#> diskutil eraseDisk JHFS+ SSD disk0
#> diskutil eraseDisk JHFS+ HDD disk1
After that, recreate the disk with the help of the #> diskutil cs create “Macintosh HD” disk0 disk1 command.
Then, create a logical volume on the disk with this command: diskutil cs createVolume “Macintosh HD” JHFS+ “Macintosh HD” 100%
Exit Terminal and try to reinstall macOS.
Take Your Mac to Apple for Repair
If you’re still getting the same error even after erasing the drive, this may indicate your disk is faulty. If your machine is equipped with an HDD, you need to replace it. If your Mac has an SDD, take it to Apple for repair.
Conclusion
If your MacBook says that an error occurred while preparing the installation, boot into Safe Mode and check your date and time settings. Then, boot into Recovery Mode, run First Aid and try to reinstall the OS without erasing the drive. If the issue persists, erase the drive and try to reinstall the OS. Did you manage to fix the problem? Let us know in the comments below.
Madalina has been a Windows fan ever since she got her hands on her first Windows XP computer. She is interested in all things technology, especially emerging technologies — AI and DNA computing in particular.
Hi, can anyone suggest anything please? I had issues running Sierra on my 2009 imac so I thought I would reinstall it. Initially I tried to several times via recovery but it failed saying not enough space on HD. As I only use it for photos and I have them on icloud I went ahead and erased the HD. The reinstall still keeps failing. I tried all recovery mode options, tried all the date change options, repairing disc, erasing HD etc. I either get a failed with -399 seconds to go or not enough space on HD message despite the progress bar on the volume showing plenty of free space. When I look at the volume list I have an internal volume that has number starting with S which is full but no option to erase it? I’m wondering if that is the reason why the install fails.
Can I erase the mac remotely on icloud ? Would this be easier? If I do will I be able to reload the original OS CD disc to restore it back to factory settings and if so how do I do this? I’m not very experienced in this techie stuff and feel as though I have now fallen down a rabbit hole without a map! Thanks 🙂
I’ve had error -69512 when installing Ventura on 27″ iMa with SSD build in instead of the original HD. This SSD is using a Kingston SNA-DC2/35 bracket. I’ve had problems using this bracket in the past. There’s some electronics inside this thing that causes some problems with some iMac’s, so get another bracket to solve this issue. It’s strange but it looks like this brackets interface is giving write errors.
I also saw this happen if you use the bracket with a ssd containing the OS and everything and it won’t startup after building the ssd into a Mac.
I was able to resolve the problem following the step “Recreate Your Fusion Drive and Add a New Volume on It” it was the only option in my case for a Macbook pro 2017


Hi, can anyone suggest anything please? I had issues running Sierra on my 2009 imac so I thought I would reinstall it. Initially I tried to several times via recovery but it failed saying not enough space on HD. As I only use it for photos and I have them on icloud I went ahead and erased the HD. The reinstall still keeps failing. I tried all recovery mode options, tried all the date change options, repairing disc, erasing HD etc. I either get a failed with -399 seconds to go or not enough space on HD message despite the progress bar on the volume showing plenty of free space. When I look at the volume list I have an internal volume that has number starting with S which is full but no option to erase it? I’m wondering if that is the reason why the install fails.
Can I erase the mac remotely on icloud ? Would this be easier? If I do will I be able to reload the original OS CD disc to restore it back to factory settings and if so how do I do this? I’m not very experienced in this techie stuff and feel as though I have now fallen down a rabbit hole without a map! Thanks 🙂
If after doing that and the issue persists, what should i do
I’ve had error -69512 when installing Ventura on 27″ iMa with SSD build in instead of the original HD. This SSD is using a Kingston SNA-DC2/35 bracket. I’ve had problems using this bracket in the past. There’s some electronics inside this thing that causes some problems with some iMac’s, so get another bracket to solve this issue. It’s strange but it looks like this brackets interface is giving write errors.
I also saw this happen if you use the bracket with a ssd containing the OS and everything and it won’t startup after building the ssd into a Mac.
did not work, the same error showed again and again…
is there any other ways i could try to install the OS?
same here did you ever get this sorted?
did not work. is there any other ways i could try to install the OS?
I was able to resolve the problem following the step “Recreate Your Fusion Drive and Add a New Volume on It” it was the only option in my case for a Macbook pro 2017