You can’t reformat a drive in macOS Disk Utility when the Erase button is grayed out. This might happen for a variety of reasons, all of which keep you from erasing or reformatting the drives connected to your Mac.
If your MacBook’s Disk Utility won’t let you erase drives, follow the steps below to fix it.
How to erase or reformat a Drive using Disk Utility
Let’s start with a brief explanation of the correct way to reformat or erase drives using your Mac. Feel free to skip this section if you already know how to do it.
You may want to erase your drive as a quick way to create space for new files. Or you might need to reformat it so it works with different operating systems, like Windows, Linux, or even iPadOS.
When you reformat a drive, it also erases all the data on it. So make sure to back up any important files before erasing or reformatting your drives.
When you’re ready, here’s how to erase or reformat drives:
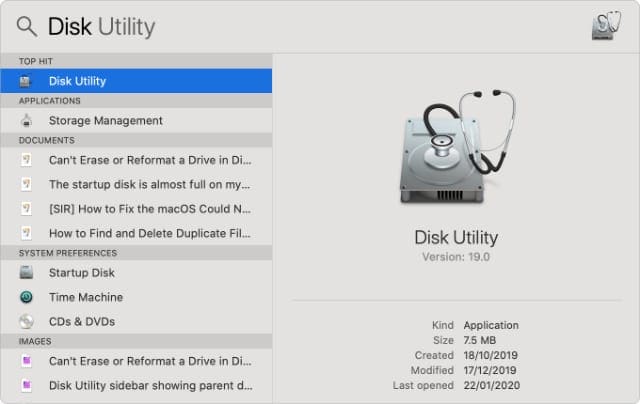
Open Disk Utility from the Utilities folder in your Applications.
Spotlight is the quickest way to open Disk Utility.
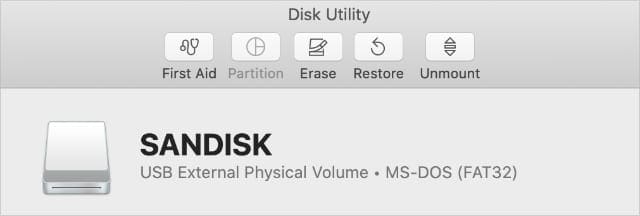
In the sidebar, select the drive you want to erase or reformat.
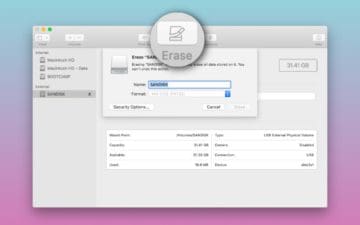
Click the Erase button at the top of the window.
Disk Utility presents several tools at the top of the window.
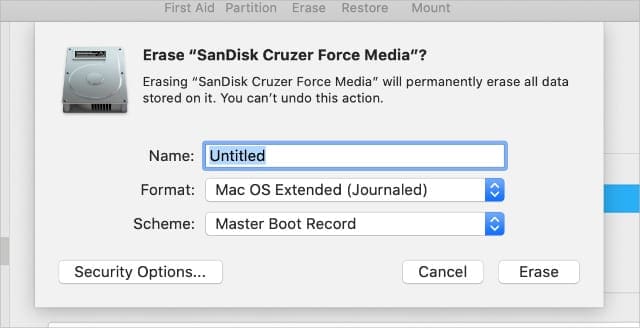
Choose a new name and format for your drive, then click Erase.
Decide what to name your drive after erasing it.
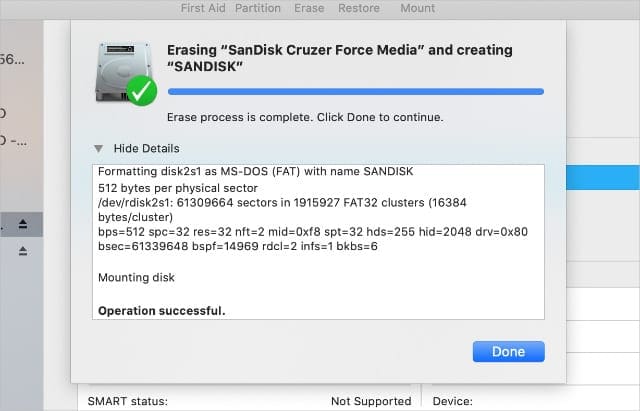
Wait for Disk Utility to erase or reformat your drive, then click Done.
Disk Utility shows each process it completes in the window.
What if the Erase Button in Disk Utility is grayed Out?
You’re probably reading this article because the Erase button was grayed out when you tried to erase or reformat a drive using Disk Utility. Use the steps below to fix it and let us know in the comments which one worked for you.
Step 1. Show All Devices and Erase the Parent Drive
By default, Disk Utility only shows the Volumes on your connected drives, rather than the drives themselves. A Volume is the partition or section of a drive you store data in.
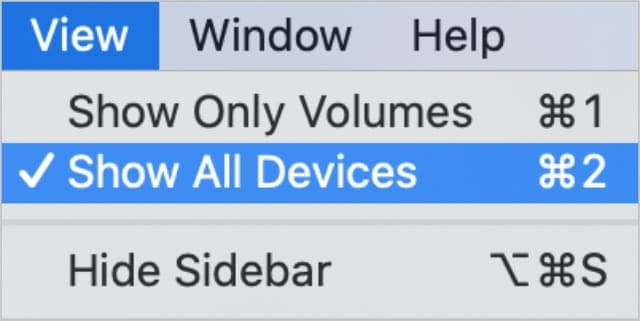
Open Disk Utility and select View > Show All Devices from the menu bar. You should see the device names for each of your drives appear in the sidebar.
Alternatively, use the shortcut Cmd + 2.
Select the parent folder for the drive you want to reformat or erase, then click the Erase button again. Take note that when you erase a device, it erases all the Volumes contained within it as well.
Step 2. Run First Aid to Repair Your Drive Before Erasing It
Disk Utility has a First Aid feature that fixes all kinds of issues related to your drives: slow performance, corrupt files, or unexpected behavior. When you run First Aid, it scans the entire disk for errors and lets you know if there are any it can’t repair.
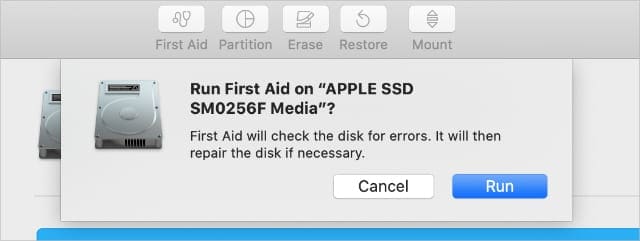
Open Disk Utility and select the drive you want to erase from the sidebar. At the top of the window, click the First Aid button, then agree to Run First Aid.
Run First Aid on any problematic drives.
The length of time First Aid takes to run depends on the size of your drive, how much data is on it, and how many errors need fixing.
Combine this step with the previous one to run First Aid on the parent device for your drive, as well as the individual Volumes.
Step 3. Boot Into Recovery Mode to Erase Your Startup Disk
If you’re trying to reformat or erase the startup disk on your Mac, you need to boot into Recovery Mode first. The startup disk is the main hard drive on your computer: the one that stores macOS and all your data. It’s not usually possible to erase the startup disk because your Mac is using it to run macOS.
Recovery Mode is a special partition on your Mac you can use to restore from a backup, reinstall macOS, get online support, or erase your startup disk.
You should back up your Mac before trying to erase or reformat it.
When you’re ready to boot into Recovery Mode, restart your Mac and hold Cmd + R while it boots up. Keep holding both keys until you see an Apple logo or hear a startup sound.
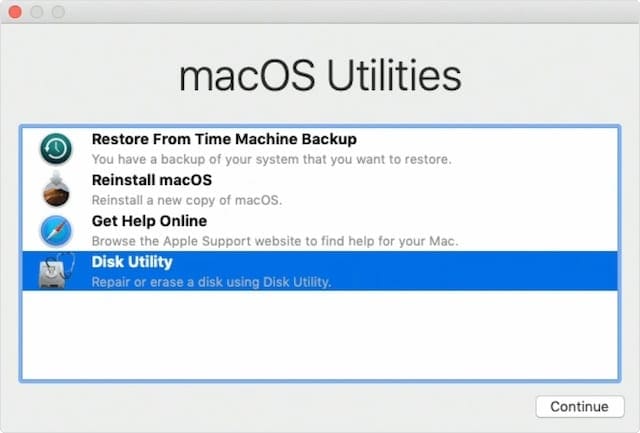
Recovery Mode appears as a Utilities window.
You should see a macOS Utilities window appear. Select Disk Utility from this window and try erasing or reformatting your drive again.
Learn how to reinstall macOS after erasing your Drive
After erasing or reformatting the startup disk—if that was your goal—you need to reinstall macOS before you can use your Mac again. This is because the original macOS installation was on the startup disk you just erased.
Your Mac prompts you to set it up again after you factory reset it.
Boot into Recovery Mode once more to reinstall macOS or follow our guide to factory reset any Mac. When you reinstall macOS, your Mac behaves as though it’s a brand new machine, with no data on it waiting for you to set it up.
Dan writes tutorials and troubleshooting guides to help people make the most of their technology. Before becoming a writer, he earned a BSc in Sound Technology, supervised repairs at an Apple Store, and even taught English in China.
This didn’t work for me. I don’t have a Devices listed under Disk Utility. Did first aid, while in recovery mode, and the Erase button is still grayed out. Need to erase computer before recycling.
I tried to clear (erase) 3 harddrives from my Truenas system it holds ZFS, too bad even diskutil unmountDisk force /dev/disk3 on Terminal does not work. Not erase, not format, nothing.
Simple, stupid idea. Is the external drive formatted for use by Linux? If the answer is yes, Mac won’t read it. Plug it into the, ideally, the same linux system used to format it.
None of this worked for me. I bought this NVME drive used. it seems it had a boot master on it. I went to the parent drive. it will not let me erase it or any of the sub folders.
Disk utility was showing 4 Mac HD with crazy names like HD DATA, HD DATA DATA,… it’s only after erasing them all that the Hard drive was finally erased.
I’ve done all of the beautifully listed “how to’s” and my mac is now in some strange Safari mode where in I can go onto the internet (via ethernet) and the secured websites appear. However, I cannot ( or at least) I am hesitant to leave this part to try and erase or start it up again. I have erased it my self and taken it to the apple store twice! It still won’t allow me permissions and greys out areas like mail, airdrop, photos. This, me thinks, is a serious hacking job of which (there was a laptop listed being used as a server) no one and I mean NO ONE seems to believe me when I tell them or take it in. However, I find sites like this and others where everyone is discussion exactly what I am experiencing – plus bank accounts and on line passwords of mine have all been changed and my debit cards are compromised. Please someone let me know if I should just chuck this machine and start with a REAL brand new one! Also, all of my apple products, charges, airpods, iphones (plural) have all specific areas of greyed out and I have no access to them. WHERE CAN A BROTHUH GO TO GET SOMEONE TO BELIEVE AND HELP CLEAN THIS MAC DADDY BAD BOY???? 310-600-4959
The Erase button will also be greyed out if the drive was formatted with a format no longer supported by disk Utility. My drive was formatted as “Mac OS Extended”, and it had become corrupted. When I tried to erase the disk, the Erase button was greyed out. By selecting “Mac OS Extended (Case-sensitive, Journaled)” the Erase button became enabled, and I could format the partition.
Plain old “Mac OS Extended” no longer shows as an option in the Format drop-down. I assume that it is no longer supported.
Threw everything at it (first aid plus Cmd R), and it finally worked, sort of. Now when I restart, it had a folder with a question mark. Off to google again…
I had tried to back up my Mac ever since I installed Catalina. Nothing I read gave me such a clean explanation of how to do it when the Erace tab is grayed out. Thank you for giving me simple directions that I could follow and which worked.
I was able to erase disk but when I try to reinstall the OS system software, it says that is unavailable and to try back later. I’ll try back later, but any tips if I keep getting this screen? THis is on a 2010 iMac, so its an old computer but trying to get rid of it, so would love to get it up and running atleast.
I recently upgraded my Mountain lion os to Catalina only to find out a program that I need doesn’t support the Catalina upgrade.
I have gone into recovery mode and erased the HDs and gone to reinstall only to find that it wants to install Catalina again. Mountain lion is what came with my MacBook pro.
I really need to put Mountain lion back on this, your help would be greatly appreciated
The part where you advised your audience to do the First Aid in Mac Utilities first before attempting to erase the external hard drive was very useful. Every time I attempted to erase the hard drive it gave me the message that it could not complete the task. After taking your advise to do the First Aid first, there was no issue in erasing the hard drive. So, thank you for the good advise!
On my old macbook can not partion hd and getting a msg saying .. the disk cannot be partitioned because some files cannot be moved ..
also cannot erase hd with grey erase button from disk utility.
also cmd r is not working.
Any help would be appreciated.
Regards
Old MacBook Model 3.1 running 10.6.8 having all the problems mentioned above.
After trying everything for several hours, This worked for me.
Remove battery.
Place laptop on flat surface.
Use hammer to destroy HD.
Have a glass of Rosso Piceno.
This is exactly where I am with a Macbook 1.1. I have tried everything mentioned , disk repair etc etc and still get a grey color for the erase button. About to use the hammer
2015 MacBook Pro unable to enter into recovery mode in order to rest to factory settings. Battery does not work (was recalled) so machine runs severely slow when plugged in. I have pressed co tell R for 15 minutes listening to it ding but it never moves on. I want to sell the machine for parts. Now what?


Was able to erase completely after rereading the directions above.
Thank you for this article!
This didn’t work for me. I don’t have a Devices listed under Disk Utility. Did first aid, while in recovery mode, and the Erase button is still grayed out. Need to erase computer before recycling.
Thanks,
Angie
I tried to clear (erase) 3 harddrives from my Truenas system it holds ZFS, too bad even diskutil unmountDisk force /dev/disk3 on Terminal does not work. Not erase, not format, nothing.
OH MY GAWD THANK YOu!!!
The CMD-R worked when nothing else would. Thanks.
Simple, stupid idea. Is the external drive formatted for use by Linux? If the answer is yes, Mac won’t read it. Plug it into the, ideally, the same linux system used to format it.
Thanks for the article! Showed me how to find the drive, so I can reformat it.
None of this worked for me. I bought this NVME drive used. it seems it had a boot master on it. I went to the parent drive. it will not let me erase it or any of the sub folders.
Disk utility was showing 4 Mac HD with crazy names like HD DATA, HD DATA DATA,… it’s only after erasing them all that the Hard drive was finally erased.
I’ve done all of the beautifully listed “how to’s” and my mac is now in some strange Safari mode where in I can go onto the internet (via ethernet) and the secured websites appear. However, I cannot ( or at least) I am hesitant to leave this part to try and erase or start it up again. I have erased it my self and taken it to the apple store twice! It still won’t allow me permissions and greys out areas like mail, airdrop, photos. This, me thinks, is a serious hacking job of which (there was a laptop listed being used as a server) no one and I mean NO ONE seems to believe me when I tell them or take it in. However, I find sites like this and others where everyone is discussion exactly what I am experiencing – plus bank accounts and on line passwords of mine have all been changed and my debit cards are compromised. Please someone let me know if I should just chuck this machine and start with a REAL brand new one! Also, all of my apple products, charges, airpods, iphones (plural) have all specific areas of greyed out and I have no access to them. WHERE CAN A BROTHUH GO TO GET SOMEONE TO BELIEVE AND HELP CLEAN THIS MAC DADDY BAD BOY???? 310-600-4959
The Erase button will also be greyed out if the drive was formatted with a format no longer supported by disk Utility. My drive was formatted as “Mac OS Extended”, and it had become corrupted. When I tried to erase the disk, the Erase button was greyed out. By selecting “Mac OS Extended (Case-sensitive, Journaled)” the Erase button became enabled, and I could format the partition.
Plain old “Mac OS Extended” no longer shows as an option in the Format drop-down. I assume that it is no longer supported.
Threw everything at it (first aid plus Cmd R), and it finally worked, sort of. Now when I restart, it had a folder with a question mark. Off to google again…
I had tried to back up my Mac ever since I installed Catalina. Nothing I read gave me such a clean explanation of how to do it when the Erace tab is grayed out. Thank you for giving me simple directions that I could follow and which worked.
I was able to erase disk but when I try to reinstall the OS system software, it says that is unavailable and to try back later. I’ll try back later, but any tips if I keep getting this screen? THis is on a 2010 iMac, so its an old computer but trying to get rid of it, so would love to get it up and running atleast.
I had a hard time to erase my hard drive on my old Mac computer . this worked perfect!!
Thanks Dan !
This was an awesome and not too detailed. This worked like a charm! Thanks!
Step 1 worked for me. Once I listed “all devices” I was able to reformat the hard drive – Thanks!
I recently upgraded my Mountain lion os to Catalina only to find out a program that I need doesn’t support the Catalina upgrade.
I have gone into recovery mode and erased the HDs and gone to reinstall only to find that it wants to install Catalina again. Mountain lion is what came with my MacBook pro.
I really need to put Mountain lion back on this, your help would be greatly appreciated
The part where you advised your audience to do the First Aid in Mac Utilities first before attempting to erase the external hard drive was very useful. Every time I attempted to erase the hard drive it gave me the message that it could not complete the task. After taking your advise to do the First Aid first, there was no issue in erasing the hard drive. So, thank you for the good advise!
I’ve followed all the correct steps and have come to “unmounting disk” “Couldn’t unmount disk” “Operation failed…”
So, now what? Any suggestions would be very welcome.
On my old macbook can not partion hd and getting a msg saying .. the disk cannot be partitioned because some files cannot be moved ..
also cannot erase hd with grey erase button from disk utility.
also cmd r is not working.
Any help would be appreciated.
Regards
Old MacBook Model 3.1 running 10.6.8 having all the problems mentioned above.
After trying everything for several hours, This worked for me.
Remove battery.
Place laptop on flat surface.
Use hammer to destroy HD.
Have a glass of Rosso Piceno.
This is exactly where I am with a Macbook 1.1. I have tried everything mentioned , disk repair etc etc and still get a grey color for the erase button. About to use the hammer
2015 MacBook Pro unable to enter into recovery mode in order to rest to factory settings. Battery does not work (was recalled) so machine runs severely slow when plugged in. I have pressed co tell R for 15 minutes listening to it ding but it never moves on. I want to sell the machine for parts. Now what?