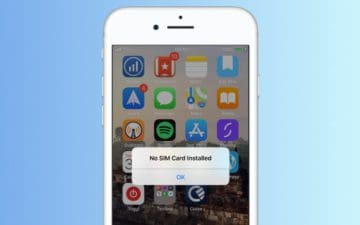
Shortly after the iPhone 4’s launch, many early adopters found their SIM card wasn’t recognized. Error messages bombarded users saying “No SIM Card Installed,” and there was no clear way to fix it.
You can have SIM card problems on any iPhone.
The iPhone 4 is long in the past now, but the No SIM issue is still a common problem for iPhone users. Even with iPhone XS or iPhone XR!
Why is my iPhone saying there is no SIM card installed?
Your iPhone might give any of the following messages if the SIM card isn’t working properly:
No SIM
No SIM Installed
Invalid SIM
Insert SIM
This issue happens when your iPhone is unable to detect the SIM card in your device. It might be because there isn’t a SIM card in there. It might be because the SIM card is dislodged. Or it might be because the software isn’t working correctly.
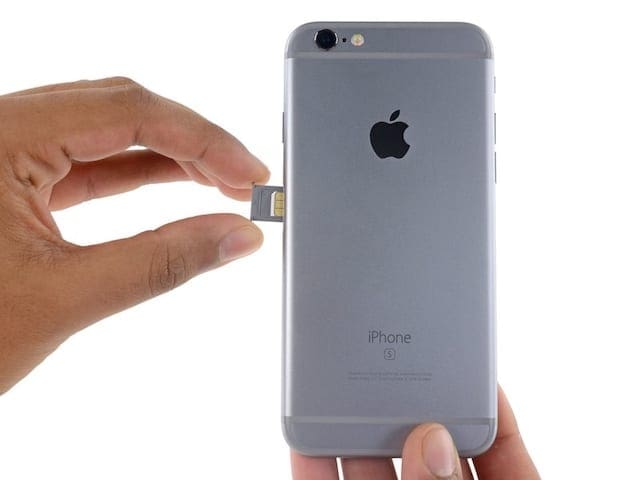
Take your iPhone out of its case and look for a rectangular slot on the edge of your device. This is the SIM tray — the SIM card is inside.
Remove the SIM tray using the SIM tool that came with your iPhone or a straightened paperclip. Push the end into the small hole until the tray pops out. It only pops out a little bit, but it’s enough to grab it and pull the rest of the way.
Pop your SIM card tray out with a paperclip — image from Apple.
When you finish, push the SIM tray back into the slot — making sure it’s the right way around. It clicks back into place and should be flush with the edge of your iPhone.
How do I fix my SIM card not being detected?
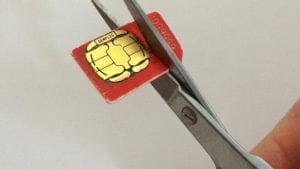
There are plenty of questionable solutions on the internet for the No SIM card installed error on iPhones.
We really don’t suggest you do this! Image from MacWorld.
Since it’s caused by the SIM card not connecting with your iPhone properly, some users have taken to putting tape on the back to thicken it or fashioning makeshift SIM trays to add pressure on the card, forcing a better connection.
I’ve even seen people advise you to slam your iPhone on a table to make the SIM card connect again!
We don’t recommend any of these solutions. They would all void your warranty or consumer law rights if Apple found out you did them. And what’s more, they could cause damage or more problems on your iPhone!
Instead, follow our steps below to fix your iPhone No SIM problems safely.
Step 1: Make sure your cell plan is active
It’s possible your SIM card has stopped working because of a problem with your cell provider. Perhaps they’ve got a cell tower down or other known issues?
Log in to your wireless provider’s website to check your account — image from AT&T.
Might they have closed your account by mistake or blocked your SIM card? Sometimes this happens after delayed payment or if you report your phone as stolen.
You should check your cell plan online and look for new messages or notifications. If you don’t see anything, call your cell provider to ask if your account is still active.
Step 2: Update iOS on your iPhone
When your iPhone says No SIM card installed, there’s a chance it’s because of a fault in the operating software. Bugs in iOS are relatively rare, but still, happen from time to time. You can fix them by updating to the latest software.
As soon as Apple finds a software bug — like iPhones thinking there is no SIM card installed — it works hard to release a fix in the next update.
Look for iOS updates if your SIM card isn’t working.
Go to Settings > General > Software Update to look for new updates on your iPhone. Or connect it to a computer running the latest version of iTunes. Download and install any that you find.
Step 3: Close every app and restart your device
A good old restart might be the trick you need. It’s an old favorite for a good reason. Closing every app and restarting your iPhone forces it to restart background processes which might be the cause of your problems.
Close your apps before restarting your iPhone.
Swipe up from the bottom of the screen and pause in the middle, or double-click the Home button, to see all your open apps. Push each app off the top of the screen to close it.
Then hold the Sleep/Wake button on the side of your iPhone. Slide to power off when you see the prompt and wait 30 seconds for your iPhone to power down completely.
Finally, press the Sleep/Wake button again to turn the iPhone back on — hopefully, you don’t get a message about the SIM card again!
Slide to power off your iPhone then wait a moment before turning it back on again.
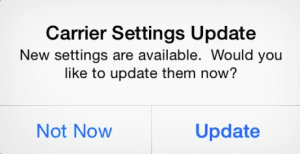
Step 4: Check for Carrier Settings Updates
Carrier Settings Updates should take place automatically.
When your cell carrier changes its systems, your iPhone should update automatically. Yet, sometimes a Carrier Settings Update slips under the radar. This means your iPhone can’t speak with the network anymore!
Go to Settings > General > About. Let your iPhone sit on this page for a minute — it searches for Carrier Settings Updates in the background and alerts you if it finds any. Make to install them if it does.
Step 5: Remove, inspect, and reinsert your SIM card
There could be a physical problem with your SIM card or SIM tray that is leading your iPhone to think there’s no SIM card installed.
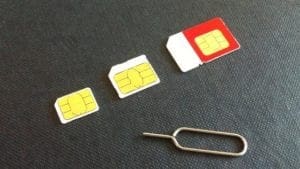
iPhone SIM trays vary in color and size for each iPhone model. Image from iFixit.
Remove your SIM tray and ensure it isn’t bent. Also, make sure it sits flush against your iPhone when fully inserted. If you have the SIM tray from a different model iPhone, it won’t connect your SIM card properly.
Look inside the SIM tray slot on your iPhone for a small white liquid indicator tab. If this tab has turned orange or red, it could mean your iPhone has suffered liquid damage, which might be why it doesn’t recognize your SIM card!
Look inside your SIM tray slot to see if there is liquid damage. Image from Apple.
Clean your SIM card with a soft damp cloth and clear debris out of your SIM tray slot using compressed air. Ensure the SIM card is totally dry before you put it back in the iPhone.
Step 6: Try a different SIM card
It’s possible your particular SIM card is faulty. If you have a second active SIM card, or you can borrow one, insert that into your iPhone instead.
SIM cards vary in size by quite a lot! Image from Macworld.
Use your iPhone with the new SIM card for long enough to find out if the No SIM message still pops up or not. Don’t worry if you can’t make phone calls or access the internet — your iPhone might be locked to a different network.
If your iPhone recognizes the new SIM card, contact your cell provider to replace your original one.
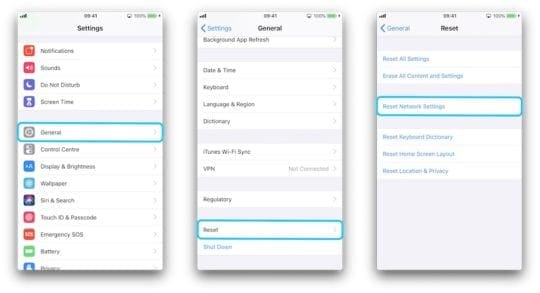
Step 7: Reset Network Settings
Various background settings on your iPhone can change the way it works with your SIM card. You can reset them, but it also causes your iPhone to forget any Wi-Fi networks you’ve connected to in the past.
After you Reset Network Settings, you’ll need to connect to Wi-Fi networks again.
Go to Settings > General > Reset. Choose to Reset Network Settings and enter your passcode if prompted.
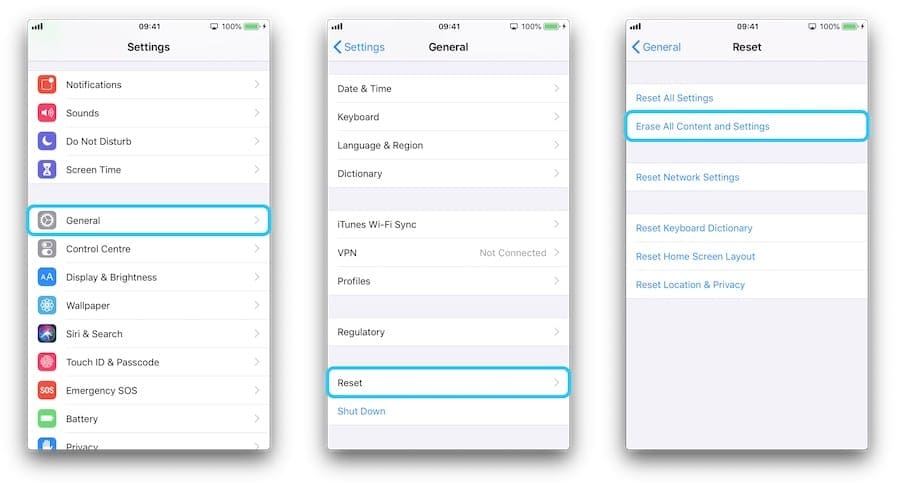
Step 8: Restore your iPhone to factory settings
CAUTION: This may brick your iPhone!
Make sure you’ve got a recent backup before erasing your iPhone!
When you restore an iPhone, it uses a SIM card to activate itself. If your iPhone can’t do this, it becomes totally unusable! You should only restore your iPhone if you have a spare phone to use should it go wrong.
Alternatively, go to Settings > General > Reset. Choose to Erase All Contents and Settings then enter your passcode and Apple ID details when prompted.
It’s quicker to Erase All Content and Settings from your iPhone, but it isn’t as thorough as using DFU mode.
Visit the Apple Support website to speak to Apple’s advisors, who can offer further troubleshooting help. They may schedule an appointment at the Genius Bar for hardware diagnostics and repair.
If your iPhone is under a year old and doesn’t have accidental damage, any repair should be free under Apple’s warranty. Otherwise, ask about your consumer law rights you may have with your device.
Depending on your situation and your location, you may be entitled to a free repair through your statutory rights — image from Apple.
I hope you got all the help you needed from this post. Let us know in the comments below if your SIM card still doesn’t work, and we’ll do what we can to help!
Dan writes tutorials and troubleshooting guides to help people make the most of their technology. Before becoming a writer, he earned a BSc in Sound Technology, supervised repairs at an Apple Store, and even taught English in China.


Write a Comment