It’s no secret that the iPhone and Apple Watch are incredible devices that can be used to help keep track of your health, fitness, and overall well-being. All you need to do is watch one or two Apple commercials to see examples of when an Apple device was used to save someone’s life. Most of the time, these advertisements are associated with the Apple Watch and its ability to track your heart rate or blood oxygen levels.
Related Reading
- Apple Watch Not Working? Troubleshoot Your Problems Today
- How to Use Action Button on Apple Watch Ultra
- How to Use Siren on Apple Watch Ultra
- Can’t Download and Install Apple Watch Update? How-to Fix
- How To Use Health Checklist on iPhone and Apple Watch
Contents
What Is Emergency SOS?
In addition to improving the stability and reliability of the health and benefits of your devices, Apple is also implementing different tools to help you in various ways. One of which is the Emergency SOS functionality which can be activated from either your iPhone or Apple Watch. When activated, this will call or notify emergency services, providing them with your location, and start a phone call. But Emergency SOS can also be used to notify emergency contacts, and even provide first responders with your Medical ID.
How to Set up Emergency SOS on Your Apple Watch
In order to take full advantage and set up Emergency SOS on your Apple Watch properly, there are a few different steps that you need to take. These vary from adding your emergency contacts to making sure that the necessary emergency features are properly enabled.
Set up Your Medical ID
Apple’s addition of the Medical ID to the Health app plays a big role in Emergency SOS and all of the various features tied to it. With Medical ID, you are essentially creating a virtual medical card that is stored on your device, is not uploaded or shared to any of Apple’s servers. But this provides essential information to first responders or other medical personnel in the event that you cannot provide responses or answers yourself.
- Open the Health app on your iPhone.
- Tap Summary in the bottom left corner of the toolbar.
- In the top right corner, tap your profile picture.
- Select Medical ID.
- If this is your first time setting up Medical ID, tap the Get Started button.
- Enter all of the information for the following categories:
- Name
- Photo
- Date of Birth
- Medical Conditions
- Medical Notes
- Allergies & Reactions
- Medications
- Blood type
- Organ Donor
- Weight
- Height
- Primary language
- Once complete, tap the Done button in the top right corner.
With your Medical ID filled out, this information can be shared with first responders or others in the event that you are in need of medical attention.
Add Emergency Contacts
Filling out your Medical ID is only part of the equation, as you’ll also likely want to add some emergency contacts. These self-selected individuals can also be notified when they need to use the Emergency SOS functionality of their iPhone or Apple Watch.
- Open the Health app on your iPhone.
- In the top right corner, tap your profile image.
- Tap Medical ID.
- In the top right corner, tap Edit.
- Scroll down and tap the + add emergency contact button under the Emergency Contacts section.
- Select the contact that you wish to add.
- If prompted, select the Relationship to the contact.
- Repeat the process to add more Emergency Contacts.
- Once complete, tap Done in the top right corner.
In the event that you need to use Emergency SOS, a text message is automatically sent to your emergency contacts. This provides your current location, and your contacts will also receive automatic updates whenever your location changes. The Apple Watch has this feature enabled by default, but here’s how you can make sure that everything is turned on and working properly.
- Open the Settings app on your Apple Watch.
- Scroll down and tap Privacy & Security.
- Tap Location Services.
- Scroll all the way to the bottom of the list and tap System Services.
- Look for the Emergency Calls & SOS toggle.
- Make sure this is enabled.
Turn On Automatic Dialing
As we’ve stated, when you use Emergency SOS, a phone call is automatically placed to emergency services. You can cancel this call when prompted from your Apple Watch, as there’s always a chance that you might accidentally press the Side Button for too long, not knowing that you are doing so. In the event that you want to toggle automatic dialing for Emergency SOS, here’s how you can do so:
- Open the Watch app on the iPhone paired with your Apple Watch.
- Tap the My Watch tab in the bottom toolbar.
- Scroll down and tap Emergency SOS.
- Tap the toggle next to Hold Side Button to Dial to the On position.
- In the top left corner, tap < Back to save your changes.
Enable Fall Detection
With the release of the Apple Watch Series 4, Apple first debuted the ability for your Apple Watch to detect when you have fallen unexpectedly. This is great for those with mobility issues but also works quite well in the event that you are in an accident when biking, for example. Here’s how you can make sure Fall Detection is enabled on your Apple Watch:
- Open the Watch app on the iPhone paired with your Apple Watch.
- Tap the My Watch tab in the bottom toolbar.
- Scroll down and tap Emergency SOS.
- Tap the toggle next to Fall Detection to the On position.
- Select one of the following:
- Always on
- Only on during workouts
Turn On Crash Detection
One of the newest features to arrive with the Apple Watch Series 8, Apple Watch SE (2nd Generation) Apple Watch Ultra, and iPhone 14 series is called Crash Detection. When enabled, this uses the various sensors in your devices to determine whether you have been in a severe car crash.
- Open the Watch app on the iPhone paired with your Apple Watch.
- Tap the My Watch tab in the bottom toolbar.
- Scroll down and tap Emergency SOS.
- Tap the toggle next to Call After Severe Crash to the On position.
If you happen to be in a severe car crash, your Apple Watch will do the following:
“It will display an alert and automatically initiate an emergency phone call after 20 seconds unless you cancel. If you are unresponsive, it will play an audio message for emergency services, which informs them that you’ve been in a severe car crash and gives them your latitudinal and longitudinal coordinates with an approximate search radius.”
How To Use Emergency SOS on Your Apple Watch
With everything set up and the various settings enabled, here’s how you can actually use Emergency SOS on your Apple Watch:
- Press and hold the Side Button on your Apple Watch.
- Continue holding until the Emergency Call slider appears.
- Drag the Emergency Call slider from left to right to start the call.
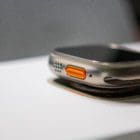
Another option that you have when trying to use Emergency SOS on your Apple Watch is to simply press and hold the Side Button. After about 10 seconds, your Apple Watch will automatically call emergency services without you needing to interact with the screen or drag the slider.
Andrew Myrick is a freelance writer based on the East Coast of the US. He enjoys everything to do with technology, including tablets, smartphones, and everything in between. Perhaps his favorite past-time is having a never-ending supply of different keyboards and gaming handhelds that end up collecting more dust than the consoles that are being emulated.






Write a Comment