Although most of us probably ignore and even remove most of the stock iPhone apps (does anyone even use the Clips app?), there’s one built-in app that I don’t think I could live without. And that’s the Notes app. Whether it’s jotting down a quick idea, a reminder for later, or making a list, the Notes app is a convenient digital notepad. What you may not know about this staple app is that you can share Notes on iPhone.
Yep! In the last few iOS releases, Apple has added and expanded on the ability for users to share Notes with one another. You can also do this on macOS and iPadOS, making it that much more versatile.
In this post, we’re going to be covering all of the ways that you can share Notes with your friends, family, and coworkers.
First, though, let’s cover how this feature works. After all, can’t you just screenshot or copy/paste a note to share it with someone?
Technically, you can do this. But a better way to do it is through the official sharing feature of the Notes app. This works very similarly to Google Docs, so if you’ve used that before, it works identically.
For those unfamiliar with real-time document sharing, though, here’s what it looks like:
You give another user the ability to work on the same Note that you’re working on
They can then edit this Note on a different device
As both of you edit and add to the Note, you’ll see each other’s work in real-time
That means every word you type, delete, or change will instantly change for them, too, over the internet
Using this method to share Notes on iPhone and Mac makes the experience far more collaborative. You can maintain a list between two or more people, work on an essay together, write notes back and forth, and do anything else you can think of.
How to share Notes on iPhone and Mac
Now that you know how Notes sharing works on iPhone, you’re ready to learn how to do it. Below are four built-in ways that you can share a Note with someone else on your iPhone, iPad, or Mac. The process is the same on all three devices. So even though we’re just going to be focusing on the iPhone, know that the directions can be followed on whichever device you choose.
Share Notes on iPhone and Mac through email
The first way to share Notes on iPhone is through email. Using this method will send the person a link in their email. When they click the link, it’ll open your Note in the Notes app on their device. That means they’ll have to have an Apple device to view it, which goes for all of the methods in this article. You can’t share a Note in the Apple Notes app with someone who doesn’t have the Apple Notes app.
Alright, here’s how it works:
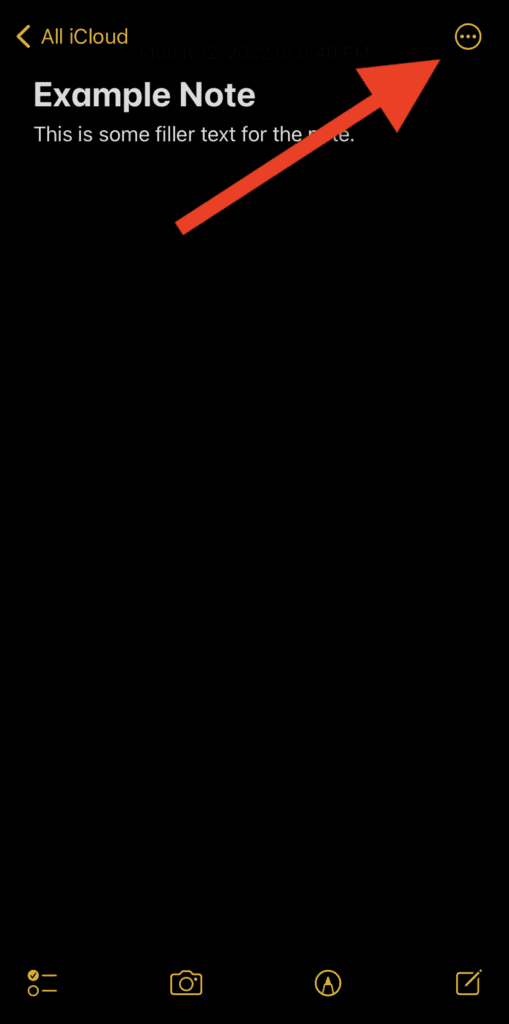
Open the Notes app on your iPhone.
Tap the “…” menu button in the top-right of the screen. On a Mac, you’ll skip this step.
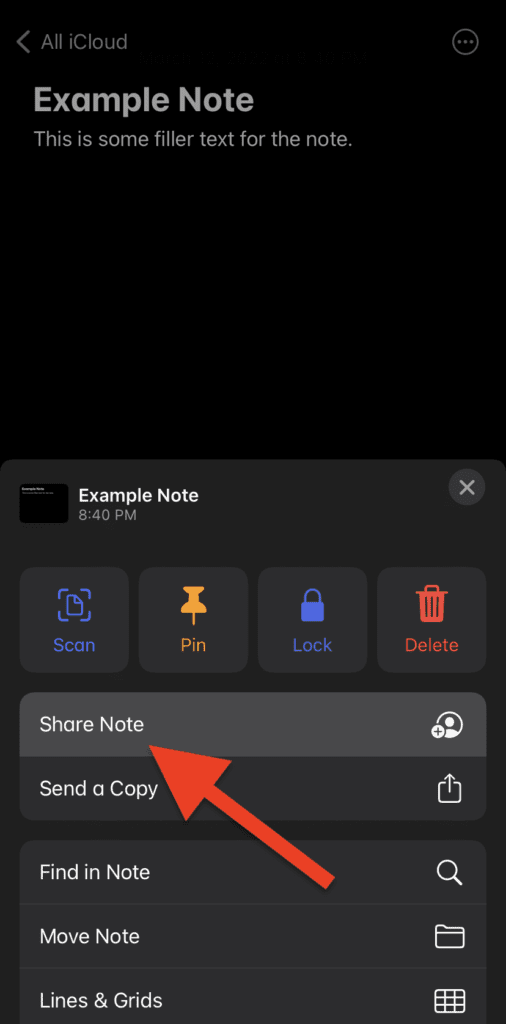
Tap the Share Note option from the slide-up menu. It’ll have a little person with a “+” next to them, which is the icon you’ll click on a Mac.
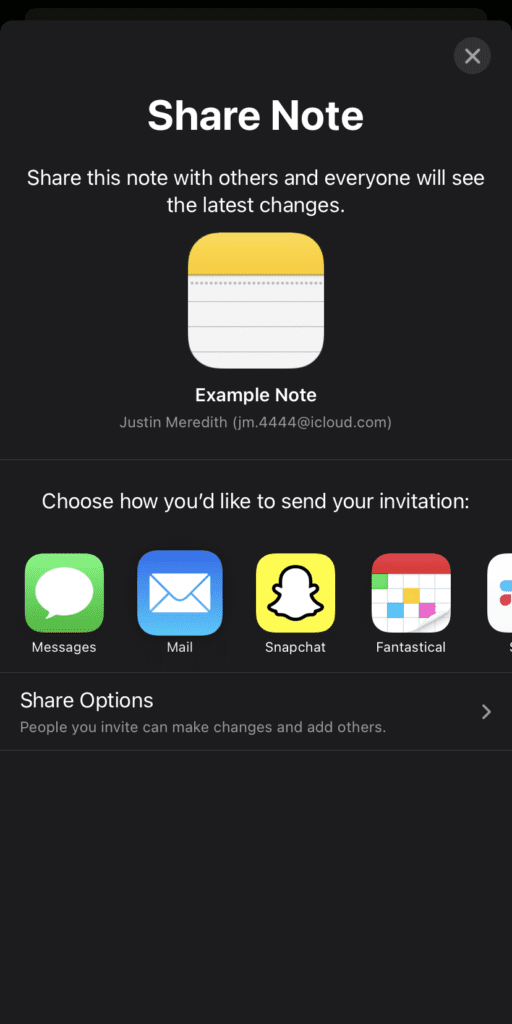
Tap the Mail button to share this note over email. If you use another email client, like Gmail, you can tap that instead.
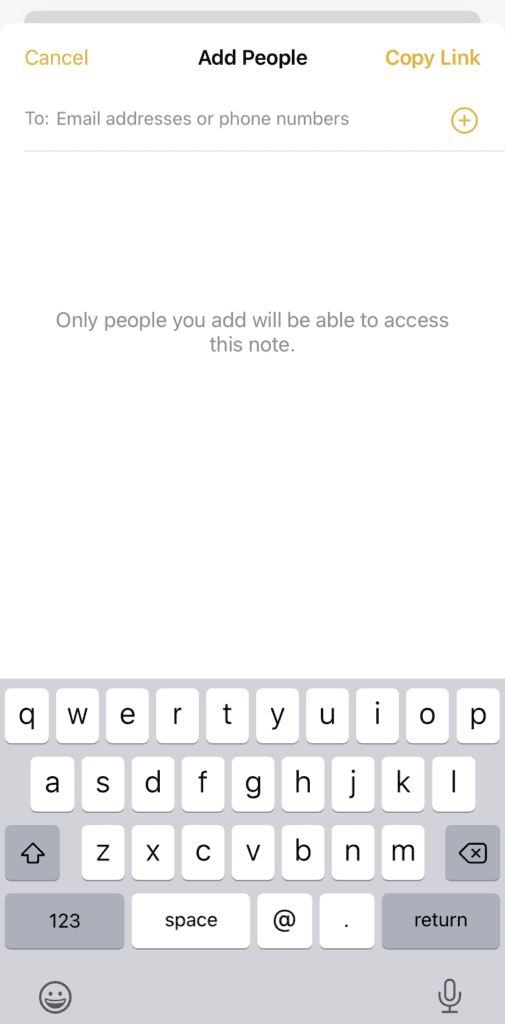
Choose the person(s) you want to share this note with by entering their email addresses.
Type a message letting them know it’s from you and what the Note is for, then hit send!
And that’s it! The person(s) you sent the Note to will now be able to access it.
Share Notes using Messages
The next way to share Notes on iPhone is through a text message. This feature isn’t tied to iMessage, so you can send it to anyone whose number you have saved in your iPhone. Here’s how:
Open the Notes app on your iPhone.
Tap the “…” menu button in the top-right of the screen. On a Mac, you’ll skip this step.
Tap the Share Note option from the slide-up menu. It’ll have a little person with a “+” next to them, which is the icon you’ll click on a Mac.
Tap the Messages icon.
In the To: field, type the name or number of whoever you want to send the message to.
Hit the send button.
And that’s it! They’ll receive a link to the note via text.
Share Notes using a link
A more universal way to share Notes on iPhone is through a link. With a link, you can share the note over text, email, instant messenger, or even by writing it down on a piece of paper.
Open the Notes app on your iPhone.
Tap the “…” menu button in the top-right of the screen. On a Mac, you’ll skip this step.
Tap the Share Note option from the slide-up menu. It’ll have a little person with a “+” next to them, which is the icon you’ll click on a Mac.
Scroll through the app icons for a moment until you find the one labeled “Copy Link”. Its icon will look like a chain link. Tap it.
You can type in email addresses or phone numbers to send this link to if you like, or you can just tap the Copy Link in the top-right of the screen.
If you tap the Copy Link button, it’ll copy the link to your iPhone’s clipboard. From there, you can paste this link into any app or message you like. You can also paste it into the Notes app and write it down for people to use! This is handy for putting a note on a whiteboard in the office.
Share Notes with AirDrop
Lastly, you can share a note with someone over AirDrop. AirDrop is a Bluetooth-sharing feature built into iOS. It works by sending files and links to other Apple devices. It only works with Apple devices, though, and can be a bit tricky to get working. Here’s some more information on getting it to work.
It’s also important to note that when you share iPhone notes over AirDrop, it just sends a copy of the note. You won’t be able to edit it with someone else in real-time, see each other’s edits, and so on.
Open the Notes app on your iPhone.
Tap the “…” menu button in the top-right of the screen. On a Mac, you’ll skip this step.
Tap Send a Copy on iPhone or the Share button on Mac.
Tap the AirDrop icon.
Bubbles will appear showing you nearby devices you can send the note to. All you have to do is tap them and it should send the note over in just a few seconds! That’s assuming it works, of course – this feature can be finicky!
How to stop sharing a Note with someone
And that’s it! Those are all of the ways that you can share Notes on iPhone. Now, we’re going to quickly cover how you can stop sharing a note, too, after you’ve shared it.
Select the note that you want to stop sharing in the Notes app.
Tap the icon in the top-right that shows a person with a checkmark.
Tap Manage Shared Note.
You can now tap each person and select Remove Access to stop sharing the note with them.
Or you can tap Stop Sharing on the same page to stop sharing the note with everyone at once. This will not get rid of the note, only change who can view it.
It’s important to note that you can only control who can or can’t see a note if you are the manager for that note. You become the manager of a note when you are the creator of the note.
How to manage sharing permissions in the Notes app
Managing the sharing permissions of a note in the Notes app follows nearly the same steps as removing someone’s access to a note. By changing someone’s permissions, you can allow or deny them the ability to edit and/or add people to a note.
Select the note whose permissions you want to edit in the Notes app.
Tap the icon in the top-right that shows a person with a checkmark.
Select Manage Shared Note.
Tap the person whose permissions you want to edit.
You can change their PERMISSION level to Can make changes, which allows them to make edits, or View only, which only allows them to read a note.
You can also give or revoke the ability to share the note with other people.
How to collaborate with Notes on iPhone and Mac
Now that you know how to share Notes on iPhone, stop sharing them, and edit how they’re shared, you’re ready to start collaborating in the Notes app. Below is a short list of all of the ways that you can collaborate with other Apple users on a note.
See other people’s edits in real-time
Similar to working in Google Docs with others, you can view other people’s Notes edits in real-time. All you need to do for this to work is to start working on the note at the same time on two different devices. You’ll be able to see what each person is doing without them interrupting what you’re working on.
This is great for remote collaboration, when you may not be in the same room as the people you’re working on the note with. It’s a great way to work on essays, projects, and other assignments together.
View the activity history of other users
If someone works on a note while you’re not using the Notes app, you can view their edits retroactively. Just tap the three-dot menu in the top-right of the note and choose Show Note Activity from the menu.
This will pop up a list of all of the changes that each user has made to the note. Great for when you missed a session of working on a note and want to know who contributed what and when.
Share Notes on iPhone with your friends
And that’s it! That’s everything there is to know on how to share Notes on iPhone. This is a super handy feature, so be sure to take advantage of it!


Write a Comment