iTunes has largely been replaced by Apple Music, especially on macOS, yet many Windows users still use it to upload music and interact with Apple devices. If you’re looking to sync music you already own with your Apple Music library and take it with you wherever you go, this article will show you how to move iTunes to Apple Music for Windows.
Apple Music brings the convenience of a streaming service to users, with an on-the-go focus over its predecessor. While iTunes specialized in purchased music, Apple Music puts the focus on subscription. That said, though, users can still upload their old iTunes libraries and some playlists to Apple Music, even on Windows.
What’s more, if you have an active Apple Music subscription, you can sync this music with any device you use, meaning you’ll never have to upload again.
Making the Transfer From iTunes to Apple Music for Windows
To make the move from one app to the other, you’ll need to download and install the Apple Music app. Let’s go through the entire process of making the transfer:
Download Apple Music
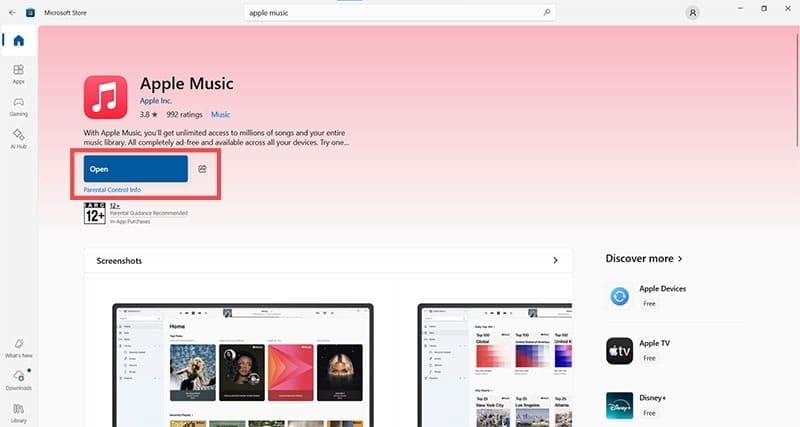
Apple Music, like iTunes, can be directly downloaded and installed from the Microsoft Store. Simply search for Apple Music in the store and click the “Install” button to begin the process. Once done, the button should change to “Open,” and you can click this to launch.
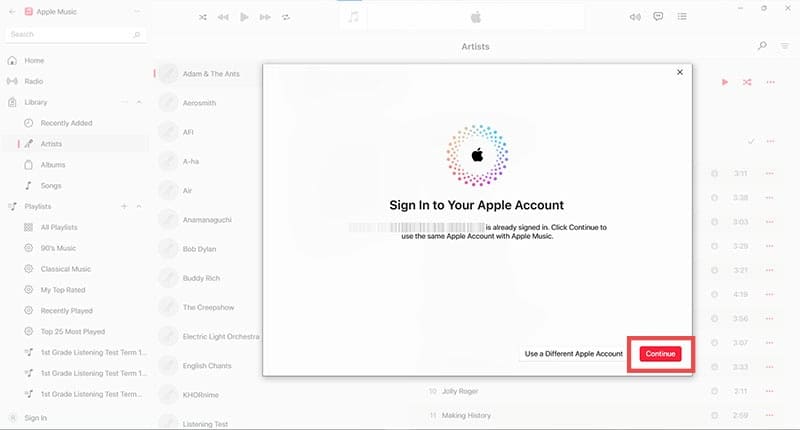
You can then sign into your Apple account if you want to take advantage of syncing later on.
The Library and Playlists
Once installed, Apple Music will look for your iTunes library on your machine, including the pathing to the actual files, and load them and the playlists into the app automatically. This doesn’t necessarily work for certain metadata, like some album art, or “.wav” files, for example.
The two main files that enable this convenient transfer are:
itl
iTunes Music Library.xml
If you find your library isn’t transferring seamlessly, you can also do things manually. Here’s how:
Step 1. Open an Explorer Window (Win + E) and navigate to your main drive and “Users.”
Step 2. Under your user name profile, click “Music,” followed by “iTunes” in the next screen.
Step 3. Go to “iTunes Media,” then “Music” to locate music files that have been duplicated or added directly to your library.
Step 4. Drag these folders into Apple Music one by one, and the app should add them to the library.
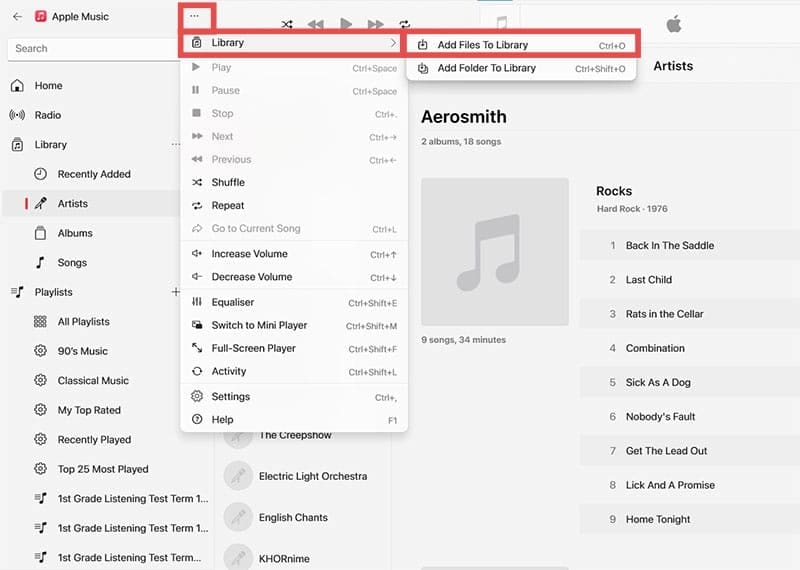
With music that you haven’t created duplicates of in your iTunes folder, you’ll need to locate these files on your storage devices or the machine itself and drag and drop them into Apple Music. If you’d prefer to do this in the app itself, click the Menu Icon (three dots), then “Add Files to Library” under the “Library” subsection.
Syncing Your Music Across Devices
A big draw of Apple Music is its ability to sync music across all connected devices under a shared Apple ID. You’ll need an active Apple Music subscription (and to be signed in) to make this happen, but you also have syncing enabled. Here’s how to do this:
Step 1. Click the Menu icon (three dots) and navigate down to “Settings.”
Step 2. Click “General” and then enable “Sync Library.”
As an avid gamer, I’ve run into my fair share of error codes and weird faults that have forced me to find fixes to problems I never anticipated. That gave me a passion for sharing those fixes with others so we can all game without feeling like our hardware is rebelling against us.


Write a Comment