While many of us are hoping for Apple to bring a reinvigorated experience to iOS, iPadOS, and watchOS in the near future, Apple is already doing just that. However, instead of focusing on major new features for everyone, the company has been putting more focus than ever on Accessibility. And there’s no better example of this than the new AssistiveTouch features that were recently announced for the Apple Watch.
There’s a good chance that you might remember AssistiveTouch from the days of iPhones with broken Home Buttons. This is because the AssistiveTouch Accessibility feature is a way to add a virtual Home Button to your iPhone’s screen, providing a different method for interaction.
While many of us might have forgotten about this key Accessibility feature, Apple has finally implemented it into the Apple Watch. With it enabled, you can now use a combination of the built-in motion sensors along with on-device machine learning and hand gestures to perform different tasks or actions.
According to Apple, there are some limitations as you will need at least an Apple Watch SE or Watch Series 4 in order to use these features. From there, you’ll need to have at least watchOS 8.3 installed on your Watch in order for the features to appear. Here’s the full list of AssistiveTouch compatible Apple Watch models:
Apple Watch SE
Apple Watch Series 4
Apple Watch Series 5
Apple Watch Series 6
Apple Watch Series 7
What Can You Do With AssistiveTouch?
As we mentioned previously, AssistiveTouch on Apple Watch makes it possible for those with limb differences to still enjoy the Apple Watch. There are a slew of different sensors packed into your Apple Watch, all of which provide the different health and fitness tracking metrics that we rely on. As for how this new feature works, here’s Apple’s official description:
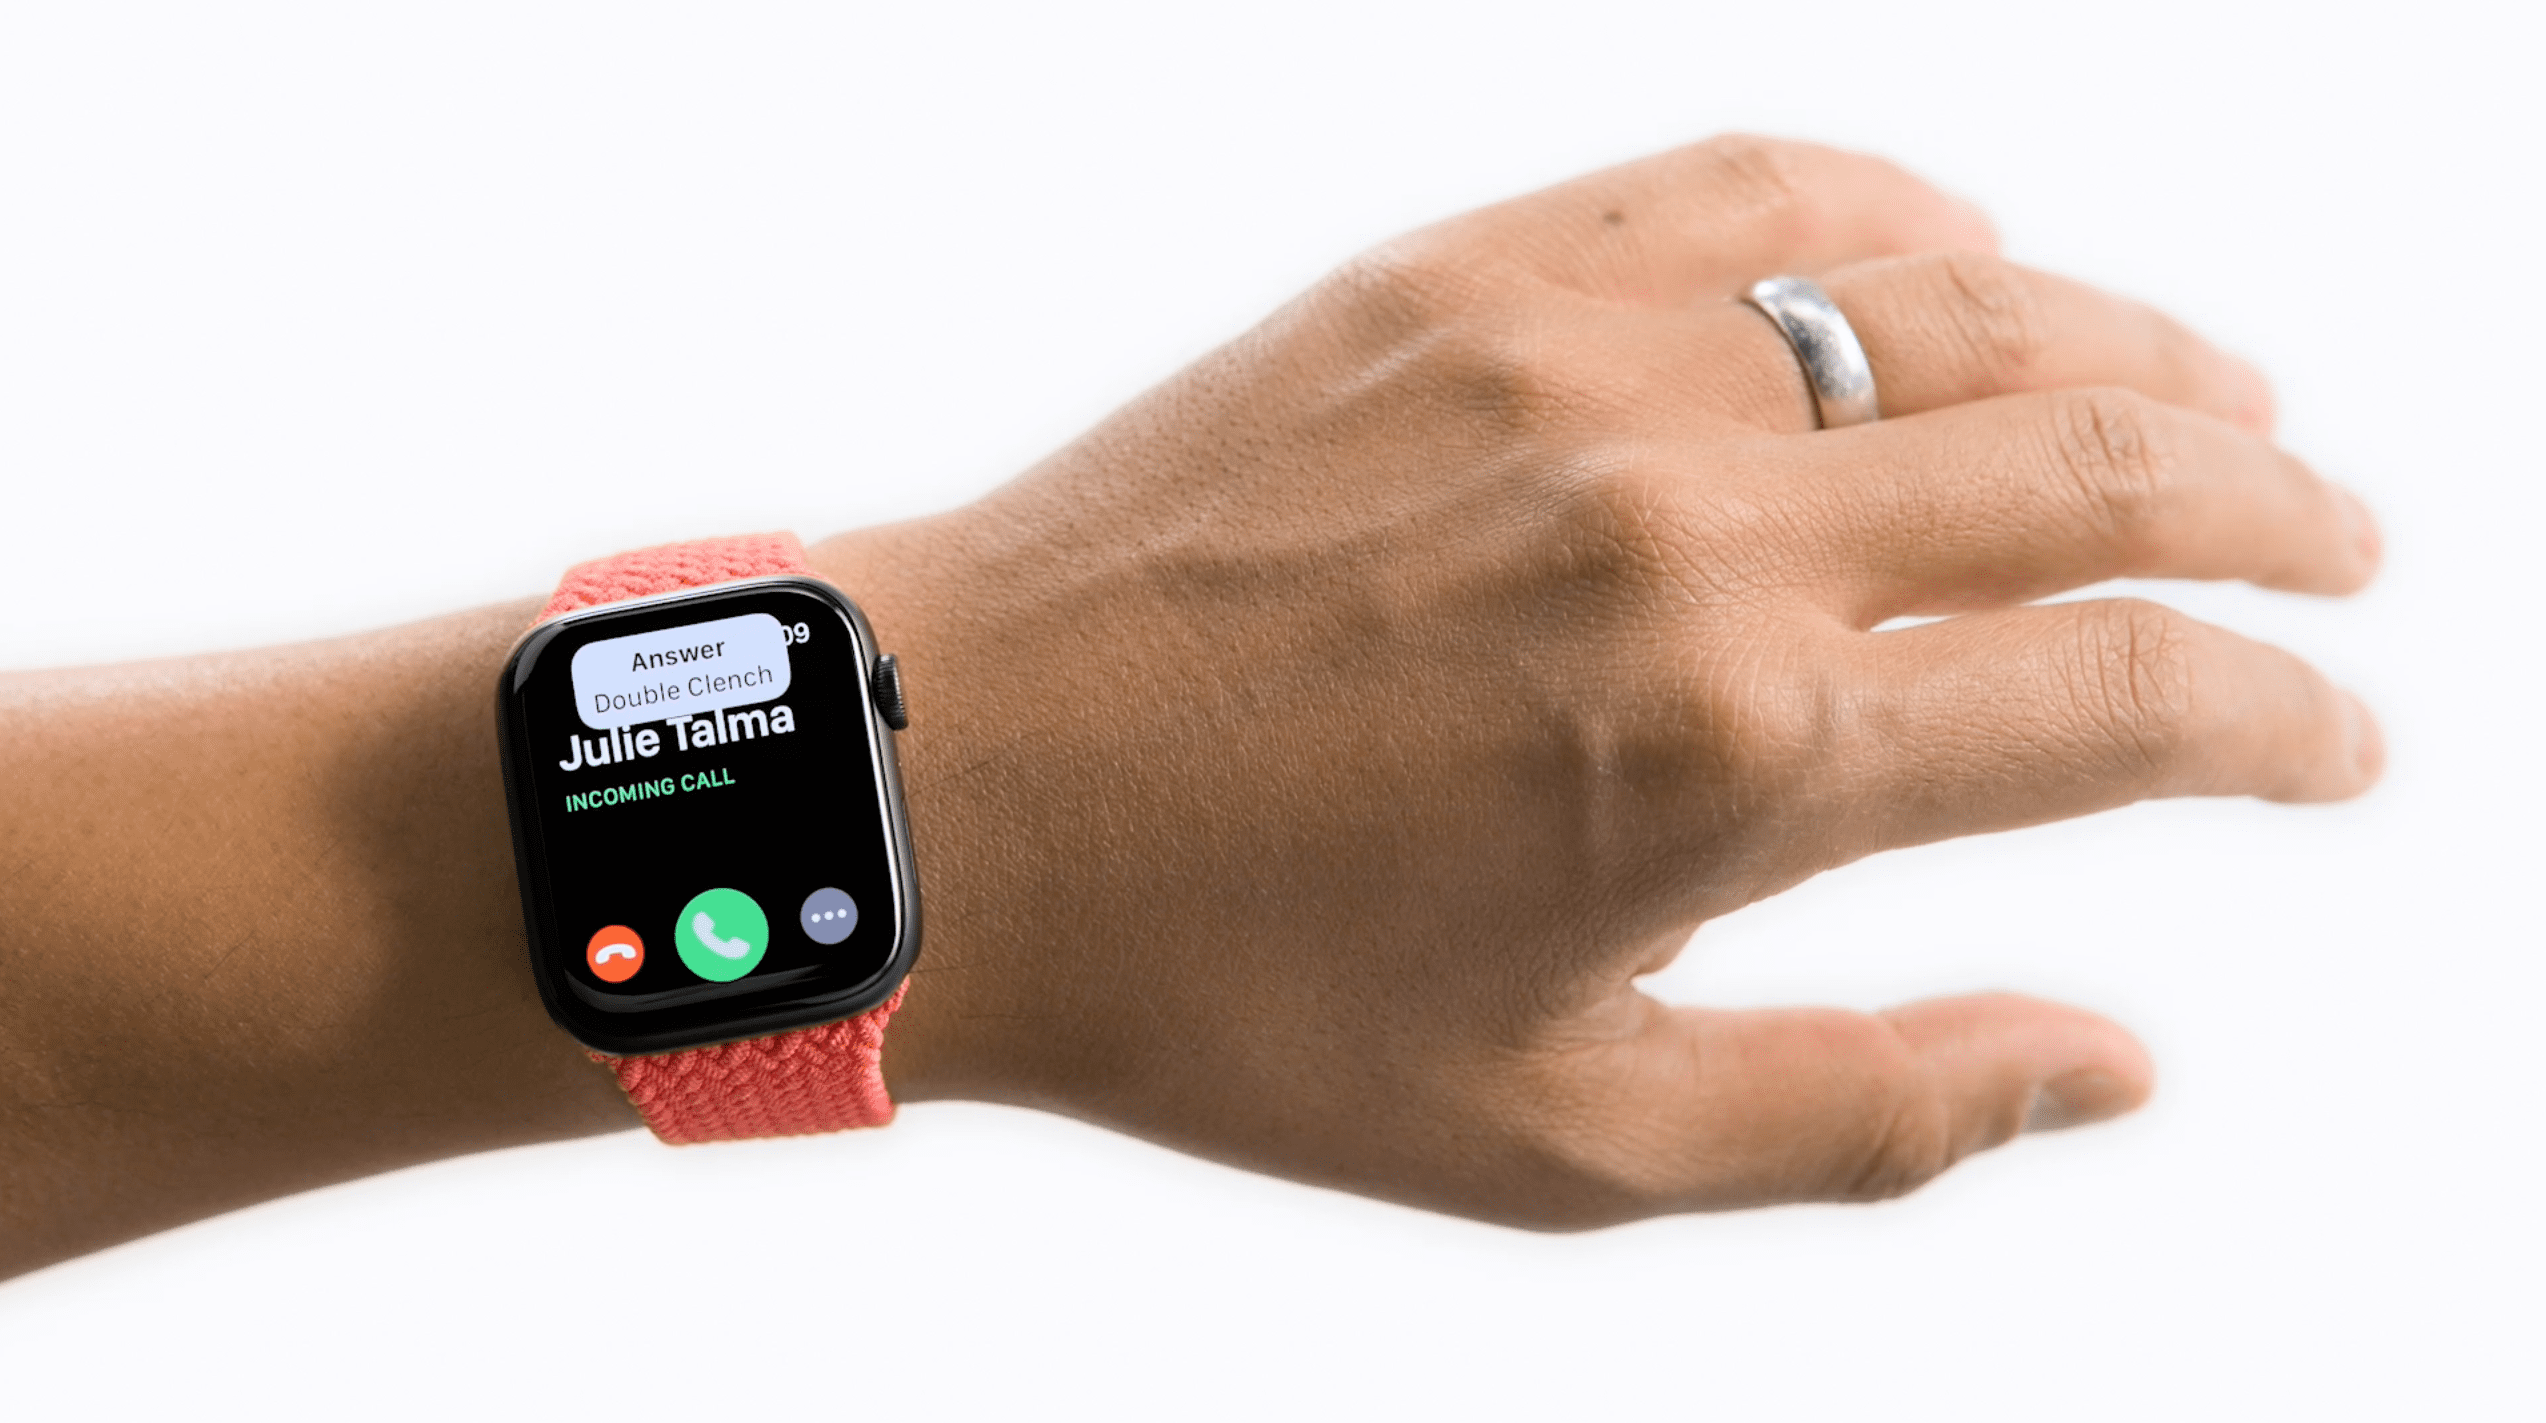
Using built-in motion sensors like the gyroscope and accelerometer, along with the optical heart rate sensor and on-device machine learning, Apple Watch can detect subtle differences in muscle movement and tendon activity, which lets users navigate a cursor on the display through a series of hand gestures, like a pinch or a clench. AssistiveTouch on Apple Watch enables customers who have limb differences to more easily answer incoming calls, control an onscreen motion pointer, and access Notification Center, Control Center, and more.
If you’re still looking for a more robust list of options, these are the different actions that can be performed once AssistiveTouch has been enabled:
Tap the display
Press and turn the Digital Crown
Swipe between screens
Hold the side button
Access Notification Center, Control Center, and the Dock
Show apps
Use Apple Pay
Confirm double-clicks of the side button
Activate Siri
How To Set Up AssistiveTouch on Apple Watch
Getting AssistiveTouch set up is easy enough, as all of the necessary toggles can be found right within the Settings app on your Apple Watch. Here’s how to set up AssistiveTouch on Apple Watch:
Open the Settings app on your Apple Watch.
Scroll down and tap Accessibility.
Select AssistiveTouch.
Tap the toggle next to AssistiveTouch to the On position.
Tap Hand Gestures.
Tap the toggle to turn on Hand Gestures.
If you would prefer to work with a bit larger screen compared to your Apple Watch, you can enable AssistiveTouch from your iPhone.
Open the Watch app on your paired iPhone.
Tap My Watch in the bottom toolbar.
Select Accessibility from the list of options.
Under the Motor section, tap AssistiveTouch.
Tap the toggle at the top of the page to turn on AssistiveTouch.
Tap Hand Gestures.
Tap the toggle at the top of the page to turn on Hand Gestures.
And with that, AssistiveTouch with Hand Gestures is now enabled on your Apple Watch. If you ever need to turn the feature off, you can just follow the steps above and tap the toggle to the Off position.
How To Use AssistiveTouch on Apple Watch
With AssistiveTouch enabled, this now gives you a number of different hand motions and gestures that you can perform. Listed below are the four different gestures that you can perform in order to navigate your Apple Watch without using your other hand.
Pinch: Forward
Double-pinch: Back
Clench: Tap
Double-clench: Show the Action Menu
Regardless of whether you’re a long-time Apple Watch owner or not, Apple provides an interactive animation that walks you through the different gestures. This can be found in the Hand Gestures section of the Accessibility settings, as you just need to tap the Learn more button.
Making Adjustments
As if it’s not obvious enough, not everyone can perform the exact same amount level of motion, or perform different gestures in the same manner. That’s why Apple took things a step further with the implementation of AssistiveTouch, as there are also a plethora of different settings that you can customize. All of these can be found in the same AssistiveTouch panel in the Settings app:
Customize gestures: Tap Hand Gestures, tap a gesture, then choose an action.
Customize the Motion Pointer: Tap Motion Pointer, then adjust settings for sensitivity, activation time, movement tolerance, and hot edges.
Scanning style: Choose between Automatic scanning, where actions are automatically highlighted one after the other, or Manual, where you use gestures to move between actions.
Appearance: Turn on High Contrast to make the highlight bolder. Tap color to choose a different highlight color.
Customize Menu: Choose favorite actions, the position and size of the Action Menu, and its autoscroll speed.
Confirm with AssistiveTouch: Turn on to use AssistiveTouch to confirm payments with the passcode or any time double-clicking the side button is required.
Of course, you’ll want to go through and see if you run into any issues when you enable AssistiveTouch for the first time. This provides a baseline for what adjustments need to be made to ensure the best experience possible when using this new feature.
Andrew Myrick is a freelance writer based on the East Coast of the US. He enjoys everything to do with technology, including tablets, smartphones, and everything in between. Perhaps his favorite past-time is having a never-ending supply of different keyboards and gaming handhelds that end up collecting more dust than the consoles that are being emulated.


Write a Comment