With iOS and iPadOS, you or a loved one can take advantage of an array of accessibility features. The settings include options for those with both visual and audio impediments. But there are also features to assist those with physical or motor skill difficulties, and one such feature is AssistiveTouch.
AssistiveTouch helps you navigate your device and perform actions on it using simple taps. For instance, rather than using a pinch-to-zoom action, you can tap instead.
This tutorial walks you through enabling and customizing the options you use with AssistiveTouch so that you can make the most of the feature when you need it.
Turning on AssistiveTouch is super easy on iPhone and iPad.
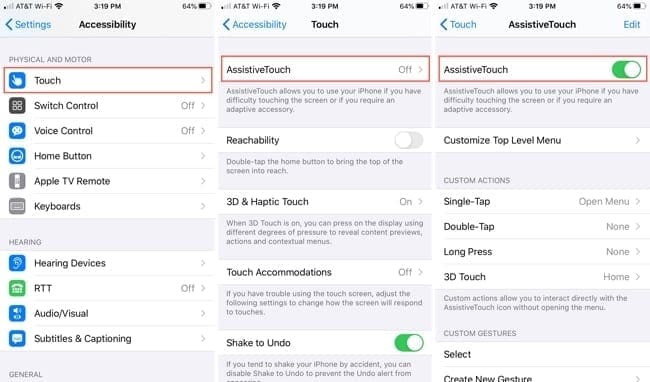
Open your Settings and select Accessibility.
In the Physical and Motor section, tap Touch.
Choose AssistiveTouch and turn on the toggle for it on the following screen.
Enable AssistiveTouch on iPhone
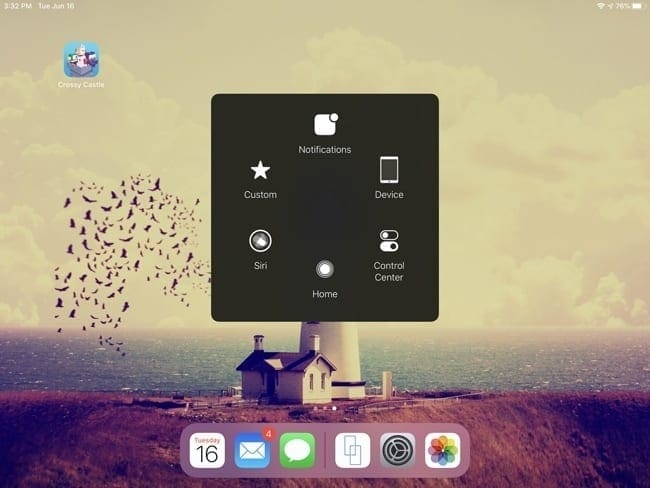
Once you turn on AssistiveTouch you’ll immediately see the shortcut to the AssistiveTouch menu. This icon displays as a black square with a white circle in the center.
You can tap the icon to view the menu, which we’ll show you how to customize next, and drag to move it wherever you’d like it on your screen.
AssistiveTouch menu
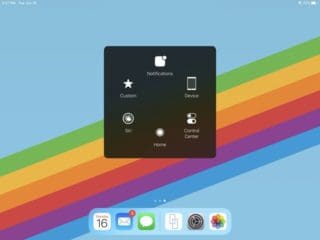
By default, AssistiveTouch contains six buttons that give you quick access to your Notifications, device settings, Control Center, Siri, the Home screen, and custom actions.
AssistiveTouch menu on iPad
Some default buttons will take you straight that section, like Notifications and Control Center. While others, like Device, will give you actions to take such as turning the volume up or down.
Customize the menu
You can change the buttons in the AssistiveTouch menu so that you have fast access to things you use most often on your device. And you can have up to eight buttons.
Head back to the AssistiveTouch area of your Settings where you enabled the feature. (Settings > Accessibility > Touch > AssistiveTouch).
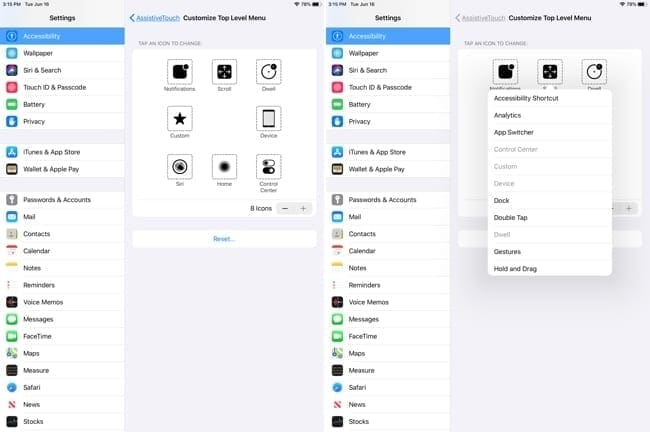
Select Customize Top Level Menu.
Tap a button that you want to change. You’ll see a scrollable list of options for locations like Dock, gestures like pinch and rotate, and actions like restart. Select the one you want to use.
You can add or remove menu buttons using the plus and minus buttons. And if you want the default menu back, just tap Reset.
Customize the AssistiveTouch menu on iPad
Add custom gestures
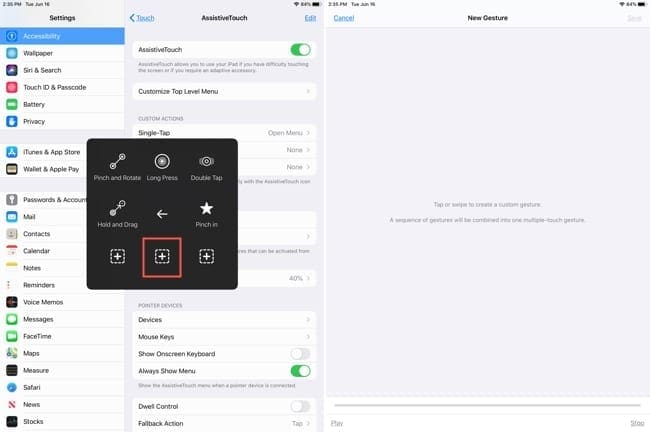
If you tap the AssistiveTouch icon to open the menu, you’ll see the Custom button which lets you use gestures that you perform often. You’ll notice a few set up for you already such as long press and double tap.
To add another gesture, tap a plus sign. You’ll then see the New Gesture screen where you can tap or swipe to create your own gesture. Use the controls at the bottom to play and stop when you finish. And if you want to keep the gesture, tap Save, name your gesture, and then tap Save again.
AssistiveTouch custom buttons on iPad
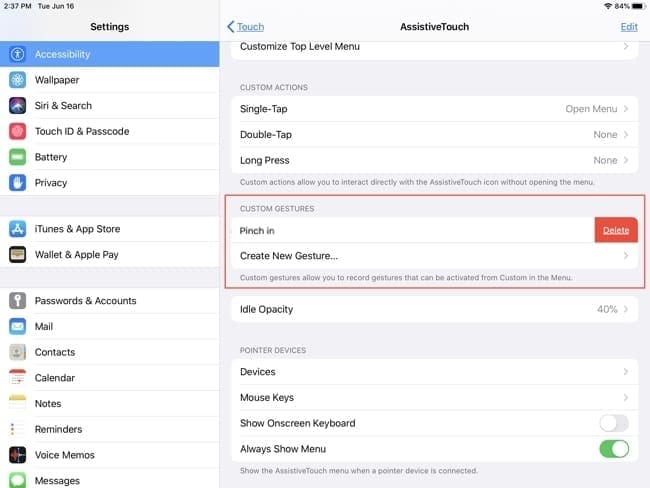
You can also add custom gestures in the AssistiveTouch section of the Settings. Go down to Custom Gestures and tap Create New Gesture. This will take you to that same New Gesture screen described above. And, any new gestures you create will display here.
AssistiveTouch custom gestures on iPad
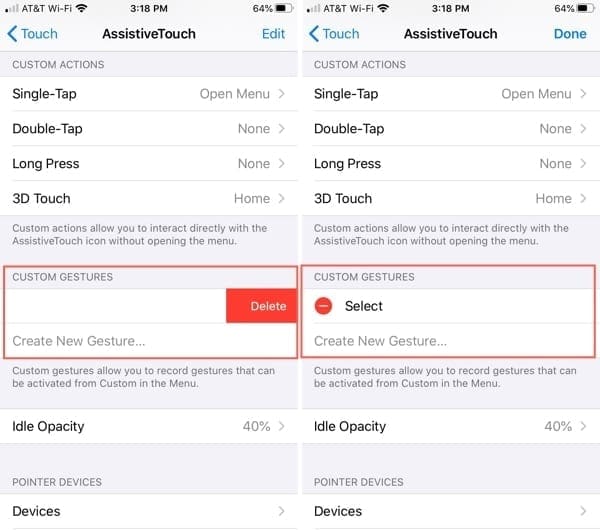
If you want to remove a gesture you create, swipe it from right to left and tap Delete. On iPhone, you can also remove a custom gesture by tapping Edit at the top and then minus sign in red.
Delete custom gestures on iPhone
AssistiveTouch settings, features and options
Along with the AssistiveTouch menu, you can make additional customizations to the feature. This includes custom actions, pointer devices, Dwell Control, and more.
So once again, head to Settings > Accessibility > Touch > AssistiveTouch.
AssistiveTouch settings on iPad
Here are the options you can customize:
Custom Actions: Choose the actions you want to use when interacting with the AssistiveTouch icon. You can select a different action for each gesture: Single-Tap, Double-Tap, and Long Press.
Custom Gestures: This is the area we explained above that lists any custom gestures you create and save along with the option to create a new one.
Idle Opacity: This dims the AssistiveTouch icon to your preferred transparency when inactive.
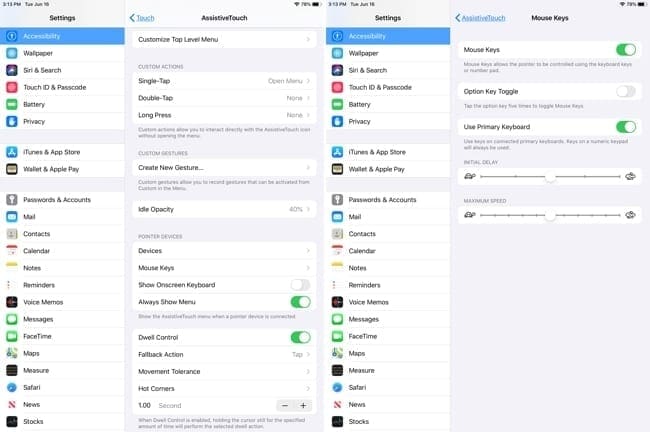
Pointer Devices: Here you can use AssistiveTouch with Bluetooth devices, adjust mouse key settings, and show or hide the onscreen keyboard and menu.
The settings for Mouse Keys let you enable or disable them along with the option key toggle and primary keyboard. In addition, you can set the initial delay and maximum speed.
Dwell Control settings: At the bottom of the screen, you have several additional settings you can customize for Dwell Control.
Dwell Control: You can enable this setting so that the action will occur while holding the cursor still for the amount of time you select.
Fallback Action: This reverts to your preferred action after performing an action. You can pick from Tap or Pause Dwell.
Movement Tolerance: This determines the distance you can move while dwelling.
Hot Corners: You can set an action when dwelling in each of the four corners of your screen. Select an action for each by tapping and picking from the list. This is similar to the Hot Corners feature on Mac.
Second: Select the number of seconds for the dwell timing. Use the plus and minus buttons to move the time up or down in 25-second increments.
Get a Little Help With AssistiveTouch on iPhone or iPad
AssistiveTouch on iPhone and iPad can certainly make using your device simpler. And once you give it a try, you’ll then know which options to customize to make it work even better for you.
Are you going to enable and check out AssistiveTouch on your device or help a loved one start using it? If so, please let us know below if you run into any problems with the settings and features we’ve discussed here.
And don’t forget, you can connect with us on Facebook and Twitter so you’re always in the loop with news and how-tos!
Sandy worked for many years in the IT industry as a project manager, department manager, and PMO Lead. She then decided to follow her dream and now writes about technology full-time. Sandy holds a Bachelors of Science in Information Technology.
She loves technology– specifically – terrific games and apps for iOS, software that makes your life easier, and productivity tools that you can use every day, in both work and home environments.
Her articles have regularly been featured at MakeUseOf, iDownloadBlog and many other leading tech publications.
Explain how I remove AssistTouch oFF of my AppStore app.
It just showed up on there a while ago, I don’t have AssistiveTouch on any of other apps that require facial recognition.
I really want to purchase things from the AppStore.
I am trying to set up a custom gesture to unlock my iPhone but I can only do 5 taps for the gesture instead of the 6 taps I would need to enter in my passcode. Is there a limit on the number of taps you can do in a custom gesture?


Explain how I remove AssistTouch oFF of my AppStore app.
It just showed up on there a while ago, I don’t have AssistiveTouch on any of other apps that require facial recognition.
I really want to purchase things from the AppStore.
Thank you for your help and time
Sloane Nyman
Every time I want to purchase something using the App Store I am unable to do so.
The icloud account, fac
I am trying to set up a custom gesture to unlock my iPhone but I can only do 5 taps for the gesture instead of the 6 taps I would need to enter in my passcode. Is there a limit on the number of taps you can do in a custom gesture?