Getting around on your travels abroad is much easier with an iPhone. Look up the best places to eat, get directions to walk there, and translate the menu when you arrive. How did tourists ever cope in the past?
Before you hop on that plane, take a moment to make sure your iPhone is travel-ready. Here’s everything you need to do to prepare.
Some cell carriers charge extortionate fees for you to use your iPhone abroad. Go to your carrier’s website or give them a call to find out what the roaming charges are with your contract.
If you’re lucky, you’ll be able to use your iPhone abroad at no extra cost.
Otherwise, you might want to inquire about pausing your contract while you’re away. Then look into getting a local SIM for the country you’re visiting so you can still get online and stay in touch with people.
Alternatively, you could turn off the cellular data options on your iPhone to minimize charges. You’ll need to depend on Wi-Fi if you do this, but most hotels, cafés, and restaurants offer free Wi-Fi you can use.
To turn off cellular data for traveling, go to Settings > Cellular Data > Cellular Data Options and disable Data Roaming.
2. Unlock your iPhone for international SIM cards
Getting a local SIM card for your destination country is often the cheapest way to use cellular data abroad. Of course, this method comes with downsides as well, since it comes with a different phone number and you need to go through the hassle of buying a SIM card abroad.
That said, it’s certainly worth the effort if you plan to be away for a while.
Make sure your iPhone is unlocked to work with other networks. Otherwise, foreign SIM cards (or even local SIM cards from a different network) won’t work with your iPhone.
You should also find out if your iPhone works with the right cell frequencies. Different countries transmit cell signals at different frequencies, and you need the right iPhone to receive them
Most of the time it’s fine, but research your destination country to make sure your iPhone is ready for traveling.
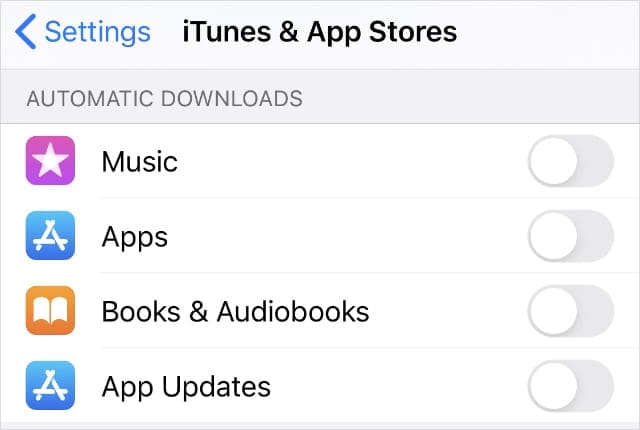
3. Turn off automatic downloads
Turn off automatic downloads to save data.
Even with a large data allowance and no roaming fees, it’s a good idea to stop your iPhone from downloading media in the background. This could drain the battery when you need it most and might rack up an expensive phone bill when you return home.
Go to Settings > iTunes & App Store and turn off automatic downloads for Music, Apps, Books & Audiobooks, and App Updates.
Of course, this means you need to manually download new app updates or the latest music added to your library. But it’s unlikely that you’ll need to do this while you’re away.
4. Start using Internet messaging services
If you still want to keep in touch with people back home while you’re on your travels, you should start using Internet messaging services. This way, you can text or call people over Wi-Fi without risking any extra costs.
You can even use these services to share photos and videos of your adventures.
If you plan to message other people who use Apple devices, turn on iMessage so you can keep using the Messages app. Go to Settings > Messages > iMessage.
Otherwise, here are the most popular third-party Internet messaging apps:
Make sure you install and set up the app you want to use before setting off on your journey.
5. Sign up for a VPN
There are lots of reasons to use a VPN while you’re at home. There are even more reasons to use one while traveling.
Every time you connect to a public Wi-Fi network, you run the risk of someone tracking your online activity. But you can reinforce your privacy with the use of a good VPN.
You might also find that some countries don’t let you use certain websites and services. For example, China doesn’t allow access to Facebook or Google. A VPN also lets you bypass these restrictions as well; install one on your iPhone when getting ready for you travels.
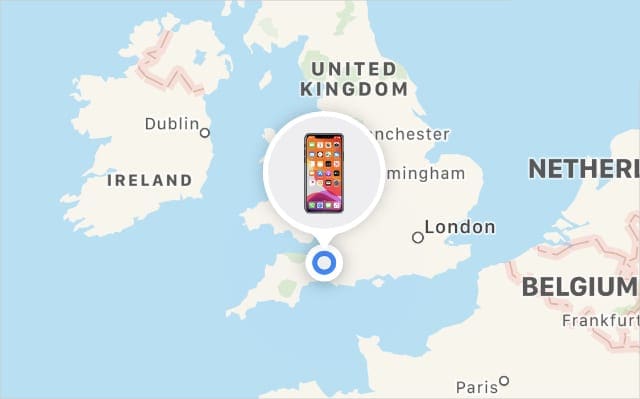
6. Turn on Find My iPhone
Make sure you can recover your iPhone if you lose it.
You’re at a greater risk of losing your iPhone whenever you visit a popular tourist destination. Not only do the bustling crowds and dazzling attractions make it easy to forget your precious device, but amongst all those busy people there might lurk a pickpocket or two.
Fortunately, Apple makes it easy to protect against losing your device by turning on Find My iPhone.
To do so, go to Settings > [Your Name] > Find My and choose to turn on Find My iPhone at the top of the screen.
If your device goes missing, visit the iCloud website to find your iPhone on a map. You can even mark it as lost to add extra layers of protection.
7. Back up your iPhone before and during your trip
We already talked about the possibility that you might lose your iPhone while traveling. To make matters even more tragic, if this happens, you might lose all your awesome travel photos as well.
Make a point to back up your iPhone before you leave and at every opportunity on your travels. You should be able to do it in your accommodation each night, provided they offer Wi-Fi.
Connect your iPhone to Wi-Fi and go to Settings > [Your Name] > iCloud > Backup and tap Back Up Now.
8. Get an impact-proof or waterproof case
It’s scary enough when you drop your iPhone in the safety and comfort of your own home. If you drop it abroad, you might not able to fix it until after you return.
That could leave you without a working iPhone for the rest of your trip!
Get your iPhone travel-ready by putting it in a high-quality, impact-proof case. If you plan to go snorkeling, surfing, or swimming with your iPhone, you should get a waterproof case as well.
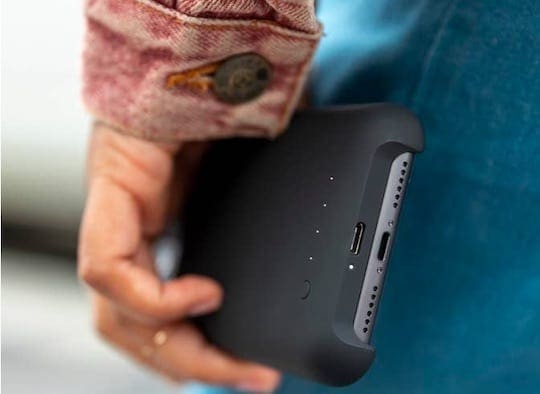
9. Get an external power bank for your iPhone
Some iPhone cases feature a built-in battery pack.
You’re bound to have a few long days when you’re out exploring new parts of the globe. For those moments, it’s a good idea to get a power bank so your iPhone doesn’t run out of juice before getting back to the hotel.
Even if your battery usually lasts the whole day without any issues, we often use our iPhone a lot more when we’re traveling. Think about how often you want to take a new photo, get directions on the map, or research tourist destinations and popular eateries.
And don’t forget to charge up the power bank before you go! You might need it for a long flight.
10. Insure your iPhone for traveling
It’s a good idea to get travel insurance before you set off on your holiday. When you do so, be careful to read the fine print so you know if your iPhone is covered by that policy or not.
Lots of insurance companies require you to buy additional packages if you want your smartphone covered for international travel. Unfortunately, this usually comes with a higher excess or a more expensive premium.
Shop around to find the best travel insurance deal for your device.
11. Clear more free space before you set off
You’re going to want to create more free space on your iPhone to get it ready for traveling. This gives you plenty of room for all the photos and videos you’re bound to take. But it also means you’ve got space for everything else you need on the trip.
That might include offline maps, documents, apps, and other media. We’ll get into downloading those things in the following steps. But first, you need to make ample space for them.
Go to Settings > General > iPhone Storage to look at your current usage. Your iPhone gives you quick tips to create free space at the top of this page. You can also tap any apps on this page to remove their data.
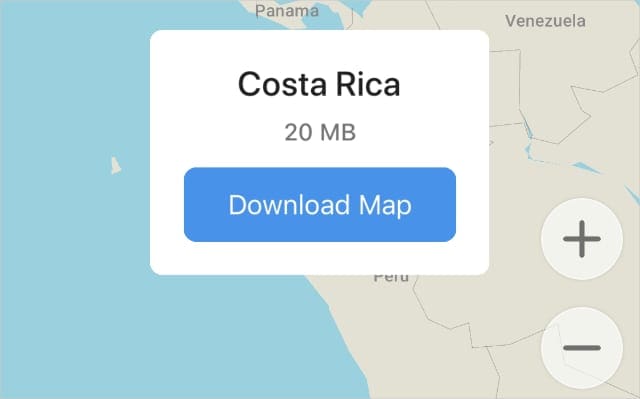
12. Download offline maps
Download maps so you can use them without the Internet.
You probably want a map to help you find your way around on holiday. It’s a good idea to download some offline maps to your iPhone when getting ready for your travels, in case you don’t get any cell service abroad.
There are a few great options for doing this.
Google Maps is definitely the most popular maps app. To download a map offline, view a destination in full-screen and tap the More (…) button in the top-right corner. Then tap Download offline map and adjust the scale to cover as much of the region as you need, up to 40MB.
Another great option is Maps.Me which solely offers offline maps. Zoom in on your destination country to trigger the download, then add pins for all the places you want to go.
13. Save important documents in Files
Maps aren’t the only thing you should download an offline copy of for your travels. It’s also a good idea to save any important documents to the Files app: things like your boarding pass, booking confirmation, or insurance details.
Most people keep these documents in their email inbox or print them out. But it’s a good idea to save them to Files as well so you can always access them on your iPhone.
Open each document on your iPhone, then tap the Share button and select Save to Files. Make sure you choose to save documents On My iPhone, rather than in iCloud Drive, to keep them available offline.
14. Install useful travel apps
There are tons of other useful travel apps you might want to install on your iPhone before jetting off. These include everything from airlines and accommodation apps to translation and transportation services.
Here are some ideas for useful apps get your iPhone travel-ready:
Make sure you download movies to watch on the flight.
Finally, to prepare for long flights, layovers, bus journeys, and even downtime where you might have nothing to do you should download plenty of media to your iPhone, like movies, music, games, and audiobooks.
You can usually download each type of media from its own app. For instance, if you want to download some Netflix shows, you need to do so from the Netflix app. For podcasts, look in the Podcasts app.
Make sure everything is fully downloaded—without taking up all the free space on your iPhone—before you set off on your trip.
Don’t break the bank on your travels
With these tips, you should find it easy to get your iPhone travel-ready for the next international holiday. But there’s always more you can do to prepare.
Dan writes tutorials and troubleshooting guides to help people make the most of their technology. Before becoming a writer, he earned a BSc in Sound Technology, supervised repairs at an Apple Store, and even taught English in China.


Write a Comment