The Do Not Track (DNT) feature is a technological mechanism that enables users to inform websites (including advertising networks) that they do not want to be tracked. Safari offers this feature. When the feature is enabled, Safari will ask web sites not to track you online.
You can stop websites and advertisers from tracking you on your iPhone, iPad, and Mac. The process is simple on each of them, and we’ll show you how to enable and disable this feature for each device today.
Enabling and disabling the Do Not Track feature is an identical process for iPhone and iPad. Below are the steps, and we’ll also give you another unique trick that you can try to further enhance privacy.
First, let’s start off by looking at how to switch Do Not Track on and off.
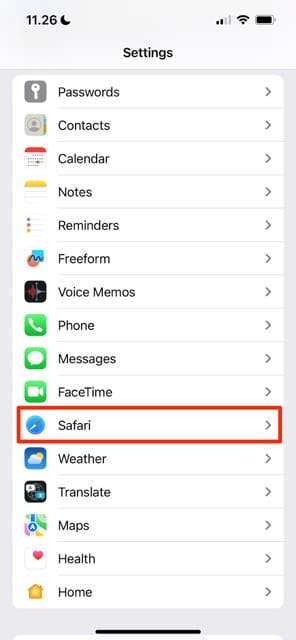
Open the Settings app.
Scroll down to Safari. Alternatively, you can search for the app in your search bar at the top.
Keep scrolling on the next window until you see Privacy & Security. Then, toggle Prevent Cross-Site Tracking off or on — depending on your preferences.
If you switch off the tracking prevention feature, you can still hide your IP address from trackers.
Navigate to Settings > Safari > Privacy & Security.
Here, you’ll see a tab called Hide IP Address. Click on this tab.
Make sure that you’ve turned on From Trackers to enable the feature.
macOS
You can also stop websites from tracking you in Safari on your Mac. However, you’ll need to follow a different set of instructions than iPhone and Mac users. Here are the steps to take instead.
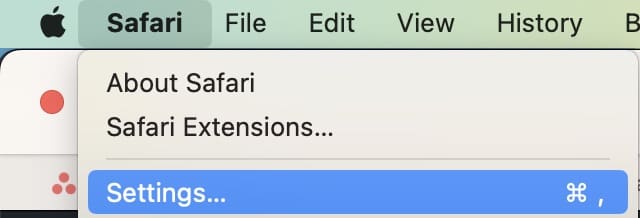
Open Safari on your Mac.
Click on the Safari tab at the top of your screen. Then, tap on Settings.
Click on the Privacy tab when the pop-up window appears.
Next to Website tracking:, you’ll see a checkbox called Prevent cross-site tracking. Make sure that this is checked if you want to enable the feature, and uncheck it if you want to disable it.
Like when disabling the Do Not Track feature on iOS and iPad, you can — if you keep the tool switched off — still hide your IP address. Tick the box next to Hide IP address from trackers to do this.
Control Your Safari Tracking Settings With These Tips
The tips mentioned in this guide will help you quickly enable Safari’s Do Not Track settings. You can turn these on and off whenever you want, and you shouldn’t have too many problems using these features.
While you can use the settings we’ve shown you how to use today, you can increase your privacy when browsing online in numerous other ways. For example, you can use a virtual private network (VPN). Another option is to use incognito tabs when using the internet on your preferred device(s).
Danny has been a professional writer since graduating from university in 2016, but he’s been writing online for over a decade. He has been intrigued by Apple products ever since getting an iPod Shuffle in 2008 and particularly enjoys writing about iPhones and iPads. Danny prides himself on making complex topics easy to understand. In his spare time, he’s a keen photographer.


Write a Comment