The tech world is constantly evolving, and we aren’t just talking about the ongoing improvements being made to our devices and the processors that power them or the cameras that are built-in. There’s another side of the tech world that isn’t as friendly as the smiling faces that we see in commercials, as our collective data is being collected or leaked in one way or another.
Apple has made some pretty incredible leaps when it comes to attempting to keep your data and information as secure as possible. Just fire up the App Store, tap on the first app that appears, and then scroll to the bottom. You’ll be presented with a list of the different pieces of data that are collected when you use the app, aiming to give you a better understanding of what you’re getting into before deciding whether to download that app.
But there are also ways that Apple is implementing improved privacy features within its own apps, including the likes of Mail. If you’ve ever received and opened an email, sent it to trash (or spam), only to find that a follow-up email was sent, there’s a good chance that’s because of tracking software being used by the sender. It’s a common occurrence in our industry, but is also a really creepy way for someone to track whether you read their email or not.
With Mail Privacy Protection, Apple aims to combat this “creepiness” whenever using the Mail app and provides the following description:
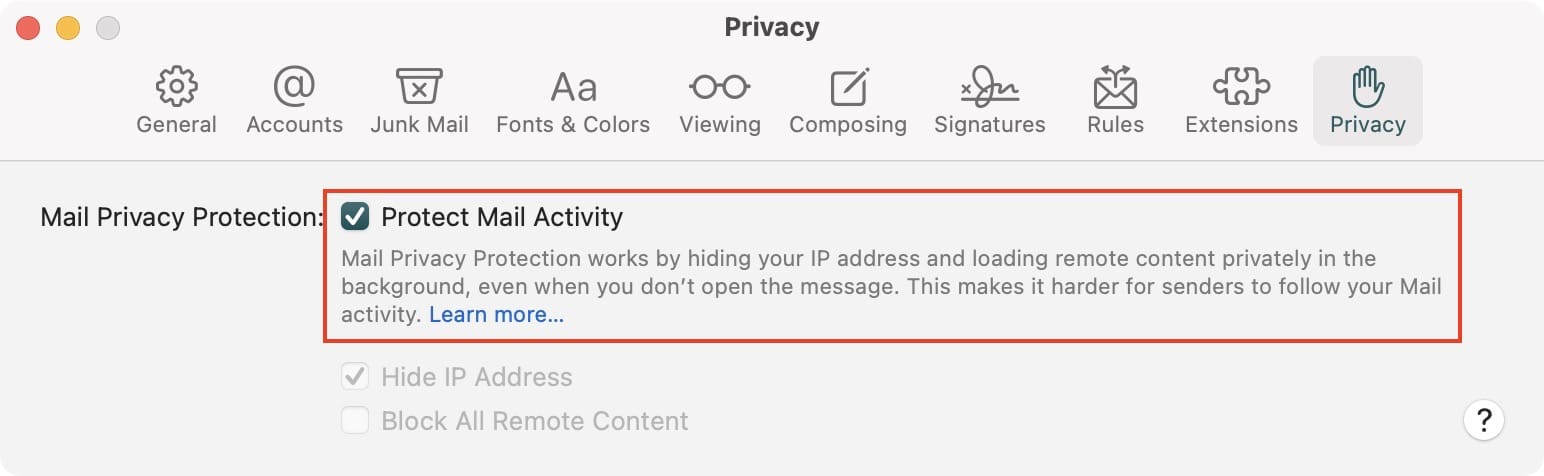
“Mail Privacy Protection works by hiding your IP address and loading remote content privately in the background, even when you don’t open the message. This makes it harder for senders to follow your Mail activity. Mail Privacy Protection hides your IP address so senders can’t link it to your other online activity or determine your exact location. It also prevents senders from seeing if you’ve opened the email they sent you.”
How to use Mail Privacy Protection on iPhone and iPad
When it comes to some of the privacy features that Apple implements, these are turned off by default. It’s just one way that Apple gives you the control over your data and information. That being said, Mail Privacy Protection seems to fall in the category of being enabled automatically, but if you want to use Mail Privacy Protection on iPhone and iPad, here’s how you can enable it:
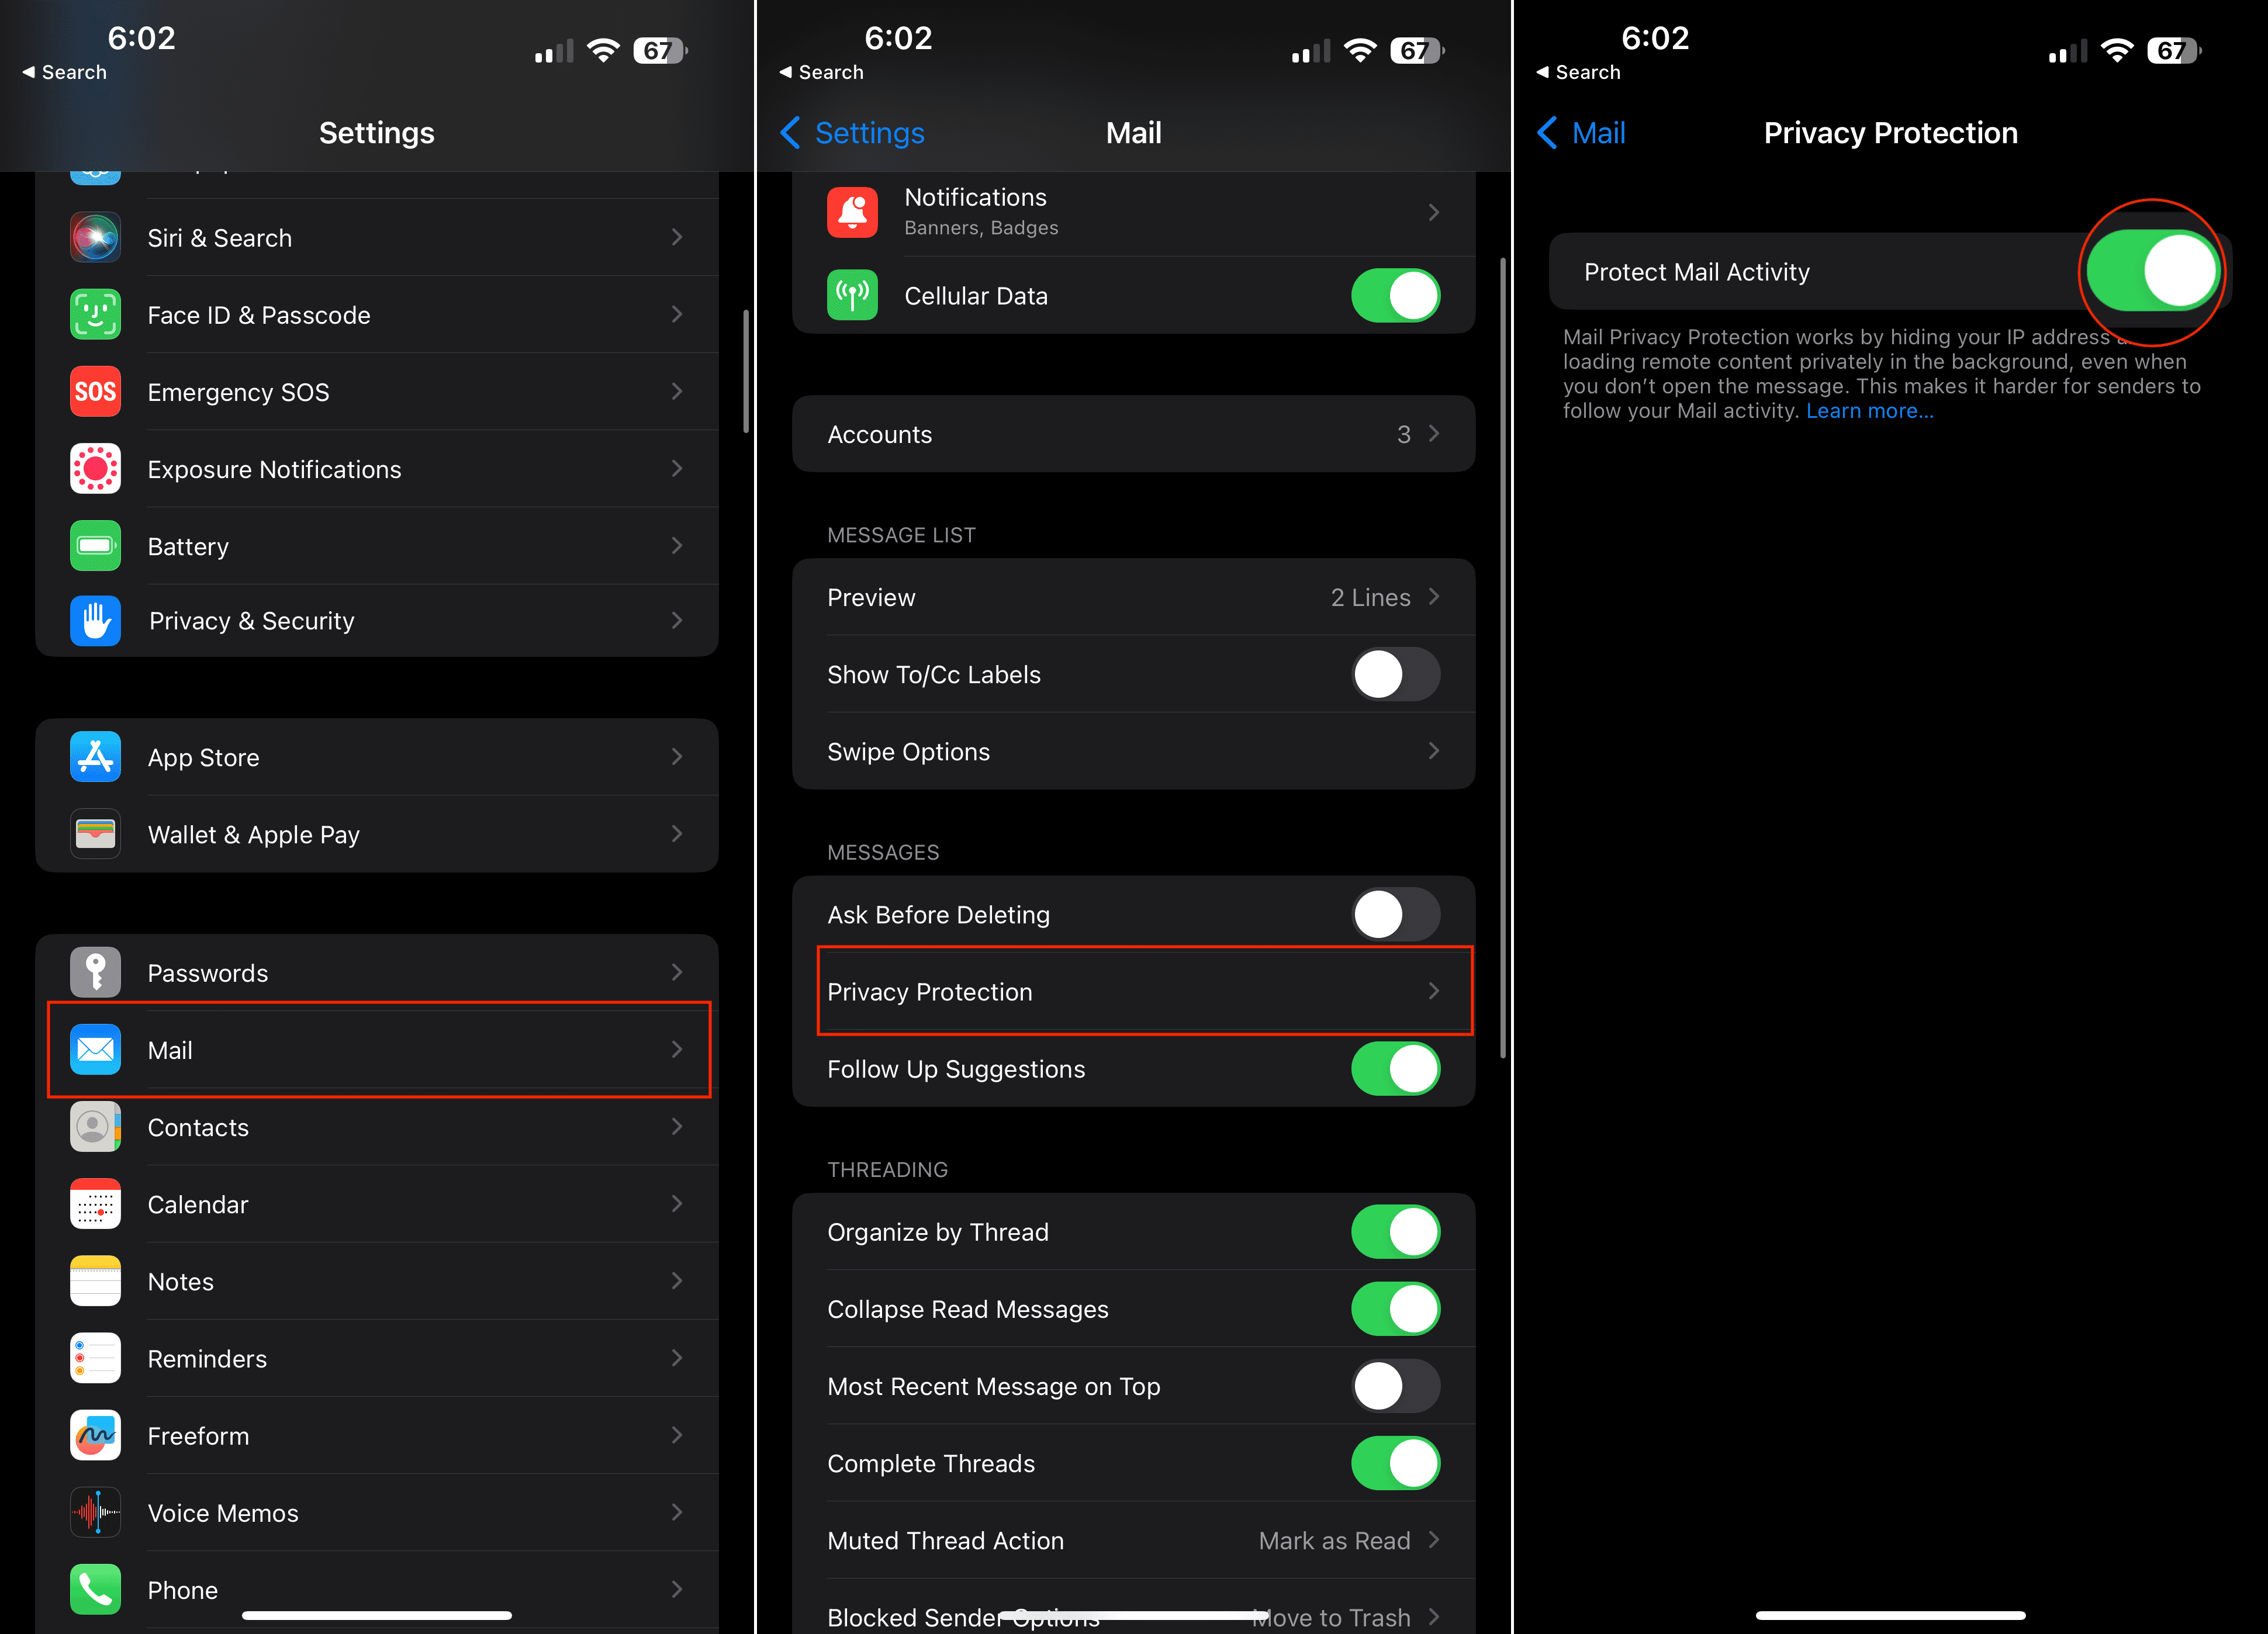
Open the Settings app on your iPhone and/or iPad.
Scroll down and tap Mail.
Under the Messages section, tap Privacy Protection.
Tap the toggle next to Protect Mail Activity to the On position.
How to use Mail Privacy Protection on Mac
We are still waiting for the day that the Mail app on the iPhone and iPad offers the same experience provided by the Mail app on the Mac. But there are quite a few features that are available on all three of Apple’s platforms, including Mail Privacy Protection.
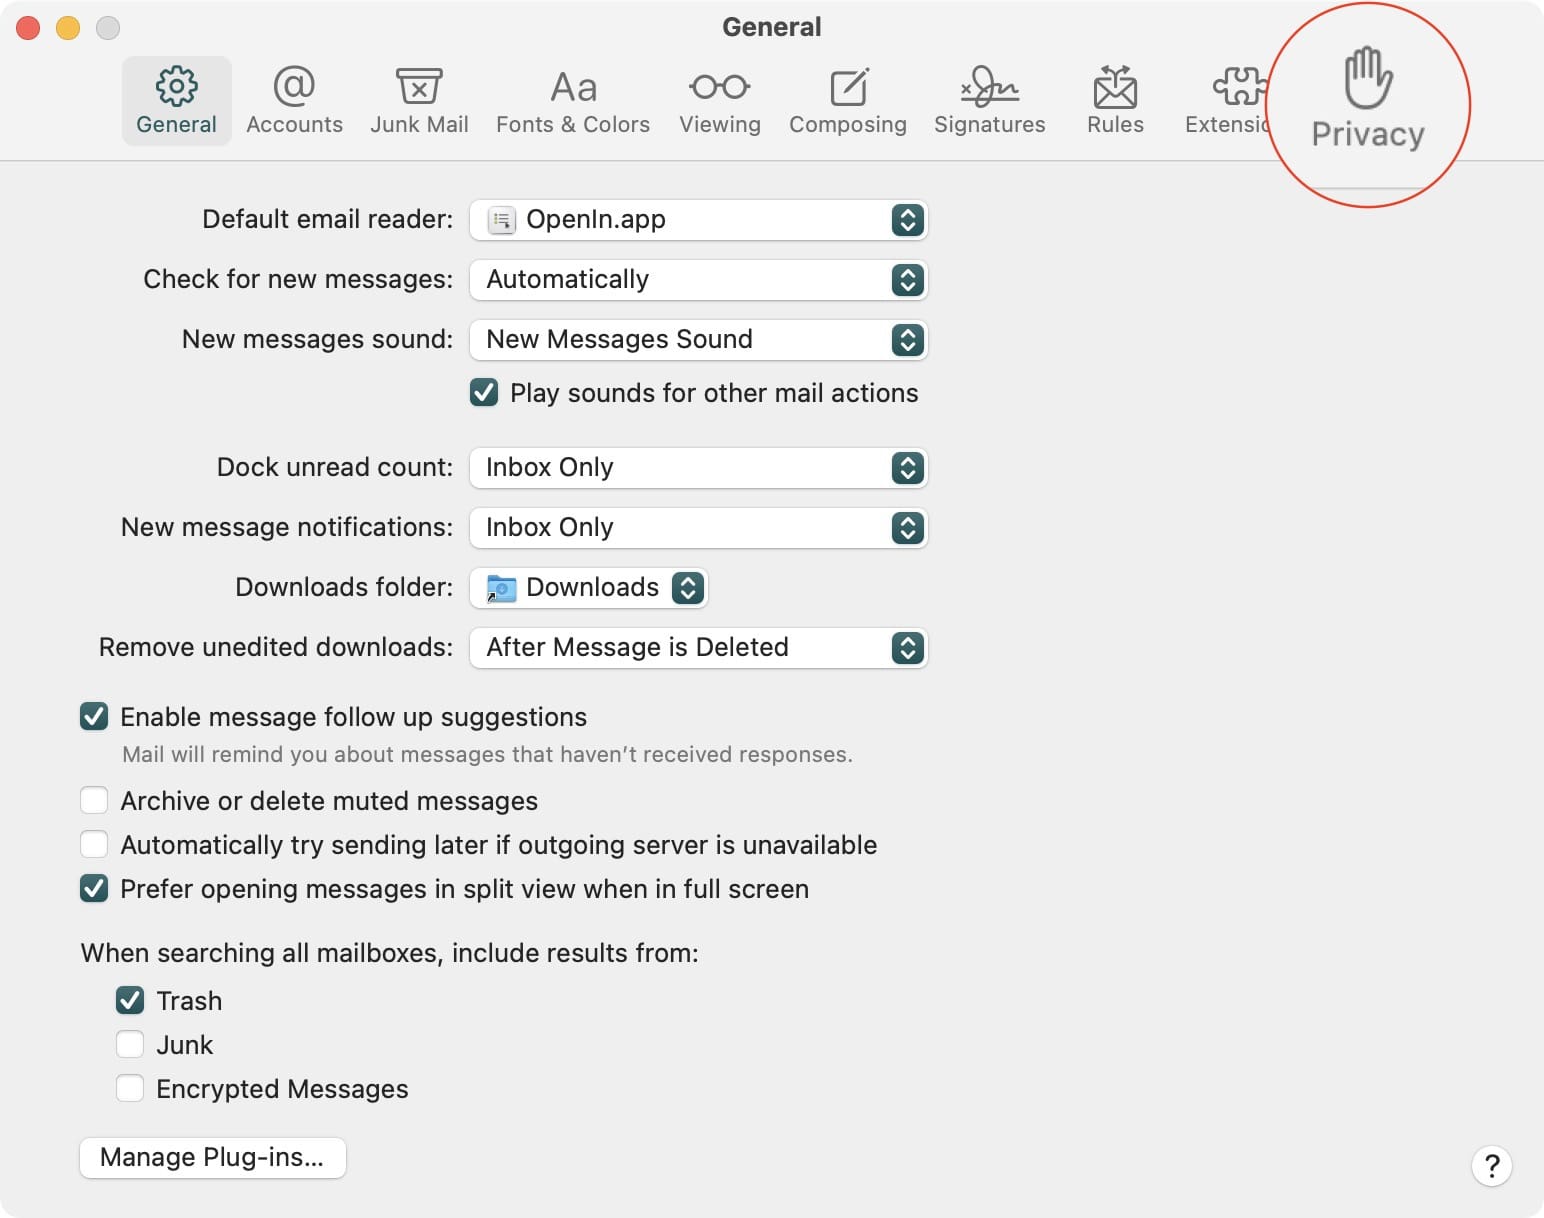
Open the Mail app on your Mac.
In the menu bar, click Mail.
Highlight and select Settings… from the drop-down menu.
Within the Mail Settings window, click Privacy in the top toolbar.
Click the checkbox next to Protect Mail Activity.
As you might suspect, you won’t see any prompts when you want to use Mail Privacy Protection on iPhone, iPad, and Mac. All of the “work” is done behind the scenes, with the only real requirement being that you need to use Apple’s Mail app in order to take advantage. It doesn’t apply to your specific email address, but instead, applies to whatever accounts are being used in conjunction with the Mail app.
Andrew Myrick is a freelance writer based on the East Coast of the US. He enjoys everything to do with technology, including tablets, smartphones, and everything in between. Perhaps his favorite past-time is having a never-ending supply of different keyboards and gaming handhelds that end up collecting more dust than the consoles that are being emulated.


Write a Comment