If you sat down and watched the WWDC ’21 Keynote, you could instantly tell that Apple is paying more attention to the privacy of its users. The first and most obvious example of this was the change for Siri to begin processing more information on your device as opposed to relying on Apple’s cloud servers.
But we have also seen quite a few changes to improve privacy in Safari, along with a new privacy report section of the Settings app. This will show you pertinent information to what the apps are actually using on your phone, from location services to the microphone and camera. But it doesn’t stop there.
Announced at WWDC ’21, iCloud Private Relay is a part of the new iCloud+ subscription package. Also included with iCloud+ is more iCloud storage, Hide My Email, and HomeKit Secure Video. In short, Private Relay ensures that any traffic coming from your iPhone, iPad, or Mac, is fully encrypted. Here’s Apple’s full description of what iCloud Private Relay is:
Private Relay is a new internet privacy service that’s built right into iCloud, allowing users to connect to and browse the web in a more secure and private way. When browsing with Safari, Private Relay ensures all traffic leaving a user’s device is encrypted, so no one between the user and the website they are visiting can access and read it, not even Apple or the user’s network provider.
At first glance, it may sound like iCloud Private Relay is a type of Virtual Private Network offered by Apple. While that’s partially true, it’s also a bit different from using a VPN. Using a traditional VPN allows you to select the region that your network data runs through. But you don’t have the same type of granular controls when activating and using Private Relay.
How to Set Up iCloud Private Relay on iPhone and iPad
The first step that you need to take before you can enjoy the benefits of Private Relay is that you’ll need to upgrade your account to iCloud+. This was introduced back in June 2021 and starts at $0.99 per month. For that monthly subscription, you not only get 50GB of storage (with higher storage tier options available), but Apple also includes one HomeKit Secure Video, Hide My Email, and Private Relay. Here’s how you can upgrade your existing account to iCloud+ from your iPhone or iPad:
Open the Settings app on your iPhone or iPad.
Tap [your name] at the top of the Settings app.
Tap iCloud.
Select Manage Storage.
Tap Change Storage Plan.
Select the amount of storage that you want to use:
50GB – $0.99 per month
200GB – $2.99 per month
2TB – $9.99 per month
Follow the on-screen instructions to upgrade to iCloud+
Once the changes have been made and saved, you’ll now have access to more storage, the ability to add one HomeKit Secure Video camera, Hide My Email, and Private Relay.
Set Up iCloud Private Relay
Now that your account has been upgraded to iCloud+, you can proceed with starting to set up iCloud Private Relay. Here’s what you’ll need to do after signing up for iCloud+:
Open the Settings app on your iPhone or iPad.
Tap [your name] at the top of the Settings app.
Tap iCloud.
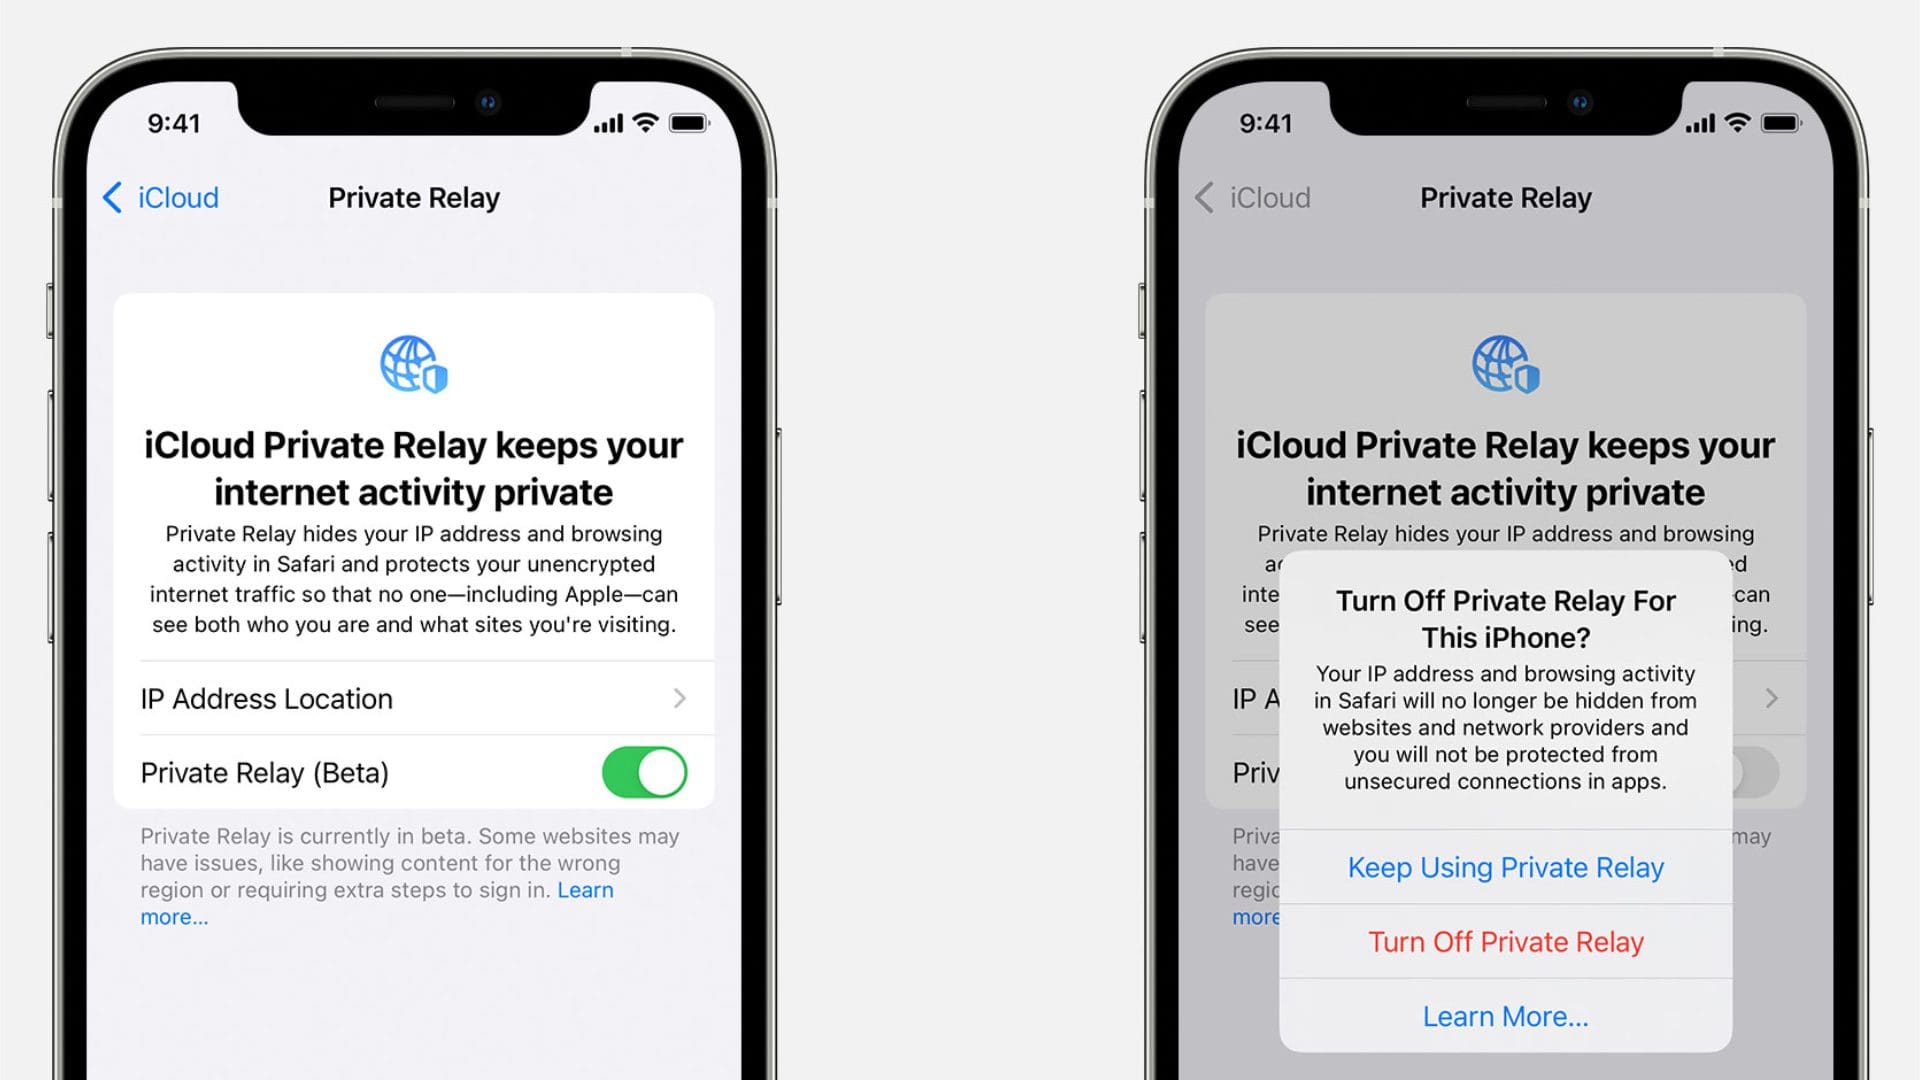
From the list, select Private Relay (Beta).
Tap the toggle next to Private Relay (Beta) to turn it on.
After enabled, tap IP Address Location.
Choose one of the following:
Maintain general location
Use country and time zone
No other prompts appear on the page, and instead, it just starts working automatically. After enabled, you’ll be able to browse the web anonymously thanks to the use of an anonymous IP address found in a region instead of your actual physical location. And the best part is that if you enable Private Relay for your iCloud account, it will also be activated on any of your other Apple devices such as the iPad or Mac.
Enable iCloud Private Relay For Specific Networks
Another nifty feature available after you set up iCloud Private Relay is the ability to enable the feature for specific networks. This can be applied to specific Wi-Fi networks or even your cellular network provider. Here’s how you can set up iCloud Private Relay for specific Wi-Fi networks:
Open the Settings app on your iPhone or iPad.
Tap Wi-Fi.
Next to the Wi-Fi network that you are connected to, tap the information (I) icon.
Tap the toggle next to iCloud Private Relay to the On position.
If you find yourself also wanting to try out Private Relay with your mobile network, here’s what you’ll need to do:
Open the Settings app on your iPhone or iPad.
Tap Cellular.
Select Mobile Data Options.
Tap the toggle next to iCloud Private Relay to the On position.
In the event that you are using multiple SIM cards with your iPhone, you will need to look for the Cellular Plans section in the Cellular section. Select the line that you want to enable iCloud Private Relay for. Then, tap the toggle to enable iCloud Private Relay for that specific cellular network connection.
Andrew Myrick is a freelance writer based on the East Coast of the US. He enjoys everything to do with technology, including tablets, smartphones, and everything in between. Perhaps his favorite past-time is having a never-ending supply of different keyboards and gaming handhelds that end up collecting more dust than the consoles that are being emulated.
I noticed that I turned private beta on but it won’t work with Vpn on. I have to turn private beta relay off to use my other vpn to browse safari. Can I have both to work together?


I noticed that I turned private beta on but it won’t work with Vpn on. I have to turn private beta relay off to use my other vpn to browse safari. Can I have both to work together?