Siri is a voice-controlled virtual assistant available to Apple users. The software aims to help you complete tasks while speaking to you as a friend would. The virtual assistant is configured to iOS, iPad, watchOS, macOS, Apple TV, and your HomePod.
Having a HomePod that only recognizes one voice is quite frustrating, especially if you live with someone or intend to share the HomePod with someone else. Luckily, Siri’s multi-user function can accommodate up to six people. Anyone you give this privilege to will be able to call upon Siri.
Before Siri can recognize your friends’ and family’s voices, you have to enable the multi-user feature. You may find this process quite tedious because the controls are dotted all over your device. You will have to go in and out of your home app and Bluetooth settings a couple of times.
Simply follow the steps in this article, however, and you’ll configure Siri multi-user in no time!
All iPhones or iPads, including yours, must run iOS 13.2 or later. Your HomePod should also run on 13.2. You are going to need access to your friend’s phone for at least one minute to configure multi-user, as well.
To ensure that all devices are on the right OS:
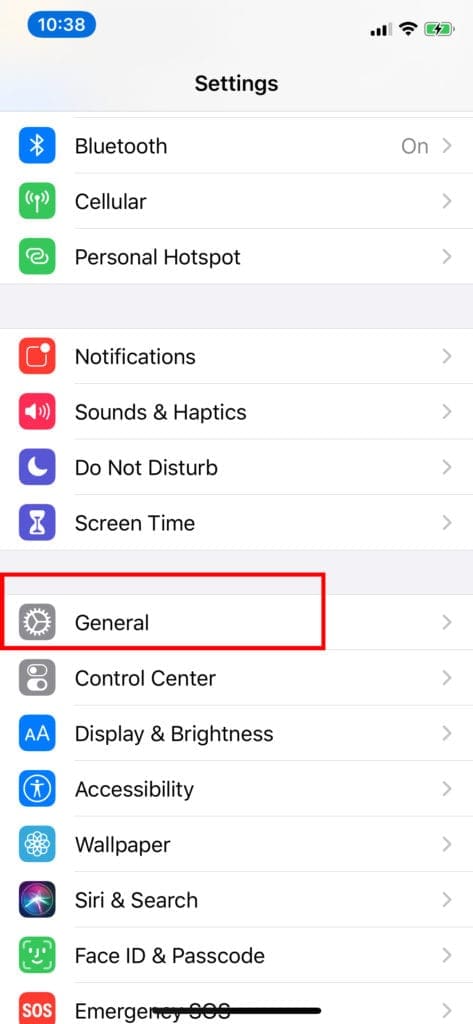
Tap on Settings > General.
Select “Software Update.” The device will tell you if it has the latest OS.
If not, you’ll see a download button to install the latest version.
For your HomePod, you’ll want to go into your Home app and check the system’s number. In the home app at the bottom-left corner, tap on the house icon. Here, from here, you can find the “Software Update.” When you update your device’s software, any other HomePod you have on the network will also be updated.
Add Users to Your Home Network
If your friend or family member isn’t part of your home network, you have to add them to ensure your HomePod detects them.
To include them:
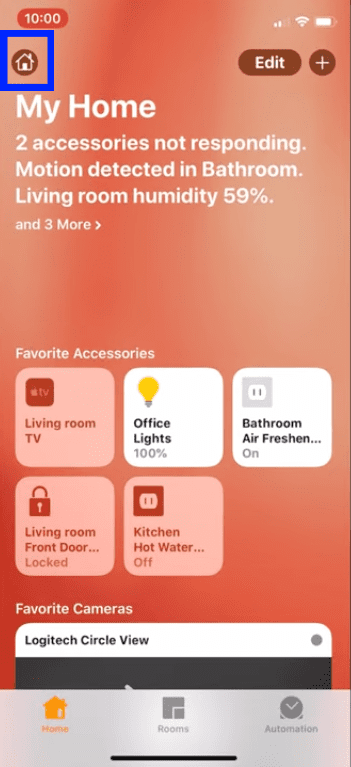
Go to the Home app on your device.
Click the house icon.
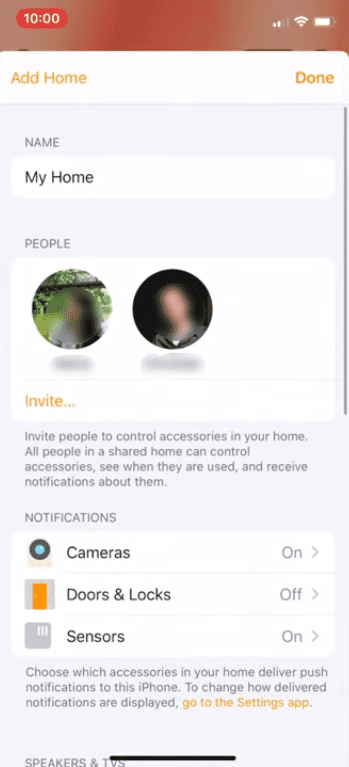
Tap “Invite” under People. Invite the friend or family member you need to add. They will receive an invitation which they should accept.
Go to your home screen.
Press and hold your HomePod icon.
Click the gear icon that appears on your screen at the bottom right.
Check Your Settings
Make sure you have the “Listen for ‘Hey Siri” and “Personal Requests” options turned on in your iOS device and HomePod. Additionally, ensure the language in the HomePod device is the same as your iOS device. After that, turn on the “Find My” feature:
Exit the Home app.
Select Settings.
Tap your name and choose “Find My.” Toggle “Find My” on.
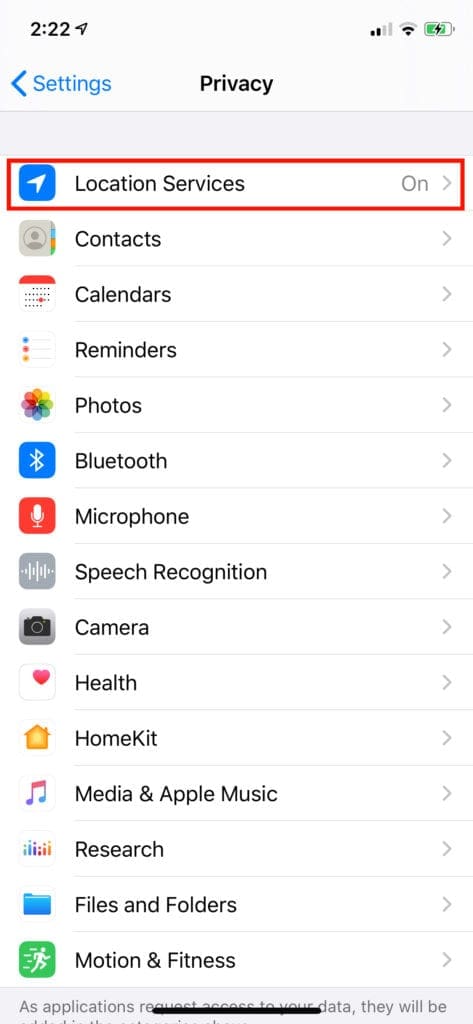
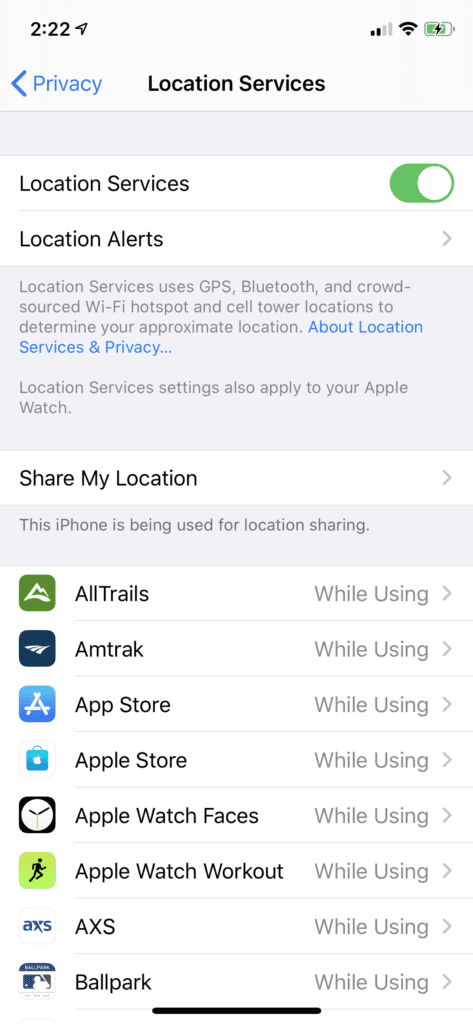
Ensure that location services and Bluetooth® are also turned on.
Navigate to Settings > Privacy.
Then toggle Location Services on.
You will receive a notification in the Home app that the HomePod now recognizes your voice. After that, proceed to follow the instructions on the screen to complete the setup.
When You Don’t Get The Notification
If you did not receive the notification in the Home app, try troubleshooting.
Recognize My Voice
Click the house icon.
Tap on your name under People.
After setting up everything correctly, tap Siri and find the “Recognize My Voice” setting.
Toggle it on.
Update from iOS 13.2 Beta
If your device is running the iOS 13.2 Beta, you should update it to the publicly released version iOS 13.2 and remove the Beta version.
Go to Settings > General.
Then tap Profiles and Device Management.
Click the iOS Beta Software Profile.
Click on Remove Profile.
Restart your device.
If a public version of iOS is available:
Go to Settings > General.
Click Software Update.
Siri Doesn’t Recognize Your Voice
Siri can have problems distinguishing the voices of children or people with similar voices. Try following the steps below to troubleshoot the issue.
Resetting Recognize My Voice
Open your Home app.
Click on the home icon.
Click on your name under “People”
Select Home Settings and toggle Recognize My Voice.
After a few seconds, try Siri again.
If that doesn’t work, reboot the iOS device you use with “Hey Siri.”
Resetting Siri
On your device, go to Settings.
Go to Siri > Search.
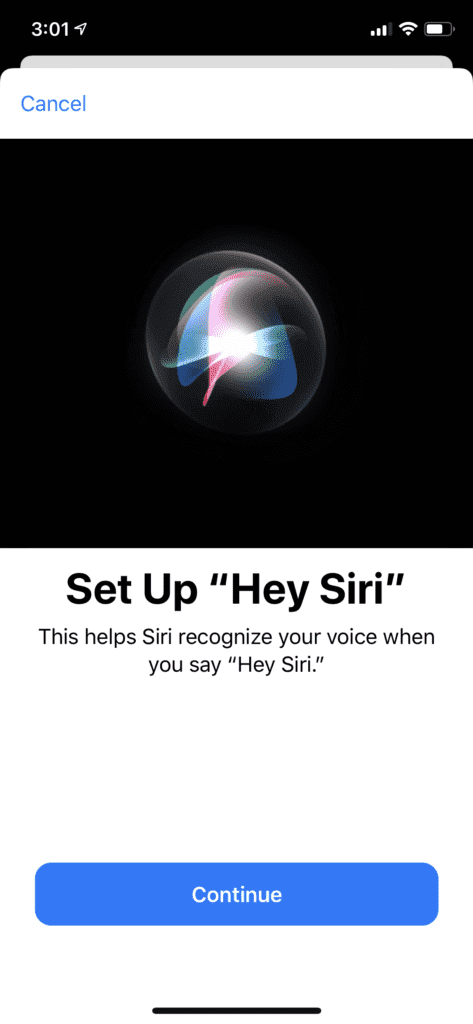
Turn off the Listen for “Hey Siri,” then toggle it back on.
Follow the on-screen instructions to teach Siri your voice.
Distinguishing Voices by Name
It may ask who you are from time to time. When this happens, respond with your name or begin a request by saying, “Hey Siri, this is…” proceed to say your name.
When Siri calls you the wrong name, you can respond by saying, “No, this is…” then say your name. If you share a common name with someone else sharing the HomePod, you can have Siri call you by a nickname. When the HomePod is not sure who you are, it will ask.
Conclusion
Setting Siri to accommodate more than one person sounds like a handful, especially Apple’s mantra is supposed to be, “It just works.” However, the hustle is worth it. Once you’re set-up, you don’t have to do it again. You can now enjoy using your HomePod with your friends and family.


Write a Comment