Why do so many people choose to do a Windows and Mac OS dual boot? Here are some top reasons.
Reason 1: Enjoy Your Favorite Interface
If you invested in a powerful Mac for speed and efficiency but actually enjoy the layout of Windows, a dual boot gives you the best of both worlds. Use the interface you’re familiar with on a machine that gives you the power and capabilities for a range of tasks.
Reason 2: Use One Machine for Work and Leisure
If your work files are all completed on a Windows PC in your office and you need to work from home occasionally, the ability to dual-boot Windows and Mac saves you from having to buy two machines. You can use your full Microsoft Office suite without having to download additional apps on your Mac OS, and keep all your work files separate from your personal documents.
Reason 3: Try a New Operating System
If you’re not sure if Windows is for you, setting up a dual boot is an inexpensive way to do this. Of course, you’ll need a friend with a valid Windows 11 license key to help you out with this.
How to Dual-Boot Windows and Mac: A Step-by-Step Guide
Step 1: Download a Windows ISO file from https://www.microsoft.com/en-us/software-download/windows11. This is a version of Windows that you can put on an external drive and install on any machine. You should do this directly on your Mac so that you can access it immediately. Select Windows 11 from the drop-down menu and click Download Now.
Step 2: Now go to Finder>Applications>Utilities and click on Boot Camp Assistant. If you don’t see this utility, it’s a free download from the App Store. You may be prompted to back up your data — this step is optional.
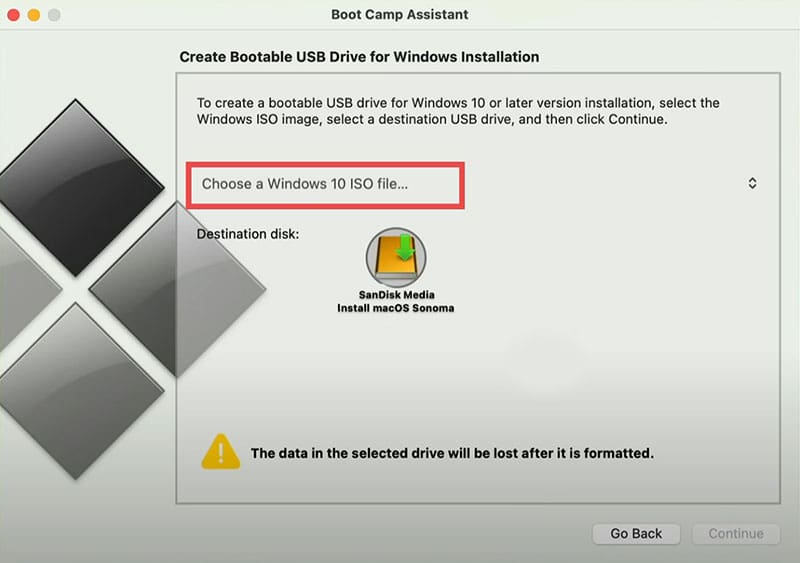
Step 3: Boot Camp Assistant will show a Choose button; click here and you’ll be able to select the Windows ISO file from step 1.
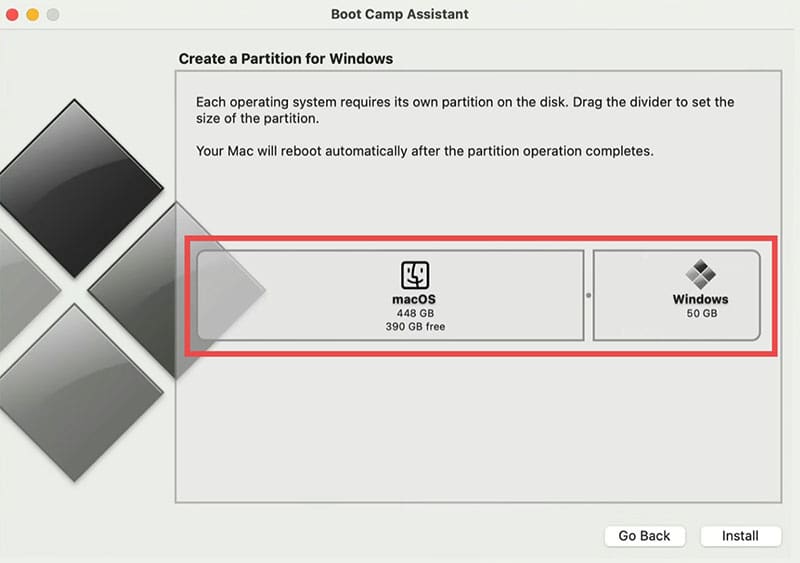
Step 4: Choose a partition size. This is the space you are allocating to Windows, in other words, how much of your Mac you are allowing Windows to use for storage and running itself. Go for at least 50 GB.
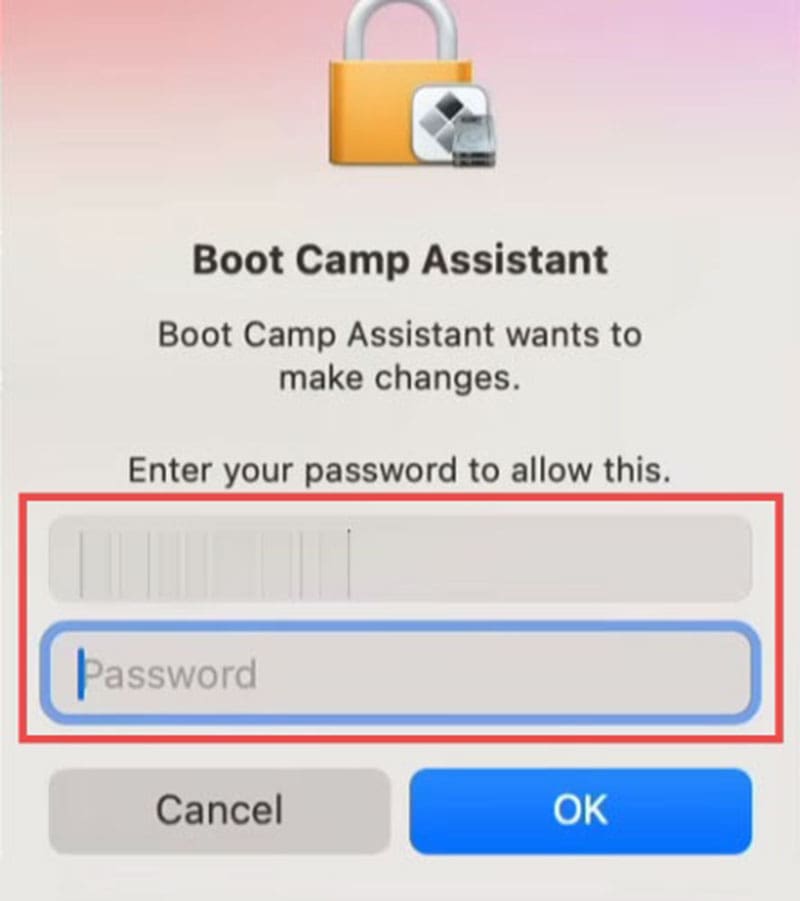
Step 5: When prompted, type your administrator’s password and confirm that you’re happy for your Mac to restart.
Step 6: When your machine restarts, you’ll see the Windows installation setup box. Follow the onscreen prompts until you reach a screen that says, “Which type of installation do you want?”
Step 7: At this stage, select “Custom: Install Windows Only (advanced).
Step 8: The installation wizard will now ask where you want to install Windows. Make sure you choose the new, smaller partition. Make sure any external devices are disconnected (e.g., phones, USB drives) and click “Next” and follow all prompts to complete the installation process.
The next time you reboot your Mac, you’ll have the option to boot from Mac OS or Windows. Simply choose the OS you want to work in, and away you go.
As an avid gamer, I’ve run into my fair share of error codes and weird faults that have forced me to find fixes to problems I never anticipated. That gave me a passion for sharing those fixes with others so we can all game without feeling like our hardware is rebelling against us.


Write a Comment