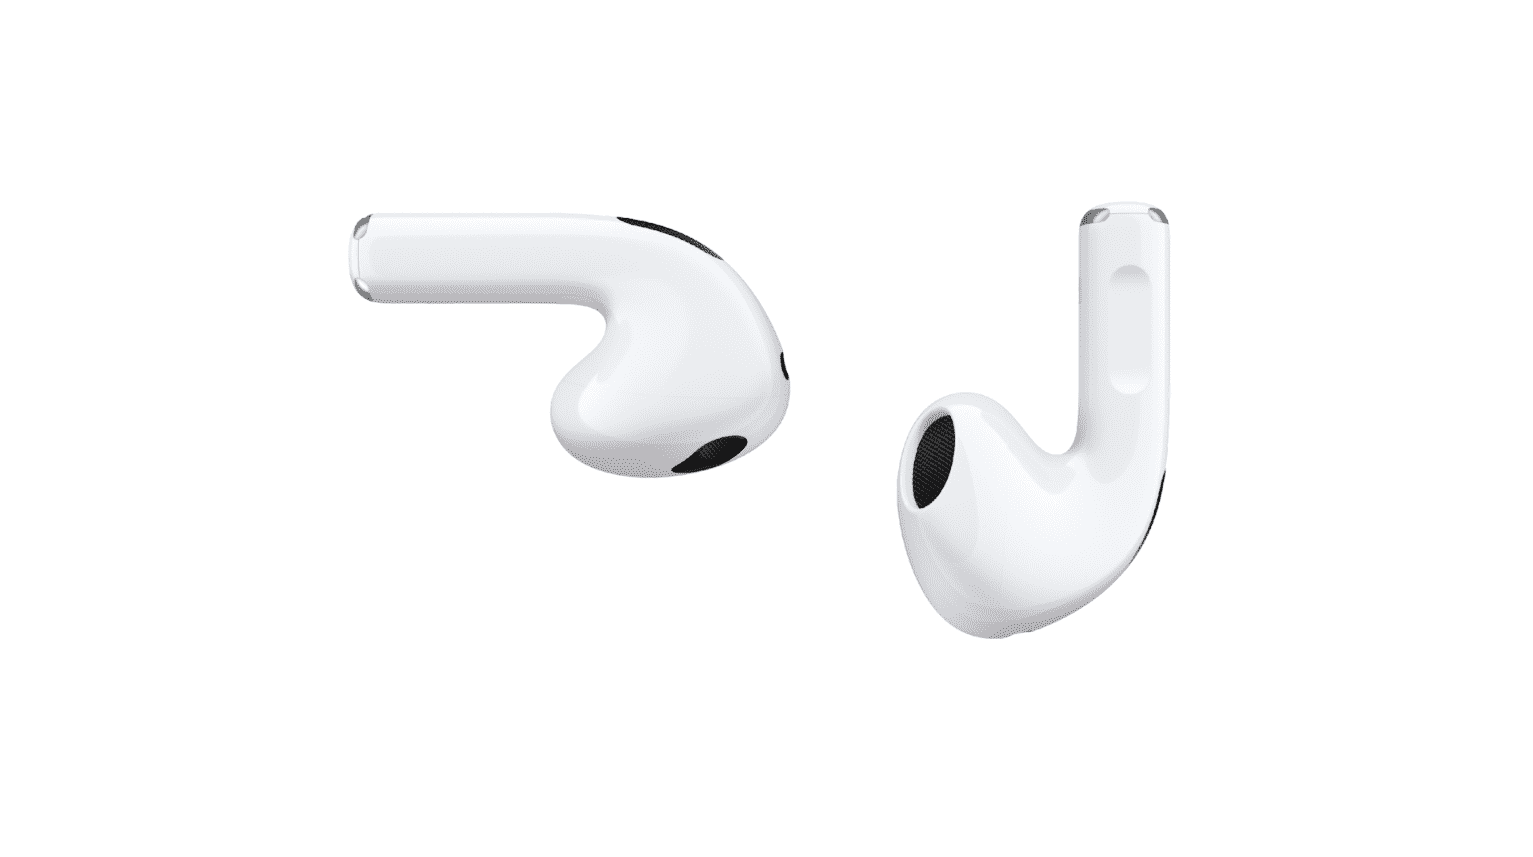
The day has finally arrived as Apple has finally given everyone what we were hoping for. The AirPods 3 aim to take the world by storm, just as the previous iterations have done. But instead of sticking to the traditional “regular” AirPods design, the AirPods 3 take some cues from the AirPods Pro with a shorter stem and plenty of excellent features. Today, we’re taking a look at the best AirPods 3 tips and tricks.
Because the AirPods 3 make use of shorter stems with a force sensor, this means the tapping gestures are finally gone. Instead, you’ll need to use the following gestures in order to control your media playback while using the AirPods:
Play / Pause Audio: Press the force sensor on the stem
Skip Forward: Double-press the force sensor.
Skip Back: Triple-press the force sensor.
Enable Spatial Audio
It came as a surprising move for some, but the AirPods 3 actually support Spatial Audio. This marks the third set of AirPods to do so, following the AirPods Pro and AirPods Max. Here’s how you can enable Spatial Audio and enjoy music like you never have before:
Connect your AirPods 3 to your iPhone or iPad.
Open the Settings app.
Tap Bluetooth.
Locate your AirPods 3 in the list of devices.
Tap the More Info button next to the name of your AirPods
Select Spatial Audio.
Tap Spatial Audio.
Tap the Done button.
Select the microphone
In some instances, you might find yourself only using one AirPod when on a call. Because of that, Apple provides the ability to select which microphone to use, even if both AirPods are connected at the same time.
With your AirPods connected, open the Settings app on your iPhone.
Tap Bluetooth.
Locate your AirPods from the list of devices.
Tap the More Info icon to the right of the AirPods.
Tap Microphone.
Select one of the following:
Automaticaly Switch AirPods
Always Left AirPod
Always Right AirPod
Tap the Back button in the top left corner.
Enable Automatic Ear Detection
Another nifty feature available with the AirPods 3 is the ability to have your music automatically stop when you take them out. This is thanks to the new sensors implemented in the casing, which are said to be even more reliable than the AirPods Pro. Automatic Ear Detection should be enabled by default, but you can always jump into the Settings app to double-check.
With your AirPods connected, open the Settings app on your iPhone.
Tap Bluetooth.
Locate your AirPods from the list of devices.
Tap the More Info icon to the right of the AirPods.
Toggle Automatic Ear Detection on or off.
Announce notifications
If you’re trying to keep your head down and don’t want to be relegated to picking up your phone whenever a notification comes in, your AirPods have you covered. Just enable the Announce Notifications feature and you’ll be ready to go.
Open the Settings app.
Tap Notifications.
Tap Announce Notifications.
Toggle Announce Notifications to the On position.
Check battery life
The AirPods 3 are touted as having incredible battery life, but you’ll definitely want to make sure you’re keeping them charged. There are two different ways that you can keep an eye on the remaining battery life, with the first being a bit more cumbersome.
Open the lid of your case with the AirPods 3 inside.
Make sure your case is close to your iPhone.
Wait a few moments and the battery life will appear on screen.
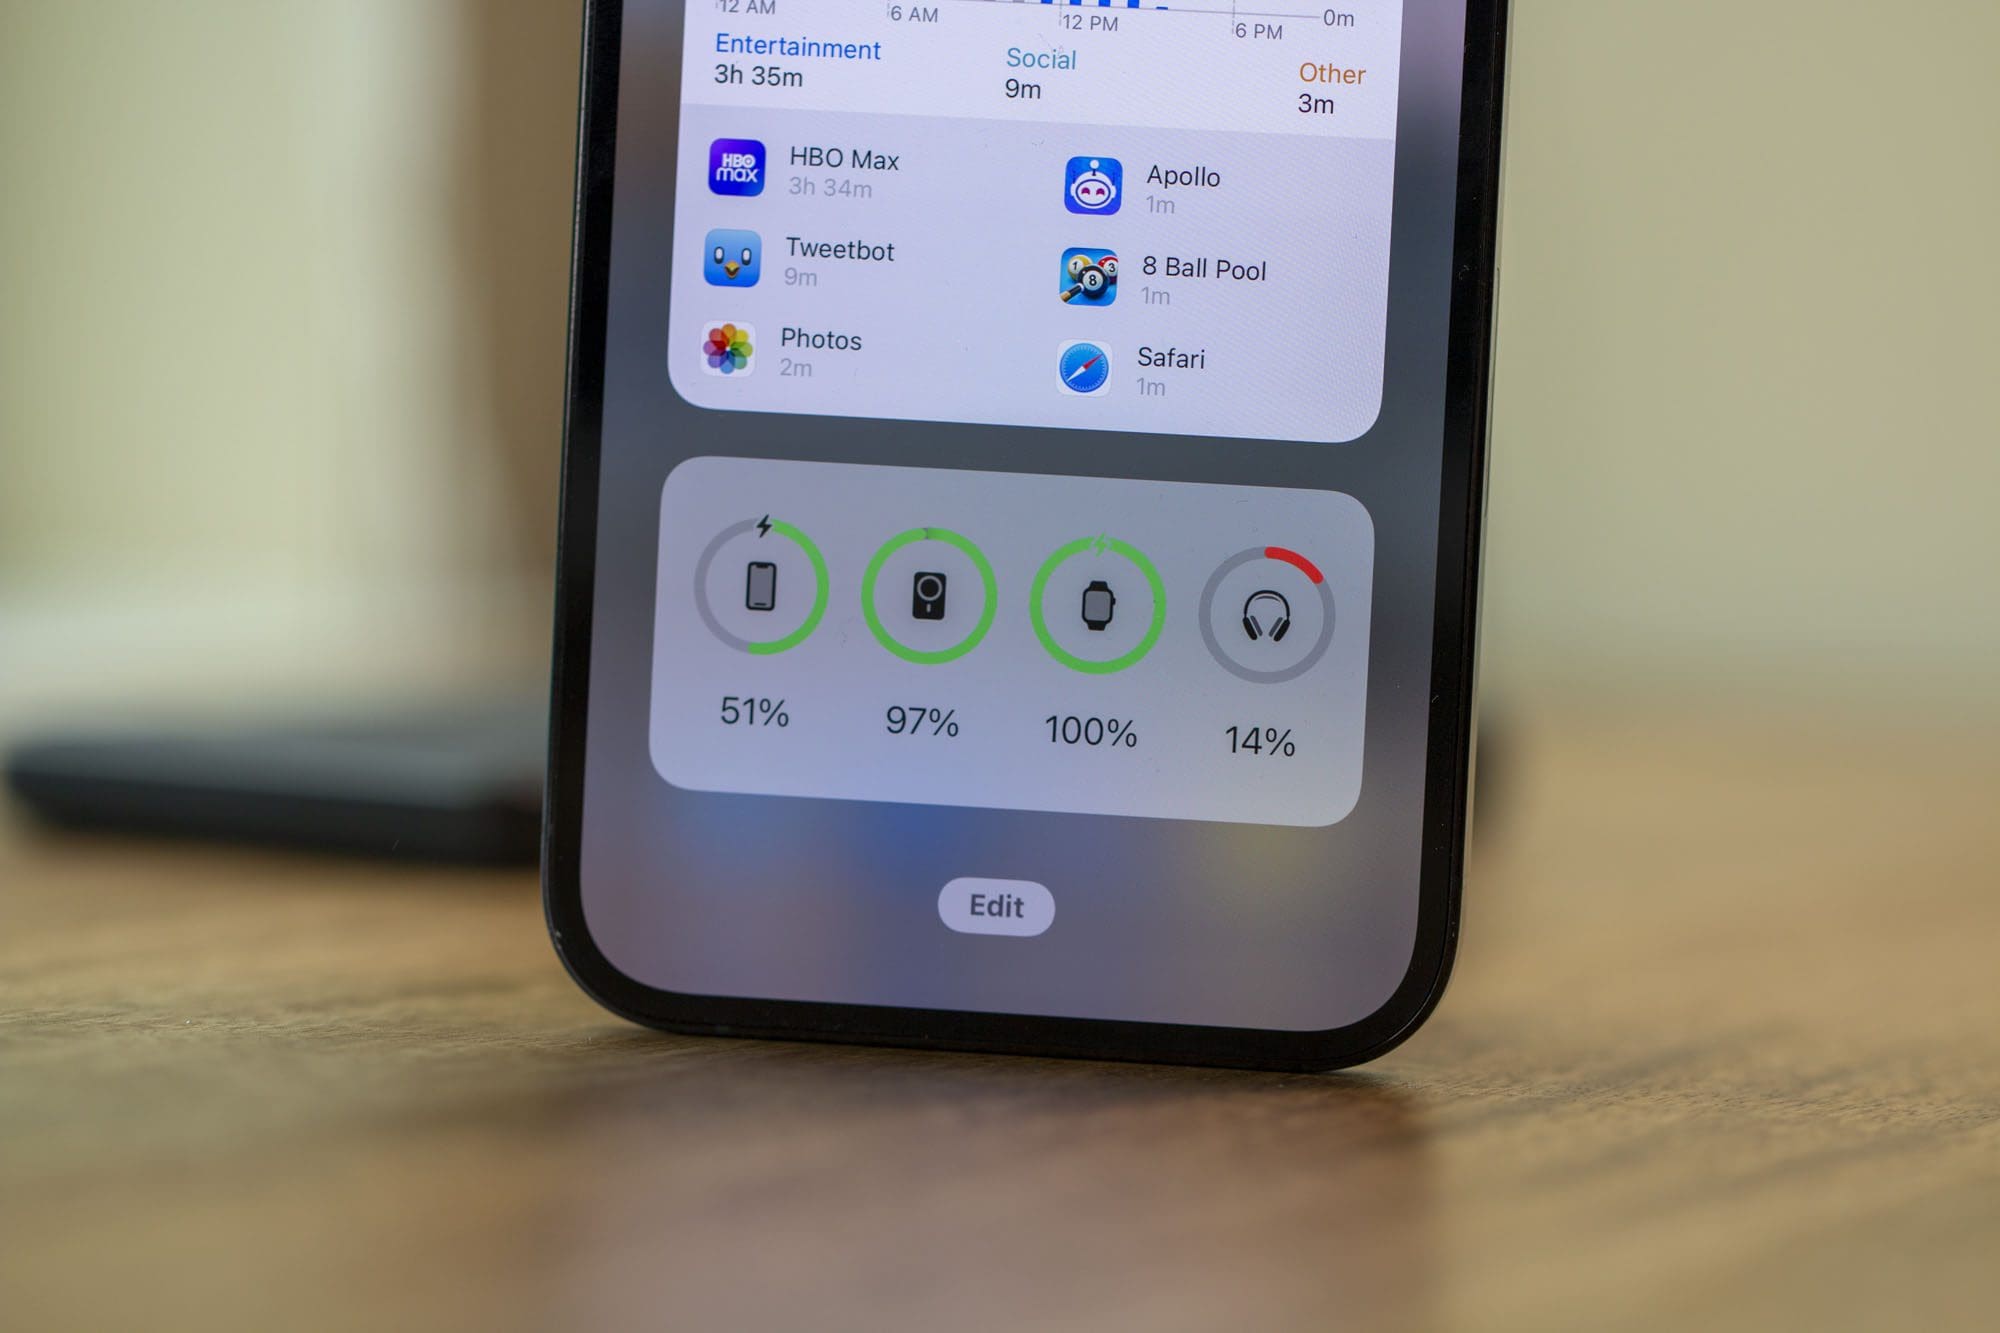
A more useful option to check the battery life on your AirPods 3 is by making use of Apple’s battery widget. Now, you can add the widget to the Home Screen and can view the remaining battery life of all of your connected devices.
Tap and hold on an empty space on the Home Screen.
In the top right corner, tap the + icon.
Search for Batteries.
Select the widget size that you wish to use.
Tap the Add Widget button.
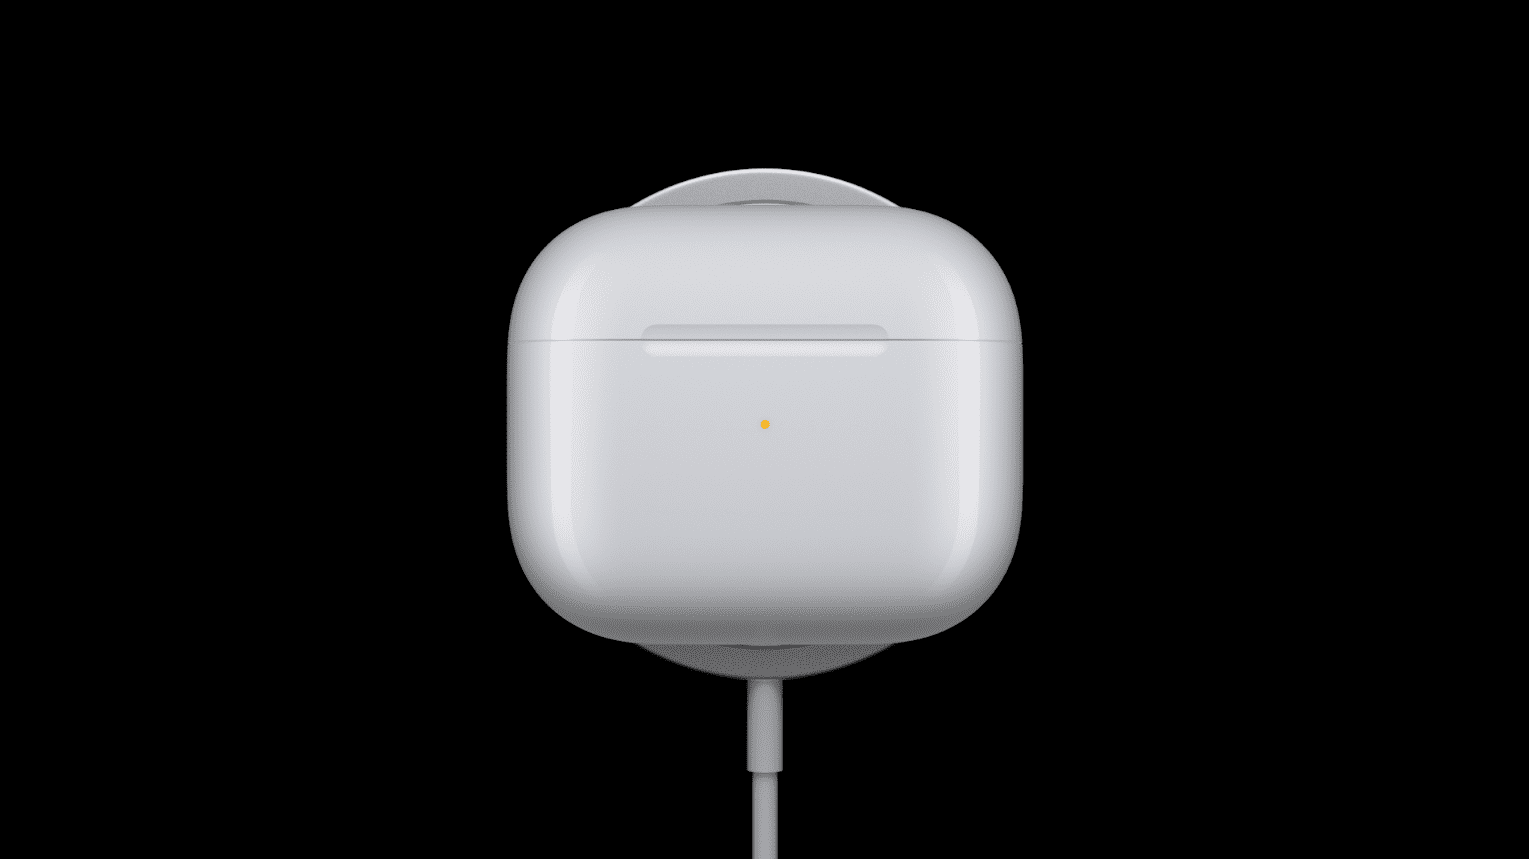
Charge with MagSafe
For the first time ever, Apple has released a charging case for the AirPods that is compatible with MagSafe. Now, you don’t need to worry about misaligning the charging case on your Qi wireless charger as the case just snaps into place. Unfortunately, you can’t reverse wireless charge your AirPods using your phone, but at least we have MagSafe now.
Get a case
While the AirPods charging case is pretty good about hiding scratches that appear, you’ll still want to make sure the case stays in tip-top shape. This is why we recommend grabbing a case for your AirPods 3, so they will stay looking amazing. Here are a few recommendations:
The people to repair your Apple products are the people who made them.
AppleCare can really save your bacon if something bad happens to your AirPods. Not only can you get the AirPods themselves replaced, but you can also get a new charging case without needing to purchase a whole new set. If you just purchased your AirPods 3 and didn’t add AppleCare+ at the time, you have 60 days to add it and here’s how you can do so:
With your AirPods connected, open the Settings app on your iPhone.
Tap Bluetooth.
Locate your AirPods from the list of devices.
Tap the More Info icon to the right of the AirPods.
Scroll down and tap AppleCare+ Coverage Available.
Follow the on-screen steps to enroll your AirPods in AppleCare+.
Hard reset
While the AirPods 3 are pretty incredible, there are going to be times where things get wonky. The first and best course of action if that happens is to perform a hard reset.
Place your AirPods in the charging case and close the lid.
Wait for 30 seconds.
Open the lid of the charging case and make sure they connect to your iPhone.
Open the Settings app on your iPhone.
Tap Bluetooth.
Tap the More Info button next to the name of your AirPods.
Select Forget This Device.
Tap again to confirm.
While the lid of the charging case is still open, press and hold the setup button on the back of the AirPods 3 case for 15 seconds.
After the status light flashes amber and then white, close the lid of the charging case.
Open the lid of the case and begin the setup process.
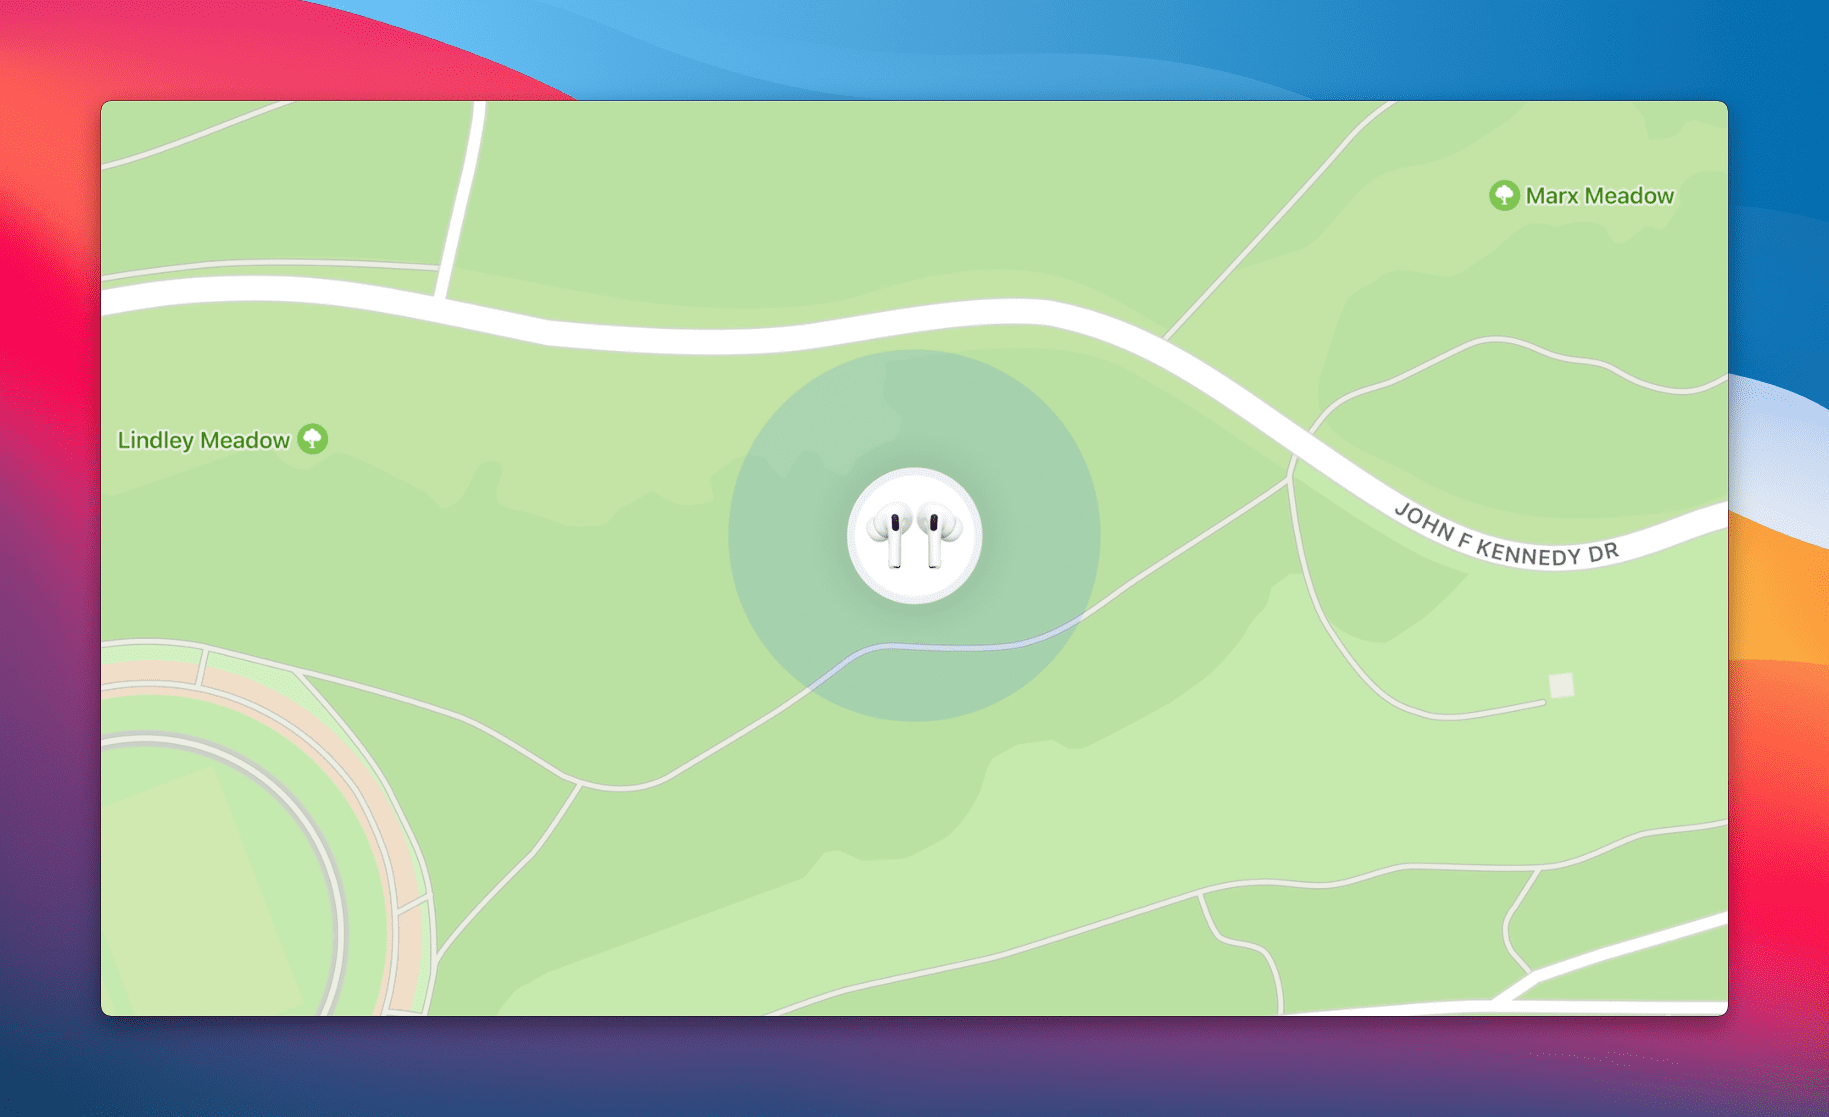
Find My integration
Thanks to the deeper integration with the Find My app, you can actually use your iPhone to locate the left or right AirPod. Here’s how you can do so:
Open the Find My app on your iPhone.
Tap the Devices tab in the bottom toolbar.
Locate your AirPods 3 in the list of devices.
Select one of the following:
Play Sound
Find
Follow the onscreen instructions to locate your AirPods.
Get Notified if you left them behind
Nobody wants to lose a set of AirPods, as these aren’t exactly the cheapest headphones available. Thankfully, you can set up your iPhone to be notified if you accidentally leave your AirPods behind.
Open the Find My app on your iPhone.
Tap either the Devices or Items tab in the bottom toolbar.
Select the device that you want to set the alerts for.
Tap Notify When Left Behind.
Tap the toggle next to Notify When Left Behind to the On position.
Under Notify Me, Except At, tap New Location.
From the Add Location screen, enter or search for an address in the search box at the top.
Once selected, define the geofencing area for your location by tapping the Small, Medium, or Large buttons at the bottom.
You can also drag the blue dot around the area to expand or shrink the geofence.
Tap Done in the top right corner.
Protect your hearing
Back in the day, many of us didn’t really care about how loud we listened to our music. But as we’ve gotten older, it’s become more important than ever to protect our hearing. And with the AirPods, you can set your AirPods and iPhone to notify you if the sound levels are too loud.
Open the Settings app.
Scroll down and tap Sounds & Haptics.
Select Headphone Safety.
Toggle the following options to the On position:
Headphone Notifications
Reduce Loud Sounds
Adjust the slider to change the decibel levels.
Live Listen
Speaking of damaged hearing, Live Listen is a recently-introduced feature that makes it easier to listen in on conversations. Essentially, you can turn your AirPods into a hearing aid, without actually getting a hearing aid. But first, you’ll need to make the feature available in Control Center.
Open the Settings app on your iOS device.
Scroll down and select Control Center.
Under More Controls, locate Hearing.
Tap the + icon to add Hearing to the list of enabled toggles.
Grab the three horizontal lines to the right of Hearing and drag it up or down to re-organize its position.
Now that the Hearing tile has been added to Control Center, here’s how you can actually use it with your AirPods 3:
Place your iPhone near the sound source you want to listen to.
Put one or both of your AirPods in your ears.
Live Listen does not work if the AirPods are in the case or not in your ears (at least one AirPod must be in your ear)
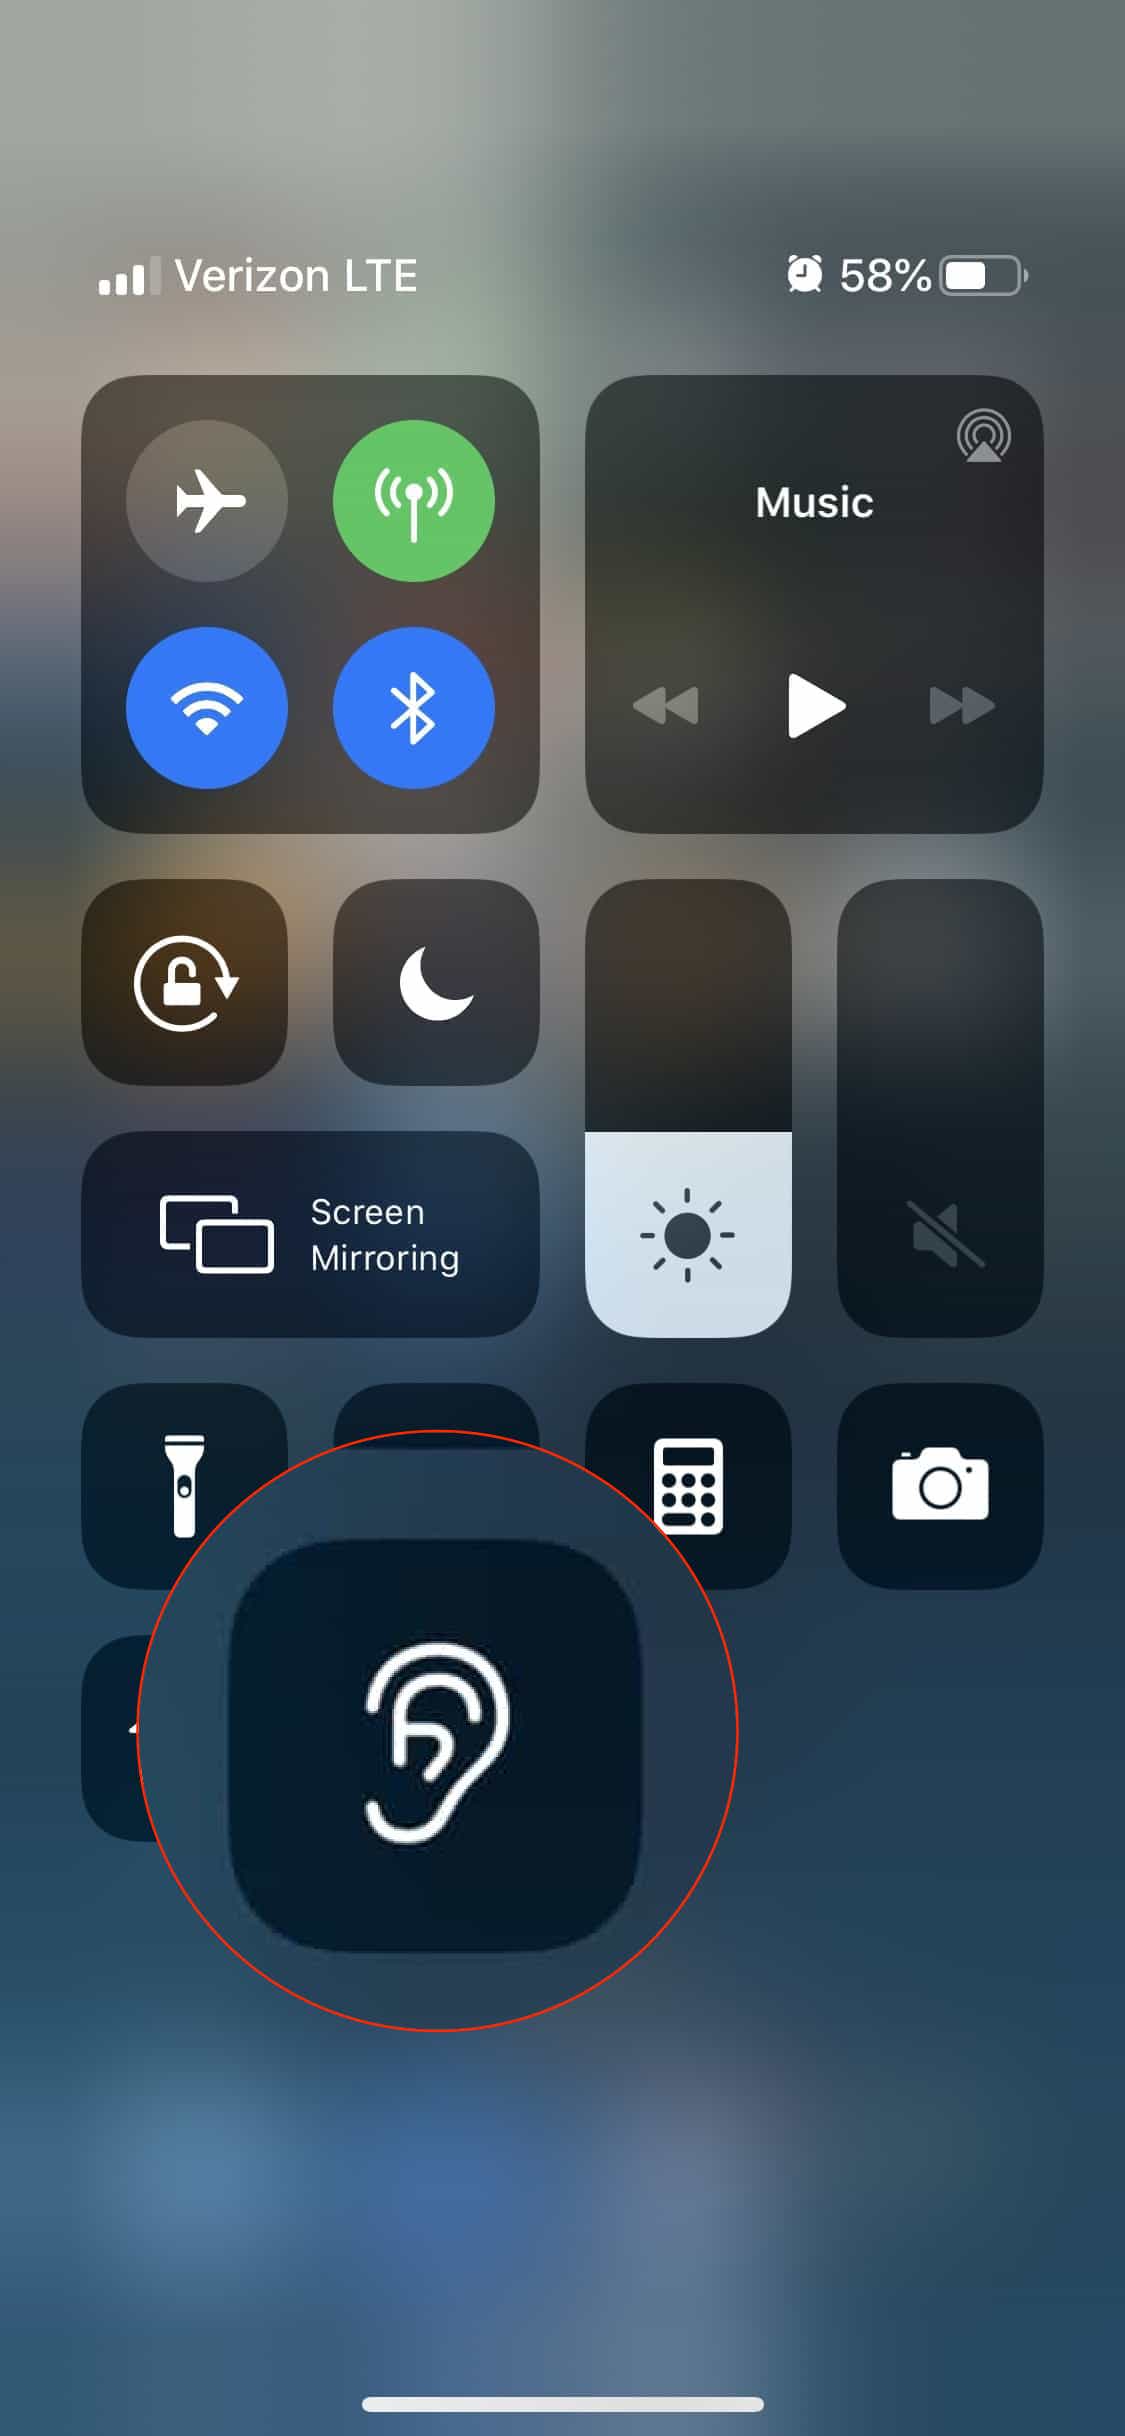
Swipe down from the top right corner to open Control Center.
Tap the Hearing icon (Ear)
Tap Live Listen.
Adjust the volume if needed.
Update your AirPods
It’s not as frequent as the iPhone or iPad, but Apple does release new software updates for the AirPods line from time to time. But unlike the other Apple devices, actually updating the software is a bit of a nuisance. This is because Apple doesn’t offer a “check for updates” screen when it comes to the AirPods. Instead, you’ll need to follow these steps:
Place your AirPods 3 in the charging case.
Connect the charging case to power via the Lightning port or on a wireless charger.
Leave the lid of the charging case open to ensure that the AirPods are connected to your iPhone.
Wait.
If an update is available, it will be automatically downloaded and transferred to your AirPods 3.
Andrew Myrick is a freelance writer based on the East Coast of the US. He enjoys everything to do with technology, including tablets, smartphones, and everything in between. Perhaps his favorite past-time is having a never-ending supply of different keyboards and gaming handhelds that end up collecting more dust than the consoles that are being emulated.


Write a Comment