In iOS 16, Apple introduced multi-stop routing to the Maps app. But at the time of writing in October 2022, you can only use the feature for driving routes.
If you want to use Google Maps, you’ll be pleased to know that this app has a similar feature. But can you use it for more than just driving, and is downloading iOS 16 necessary before you can add multiple stops to your route? Let’s find out.
Do You Need iOS 16 to Use Multi-Stop Routing in Google Maps?
No – unlike when you use the feature in Apple Maps, you do not need iOS 16 for multi-stop routing in Google Maps.
Multi-stop routing is a long-standing feature of Google Maps; smartphone users have had access to the feature for over five years. And overall, Google Maps has allowed adding multiple stops to routes altogether since 2013.
While you don’t need iOS 16 to use multi-stop routing, you should still keep your software updated for several reasons. Usability and security are two of the most important.
When using Google Maps, you can have a maximum total of 10 stops on a single route. In most instances, however, you probably won’t need so many.
Which Forms of Transportation Is Multi-Stop Routing in Google Maps Available For?
While Apple Maps only lets you add multiple stops on driving routes, Google Maps has a little more flexibility.
You can still add multi-stop routing for driving, but it’s also possible to do so when you need to walk instead. If you cycle and Google Maps offers routing options for your local area, you can also use multiple stops for that mode of transport.
If you want to take public transportation, however, you can still only choose your beginning point and end destination.
How to Use Multi-Stop Routing in Google Maps for iOS
If you want to add multiple stops to your route in Google Maps on iOS, you don’t need to do too much. The steps are listed below.
Open the Google Maps app and enter your desired start and end destinations.
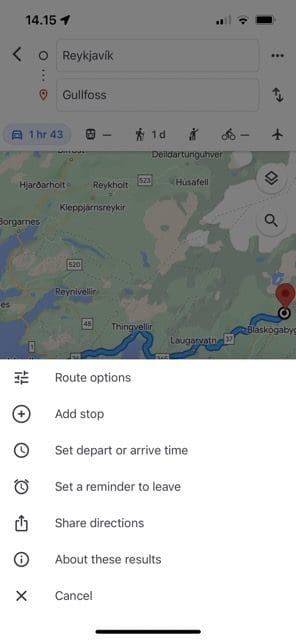
Tap the three dots in the top right of your screen. There, you’ll see an option titled Add stop.
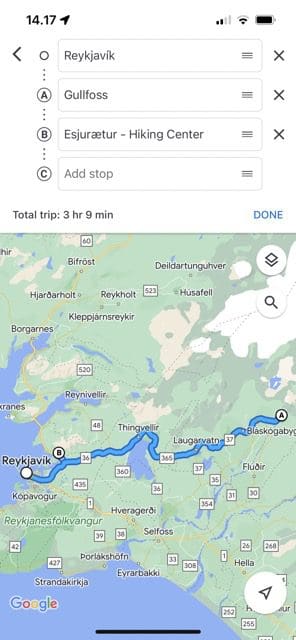
After selecting the option listed above, you’ll be able to add a new stop. Enter your preferred destination. If you need to move it up, you can drag each location using the three lines icon.
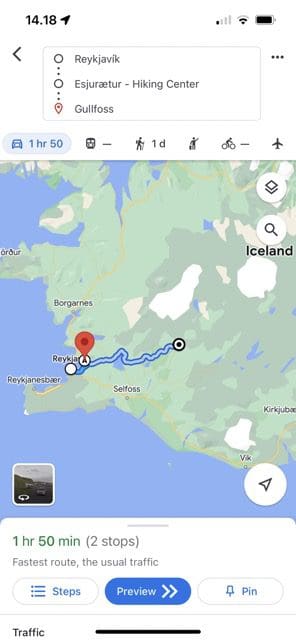
Once you’ve added all your stops, hit Done. After that, you’re ready to start your journey.
Take the Scenic Route With Google Maps on iOS
Adding multiple stops is an incredibly useful feature, and it’s a little surprising that it took Apple Maps so long to add it. However, the tool is still in its early days; Google Maps is still more sophisticated in this respect for transport other than driving.
You can easily add more than one stop to your route when using Google Maps on iOS. Whether you want to visit beautiful scenery or do your chores in one go, you will find the tool pretty handy.
Danny has been a professional writer since graduating from university in 2016, but he’s been writing online for over a decade. He has been intrigued by Apple products ever since getting an iPod Shuffle in 2008 and particularly enjoys writing about iPhones and iPads. Danny prides himself on making complex topics easy to understand. In his spare time, he’s a keen photographer.


Write a Comment