One such customization that can significantly enhance your productivity and entertainment experience is setting different audio output speakers for individual apps on your Mac. You might be attending a Zoom meeting while also needing to review a video clip for work, or perhaps you’re listening to music while editing a podcast. By assigning different audio outputs to each app, you can ensure that the sound from each application goes exactly where you want it to, preventing any audio overlap that could cause confusion or distraction.
For users with hearing impairments, being able to route certain sounds to specific output devices can be a significant accessibility feature. For instance, you could route your system alerts to a device that provides visual cues, while your media plays through your speakers.
Control Individual Application Volume on Mac: SoundSource
SoundSource is an app developed by Rogue Amoeba and makes it so you can control the volume level and output devices for individual applications. This means you can set one app to output to your headphones, while another outputs to your speakers, for example. You can also adjust the volume of each app independently, so you can have your music playing loudly while keeping your email notifications quiet.
In addition to these per-app controls, SoundSource also provides global controls. You can quickly switch your Mac’s output device, adjust the volume, and even tweak your Mac’s audio with built-in equalizers and effects.
Install Rogue Amoeba’s Audio Capture Engine (ACE)
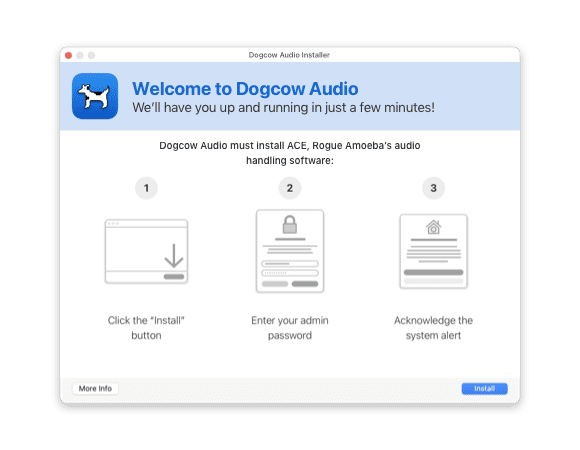
Before you can install and use SoundSource or Rogue Amoeba’s other software, Audio Hijack, you’ll first need to install the company’s Audio Capture Engine. However, in order to do so, you’ll first need to allow system extensions to be enabled before SoundSource or Audio Hijack can be installed.
Download the SoundSource app using the link below.
Double-click the file in your Downloads folder
Open the Installer that is unpacked.
Click the Install button.
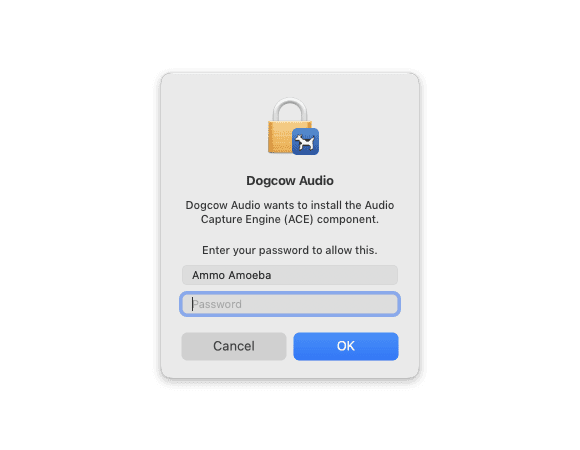
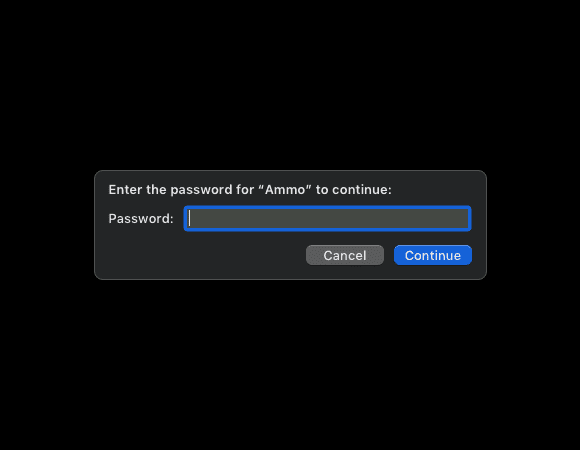
When prompted, enter your Administrator password and click OK.
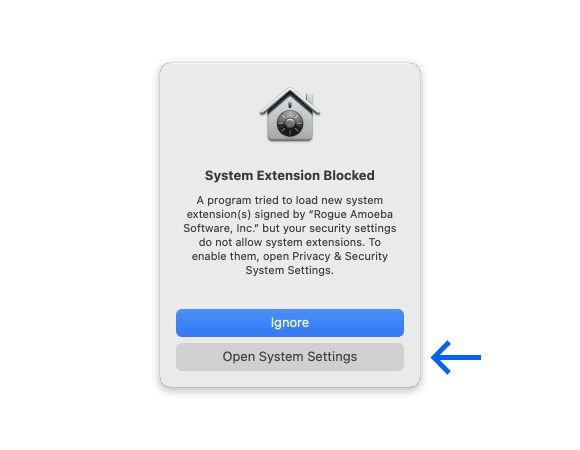
Click the Open System Settings button.
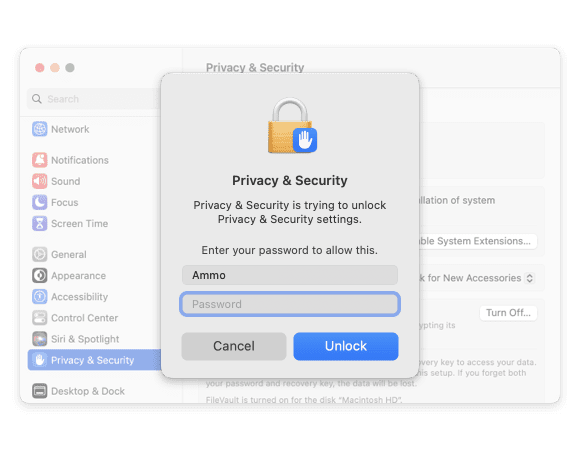
In the sidebar on the left, click Privacy & Security.
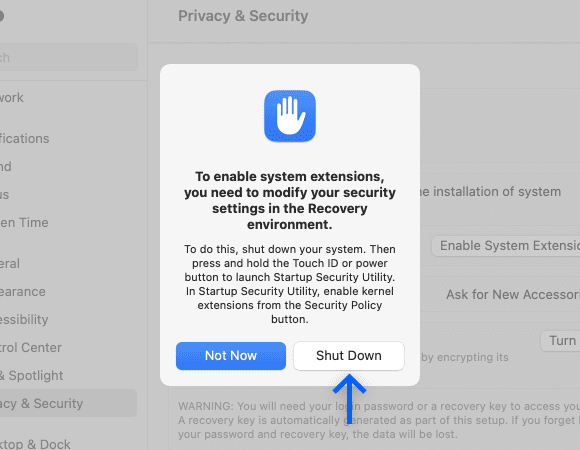
Under the Security section, click the Enable System Extensions… button.
Enter your Administrator password again.
When prompted, click the Shut Down button.
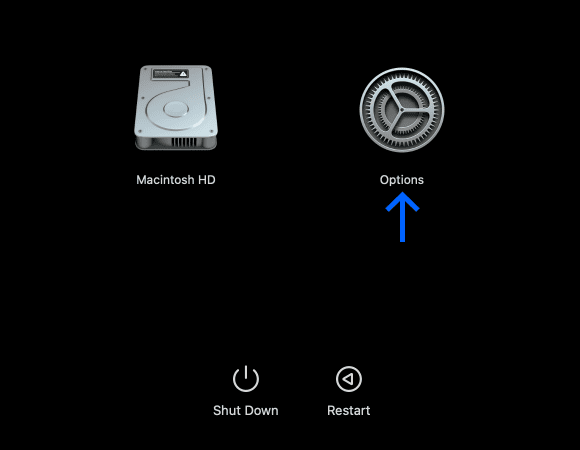
After your Mac is turned off, press and hold the Power button.
Continue holding until you see the Loading startup options prompt.
Click Options.
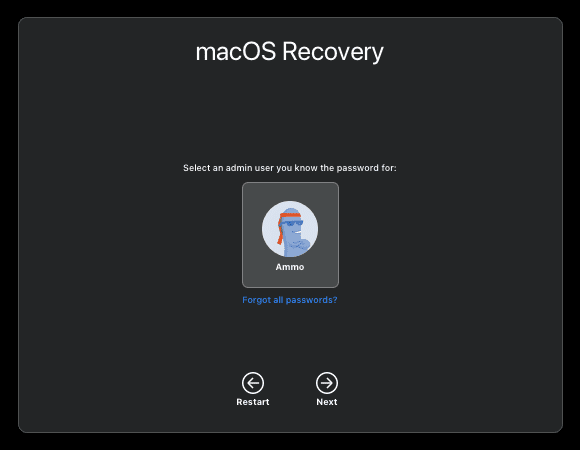
Select the Administrator user and click Next.
Enter the Administrator password and click the Continue button.
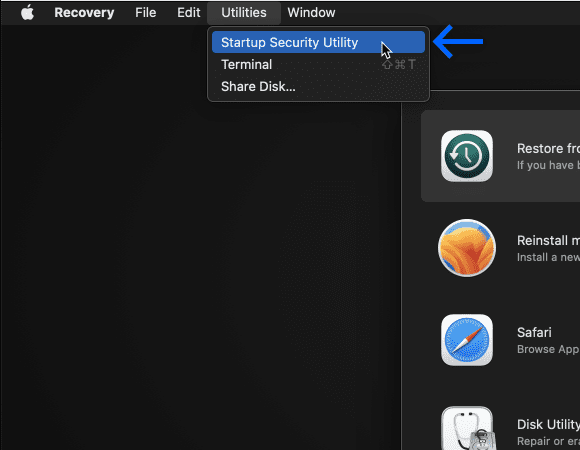
In the Menu Bar, click Utilities.
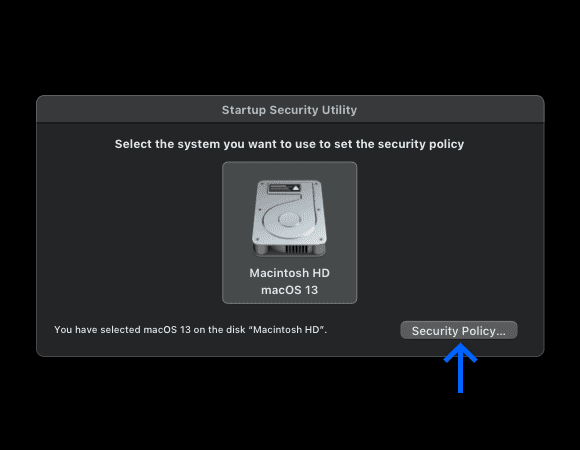
From the drop-down menu, select Startup Security Utility.
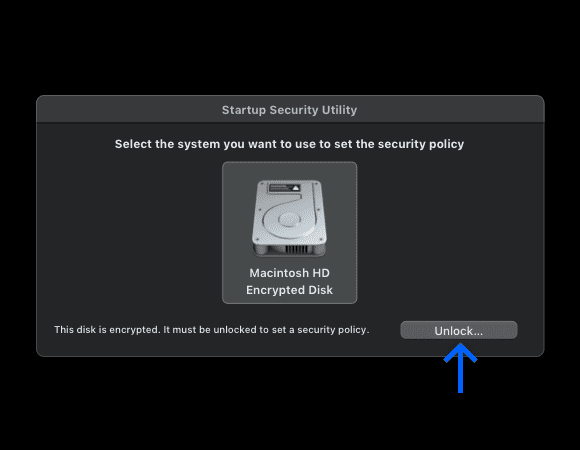
If you have enabled FileVault, select your hard drive and click the Unlock… button.
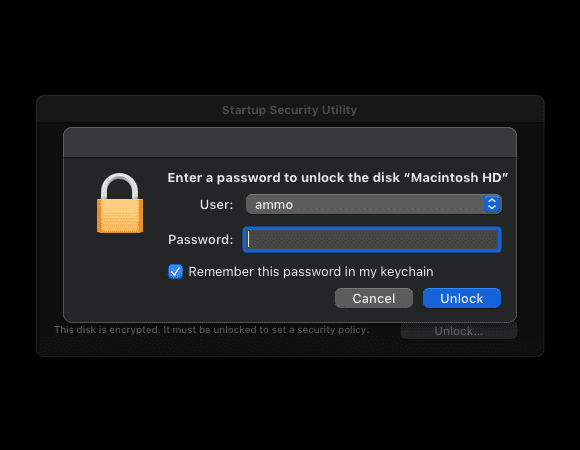
Enter the login password for the Administrator account and click Unlock.
Click the Security Policy… button.
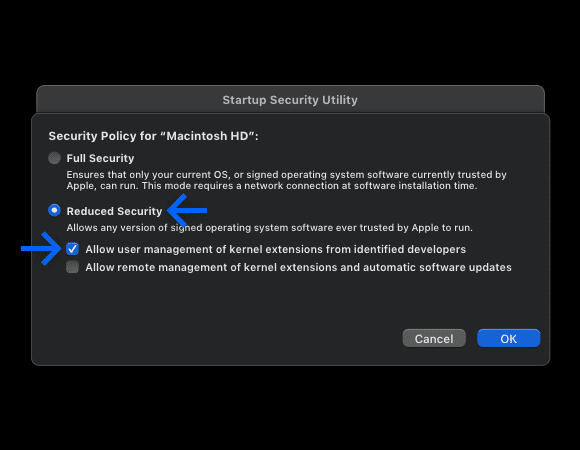
Select Reduced Security.
Click the checkbox next to Allow user management of kernel extensions from identified developers.
Click the OK button.
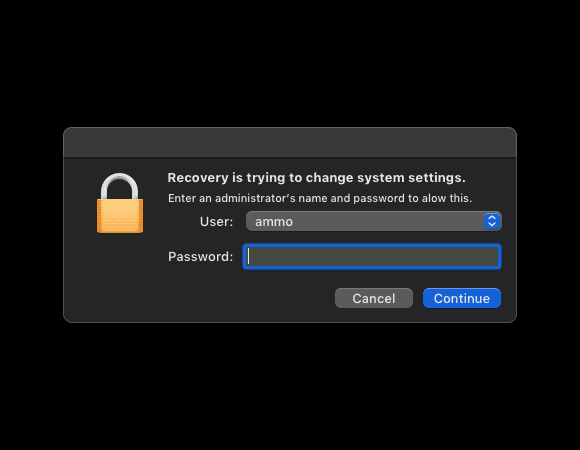
When prompted, enter your Administrator password and click the Continue button.
In the Menu Bar, click the Apple logo.
From the drop-down menu, highlight and select Restart.
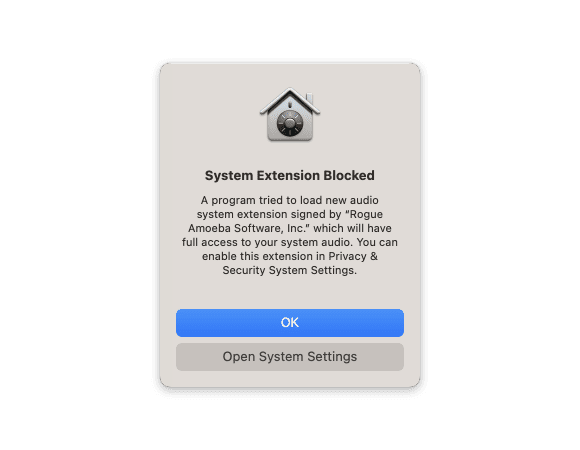
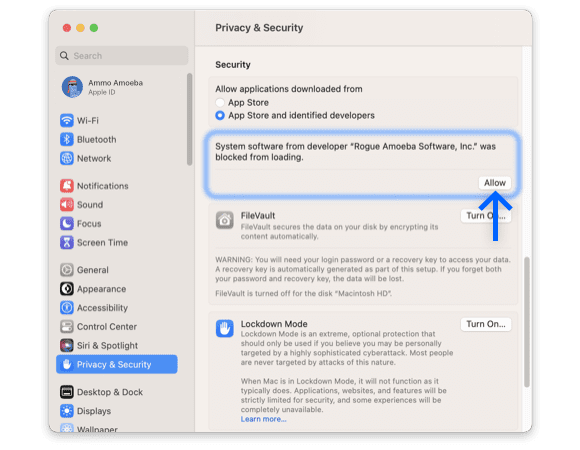
After your Mac is finished restarting, and you have logged in, click the Open System Settings button that appears within the System Extension Blocked prompt.
In the sidebar on the left, click Privacy & Security.
Click the Allow button under the Security section.
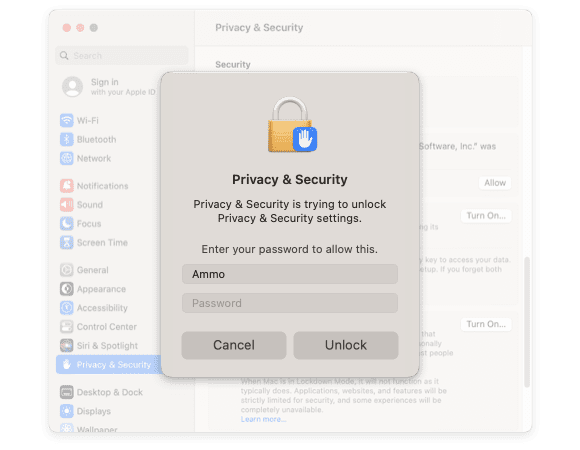
Enter your Administrator password when prompted.
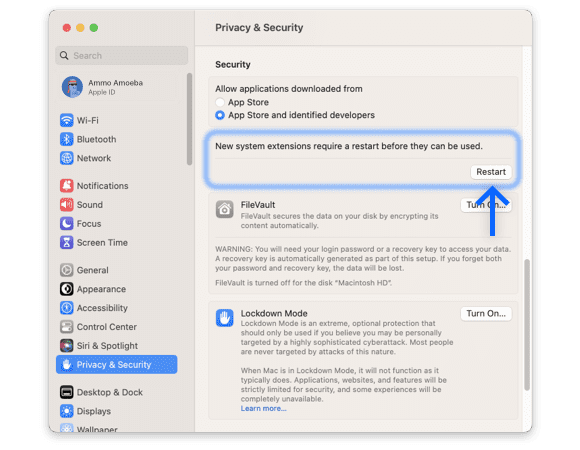
Restart your Mac.
Set Up and Use SoundSource
Now that you have finished installing the Audio Capture Engine, you can go ahead and finish the installation process for SoundSource. The process is just as easy as installing any other app, and once you are done, SoundSource will reside in your Menu Bar.
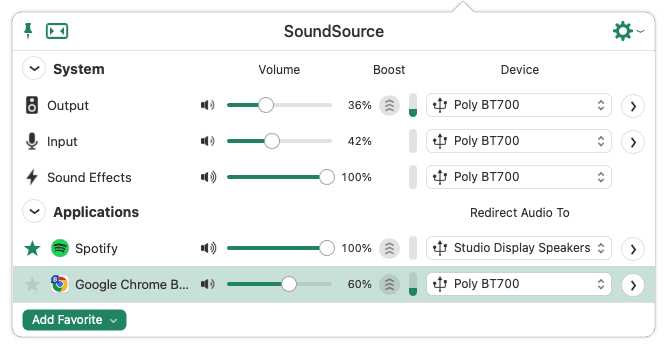
From there, you’ll want to click the new Sound icon that appears, which looks pretty similar to the traditional audio control button for the Menu Bar. SoundSource includes a bunch of different controls and options to tinker with, but if you just want to control individual application volume on Mac, then you can ignore everything else.
Click the Sound icon in the Menu Bar on your Mac.
Click the drop-down button next to Applications.
Under the Output section, click the drop-down menu next to the application that you want to control.
From the drop-down menu, select the output source that you want to use.
And that’s it! Besides getting the Audio Capture Engine set up, actually using SoundSource couldn’t be easier. The only catch is that while there’s a free trial for the app, you’ll have to shell out $39 for the License Key, or $19 if you are trying to upgrade from SoundSource 4.
Control Individual Application Volume on Mac: Audio HiJack
One could argue that Audio Hijack is the more powerful app when compared to SoundSource, if only because it allows you to actually record and save audio from different apps. Audio Hijack is a powerful tool that allows you to capture audio from the system, and microphones, and you can even use built-in effects to customize the audio experience. However, it can also be used as a way to control individual application volume on Mac.
As a reminder, in order to install and use Audio Hijack, you’ll first need to follow the steps above in order to install Rogue Amoeba’s Audio Capture Engine (ACE). In doing so, the process requires you to enable macOS System Extensions, otherwise, you won’t be able to use the app at all. Provided that you already followed the steps above, here’s how you can set up and use Audio Hijack.
Download and install Audio Hijack onto your Mac.
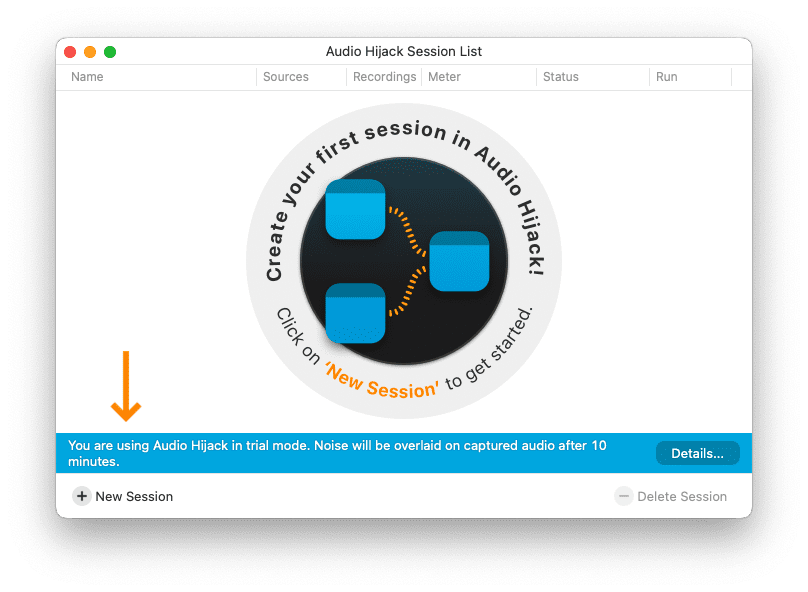
Once installed, open the app.
Click the New Session button in the bottom left corner.
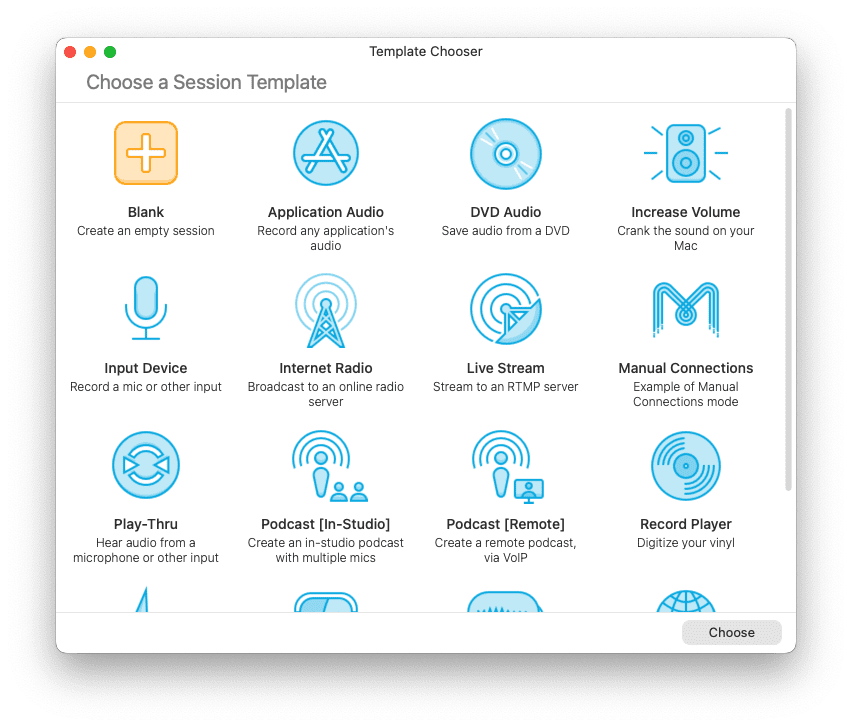
Select Blank from the Session Template Chooser screen.
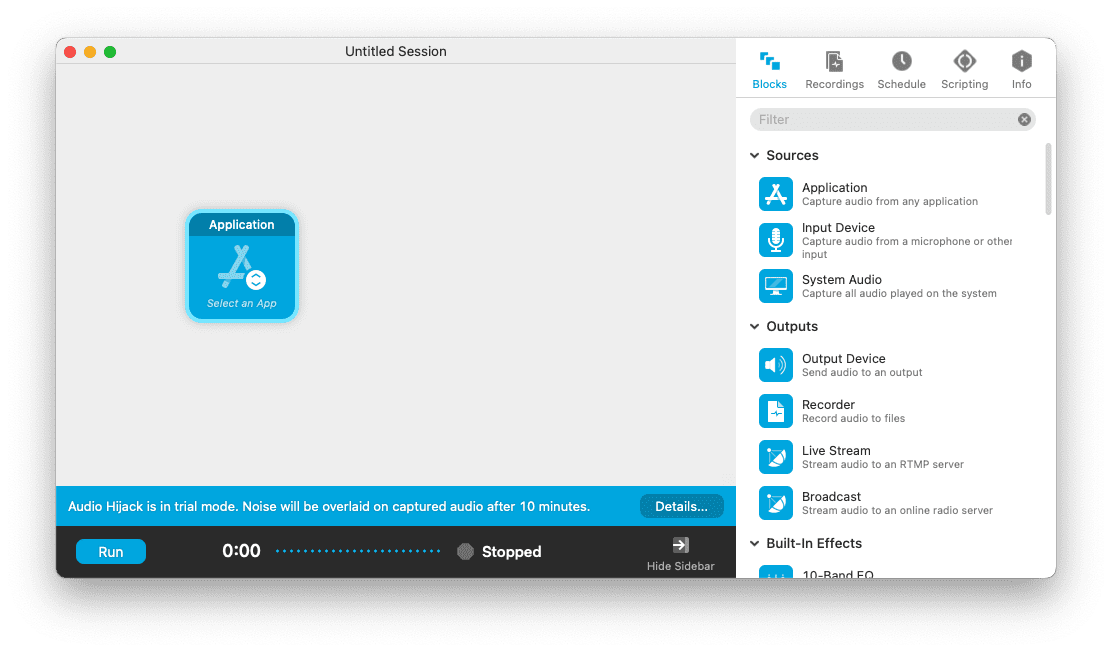
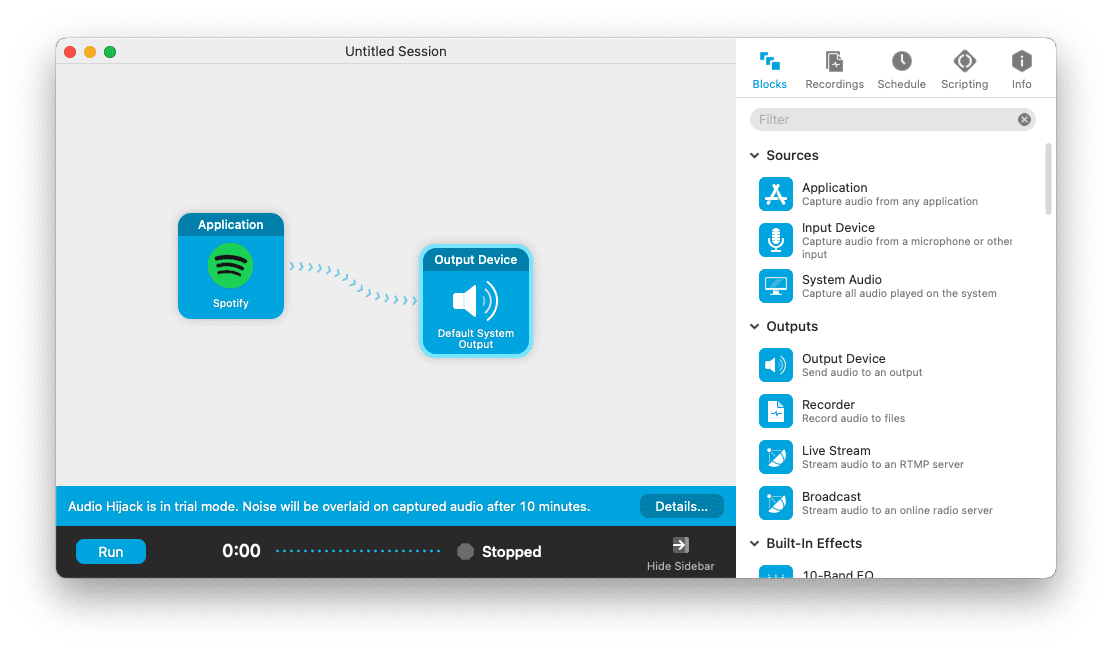
On the right side of the screen, click the Blocks section.
Under Sources, drag and drop Application to the left side of the window.
Click Select an App on the Application block.
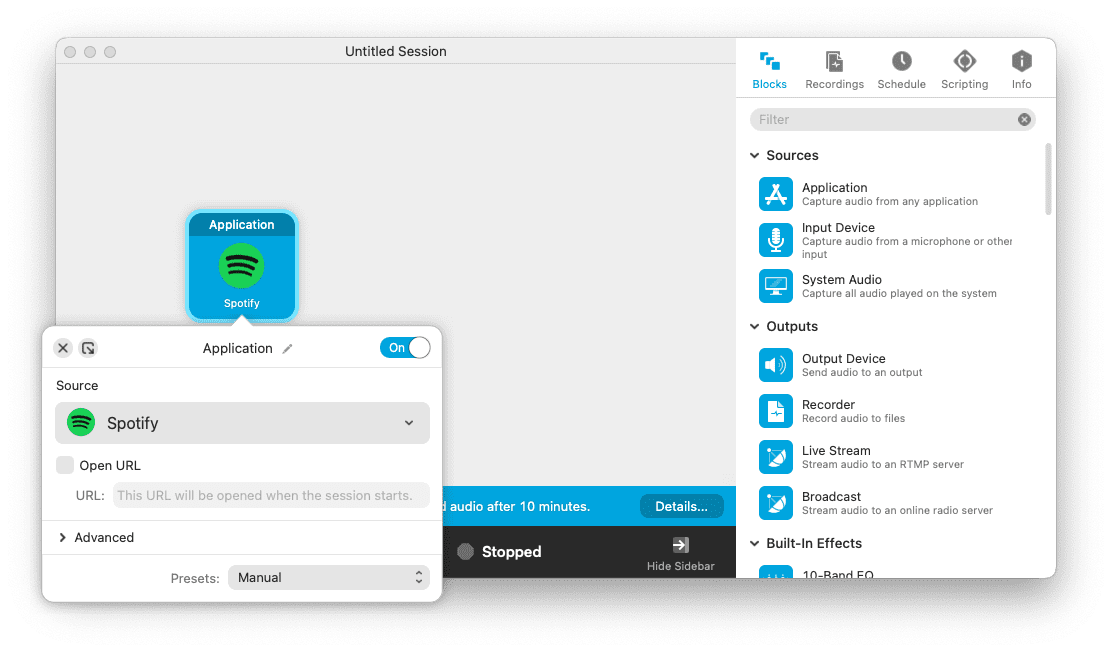
From the menu that appears, select the app that you want to control.
On the right side of the screen, click the Blocks section.
Under Outputs, drag and drop Output Device to the left side of the window.
Click Default System Output on the Output Device block.
From the menu that appears, Audio Device that you want the sound to play through.
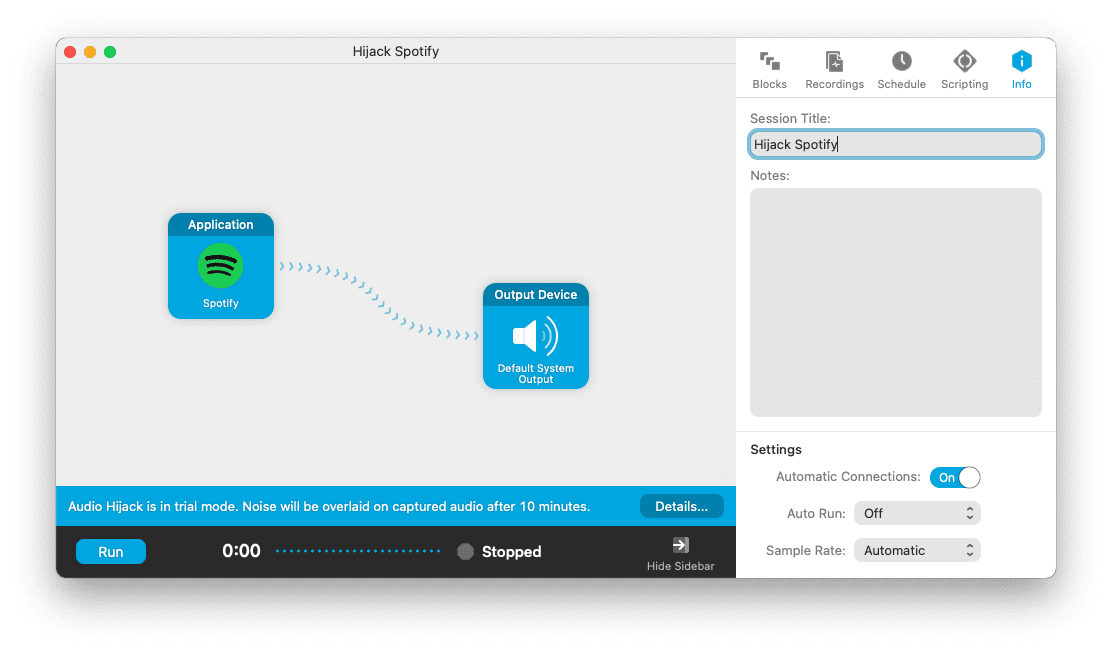
In the sidebar on the right, click the Info tab.
Enter a Session Title and decide whether you want the Session to automatically run or not via the drop-down menu.
Repeat these steps for any other applications that you want to control.
Exit the Session Creator tool.
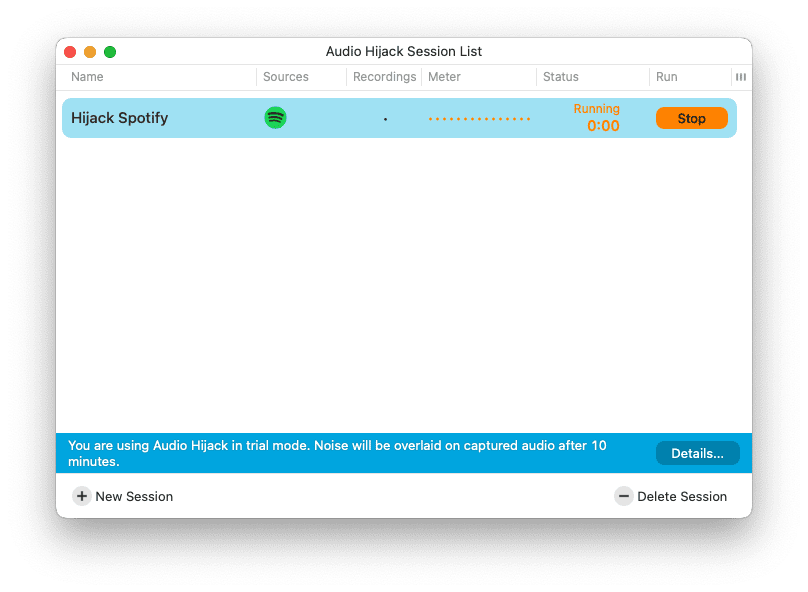
Click the Run button next to the Sessions that you created.
Similar to SoundSource, Rogue Amoeba offers a free trial when using Audio Hijack. However, the difference here is that you’ll begin to hear a noise being played over the audio that you’re trying to listen to while the Audio Hijack sessions are enabled. In order to get rid of the noise “watermark”, you’ll need to pay for the Pro version of the app.
Control Individual Application Volume on Mac: Background Music
If you’re looking for a free alternative to either SoundSource or Audio Hijack, you’re kind of in luck. We found an app called “Background Music” on Github, but at the time of this writing, the last update was released back in June of 2022. However, it seems that the app is still working for the time being, but we aren’t sure if this will break with a future update to macOS.
With that in mind, you can try to use Background Music to control individual application volume on Mac.
Click the link below to download Background Music from Github.
Double-click the app in your Downloads folder to install it on your Mac.
Once installed, click the Background Music icon in the Menu Bar.
From the drop-down menu, drag the slider back and forth to control the audio volume.
You can also select a different Output Device for the apps that are currently playing audio.
As we stated before, this is currently the only free option that seems to still be working for the majority of users. But again, there’s a chance that this might not work when the next version of macOS is released, even if it’s a simple update that includes bug fixes.
Understanding how to set different audio output speakers for individual apps on your Mac can greatly enhance your user experience, whether you’re multitasking, enjoying media, or utilizing accessibility features. It’s a customization that offers more control over your audio environment, allowing you to tailor your Mac’s sound output to your specific needs and preferences.
Andrew Myrick is a freelance writer based on the East Coast of the US. He enjoys everything to do with technology, including tablets, smartphones, and everything in between. Perhaps his favorite past-time is having a never-ending supply of different keyboards and gaming handhelds that end up collecting more dust than the consoles that are being emulated.

 One such customization that can significantly enhance your productivity and entertainment experience is setting different audio output speakers for individual apps on your Mac. You might be attending a Zoom meeting while also needing to review a video clip for work, or perhaps you’re listening to music while editing a podcast. By assigning different audio outputs to each app, you can ensure that the sound from each application goes exactly where you want it to, preventing any audio overlap that could cause confusion or distraction.


Write a Comment