When you enable productivity gestures for iPadOS 17, you get the advantage of getting things done faster and having fun in the process. You can do things such as take screenshots and switch between open apps on your iPad. Keep reading to see how you can enable the gestures feature on your iPad and discover what you can get done with different gestures.
Enable Productivity Gestures for iPadOS 17 in Settings
To access the latest on your iPad, it’s always a good idea to check you’re running on the latest version. You can check to see if you have any pending updates by opening the Settings app and going to General >Software Update.
To start using the Productivity Gestures, open the Settings app and tap the Multitasking and Gestures on the left. Look for the Gestures section and toggle on Productivity Gestures. It’ll show you different things you can do after you turn it on. For example, you can do things such as:
Double-tap with three fingers to undo
Pinch and spread with three fingers to copy and paste
Swipe left with three fingers to undo and swipe right to redo
Below the Productivity Gestures option, you’ll see the Four and Five Finger Gestures option. Toggle that option on to use gestures such as:
Switch apps by swiping left and right with four or five fingers
Go home by pinching with four or five fingers
Open the App Switcher by pinching and pausing with four or five fingers
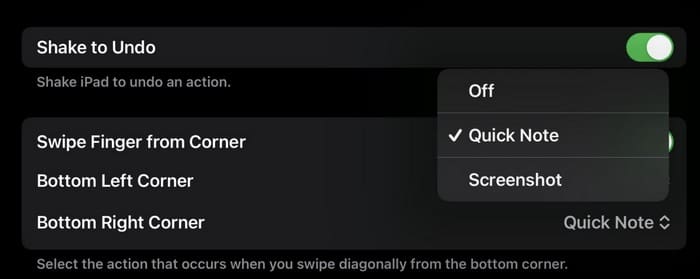
At the bottom, you’ll see the Swipe Finger from Corner option, which you can toggle on. With this option enabled, you have another way you can take screenshots. You’re already using the button combination options, but this swipe option is much easier when you don’t have both hands free.
With this last feature, you can perform different tasks in the bottom left and right corners. For example, you can use the corners to create a Quick Note or take a screenshot. You’ll also see an option to turn it off.
Helpful Gestures
Now that you’ve enabled the necessary options, you’ll see different gestures you can try to be more productive on your iPad below. For example, swipe up from the bottom center of your screen whenever you want to go to your home page.
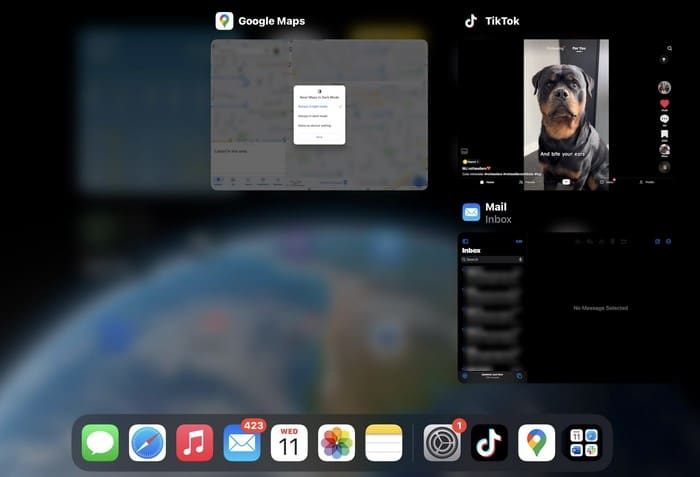
Do you need to access the Control Center? Swipe down from the top-right of your display to access the Control Center. Also, if you need to see what app you have open, you can view all the open apps by swiping up from the bottom edge of your display. To close the apps, place your finger on an app and swipe up.
You can also switch between open apps by swiping right or left along the bottom edge of your iPad. You can also use four or five fingers, swiping them across your display to switch to the next open app.
Do you need to open the Dock? You can do so by slowly swiping up from the bottom center of your display.
To access the Notification Center, swipe down from the top of your display. To remove the notifications, swipe left and tap the Clear button. When you see an X, tap on it, followed by the Clear All option.
Access all your widgets by swiping left on the notification screen.
When you have gestures enabled, things just get a lot easier. For example, you can easily take a screenshot by swiping from one of the bottom corners. You can also switch between apps by using four or five fingers and swiping. You can also access the Control Center with a simple swipe. But, out of all the things you can do with a swipe, which one is the one you use the most? Share your thoughts in the comments below, and don’t forget to share the article with others on social media.
I am a tech geek who loves technology. I have been writing about tech for over a decade, covering various devices and programs. I write about the latest Apple products and services and never go far without my Apple devices. I always stay updated on the latest gadgets, upgrades, features, and news. I aim to make complicated tech information easy for everyone to read. I’ve been with TechniPages from the beginning to help others fix their tech issues with the easy-to-follow guides.


Write a Comment