In the world of laptops, there are few options out there with trackpads that are satisfying or reliable as the Magic Trackpad found on the MacBook lineup. This extends even further for those who want to use a Magic Trackpad instead of a mouse when sitting at a desk and using your Mac.
Related Reading
- iOS: How to Enable Trackpad Mode
- Can You Use iPad Pro M1 Accessories With iPad Pro M2?
- How to Fix Your Mac with Apple’s Self Service Repair
- How to set up a Bluetooth or Magic Mouse with iPadOS
- macOS Ventura: How to Show and Hide Recent Apps in the Dock
How to Customize Trackpad Gestures on macOS Ventura
By default, there are quite a few different gestures that are already enabled when you start using a Mac for the first time. However, there are so many different ways and option to customize trackpad gestures on macOS Ventura. Let’s run through how you can make any changes and what options are available.
- Open the System Settings app on your Mac.
- In the sidebar on the left, scroll down and click Trackpad.
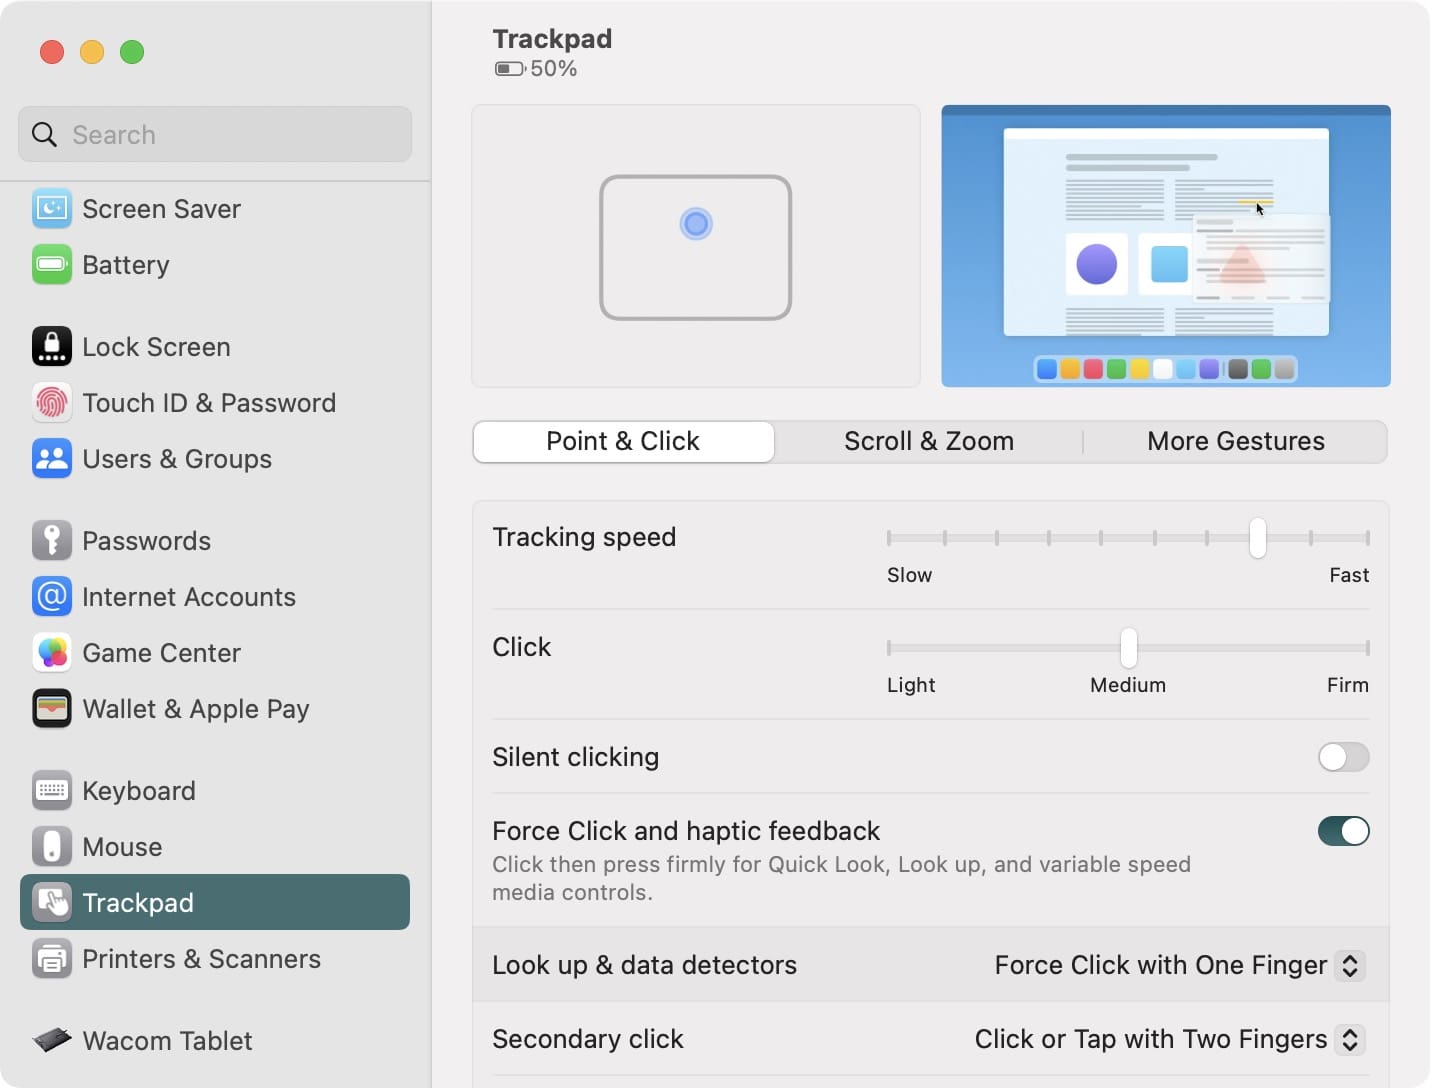
From here, you’ll see three different sections available that you can customize and interact with. These sections are “Point & Click”, “Scroll & Zoom”, and “More Gestures”. Within the Point & Click section, here are the options that you can customize:
- Tracking speed
- Slider going from Slow to Fast.
- Click
- Light
- Medium
- Firm
- Silent clicking
- Force Click and haptic feedback (Click then press firmly for Quick Look, Look up, and variable speed media controls)
- Look up and data detectors
- Force Click with One Finger
- Tap with Three Fingers
- Off
- Secondary Click
- Click or Tap with Two Fingers
- Click in Bottom Right Corner
- Click in Bottom Left Corner
- Off
- Tap to click (Tap with one finger)
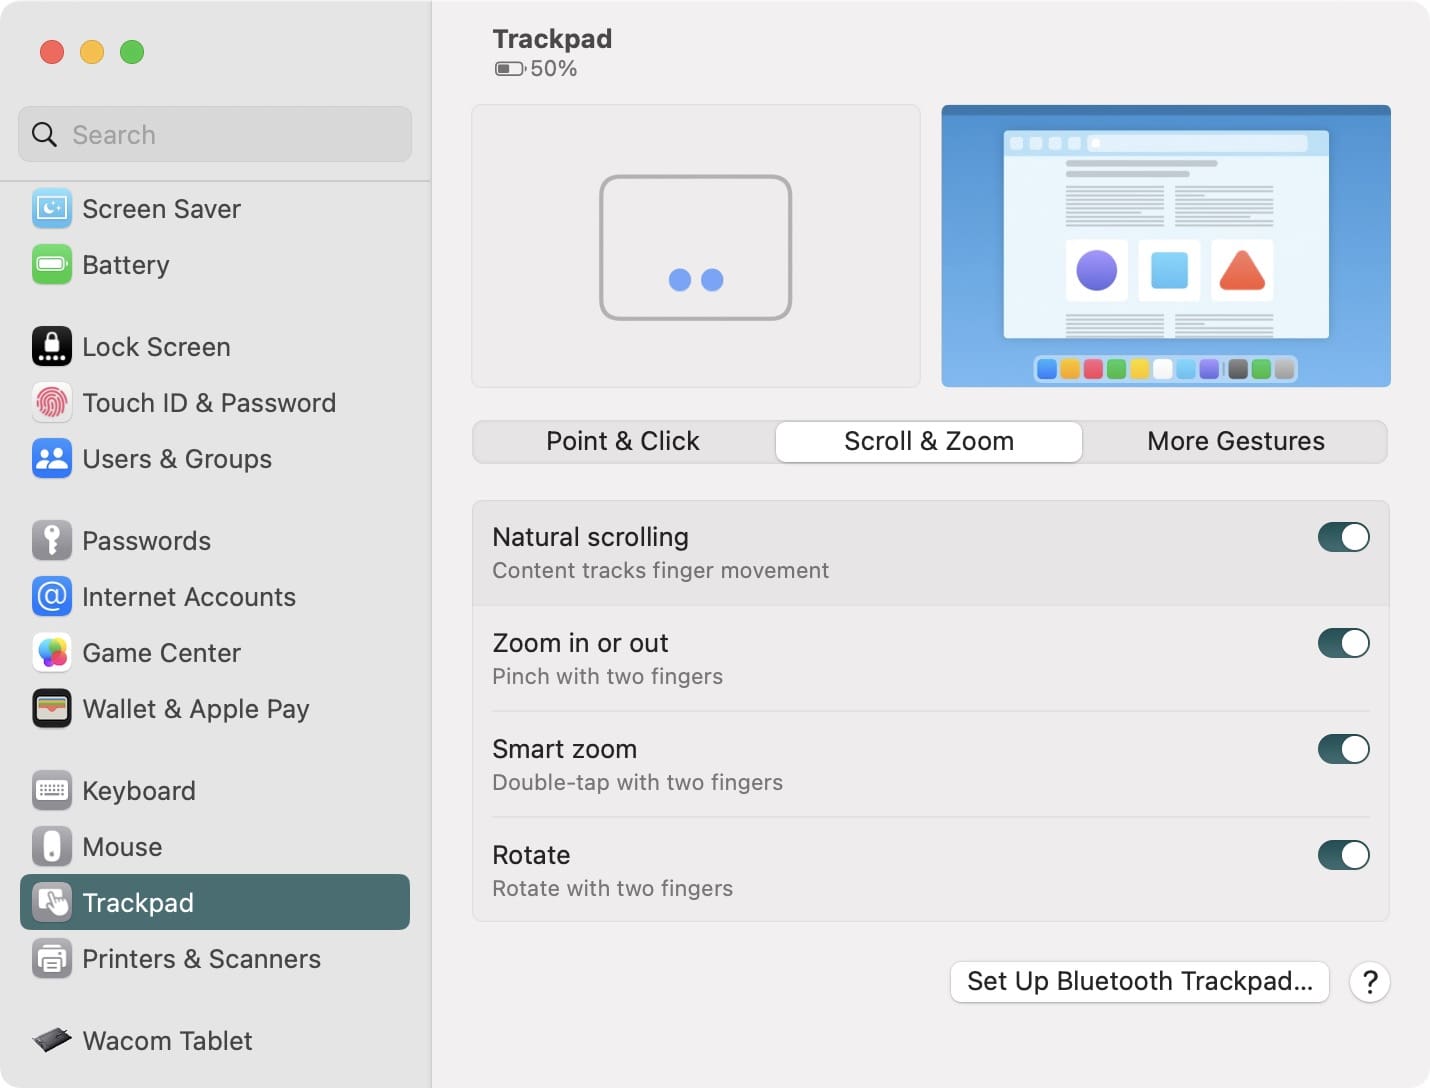
There aren’t as many options in the Scroll & Zoom section. Here’s what you’ll find if you want to customize Scroll & Zoom trackpad gestures on macOS:
- Natural Scrolling (Content tracks finger movement)
- Zoom in or out (Pinch with two fingers)
- Smart zoom (Double-tap with two fingers)
- Rotate (Rotate with two fingers)
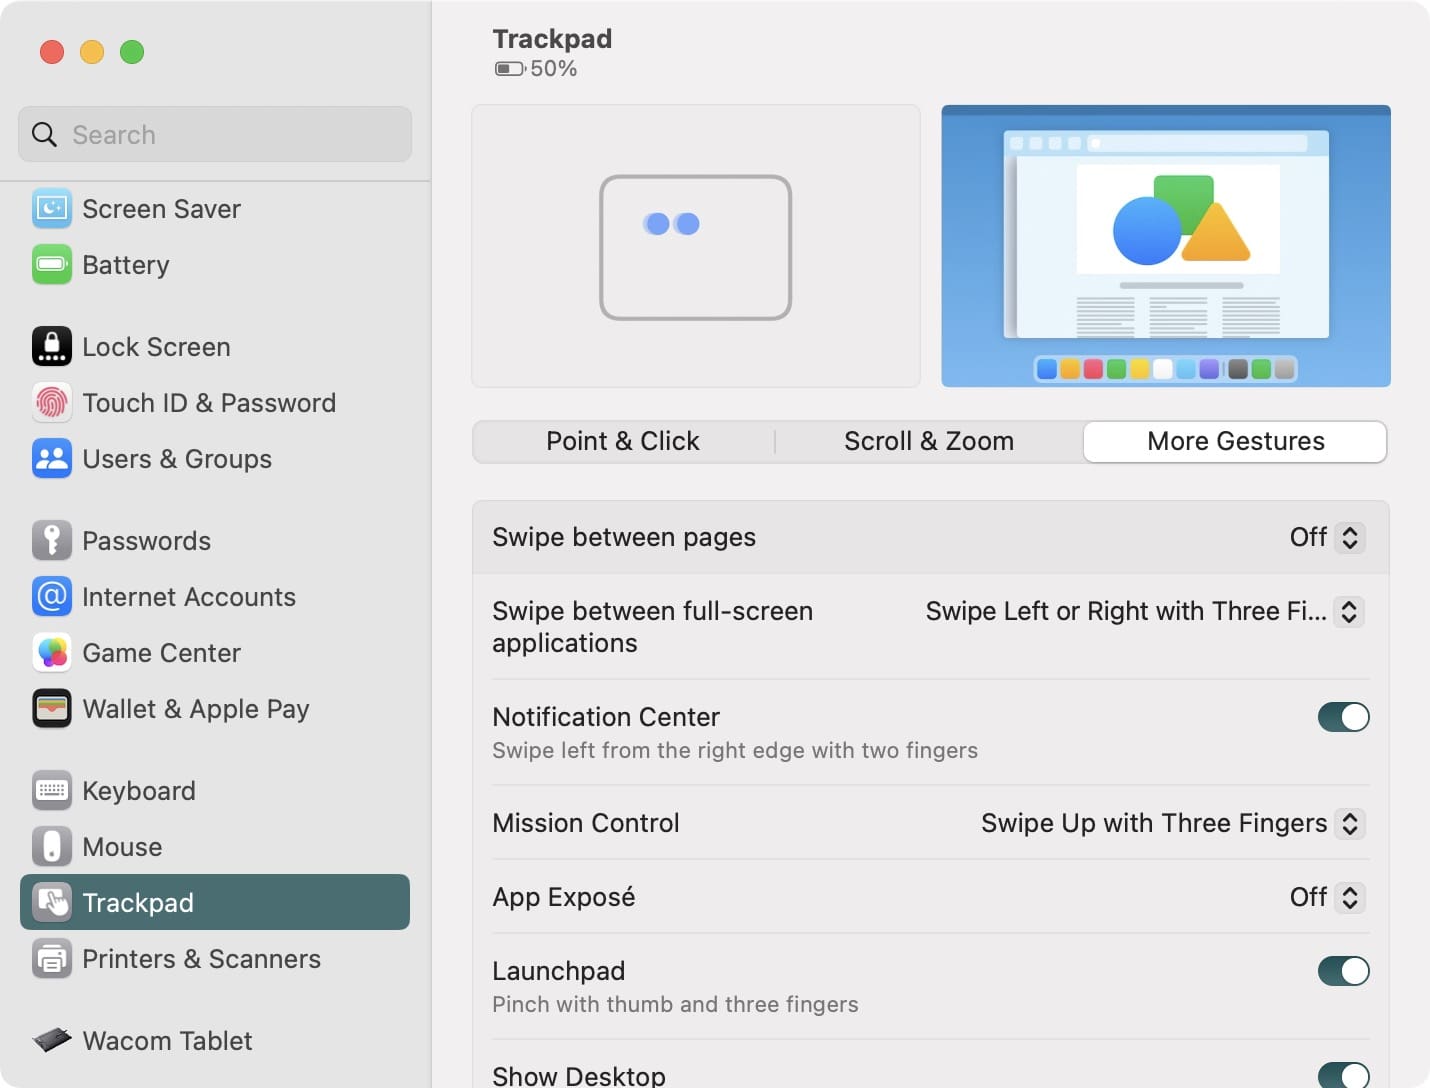
And last, but certainly not least, these are the options that you’ll find within the More Gestures section:
- Swipe between pages
- Off
- Scroll Left or Right with Two Fingers
- Swipe with Three Fingers
- Swipe with Two or Three Fingers
- Swipe between full-screen applications
- Scroll Left or Right with Three Fingers
- Scroll Left or Right with Four Fingers
- Off
- Notification Center: Swipe left from the right edge with two fingers
- Mission Control
- Swipe Up with Three Fingers
- Swipe Up with Four Fingers
- Off
- App Expose
- Swipe Down with Three Fingers
- Swipe Down with Four Fingers
- Launchpad: Pinch with thumb and three fingers
- Show Desktop: Spread with thumb and three fingers
We highly recommend heading into the System Settings (or System Preferences) app to see what you have enabled. You might come across an option that you didn’t think was possible, and it might just change up your entire workflow.
Andrew Myrick is a freelance writer based on the East Coast of the US. He enjoys everything to do with technology, including tablets, smartphones, and everything in between. Perhaps his favorite past-time is having a never-ending supply of different keyboards and gaming handhelds that end up collecting more dust than the consoles that are being emulated.





Write a Comment